Refurb underway (finally)

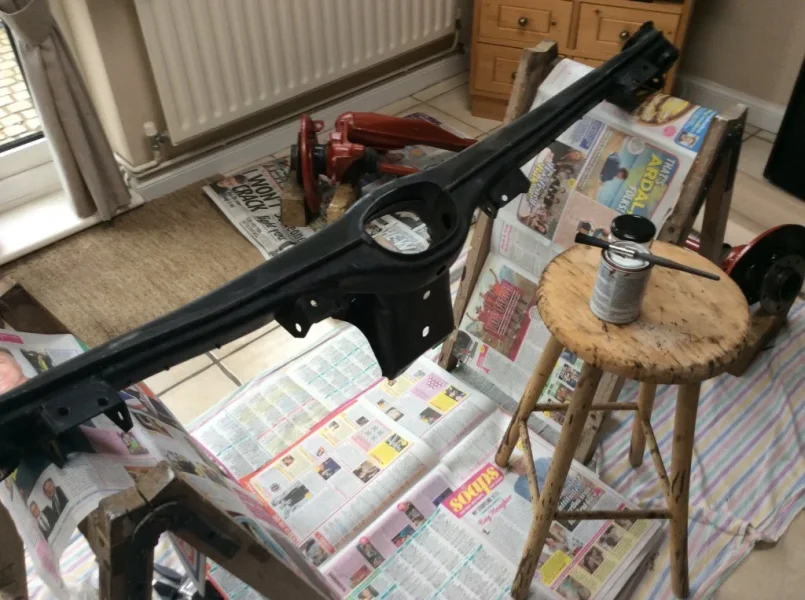
Made a start....... cant do any more till tomorrow now when hopefully, it will be dry, and I can turn it over

Quite like it in red........but it will be black by the time it all goes back together.....
.......( if I can work out where it all goes :banghead:)
7CDBA599-74A8-4412-AE03-DBA62ADE0041.webp
 
Can't see Mrs Colb allowing me to move into the Conservatory any time soon.
 
Florida trip coming up. What the eye doesn't see etc. etc.

Our utility room makes a pretty good oven .............

Tony.
 
An interesting write-up @Mazza - looks as though you are enjoying yourself.
 
I am way past enjoyment Dawn.... now at
blind panic=))
 
Last edited:
The other trailing arm primed today. Just the beam , ARB and lots of little bits to prime now ....then do them all again to finish them in black :arghh:
On the upside, I could have three parcels of bits delivered tomorrow as the tracking details show them at the Southampton hub :):)
40E0ADE1-193D-4DF7-AA7E-D7A1DC331A49.webp
 
I was wondering how the house work was going mate .................. ;)=)) Looking good.:thumbsup:

Tony.
 
HELP !!!!!!:arghh::arghh::arghh::arghh:

Where do all these bits go :banghead::banghead:
368B0FFB-0F99-47AC-BC1D-0A2451A04D20.webp


Parts from Autodoc, (shipped from Germany, ) nothing missing and parts as specified so happy ( and relieved ) that they have arrived. (7 days from ordering.)


Next on the production line. Might paint it tonight once its been sitting in the warm for a few hours.
37A07344-96E1-43C0-963A-28F951D866C8.webp


Wont paint the ends though as I think it has to be heated to get the new bushes in.
 

Attachments

  • EC6A1825-E79E-4744-9444-C0B6AD3580C3.webp
    EC6A1825-E79E-4744-9444-C0B6AD3580C3.webp
    112.7 KB · Views: 247
Last edited:
Wont paint the ends though as I think it has to be heated to get the new bushes in.

Heat may well help to get the old bushes out, if you're using polybushes then the new ones slide in nice and easy, if you're using OEM-style rubber ones then they push in with a fair amount of some suitable lubricant. And when I say push, I really mean press. A tight fit.
 
Yeah, like Mick said heat to get the old bushes out only. You could've burned the old bushes out Malc. Neighbours would love you though ....................... ;)

Tony.
 
@t-tony , The beam bushes and diff bush are going to be professionally installed when I take them up to Zedshed HQ.:thumbsup: ............ where I will play the weak, frail and old card, so I can watch someone ( who has youth and strength on their side) to actually press them all in for me :ymdevil:

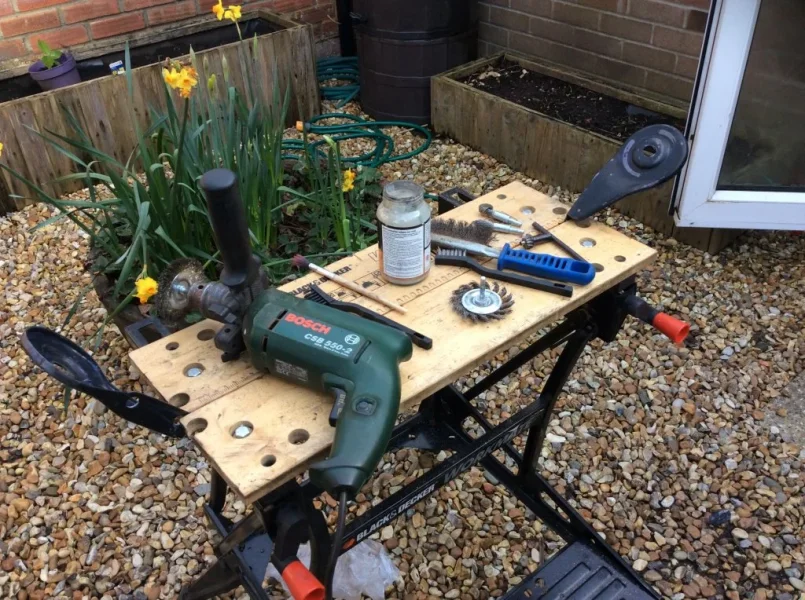
Outside this morning in the sun for about 3 hours de-rusting and treating all the small bits. I must be getting used to it as didn't mind the cleaning today............or was it that I went into Zombie mode??????
E378E1A6-2479-4B04-9D1A-B3A25E981569.webp

All these bits now just need painting with the red oxide then black top coat.
The nuts on the top of one of the trays are for the beam and trailing arms which will have to be replaced.
The washers are from the differential fill and drain plugs and also need to be changed , but luckily got some spares of these:)

By the way I don't have OCD......but if I don’t keep it all separate and labelled, I will be in sh*t street when I start putting it all back together:D

The beam brackets were in amazingly good condition just a small bit of surface rust on the edges.
DAE9E61A-8DEE-4741-A975-6191A9A0C12D.webp


Just these last two trays containing all the brake parts to do now.....
EE2C1E96-A030-4D71-89E0-F1496BC7B7F5.webp


Well I thought it was until I spoke to Maxine and Alan (@Alan Slade ) this morning . :arghh:
I was saying about just cleaning and repainting the callipers when Alan suggested and explained about doing a refurb on the them, replacing the pistons, seals etc.
Having thought about it, it does seem to be a sensible idea.....Everything else is new so not checking these properly while its all stripped out does seen a bit stupid and it will also make the cleaning and repainting on them so much easier........so tomorrow I will start stripping them down and check the condition of the insides.
After all, how difficult can it be.....:bashhead:

And my back up plan, if it goes wrong???????...............Get Alan to rebuild them =)), =))


Lastly....TIP OF THE DAY.........don't try cleaning small items, that are brownish with rust, over a shingle area, because if you happen to drop something, like a small nut.....:arghh::arghh::arghh:.....I am sure the neighbours enjoyed my colourful language for the ten minutes it took me to find the bloody thing!!!!:whistle:
 

Attachments

  • FACC1394-4036-4281-A6FA-23DB78C8F0A4.webp
    FACC1394-4036-4281-A6FA-23DB78C8F0A4.webp
    211.8 KB · Views: 253
  • 95DCD5CC-E5E5-4033-ACA7-0F2973EFD869.webp
    95DCD5CC-E5E5-4033-ACA7-0F2973EFD869.webp
    211.8 KB · Views: 262
I am sure the neighbours enjoyed my colourful language for the ten minutes it took me to find the bloody thing!!!!:whistle:

That's where a magnet comes in handy mate!

Tony.
 
Oh f***.......twatsville here I come !!!!
 
Saturday and the sun is shining ....no footy:arghh: , so decided to play at being a mechanic.

Not content with all the myriad of parts from the back of the car in every corner of the house ......I removed some from the front :blackeye:

Wheels off, ( love my impact gun ) , and removed callipers, front hoses and discs.
Gave the brake line union a good soaking with penetrating fluid first, but no issues getting any of it undone.
I removed the calliper before undoing the hex drive screw that holds the disc on, which in normal practice would probably be better to do the other way round in case it was a bit seized. (That way the brakes would stop the disc from turning) Fortunately not an issue for me as I had undone the screws a while back and put a bit of anti-seize copper grease on the threads so they came off easily. Also screwed in two blanking off caps on to the brake lines to stop and drips of fluid

18A1DE66-23A7-431F-88D0-CC8E0CD3E9EF.webp

94A90A63-AAAA-40C0-8F57-EBE4058C3644.webp


Back plates both ok so will clean them off later and give them a coat of paint.
Discs crap so just as well that they are being replaced.

So now I have 4 callipers
7637D57D-F5B5-46B3-82DF-664F9A25EE9A.webp


Next was to strip all the callipers down and check them. ( thanks to @Alan Slade ‘s suggestion that has made for all this extra work :arghh::arghh: =)))
I used a bicycle pump to push the pistons out which was ok, but only because none of them were seized. If they had been stuck I don't think this would have worked.
E6852B4E-B694-4A50-B9B3-4C24BCE7F8BD.webp


I found an old plastic lilo adaptor which cut its own thread when I screwed it into the bleed valve hole. As the hoses are being replaced I cut the end off and screwed them back in and used a self tapper bung up the open end of the hoses.
Worked luckily, and the pistons popped out ok.

Findings.....Rear ones are clean and will just need flick over with a feather duster and replacement seals.
63BF800D-F82F-417D-A493-7EC169FE0F67.webp


Front ones, .....one was ok(ish) and would probably clean up , but the other had loads of rust below the groove where the outer seal locates . So better to get two new pistons and seals for the front.
503A0D6B-887F-439F-A639-1D997EA8705E.webp


All the bores were ok, no scores or marks, so Monday, together with the carriers, they are all going to be sand blasted.
So in readiness for that, I put the pistons back in to protect the bores, put in the bleed valves, ( which are also being replaced), and the cut down hoses also put back in to protect the threads and stop sand getting inside the castings.

5D7D6EBA-0826-43CF-BA15-287AC5F96919.webp


All boxed now in the back of the Kia ready to be dropped off.
Wont order the new bits until after they have been done just in case anything else is needed.

May do some more painting tonight ...Yawn!!..............and sometime I need to arrange to get the new bushes inserted.. ( in the beam and diff housing before I get any comments:eek:)
 
Back
Top