Time for an overhaul of my 1.9 '98 BMW Z3 Individual

Matt Barnes

Zorg Guru (II)
Supporter
British Zeds
Joined
Jul 18, 2020
Points
123
Location
Portchester, Fareham
Model of Z
1998 BMW Z3 Individual 1.9 M44 B19
Its there, if and when you need it…

If its any consolation I had the same problem recently…. And had to destroy the locking ring…my saving grace was that I had Lee , Gaz and Trev looking over my shoulder and helping me with it.:thumbsup:
my nut is well and truly on there..now I've what's left of the ring off..I might buy some steel dremel.grinders just to.see if I can split it
 

Matt Barnes

Zorg Guru (II)
Supporter
British Zeds
Joined
Jul 18, 2020
Points
123
Location
Portchester, Fareham
Model of Z
1998 BMW Z3 Individual 1.9 M44 B19
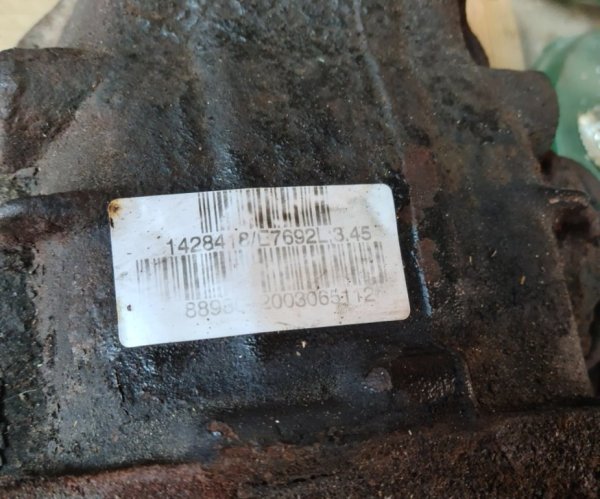
only slightly more positive news... the Diff looks very decent... all this was a soaking in Gunk degreaser... no scrubbing or anything...think it'll come up a treat
View attachment 271623
oooo forgot to say...It's a 3:45 ratio Diff.. is that usual for a 1.9?
 

Attachments

Matt Barnes

Zorg Guru (II)
Supporter
British Zeds
Joined
Jul 18, 2020
Points
123
Location
Portchester, Fareham
Model of Z
1998 BMW Z3 Individual 1.9 M44 B19
well it's another day...and I'll come on to the bad news in a bit....
thought I'd have a break from hammering driveshafts and turn my attention to some bodywork..... with the offside rear arch liner off... all looked very promising I must say... just a bit of surface rust... jabbed it all with a screwdriver and all very solid..

1691851869648.png

1691851893756.png


Time to get the sill covers off.....only broke a couple of clips as well
1691852010411.png


All looking VERY promising I must say !!

1691851940144.png


Also managed to get the front wing off without removing the wheel.....just managed to get the front wheel arch liner undone enough to reach that last bolt..
1691852120858.png

1691852144743.png

1691852266170.png


inside of the wing very very clean....

1691852176480.png


inside of the sill cover is a bit crusty but will clean up nicely...

1691852233731.png


and that is precisely where my luck ran out....the Bad news........ I have holes....

1691852314713.png


with the jacking pad removed

1691852348468.png


everything around the holes is solid... passed the screwdriver jabbing test

then I tried the offside rear jacking pad.... another hole...again, everything around it is rock solid

1691852436419.png


now I don't know what my options are now...... get a mobile welder ?... or wait until the car is back on the ground and truck it to a shop ?
 

Matt Barnes

Zorg Guru (II)
Supporter
British Zeds
Joined
Jul 18, 2020
Points
123
Location
Portchester, Fareham
Model of Z
1998 BMW Z3 Individual 1.9 M44 B19
Honestly you need to be brutal and get to clean metal even if it mean chopping some out. A good welder should be able to make a near seamless repair, have a check in my thread in the my sig mine was a lot worse.
cheers mate...will have a looksie
 

Matt Barnes

Zorg Guru (II)
Supporter
British Zeds
Joined
Jul 18, 2020
Points
123
Location
Portchester, Fareham
Model of Z
1998 BMW Z3 Individual 1.9 M44 B19
Honestly you need to be brutal and get to clean metal even if it mean chopping some out. A good welder should be able to make a near seamless repair, have a check in my thread in the my sig mine was a lot worse.
@Althulas just been going through your build ...wow !..... I've ordered one of those jacking repair plates you suggested and I'll start grinding away...cheers !
 

Matt Barnes

Zorg Guru (II)
Supporter
British Zeds
Joined
Jul 18, 2020
Points
123
Location
Portchester, Fareham
Model of Z
1998 BMW Z3 Individual 1.9 M44 B19
so today I did the nearside...

due to the tight space as I left the19" front wheels on.... had to get creative getting the wheel arch liner... midget rachet with a extender and small mole grips
1691942089965.png


left side off....
1691942123770.png


nowhere near as bad...BUT we had this "professionally" done only 4 years ago.....I can't see any treatment on there !

luckily.... no holes that shouldn't be there


1691941979333.png


1691942193658.png


applied DEOX GEL.....my taping up isn't as professional as @DrWong though !

1691942301815.png


1691942340805.png
 

DrWong

Zorg Guru (III)
Joined
May 8, 2017
Points
125
Model of Z
3.0i
Looks good to me! As long as it's airtight so the gel doesn't dry out. Decent temperature to be applying it too atm. I'd leave it for a couple days to do its thing. You can tell the gel is spent when it turns black and manky.

You ground all the loose rust off first before applying the gel, right.?
 

Matt Barnes

Zorg Guru (II)
Supporter
British Zeds
Joined
Jul 18, 2020
Points
123
Location
Portchester, Fareham
Model of Z
1998 BMW Z3 Individual 1.9 M44 B19
Looks good to me! As long as it's airtight so the gel doesn't dry out. Decent temperature to be applying it too atm. I'd leave it for a couple days to do its thing. You can tell the gel is spent when it turns black and manky.

You ground all the loose rust off first before applying the gel, right.?
as much as I could chip and grind off yes...and it's as airtight as I can get...I need to move the jacks onto the body rails as I need full access to the sills...that'll be interesting on a slope!...

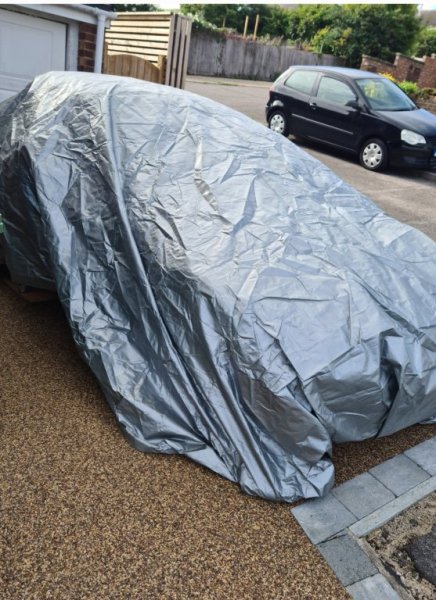
car tucked up for the night
 

Attachments

Last edited:

Andyboy

Zorg Guru (II)
Joined
Jun 2, 2019
Points
119
Location
SHEFFIELD
Those sills have been changed already by the looks of things.
 

Matt Barnes

Zorg Guru (II)
Supporter
British Zeds
Joined
Jul 18, 2020
Points
123
Location
Portchester, Fareham
Model of Z
1998 BMW Z3 Individual 1.9 M44 B19
Rain stopped play today (got a few days off)
1692025257537.png


so I got back onto you know what...... I swear this nut is taking the p***.... several hours hammering, drilling and chiselling...got through all my cobalt bits and broke my Dremel. and got HALF of it off....I'm convinced the previous guy welded it on !

1692025404209.png


1692025461251.png
 

DrWong

Zorg Guru (III)
Joined
May 8, 2017
Points
125
Model of Z
3.0i
Jeez, that nut is having your life haha. Keep up the good fight!

Is the sand colour gravel yours then? Cos the bit behind where the Z currently is looks more level, so just wondering the it isn’t there instead
 

colb

Zorg Guru (V)
British Zeds
Joined
Nov 25, 2012
Points
178
Location
Newport, South Wales,UK
Model of Z
Z3 M43 1.8 (1999) and Z4 E85 2.5 (2003)
Just hate it when you come across seized nuts like that, just been through that with a Lambda Sensor on my Z4 ended up using an air hammer chisel to break the sensor off so I could get a extractor socket on the sensors Hex. Wonderful sockets to have, they are fluted so when anticlockwise pressure is applied the socket grips even tighter and with a long breaker bar it freed off and came out. Those Hub nuts are quite big, not sure the kits of extractor sockets on ebay go up to that size biggest I have seen is 22mm in a set.
https://www.ebay.co.uk/itm/385828216454?hash=item59d5275e86:g:D3UAAOSwJKxkv49H&amdata=enc:AQAIAAAAwNOFIktt4STCvdmcZI33zfNh21eFIiSVvBY97oF4jBF4DyuVJ5TVm9LgkEMW4GeboEXu8QGeIGJmu2Rd8kVrn3bbbUXdWPpUt5iKoAMf7DNzajgmDf+zwe/eHxYTuqXMam4+wmnMII1aTpTmWn74MO/pvdpL5j1kV1nZ21mw2txHS37QbHfWcuZr9eCUmrIflKIElK6nLRpGqwnmPVxrDyvFqEdgOFOWvmHyn85dVrVmddpNllK3yquelBKuB/8bjA==|tkp:Bk9SR_7G18q-Yg
 

Matt Barnes

Zorg Guru (II)
Supporter
British Zeds
Joined
Jul 18, 2020
Points
123
Location
Portchester, Fareham
Model of Z
1998 BMW Z3 Individual 1.9 M44 B19
Jeez, that nut is having your life haha. Keep up the good fight!

Is the sand colour gravel yours then? Cos the bit behind where the Z currently is looks more level, so just wondering the it isn’t there instead
it's permeable resin mate....NOT cheap!... the bit in front is more level but means I can't the other cars in or out...I need to get axle stands on the chassis rails so I can get them off the jacking pads
 

Matt Barnes

Zorg Guru (II)
Supporter
British Zeds
Joined
Jul 18, 2020
Points
123
Location
Portchester, Fareham
Model of Z
1998 BMW Z3 Individual 1.9 M44 B19
Just hate it when you come across seized nuts like that, just been through that with a Lambda Sensor on my Z4 ended up using an air hammer chisel to break the sensor off so I could get a extractor socket on the sensors Hex. Wonderful sockets to have, they are fluted so when anticlockwise pressure is applied the socket grips even tighter and with a long breaker bar it freed off and came out. Those Hub nuts are quite big, not sure the kits of extractor sockets on ebay go up to that size biggest I have seen is 22mm in a set.
https://www.ebay.co.uk/itm/385828216454?hash=item59d5275e86:g:D3UAAOSwJKxkv49H&amdata=enc:AQAIAAAAwNOFIktt4STCvdmcZI33zfNh21eFIiSVvBY97oF4jBF4DyuVJ5TVm9LgkEMW4GeboEXu8QGeIGJmu2Rd8kVrn3bbbUXdWPpUt5iKoAMf7DNzajgmDf+zwe/eHxYTuqXMam4+wmnMII1aTpTmWn74MO/pvdpL5j1kV1nZ21mw2txHS37QbHfWcuZr9eCUmrIflKIElK6nLRpGqwnmPVxrDyvFqEdgOFOWvmHyn85dVrVmddpNllK3yquelBKuB/8bjA==|tkp:Bk9SR_7G18q-Yg
I've got those thanks mate..up to 27mm...used them to get the bolts of doom off...30mm ones are like rocking horse do doo.. but I think I'm beyond extractors for this 😄
 

Matt Barnes

Zorg Guru (II)
Supporter
British Zeds
Joined
Jul 18, 2020
Points
123
Location
Portchester, Fareham
Model of Z
1998 BMW Z3 Individual 1.9 M44 B19
right.... I decided today was a non driveshaft nut banging day !

took the bin bags off the rust and was quite impressed @DrWong ..doing job nicely !.. I've just setup a Screwfix account to ordered a cheapy angle grinder and some cup wheels... I'll add another layer later on...

1692107488090.png

1692107511373.png


then decided it was time to take the tank out.... I never knew there was a "formed" tank access hatch behind the driver's seat...:whistle:

.just needs opening with a Stanley knife

1692107601317.png

1692107645941.png


annoyingly.. you can't get the 4th screw out without removing the drivers seat.... well... I couldn't

1692107725108.png


reading that @IainP had trouble with his tank fixing bracket, so I broke as much rust off that I could with a hammer.... and gently rocked the strap up and down, tapping as I went.. eventually tapped it off the bracket... phew !!

Tank..... out... wallop !.... aaand I forgot it was half full.....:whistle::whistle:

1692107940931.png


and the straps.... amazingly under the bolt heads, it was still shiny black !!

1692108002661.png


my little "homage! to @Mazza :D

1692108166707.png


very clean under there with only a few spots of rust on seam edges that everyone has....

1692108225847.png

1692108249522.png


the tank neck got stuck.... so I rested the tank on the propshaft and managed to wiggle out the filler neck gaiter... and the vent pipe didn't break !! :thumbsup::thumbsup:
1692108320625.png


only casualty was the bracket screw holding the brake and fuel pipes

1692108372649.png


and now I'm officially.... That One Neighbour=))=))=))

1692108457129.png
 
Last edited:

DrWong

Zorg Guru (III)
Joined
May 8, 2017
Points
125
Model of Z
3.0i
only casualty was the bracket screw holding the brake and fuel pipes

1692108372649.png
What happened with the bracket screw? I couldn't for the life of me get it to turn when I re-did my rear brake lines. Was bashing it with a hammer and chisel and all sorts, but just wouldn't budge. Ended up cutting the lines after the bracket, inside the wheel arch.

Excellent progress btw, well impressed with how you've gotten stuck in!
 

Matt Barnes

Zorg Guru (II)
Supporter
British Zeds
Joined
Jul 18, 2020
Points
123
Location
Portchester, Fareham
Model of Z
1998 BMW Z3 Individual 1.9 M44 B19
What happened with the bracket screw? I couldn't for the life of me get it to turn when I re-did my rear brake lines. Was bashing it with a hammer and chisel and all sorts, but just wouldn't budge. Ended up cutting the lines after the bracket, inside the wheel arch.

Excellent progress btw, well impressed with how you've gotten stuck in!
cheers mate...yeah happy with this afternoon's effort...with that bracket, the head just sheared off...so if I can't get the shank out I'll need to play with my rivnut set! 😀
 

DrWong

Zorg Guru (III)
Joined
May 8, 2017
Points
125
Model of Z
3.0i
Seems there's still some loose stuff there that would prob be helpful to rid of first mate. This was what mine looked like before I applied the gel, pretty smooth in comparison.

1692110097502.png


For getting rid of loose paint and rust, I'd highly recommend poly paint and strip discs with an angle grinder. They work amazingly well and are really benign to good metal (won't grind it away). They're kind of pricey and wear out quickly, but well worth it.

1692110418028.png
 
Top