Time for an overhaul of my 1.9 '98 BMW Z3 Individual

ok, no real time last weekend but ... yes I went and did it.... zinc plated the pad retaining springs... :whistle:

gave them a good clean up and into the tanks they went

1765640969285.webp
1765640996636.webp


not brilliant, as I did sort of rushed it, and they got a bit "burnt" on the copper wires....

1765641057593.webp
1765641095420.webp


but. for today... decided to clean up and paint the front wheel arches, ready to receive the shiny shocks !

1765641228013.webp

1765641324073.webp
1765641340343.webp
1765641368546.webp


so gave them a decent scrub, firstly with wire pads to get rid of the mud, then warm soapy water, then washed down and then sprayed with brake cleaner as a degreaser... and we get here.

1765641414087.webp
1765641440268.webp


also ground down the front subframe and thankfully no nasty surprises under the grot

1765641515183.webp
1765641532806.webp

1765641577245.webp


liberally coated the whole lot in Kurust...

1765641615534.webp


and let it do it's magic

1765641644937.webp


turned completely black in about 10 minutes

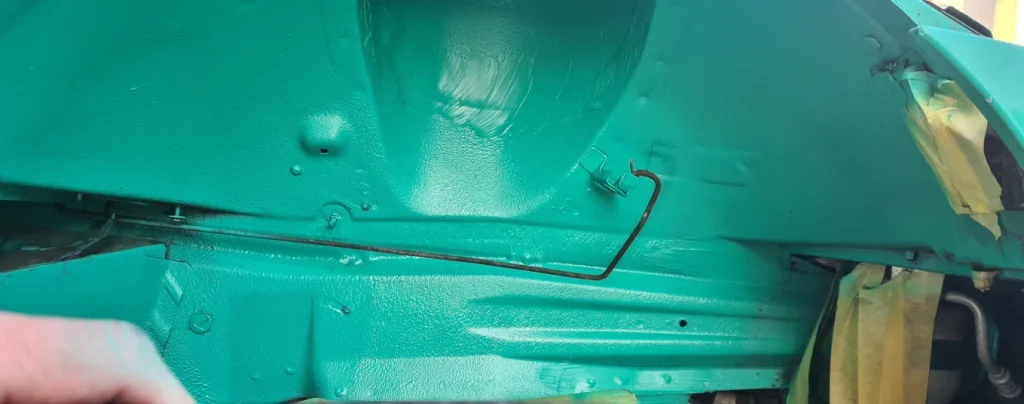
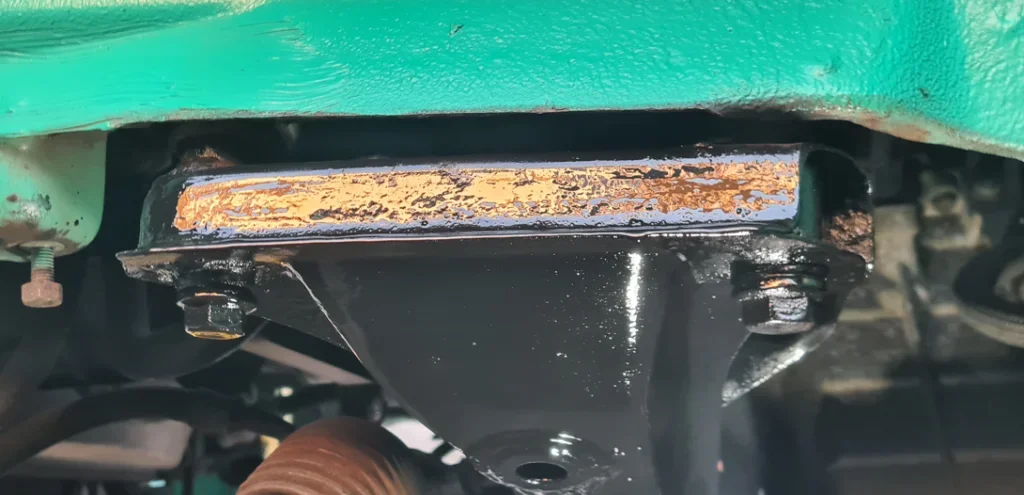
one thing I did notice was an area of crust where the seam sealer meets the lollipops, on both sides, so that needed some attention

1765641722996.webp


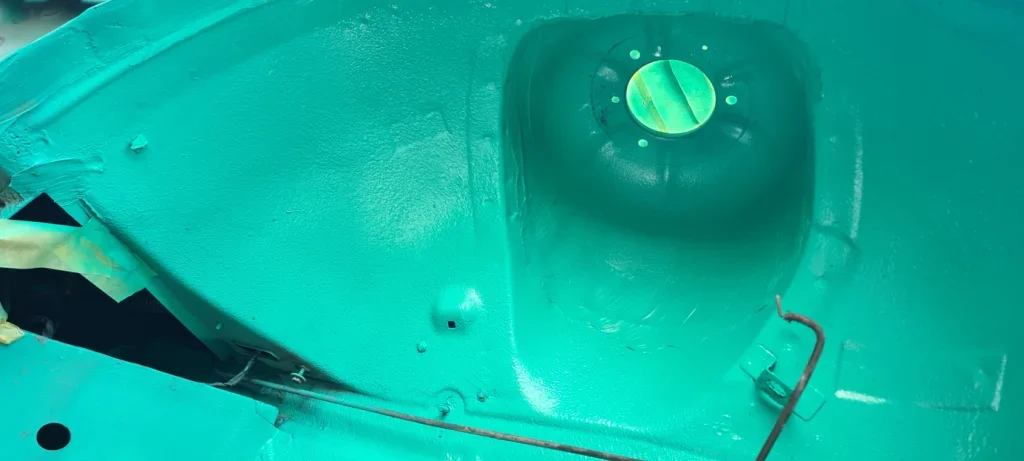
then it was a general mask up, and on with my favourite paint !!.... I didn't go too precise as most of that will be covered by wheel arch liner anyway.

1765641806798.webp

1765641840706.webp

1765641880854.webp


with that drying, I then masked from behind the wheel arch and out, so that I could get enamel black on the subframe... and yes I was temped to zinc plate the bolts, but talked myself out of it =))

1765641980948.webp

1765642031569.webp


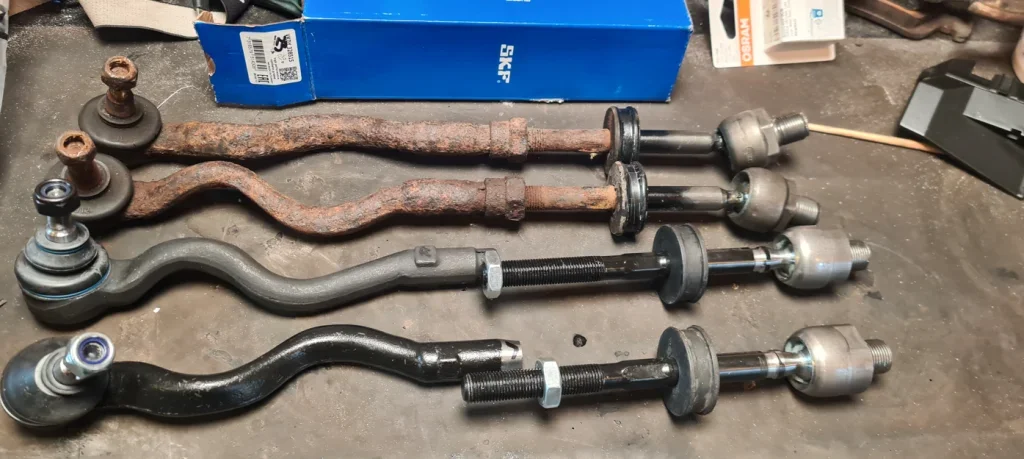
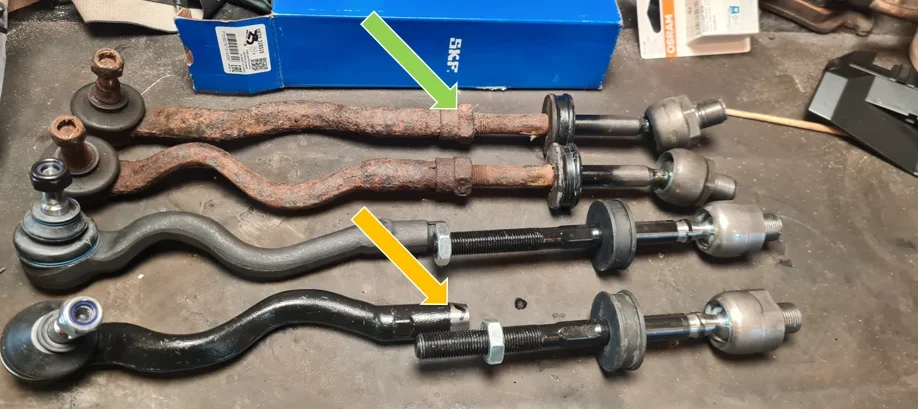
so I got done today what I planned to do, so I'm happy with that.....next is replacing those tie rods and getting that new cross brace on...
 

Attachments

  • 1765641789585.webp
    1765641789585.webp
    47.2 KB · Views: 520
  • 1765641822983.webp
    1765641822983.webp
    44.2 KB · Views: 535
  • 1765642002908.webp
    1765642002908.webp
    59.4 KB · Views: 555
I know I should wait but I couldn't help it...... decided to try and offer up the "new" front shocks... fought for what was like 20 minutes when these things weigh a ton when you're at an awkward angle... could I get those bolts into the mounting holes ?.... no..

tried the old shocks and they slipped straight back in... when I looked at the bolts on my "new" ones they were slightly splayed out. The holes on an E36 must be ever so slightly wider. Anyway I took a large adjustable spanner to the top plate and slowly tried to straighten it up so all the mounting bolts were parallel. Then we were all good !

1765723420882.png
1765723436482.png

1765723468150.png


I've ordered two new gaskets for the top of the struts, and for now the shocks are back in the garage snuggled under their favourite blanket...

next step is definitely the tie rods... I promise !... they should be the last of the old stuff to take off.

I'll look at that offside brake pipe again to decide whether to make a union in the wheel arch, or... try and run a new one through the engine bay

1765723787628.png
 
Last edited:
E36's and Z3's are all the same. There's a locating lug on the hub. It may be that aftermarket struts aren't drilled as precisely as the originals.
 
I wonder if I should get a trolley jack 🤔 thinking don't they have to be super low to get under the sills on our cars?
Slippery slope that.. you’ll use it and notice something that you’ll think ‘that can’t be too hard to fix’ .. before you know it you are knee deep looking at catalogues of socket sets and flare nut spanner’s. 😉
 
I wonder if I should get a trolley jack 🤔 thinking don't they have to be super low to get under the sills on our cars?
hi mate...I survived with a normal trolley jack for this entire project. Only got a low profile one as I put my subframe on a trolley, but then realised I couldn't get my jack under it. Plus my old jack was feeling lonely and needed a fwend...
 
:whistle: Waits patiently for an update ..with this lack of progress we’ll be calling you Mazza soon 🤣
 
well hello everyone and Happy New Year..... hope you're all well......and yes... it's been a while.

Decided to take the whole Christmas period completely out of the garage, and the first week of January was spent overcoming the mental torture of going back to work, after allowing myself three weeks off which basically consisted of drinking various forms of alcohol.

Come the second week of Jan I had to focus on the Octavia as the dreaded MoT was looming. One of last year's pickups was "underside surface corrosion"... well... come on, that's a breeze for me now !.... so ground down the subframe and trailing arms and coated the lot in Kurust, which come the day of the races had turned a nice black. It did fail though on rear wheel bearings and a nearside driveshaft... I needed the car so let them do it.... £602 later I had the car back !..... interestingly, they pulled me up as an Advisory for "Underbody sealing".... the Kurust. I can only think it was because now, they can't see if it's rusty or not !

Anyway back to the Zed..... today was my first day back on it (after replacing the sodding rear wiper motor on the Skoda).... I wasn't going to do much other than remove the Tie Rods.

and yes I do have the obligatory Rocker cover gasket leak above.
1769265923526.webp


Got the boot off, and good news, no power steering fluid leaks

1769265996183.webp


wasn't any point in using the ball joint tool as the whole lot was coming off, so just used an Adjustable and a rubber mallet. Sad thing is, the shiniest thing in this photo is the spanner ! =))

1769266122949.webp


and off she popped...... here's a Lesser Mottled Offside Tie Rod in it's natural habitat

1769266210077.webp


and here we have a rare glimpse of a Mottled pair soon after mating =))

1769266263555.webp


I also sprayed the inner arch connector case black...... too much ? =))

1769266378816.webp


whe I got them on the bench I noticed something that clearly isn't right..


The new outer tie rods have a conical slit, expecting a compression fitting (yellow arrow) and the old Inner tie rods do seem to have like a compression fitting (green arrow)

1769266865900.webp


The new Inner Tie rods though come with just a nut (blue arrow). Not sure yet if you can get that compression fitting separately or I need to get different Tie Rods?
 

Attachments

  • 1769266536716.webp
    1769266536716.webp
    74 KB · Views: 505
  • 1769266791997.webp
    1769266791997.webp
    66.8 KB · Views: 406
That’s a disappointment, can you send them back?
bought them a couple of years back so doubtful. I never even realised until I compared them against the old ones. I might try and find the "compression" nuts somewhere. If not, it's finding compatible outer tie rods
 
Not many people have the heat required to undo the tie rods, but if you have an angle grinder (w/ cutting disc), you can cut the rod through the nut, and use one of the old compression rings.
thank you @Pingu .. re using it did cross my mind, but I wasn't sure if it was classed as a "consumable" that you're supposed to replace. If I do get it off I've got to stop myself zinc plating it 😄
 
Compression rings available on ebay.
I had a guy in about a week ago with a zed 3 for a tracking.
He had changed track rods and track rod ends fitted without rings told him we weren't doing it until they were fitted found part number on real oem for him didn't check dealership price but readily available on ebay .

Stephen.
thank you mate...honestly never gave it a thought until compared them
 
Afternoon all..... definite lack of progress recently, mainly due to the incessant rain !... as you are probably experiencing, it's just day after day. I did mange to get the cover off, to give the inside a good clean and an airing....

1770560572219.webp

1770560600347.webp


inside was a bit mouldy so got a damp cloth and cleaned it all up together with some cleaner spray and paper towels... reminding myself what the inside looks like !

1770560707830.webp

1770560758168.webp


whilst wiping the seats I noticed a casualty..... it's about 1.5" long, and given it's a patterned seat, not easy to replace so might have to see if there's a way of repairing it ?

1770560805148.webp


The tie rod "clamps" turned up..... I'm still not sure why BMW chose to do this way but hey... ready to go back on....

1770560996507.webp


The next thing I decided to look at was the pesky offside front brake pipe.... it's a pretty convoluted route so might use the option as some have done by cutting it within the wheel arch and adding a union....I'd prefer to replace but...when you see the route !!

1770561250730.webp


1770561120691.webp

1770561144146.webp

1770561164337.webp

1770561186376.webp
1770561211980.webp


so, until the rain decides it's going to stop, getting stuff back on the car is going to be slow. Next jobs will be:

- THAT brake pipe
- Replace the cross brace under the engine
- On with the new Tie Rods
- On with the front struts
- On with the Rear Subframe
- Finish off the body panels (currently in the attic !)
- Paint new offside outer sill
- Fit said body panels
- Replace broken trims
- Replace power steering hoop
 
Try doing that brake pipe on a 6 cylinder car.

I use a hand held pipe cutter and a hand held Draper flaring tool and join it behind the arch liner.

And yes, this SODDING RAIN😡
 
Back
Top