Time for an overhaul of my 1.9 '98 BMW Z3 Individual

Matt Barnes

Zorg Guru (II)
Supporter
British Zeds
Joined
Jul 18, 2020
Points
123
Location
Portchester, Fareham
Model of Z
1998 BMW Z3 Individual 1.9 M44 B19
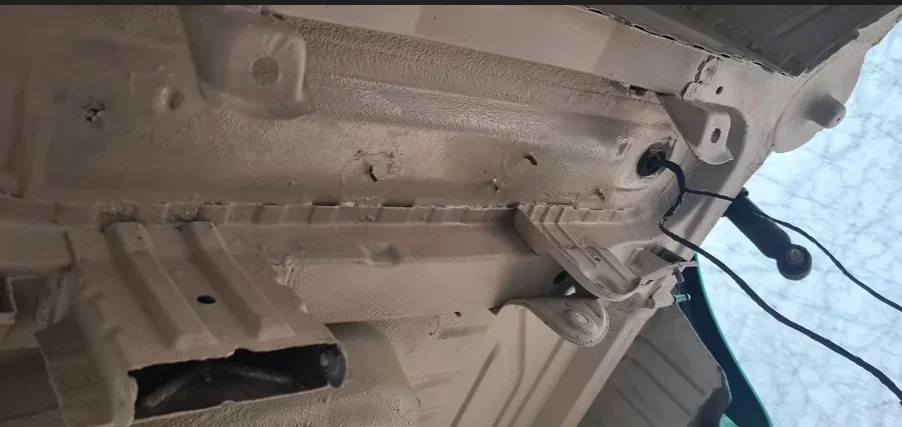
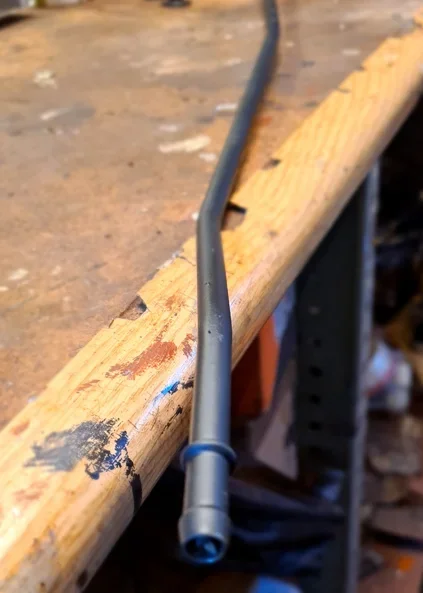
Another afternoon under the car.....and I'm definitely getting there..... noting what @Althulas said about the cable ties, I decided to gently wiggled them off with a pair of pliers, going to and fro, left and right until they came off. The studs are threaded but the ties aren't.....

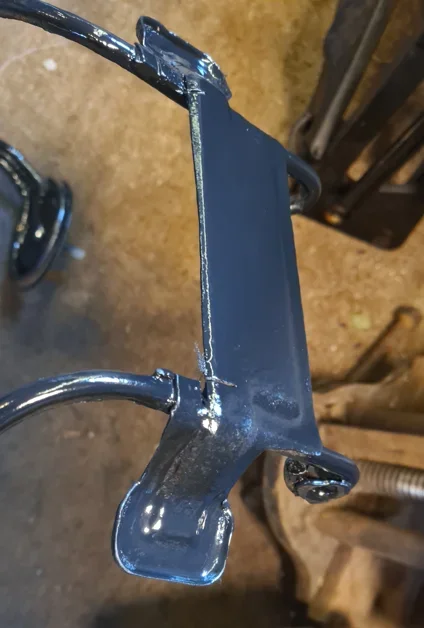
HOWEVER. the brake pipe clips unscrew !, I tried for ages trying to pull them off the studs, got them loose and turned anti clockwise and they unscrew !.... :whistle: :whistle:

1727537015923.png


and I'm mighty glad I did take them off, somehow the studs and the surrounding area were heavily pitted and corroded...and took a fair bit of finger sander, drill with a wire wheel and the Dremel to get it all off.

1727537191234.png


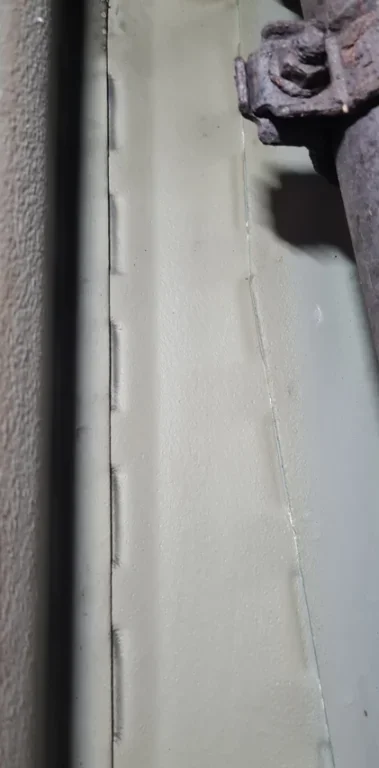
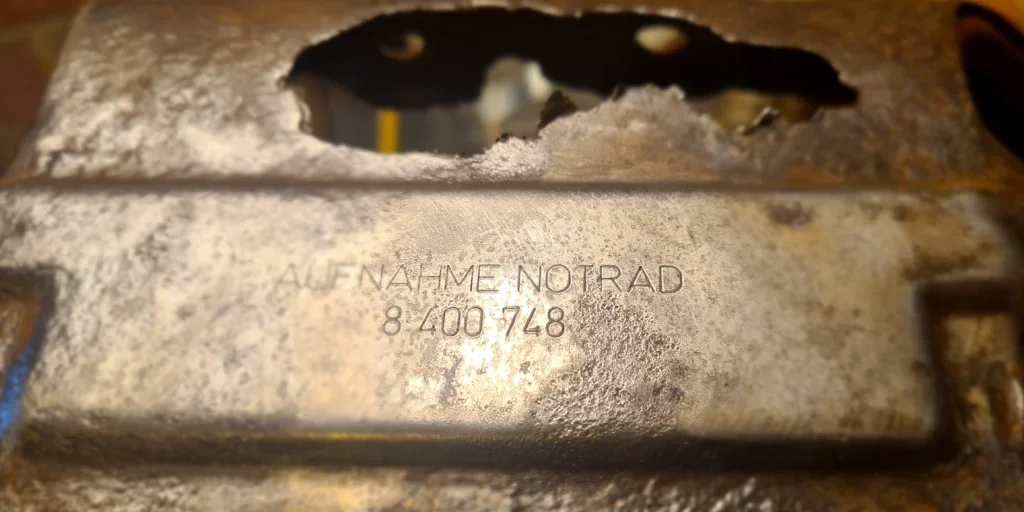
in getting rid of it I noted something curious.. this recess above the brake hose support. It felt like sharp edges and seems really weird, but it's on the nearside as well. It just doesn't look factory, almost like the brake hose has worn it down but it can't being rubber. That too was pitted with rust and took a lot of grinding to get back to bare metal

1727537385831.png


anyway, I treated the whole area with good old (and I mean old, I've had the bottle since the 90's !) =)) of Kurust.

1727537568880.png


The studs and surrounding area were treated to a liberal dose of Kurust and within 5 minutes was starting to turn black.

1727537640850.png


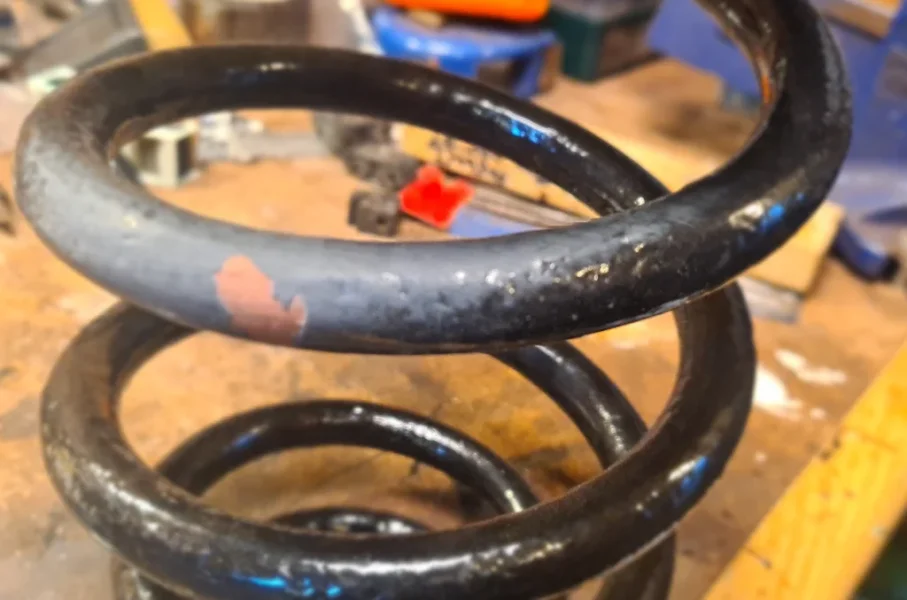
I also seam sealed the end of the sills both front and back and well as the two rear spring perches. didn't photograph it though...

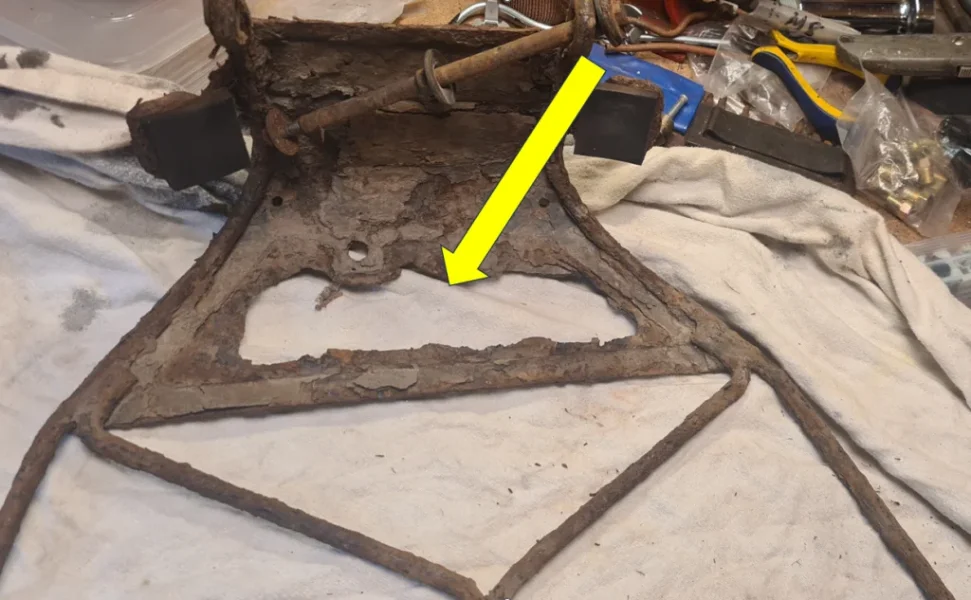
I also had a bit of a setback... I went back to my "favourite" front offside Sill end and looked underneath, and to my horror, there were three small brown brown areas on the Epoxy primer !... again !!.... this time I ground down the whole area, and got it as shiny as I possibly could given the rivulets and my dodgy welding.

I tried something different this time and caked the entire area in Kurust... I'll leave that until tomorrow and go over what I exposed today with epoxy primer

1727537941692.png


so the next steps are..... Epoxy prime the areas I've left (rear cable harness and this bloody sill).. then apply rattle can stone chip (I chose light grey given the colour of the top coat), to the sills and wheel arches.

Then it's spraying the underside in Fiji Green and e-coat colour where needed....then.... we're ready to start putting hardware back on ! starting with the brake and fuel lines.

currently the car is raised so much I can kneel underneath it, I'll obviously lower it a bit before I refit the fuel tank and the subframe.

I'll go with the option most have chosen, and that's the build up the entire rear end and roll it out on a trolley and lift.
 
Last edited:

Matt Barnes

Zorg Guru (II)
Supporter
British Zeds
Joined
Jul 18, 2020
Points
123
Location
Portchester, Fareham
Model of Z
1998 BMW Z3 Individual 1.9 M44 B19
Progress on painting a bit slow today as it's blowing an absolute hooligan and turning my tarp into a parachute !.....

1727616439725.png


still, I managed to complete the epoxy primer, and I think I've covered everything I need to before paint, think it's now ready for some Fiji Green !

oooo one word of warning, if you do use this type of 2k Epoxy primer, be warned it sets rock hard. made the mistake of getting it onto some threads on the first outing, and the nuts wouldn't go back on. Had to get the drill with a wire wheel to dig it out of the threads, took ages !!

1727616758967.png


so it was back into the garage and decided to practice my brake flaring for a bit.... talk about skill fade !.... anyway, got there in the end on some scraps..first two attempts weren't pretty... the final one is in the middle, which is more like the one I took off the car...

1727616961606.png


Then I decided to completely waste my time and clean up all the heat shield fixings because I had this crazy idea of zinc plating them... totally overkill I know, but I have to kit so it's only costing me time. I'll need to get them much cleaner than this before I do it though

1727617344672.png


Think next for me is to get the new Diff bush back into the Diff plate (I've already warned my wife that I'll need to put the bush in the freezer overnight) :whistle: =))
 

Attachments

Matt Barnes

Zorg Guru (II)
Supporter
British Zeds
Joined
Jul 18, 2020
Points
123
Location
Portchester, Fareham
Model of Z
1998 BMW Z3 Individual 1.9 M44 B19
well yesterday I had plans to really sort out the underside rear and get that all buttoned up for paint, but forgot i'd promised to fit a new bumper to my Sister's Skoda Fabia.....quite an interesting design as the rear lights are held on by locating pins and one plastic screw !..... anyway back to Z3s

given I'd mis ordered the rear trailing arm bushes, they arrived during the week and I set to....I came up with a cunning plan to make it even easier than using ring spanners... why not use the nugga !!....

1728221832031.png


all was going so well... pulled it in about halfway in seconds, then hit a stop and started stripping the thread of the bar... :whistle: :whistle:

abandoned that idea and went back to locknuts and ring spanners......

far more sensible and did the job admirably...

1728221979068.png


so onto today !.... thought I'd clear the decks, literally... and do a dry fit of most that has been refurbished.... first time this lot's been back together since July 23 ! proper Spinal Tap moment 😆

1728222095321.png

1728222118802.png

1728222146567.png

1728222176100.png


it was then I noticed something a little odd, I couldn't get the trailing arms back into the brackets on the subframe. Much manoeuvring and pushing led me to realise, the bushes were not seated properly..

1728222290017.png

1728222340045.png


notice how the left side is sticking out more than the right ?.... yep... that matters....

so I dug the threaded bar and nuts back out and gave them a little "tweak"....

then they sat nicely in the brackets.... it did come at some collateral damage in chipped paintwork, but that was sorted with a few brushes of Hammerite...

1728222492251.png


1728222455518.png

1728222469885.png

1728222526628.png


then I thought I'd have another practice at brake flaring..... getting there, but the flare on the OEM pipe seems a little wider and "fatter" (yes, my attempt is a very old bit of pipe pipe!! ). So I need to sort that out...

1728222641885.png

1728222662515.png


so that's about it for now...... progress progress..
 

Matt Barnes

Zorg Guru (II)
Supporter
British Zeds
Joined
Jul 18, 2020
Points
123
Location
Portchester, Fareham
Model of Z
1998 BMW Z3 Individual 1.9 M44 B19
well.... decided to have a long weekend, primarily taken up by us going away with friends to Somerset and effectively drinking for three days !!... however, today was a garage day and I set to by making up the front to rear Offside brake pipe.

I tried using a brake forming tool but on the second bend, (luckily I'd just started) it caused a kink.....

1728915081559.png


so I had to chop that off with a the pipe cutter and start again... this time, I did the whole thing with my thumbs and no kinks

1728915163176.png

1728915181025.png

1728915200320.png


Then I realised I clearly had too much time on my hands and decided to clean up the heat shield fasteners....

1728915262331.png


and yep.... you guess it...... zinc plate them !!.... =)) =))

1728915299881.png


some didn't turn out too well... but hey, it was only me playing around.... they might look good contrasted against the silver heat shields...

so next steps....

  1. Paint the underside - mixture e-coat colour where needed and Fiji Green.....
  2. Paint the inner sills
  3. Fit the fuel lines (thanks @Mazza ! )
  4. Fit my newly made brake pipes
  5. Refit the heat shields
  6. Assemble the subframe
  7. Make up subframe brake pipes
  8. Rebuild the rear brakes
  9. Lower the car to a reasonable height !!
  10. Fit the tank with new straps... (again thanks @Mazza )
  11. Get that lot back on the car !

Then...... sort out the front !....

- both shocks rusted
- both front discs rusted
- cross brace surface rusted
- front axle support rusted, but only surface rust
 

Synclare

Zorg Guru (III)
Supporter
3rd Party Trader
Joined
Jan 1, 2016
Points
147
Location
Staffordshire
Model of Z
1.9
That is because it looks like you are making standard SAE flares as opposed to a DIN flare that it should be. They have different profiles.

View attachment 319903

View attachment 319899
View attachment 319901
View attachment 319905

then I thought I'd have another practice at brake flaring..... getting there, but the flare on the OEM pipe seems a little wider and "fatter" (yes, my attempt is a very old bit of pipe pipe!! ). So I need to sort
 

Matt Barnes

Zorg Guru (II)
Supporter
British Zeds
Joined
Jul 18, 2020
Points
123
Location
Portchester, Fareham
Model of Z
1998 BMW Z3 Individual 1.9 M44 B19
That is because it looks like you are making standard SAE flares as opposed to a DIN flare that it should be. They have different profiles.

View attachment 319903

View attachment 319899
View attachment 319901
View attachment 319905

then I thought I'd have another practice at brake flaring..... getting there, but the flare on the OEM pipe seems a little wider and "fatter" (yes, my attempt is a very old bit of pipe pipe!! ). So I need to sort
interesting!... thanks for that mate, I'll go back and do some research, though I'm only using one compression, i.e. one use of the Die...but of course I'll do more practice!
 

t-tony

Zorg Expert (II)
Supporter
British Zeds
#ZedShed
Joined
Dec 31, 2013
Points
226
Location
Torksey Lock,Lincoln, England
Model of Z
E89 Z4 23i Auto
You have to make the convex joint before making the concave one Matt.
Have you not looked at my "How to Guide" on making brake pipes?

Tony.
 

Matt Barnes

Zorg Guru (II)
Supporter
British Zeds
Joined
Jul 18, 2020
Points
123
Location
Portchester, Fareham
Model of Z
1998 BMW Z3 Individual 1.9 M44 B19
You have to make the convex joint before making the concave one Matt.
Have you not looked at my "How to Guide" on making brake pipes?

Tony.
Thanks Tony, I thought I was doing it right as they're supposed to be ISO/DIN bubble flares?..I've got something wrong then. Glad I'm practicing on scrap pieces 😃
 
Top