Time for an overhaul of my 1.9 '98 BMW Z3 Individual

Matt Barnes

Zorg Guru (II)
Supporter
British Zeds
Joined
Jul 18, 2020
Points
123
Location
Portchester, Fareham
Model of Z
1998 BMW Z3 Individual 1.9 M44 B19
Good job Matt..having watched Lee do mine last week it’s not a job I would have looked forward to either. 👍
cheers mate....I was just waiting for the "TIIINK"... and a hairline crack.... but I took the advice of others including Lee and @Mazza and made sure I was sawing on the body side and not the outer edge...
 

Matt Barnes

Zorg Guru (II)
Supporter
British Zeds
Joined
Jul 18, 2020
Points
123
Location
Portchester, Fareham
Model of Z
1998 BMW Z3 Individual 1.9 M44 B19
I am also going to buy a lottery ticket !..... decided I'm going to redo my calipers in spray rather than brush on paint.... I knew I had a seized bleed nipple in one of them and a 7mm ring spanner just wasn't cutting it.. wasn't budging at all ..so in preparing for the worst I'd check the price of a new caliper !

1720886666405.png


so it was a case of ... "sod it".... and got a long aluminium tube for some purchase over the ring spanner

1720886730682.png


slow and steady pull..... then "pop"......... dammit... thought I'd snapped it..... but no !!... it just broke the rust seal and turned.......!

sigh of relief or what !!.... I'd previously done some research on brakes and this was apparently the best thing to prevent seized threads

1720886898921.png


so for now gave the thread a decent coating and that'll do until I get round to doing the calipers... again ! :whistle:
 

Andyboy

Zorg Guru (I)
Joined
Jun 2, 2019
Points
89
Location
SHEFFIELD
When fitting the new diff bush, place the rear cover in a saucepan so it's fully covered (or just the bush part) and boil it for five minutes before pressing the bush in. Having the bush overnight in the freezer helps.

On calipers I clamp the bleed nipple in the vice and twist the caliper.
 

Matt Barnes

Zorg Guru (II)
Supporter
British Zeds
Joined
Jul 18, 2020
Points
123
Location
Portchester, Fareham
Model of Z
1998 BMW Z3 Individual 1.9 M44 B19
good tips @Andyboy
When fitting the new diff bush, place the rear cover in a saucepan so it's fully covered (or just the bush part) and boil it for five minutes before pressing the bush in. Having the bush overnight in the freezer helps.

On calipers I clamp the bleed nipple in the vice and twist the caliper.
good tips @Andyboy !. never thought of that bleed nipple option...I've seen the freezer/heat option...I'm bound to cock that up 😅
 

Matt Barnes

Zorg Guru (II)
Supporter
British Zeds
Joined
Jul 18, 2020
Points
123
Location
Portchester, Fareham
Model of Z
1998 BMW Z3 Individual 1.9 M44 B19
Sorry for a random update....but I opened up the garage today to be welcomed to this....

1721028715247.png


Just a reminder that as we all struggle with our cars and put in hours and hours of hard work, just taking a step back to know sometimes it's all worth it...
 

Matt Barnes

Zorg Guru (II)
Supporter
British Zeds
Joined
Jul 18, 2020
Points
123
Location
Portchester, Fareham
Model of Z
1998 BMW Z3 Individual 1.9 M44 B19
When fitting the new diff bush, place the rear cover in a saucepan so it's fully covered (or just the bush part) and boil it for five minutes before pressing the bush in. Having the bush overnight in the freezer helps.

On calipers I clamp the bleed nipple in the vice and twist the caliper.
@Andyboy ... on that subject, did you push your bush in with a vice? or did you use a press ?... loaded question as I only have a couple of vices.. ta
 

Matt Barnes

Zorg Guru (II)
Supporter
British Zeds
Joined
Jul 18, 2020
Points
123
Location
Portchester, Fareham
Model of Z
1998 BMW Z3 Individual 1.9 M44 B19
bit of an odd one today, after a couple of hours sorting the garden, I decided to treat myself to stripping the paint off the calipers as I just didn't like the finish

I knew I could do better than this. This is Hammerite brush on, and I just didn't like it...

1721489026394.png


After I sprayed the Diff plate which came up really well, I decided to grind the paint off a Caliper, which literally took.....hours and hours...about 3.5 hours grinding with a Dremel

I wanted to get every bit of paint off as I wanted to zinc plate it, but it didn't work, so instead sprayed it with Hammerite silver Smooth and it came up really well, FAR better than brush on..

1721489518482.png


So today I thought I'd try another tack. This time I used a paint stripper and it was SO much easier !!... big up to Jelonite, as after 15 minutes of soak time, it started to scratch off like a scratch card

1721489681522.png


scratching off with a very blunt chisel, revealed the red oxide layer, then another spray of Jelonite

1721489749462.png


Then it was about 1.5 hours with the wire wheel and the Dremel, trying to get EVERY bit of paint off, as I might try and actually zinc plate this one !!

1721489826175.png

1721489848666.png


Can thoroughly recommend Jelonite though, now for someone to invent a spray that gets the metal in this condition from one spray ! =)) =))
 

Matt Barnes

Zorg Guru (II)
Supporter
British Zeds
Joined
Jul 18, 2020
Points
123
Location
Portchester, Fareham
Model of Z
1998 BMW Z3 Individual 1.9 M44 B19
well... I had a go.... and no... it didn't work.... surface was far too damaged/pitted for the zinc to take

you can see the brown areas where the zinc didn't adhere

1721564406094.png


went on with the passivating bit for the hell of it

1721564486662.png

1721564500798.png


but nowhere near good enough to go on the car.... so it'll get sprayed, like it's brother

1721564618366.png


now that's MUCH better... and I re zinced the bleed screws as well....

1721579878279.png
 
Last edited:

Matt Barnes

Zorg Guru (II)
Supporter
British Zeds
Joined
Jul 18, 2020
Points
123
Location
Portchester, Fareham
Model of Z
1998 BMW Z3 Individual 1.9 M44 B19
Afternoon all.... firstly.. apologies it's been a long time since I've been on the car. Painting the calipers was the last time I did anything, don't think I did any Zed stuff in August or start of September... hopefully building a little momentum now to get it off the jack stands !...

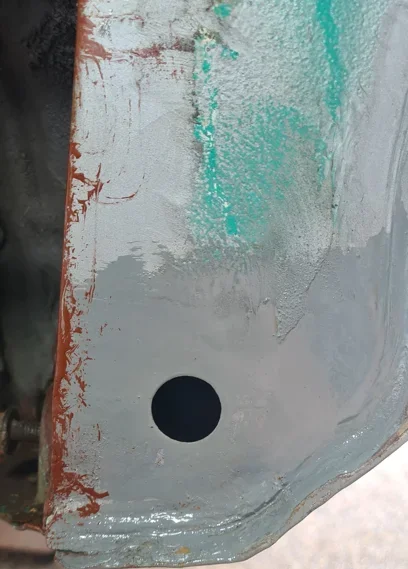
Firstly, a quick check to see how the POR15 is fairing up after I put it on in June..... Front offside Sill, which I welded back up...... I have brown spots leaking through !!..... now this is probably due to my workmanship as the other three sill ends are fine....

1726317416781.png
1726317460031.png


what I think I'm going to have to do is grind this area down and use my MIPA Epoxy primer instead and see how that fairs.

Rear offside is fine... that red is red oxide primer by the way

1726318401529.png


Now one thing that is a concern... having the car covered has caused little blisters to appear in the clear coat (that's not beads of water !) so I'm going to have to wet sand that back and respray the clear coat in those areas..

1726317711922.png


and on the rear nearside, the clear coat has peeled off !!
1726317781224.png


but the main purpose of this morning was to wash the underside with sponges and stiff brushes to get rid of any muck and grease, as I want to paint the whole rear underside in MIPA Epoxy primer and then paint.

1726317916860.png

1726317940735.png


If you saw the colour of the water afterwards I think I was vindicated doing so !

so I got the epoxy primer ready, this is a MIPA 2k Epoxy Primer, that went on surprisingly watery, but as it's supposed to be sprayed, I guess it should !

1726331448540.png


first lot of underside done....
1726331485417.png

1726331505868.png

ok so next steps...

- Sort that front offside sill again
- another coat of primer and then under coat (same colour-ish of the E-coat)
- Make up new brake lines using the old ones as a template
- Fit the replacement fuel lines
- Fit all the replacement bushes on the subframe and trailing arms
- Build up the rear brakes and replace caliper pistons and seals
- Reassemble the rear end !!

all done by the end of the day.... =)) =)) =))
 

Attachments

Last edited:

Matt Barnes

Zorg Guru (II)
Supporter
British Zeds
Joined
Jul 18, 2020
Points
123
Location
Portchester, Fareham
Model of Z
1998 BMW Z3 Individual 1.9 M44 B19
Another day of Epoxy priming !......going on from yesterday with the rust spots, bleeding through the POR15, today I ground each area down to bare metal again using the file sander, to be met by corrosion !.... managed to get to bright steel, then added a good layer of MIPA epoxy primer. I will add seam sealer in the corners and anti gravel spray later

1726409189300.png


then it back to the underside including the spare tyre well and up to the arches making sure all the flutes were kept clear

1726409352731.png


Then scuffing up the lovely POR15 coating, so I could add Epoxy Primer to the Sill ends

1726409873520.png


1726409376559.png


now, two areas I haven't done are above the tank, as the e-coat is in perfect nick and didn't see the benefit in covering it up..

1726409457796.png


I also didn't do where the harness is, as I didn't want to damage the clips as I'm not sure how they come out yet... not sure if they twist off or prise off ?

1726409532280.png


once that's sorted, it's then seam sealer where needed, especially the sill ends! anti gravel in the wheel arches and then paint. I have paint that sort of matches the E-coat for the underside, and Fiji Green for exposed areas (wheel arches; sill covers etc)
 

Matt Barnes

Zorg Guru (II)
Supporter
British Zeds
Joined
Jul 18, 2020
Points
123
Location
Portchester, Fareham
Model of Z
1998 BMW Z3 Individual 1.9 M44 B19
The cable tie clips just prise off, but don’t forget 20 year old plastic, you can still buy them or alternative options are out there if your not to fussed about oem.
Cheers mate.....good to know ! I also left the Brake pipe clips, I know they "unscrew" off the pegs but if they snap, we're talking rivnut territory...
 

Matt Barnes

Zorg Guru (II)
Supporter
British Zeds
Joined
Jul 18, 2020
Points
123
Location
Portchester, Fareham
Model of Z
1998 BMW Z3 Individual 1.9 M44 B19
well after a lazy day yesterday, my first garage act as a new 57 year old was to get back into the Z3

First off was for me to note my accounting error... given there are TWO Rear Trailing Arms, I SHOULD have ordered four bushings....I didn't :whistle: :whistle:

1727191180579.png


So after beating myself with a hammer, it was onto AutoDoc to order two more RTAB bushings...… what an idiot.. .:banghead:

onward and upward, so I made sure the inside of the bosses were as clean as possible and found that a slightly worn Dremel flap wheel fitted perfectly !

1727191324109.png

1727191344909.png


Then it was onto installing the bushing set using the nut and bar method I used to remove them

1727191404457.png

1727191422456.png


and very soon it was job done, very easy !

1727191458062.png


Now then... onto the subframe bushings. I could claim God level engineering for this....but I got the idea from a bloke on YouTube. I bought a plastic plumbing pipe adaptor online (I can get the part number if anyone wants it) .. to hold the threaded bar in place, I drilled out a large washer, so it would sit inside the adaptor to hold the threaded bar, then dropped the locknutted threaded bar through the hole.

1727191736964.png

1727191754163.png

1727191851357.png


Then it was the same method of winding the bushing into the boss with lots of silicone spray as lubricant...

1727191953000.png

1727191988315.png


1727191968622.png


it did come at the cost of some chipped paintwork, but that all needs tidying up anyway

1727192050386.png
 
Last edited:

Matt Barnes

Zorg Guru (II)
Supporter
British Zeds
Joined
Jul 18, 2020
Points
123
Location
Portchester, Fareham
Model of Z
1998 BMW Z3 Individual 1.9 M44 B19
right.... today's quest was the make the shiny reel of brake pipe the same shape as the old brake pipe.....

1727353589448.png


First off was my first attempt at fabricating a home made pipe straightener... which didn't pass muster.

1727353636879.png


Mk2 using a pallet block was better but not perfect....

1727353686407.png

1727353704018.png


I found that trying to bend pipe in a garage the size of half a shoebox, is like trying to grab an octopus that has Tourettes and covered in baby oil. Anyway... I persevered. I eventually used the technique that has been on here before of taping the new to the old. I made sure that as I approached every kink or bend, I firmly taped the new bit to the old and that REALLY helped form the bend as it kept the new pipe rock solid.

1727353884425.png


The kinks and bends were too fiddly for me to use a tool, so all bends were hand formed, the only tool in use was me.... anyway... turned out pleasantly well ! I used kunifer and it was very forgiving, allowing me to shape and reshape without collapsing.

1727353942276.png

1727354041400.png

1727354065545.png


I now have a technical issue in that what's left on the reel isn't enough to do the offside rear pipe !... best order some more !
 
Top