Time for an overhaul of my 1.9 '98 BMW Z3 Individual

Matt Barnes

Zorg Guru (II)
Supporter
British Zeds
Joined
Jul 18, 2020
Points
123
Location
Portchester, Fareham
Model of Z
1998 BMW Z3 Individual 1.9 M44 B19
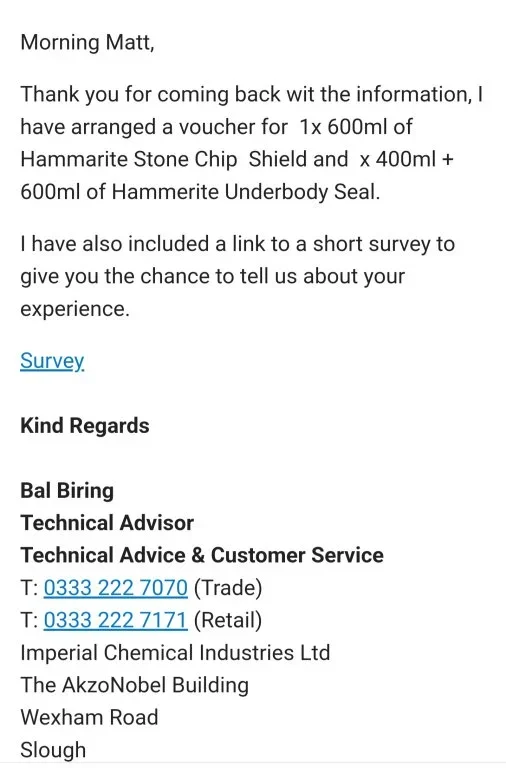
Not doing any car work today shock !... going to make the most of this sun.... however this morning I did take delivery of some cans of RAL6019, of which when I had a swatch piece matched the undercoat. However, in reality it's a fair bit brighter !!.. given that's it's just the underside it'll do, and actually freshens it up a bit...obviously a test piece before I start grinding down the under carriage... ooo er missus =))=))

1715425251315.png
1715425280494.png

1715425328915.png


again, this is purely for the underside, I already have Fidschigruen (Fiji Green) for the top cost areas and sills

anyway.... today...... we BARBEQUE !!! ☀☀☀
 

Matt Barnes

Zorg Guru (II)
Supporter
British Zeds
Joined
Jul 18, 2020
Points
123
Location
Portchester, Fareham
Model of Z
1998 BMW Z3 Individual 1.9 M44 B19
decided to attack the "new to me" Driveshaft as well as getting some more plating done....

1716119436754.png


ground each end down to bare metal and for the gaiters, sprayed on Gunk and left it for 5 miutes, then got stuck in with a nylon brush and they came up a treat !!

1716119536060.png


Masking and painting...
1716119590376.png
1716119644822.png


Then it was onto plating.. decided to tackle the handbrake cable support bracket and the rear Caliper bolts....the bracket took ages to get to bare metal.. ended up using the Milling bits in my Dremel set

1716119790276.png
1716119807478.png


Caliper bolts drying after being zinced

1716119861995.png


handbrake cable support brackets after being zinced... not great due to all the scoring from the Dremel

1716119950894.png


Then it was to this !... the first time the drive shafts and Diff have been together since last July !!!.... and I need to tidy up the diff again ! =))

1716120024025.png

1716120070505.png


Freshly zinced caliper bolts against the silver calipers

1716120138438.png


Then I ground down the subframe support plates to bare metal... then covered with POR15 Metal Prep for a zinc phosphate coating

1716120207430.png

1716120233513.png

1716120251487.png


They will then get a top coat of Black Hammerite...........right... Gin... 🍸🍸
 

Attachments

Matt Barnes

Zorg Guru (II)
Supporter
British Zeds
Joined
Jul 18, 2020
Points
123
Location
Portchester, Fareham
Model of Z
1998 BMW Z3 Individual 1.9 M44 B19
right.... busy couple of days... but.. the sills are welded !

fettled my new fabricated sill end and got it as tight as I possibly could... noting I use Flux Core which hates gaps !

1716648049129.png


tacked in a few spots to allow the claps to be removed

1716648101057.png


then just took my time and slowly went round the whole piece and ground down after and it was in !

1716648167003.png


then it was onto the front piece... I realised that below the grommet hole there was a support bracket so couldn't take the whole thing out... so bottled it and went lower as per the masking tape

1716648278468.png


lots of faffing and an utter mess which I'll spare you but..... got there in the end....after a lot of grinding down !!... notice I also nicked the end plate with my cut off wheel.... let's call that "aero" shall we ? =))

1716648348492.png


Then I decided to paint the subframe plates.. this is three coats of Hammerite Smooth

1716648598793.png


then I thought I'd turn my attention to the rear..... started grinding off the rust and then covering with red oxide primer for now

1716648698221.png
1716648725298.png
1716648759162.png


1716648800051.png
1716648828879.png
1716648865708.png


then decided to grind down the subframe bolt nuts and tank strap bolts with the Dremel ready for plating... from crusty rust to being able to see the nut size...

1716648971179.png
1716648987331.png


if the weather turns bad tomorrow I might do some zinc plating.... right.... GIN !! 🍸🍸
 

Matt Barnes

Zorg Guru (II)
Supporter
British Zeds
Joined
Jul 18, 2020
Points
123
Location
Portchester, Fareham
Model of Z
1998 BMW Z3 Individual 1.9 M44 B19
well..... some days you have progress and some days you have setbacks...... tidying up the garage for the umpteenth time and I knocked the rear spring and chipped the Hammerite and could literally chip it off with my finger nail.....I can only assume it's because I didn't rough up the Hammerite Primer before the topcoat..... this now implies that everything I've painted black... (pretty much everything) will have to come off and be redone... b***er.

1716818853909.png


Needless to say, I've now written to Hammerite.... I'll let you know the outcome

1716820125004.png
 
Last edited:

hard top

Zorg Expert (I)
Dutch Zeds
The M44 Massive
Joined
Dec 5, 2011
Points
213
Location
Netherlands
It has been a while since I have used Hammerite but as far as I can remember, you do not need to use primer or undercoat, just make sure that item that you are going to paint is clean.
 

t-tony

Zorg Expert (II)
Supporter
British Zeds
#ZedShed
Joined
Dec 31, 2013
Points
226
Location
Torksey Lock,Lincoln, England
Model of Z
E89 Z4 23i Auto
You do need undercoat with Hammerite, but, it has to be their own and left to dry for a specific length of time between coats otherwise this happens.

Tony.
 

Matt Barnes

Zorg Guru (II)
Supporter
British Zeds
Joined
Jul 18, 2020
Points
123
Location
Portchester, Fareham
Model of Z
1998 BMW Z3 Individual 1.9 M44 B19
Thanks both.....I'm really annoyed with myself...I did use Hammerite Red Oxide Primer and left it a good week before painting the top coats... I'll look back at my posts to confirm the time... but at the time I recall thinking to myself "this surface is really smooth"... and the black just glided on and looked epic.... think I might try is rather than going back to bare metal …..again... just really rough up the surface and try again.....
 

Duncodin

Zorg Guru (III)
Supporter
Joined
Sep 8, 2021
Points
139
Location
Pontrhydyrun
Model of Z
Z3 M44
I can't bring myself to tart the underside. I like the rust-look. I know what it's like if I can see it warts n all.

i eave my springs rusty looking. Every year the MOT guy puts rusty springs in the advisories. If they ever get excessively pitted I assume he'll fail them. Unless I see it first and decide they're too rusty amd change them myself.

If I was buying a car I'd rather see the rust.
 

Matt Barnes

Zorg Guru (II)
Supporter
British Zeds
Joined
Jul 18, 2020
Points
123
Location
Portchester, Fareham
Model of Z
1998 BMW Z3 Individual 1.9 M44 B19
I can't bring myself to tart the underside. I like the rust-look. I know what it's like if I can see it warts n all.

i eave my springs rusty looking. Every year the MOT guy puts rusty springs in the advisories. If they ever get excessively pitted I assume he'll fail them. Unless I see it first and decide they're too rusty amd change them myself.

If I was buying a car I'd rather see the rust.
I've gone too far and invested too much time, effort and money to let it go back to rust now...I'm hoping I can rough up the surface to get the paint to adhere...
 

Matt Barnes

Zorg Guru (II)
Supporter
British Zeds
Joined
Jul 18, 2020
Points
123
Location
Portchester, Fareham
Model of Z
1998 BMW Z3 Individual 1.9 M44 B19
So I wrote to Hammerite, and I must say, very impressed with their Technical team. Upshot is, it was mainly my fault. They politely advised that the Hammerite paints I described i.e. Hammerite Red Oxide and Hammerite Smooth Black are not designed for cars !.. They're designed for corrosion resistance of metal but not for impacts like stone chips etc. Apparently what I SHOULD be using is Hammerite Underbody Seal (guess the clue is in the name) or/and Hammerite Stonechip Shield Aerosol. All is not lost I feel. I might be able to get away with roughing up the under side of the subframe and Trailing Arms and giving them a thick coat of Underbody Seal

I think he took pity on my idiocy and is sending me a small can as a "goodwill gesture" =)) =))
 

Nodzed

Zorg Expert (II)
Supporter
British Zeds
M Power
Joined
Feb 18, 2016
Points
231
Location
Forest of Dean, Gloucestershire, England
Model of Z
Z3M Imola and Z4 (e89)
qq
 

Matt Barnes

Zorg Guru (II)
Supporter
British Zeds
Joined
Jul 18, 2020
Points
123
Location
Portchester, Fareham
Model of Z
1998 BMW Z3 Individual 1.9 M44 B19
That’s a proper company !
indeed...they could have easily said... you used the wrong stuff, and I did confess to Hammerite that I'd gone back and read the tins and nowhere did it state "impact resistant".. being cordial sometimes works, but I know now.... not all Hammerites are the same !!... I'll let you know how the Underbody seal and spray works...
 

Matt Barnes

Zorg Guru (II)
Supporter
British Zeds
Joined
Jul 18, 2020
Points
123
Location
Portchester, Fareham
Model of Z
1998 BMW Z3 Individual 1.9 M44 B19
so another afternoon of plating.... got a bit carried away and even plated the grub screws for the rear discs, and tried a bleed nipple to see how it would turn out. Also had a nice visit from @Mazza to top off the afternoon

1717252902656.png

1717253060271.png


Did the prop shaft nuts, the fuel tank strap bolts and the nuts for the subframe bolts (that goes through the subframe bushes)

1717253011954.png


then for sh*ts n giggles... thought I'd strip the paint off the anti roll bar bracket and do that as well..... oh the beautiful irony of trying to grind the Hammerite paint off =)) =)) =))

1717253166553.png


has to be spotless to plate well...combination of angle grinder and dremel attachments

1717253190764.png


now fully plated

1717253228678.png
 

Matt Barnes

Zorg Guru (II)
Supporter
British Zeds
Joined
Jul 18, 2020
Points
123
Location
Portchester, Fareham
Model of Z
1998 BMW Z3 Individual 1.9 M44 B19
Today was a momentous day !..... actually put something BACK ON !!..... exhaust bracket now back on the subframe, with a newly zinced bolt and washer ... so the return journey has begun !!

1718468218558.png


then it was onto more plating....Trailing Arm bolts and nuts this time... spent an inordinate amount of time getting rid of all the rust.. Top is how they started...
1718468339960.png


and this is how clean you need to get the hardware in order for it to plate well

1718468385620.png

Post Zinc plating

1718468421616.png


Got a bit carried away and even cleaned up and zinced, the rear shoes adjusters

1718468532891.png


Did a stock check on my bushes and I think I have them all for the rebuild

1718468668180.png
 
Top