g8jka - 2.8 Roadster Progress Journal

So sorry :facepalm:Dawn for the abbreviation, when I'm on here I take it for granted that everyone knows the most common ones.
Roy.;)


I would check the 'Rha'

I don't know what it stands for,........................... although I know it's most common .. :whistle:
 
I would check the 'Rha'

I don't know what it stands for,........................... although I know it's also most common .. :whistle:
Your still alive then Pete,?????=)) Tony has answered for me, but just in case you missed it or just sending me up it's, Idle Control Valve. I hope.

Lives under the TB.(Throttle Body)
IMG_1518.webp

IMG_1519.webp


Hope this helps.

Roy.;)
 
Taken from the 'found my leak' post -

Noticed my carpets were soaked a couple of weeks ago when hoovering the car out. Had an idea it was leaking a while ago as I've seen some water trickling out the bottom of the doorcards. Also I did hear a small amount of water sloshing around in the dash. I started with the drains under the scuttle panel below the windscreen thinking they may be blocked. There was some debris in there but it was dry. I put some water in with a hose which confirmed they were blocked. Cleaned them out with some wire and they are now draining well.

IMG_7600.webp


IMG_7599.webp


This wasn't the problem though. Today I checked the doorcards, opened the door and poured water on the window which confirmed my thoughts. The outer window seals were off a while back when the car was repainted and I never put them on properly enough to get a decent seal. So the water was getting in there, going down the doors and not draining just out the bottom of the door as it should. It also gets past the membrane which has been damaged in the past and out of the bottom of the doorcard and into the footwell.

A quick video to show


And a couple of pics of the passenger side showing it coming out the bottom of the doorcard.

IMG_7604.webp


IMG_7605.webp


So I need to repair the membrane or replace and I'll put some plastic over the main holes to stop it getting in. And then try and dry the carpets but I need to take the hardtop off first to start stripping the interior.

I had a blocked vent in the filler cap which I've cleaned out with some pipe and also sealed the 3rd brake light again as there was a bit of condensation in the boot. Plenty more jobs to come on the zed :)

Update:

I've had the doorcards off and the butyl sealant holding the membrane is not sealing all the way around, causing the leaks. I've put some plastic sheeting and duct tape in place at the moment just to see if I can cure the leak. It was a lot better, but originally I just closed up the main holes. When applying water it was still coming in where the interior handle is at quite a rate. Now I've sealed the whole section it bypasses everything and empties out the bottom of the doors as it should. This is just a quick fix until I get some better membranes and I have some new butyl sealant ready. One thing I did notice that when the door is open (as in the video above), the window doesn't press fully against the door to window seal, leaving a gap meaning more water gets in. Also I put the inner seal from the top of the doorcard back in which seals the window nicely between the two. Obviously with the door closed the window compresses against the seal better and not letting as much water through as in the video.

IMG_7609.webp


Now the seats are out along with the centre console so I have decent access to the underside of the carpets to dry them out. Turns out they are not actually as bad as I was expecting so the water I found must have been fresh and not had enough time to soak through. They were still wet but nothing serious. I've squeezed out as much as I can from the foam and now have them lifted up so they can completely dry over the next week or so as the weather is due to get warmer. It's been nice and windy today as well so it's getting a good airing out.

IMG_7610.webp


IMG_7611.webp


IMG_7612.webp


IMG_7613.webp


Now the seats are out it looks like a perfect time to change the seat bushes which I've had nearly 18 months.
 
Today I got chance to change the bushes on the seats, first the passenger side.

IMG_7614.webp


Unit out and ready for the new bushes

IMG_7615.webp


Side by side from the same seat

IMG_7616.webp


Old ones are not actually that bad

IMG_7617.webp


It's not that often the passenger seat gets used, so they weren't that bad. There was some movement in the drivers seat but not a lot, you can see the originals below. They did have quite a bit of play when I took them out and they fell straight out of the housing so needed replacing sooner than later.

IMG_7618.webp


IMG_7619.webp


All back in and the threads were greased up nicely. I left the drivers seat for last as I wanted to fix a problem thats being bugging me for a while, one that wouldn't be quick.

The belt holder was loose at the bottom as it had come off the starlock washer. These were originally coupe seats and had no belt guides so I installed new ones not long after I got them. To get to it meant stripping the leather up the seat, not too hard just time consuming.

IMG_7620.webp


IMG_7623.webp


All for this little bugger

IMG_7624.webp


Managed to secure it back on and put the leather all back in place. I did tape up the drivers side bolster as it's gone a bit saggy, plus stuffed a couple of microfibres in there to fill it out a bit :eek: Ideally this side needs new foam but that's too much work and money for now.

Back in place, much better.

IMG_7625.webp


Will see how the new bushes perform once it's all back together and were allowed out.

 
Kept you out of mischief Dave, well done mate. Big job for such a small item.

Tony.
 
You mean you found it? I thought it was the 10mm that went AWOL?

Tony.
 
he wouldn't have the 10mm, that would fit things without rounding them off..

I'll round you off next time I see you! And I haven't rounded anything off for a while, I could do with some tools though to fix these bolts I've threaded.
 
why do I think you are not joking about the last part?

For once I haven't broke anything... Yet.

Best thing for me to do is not touch anything and just sit here watching tele. There's plenty videos on youtube showing how to remove rounded off nuts and bolts, how to re-thread things and what to do when you snap a bolt. Plus there are some good guides showing the right tools to use.

The best tool I have access to is currently on lockdown at the moment, until he's allowed back out I guess I best not touch anything :whistle:
 
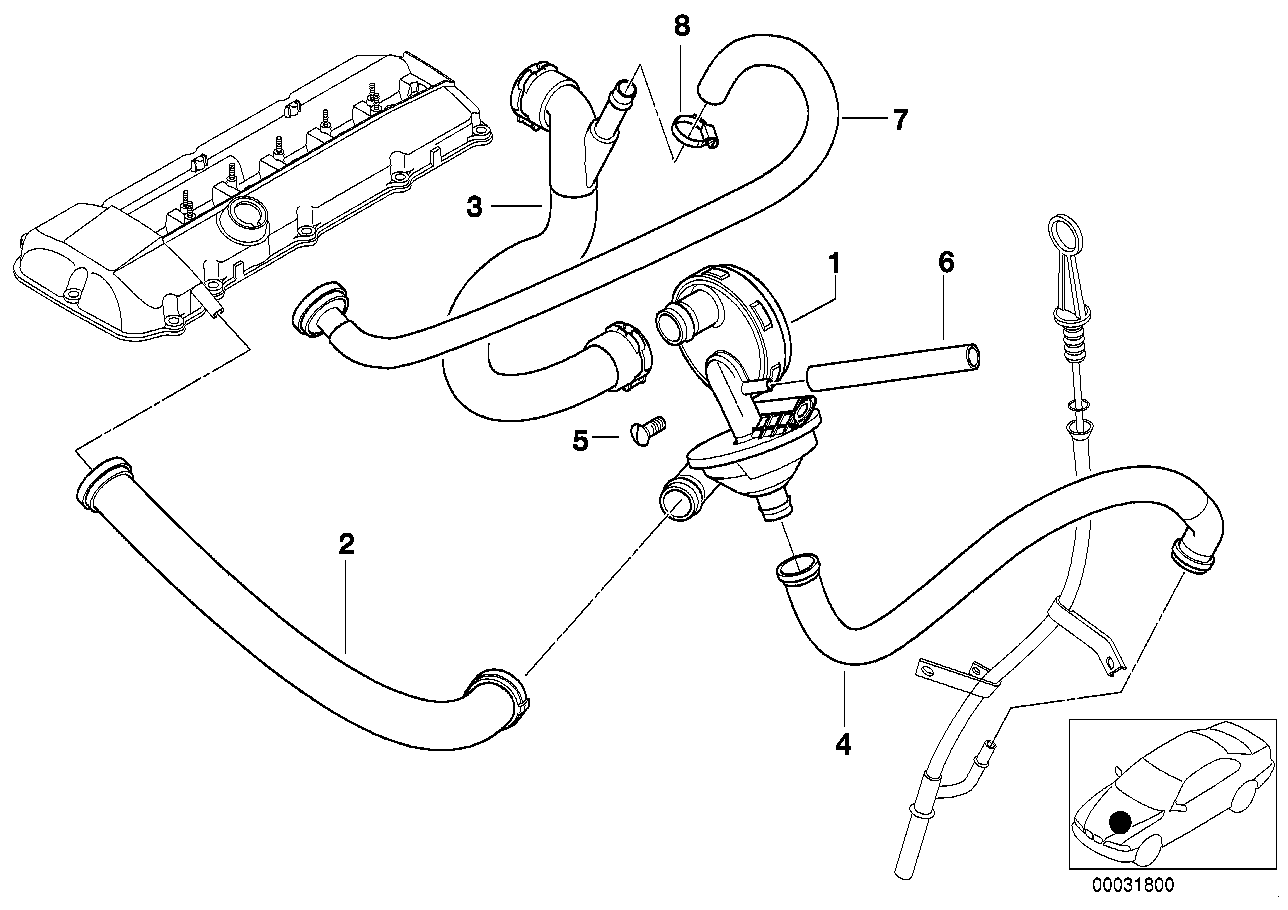
@gookah, did you say you have replaced the CCV system on yours?

It looks like mine needs doing, this could also be the cause of my dodgy idle when cold? It's the in the return pipe that runs along the top of the manifold. It's not fully split as it looks but is very close.

IMG_7631.webp


IMG_7629.webp


On a couple of occasions in the past few months when I have put my foot down there has been a huge cloud of white smoke that comes out of the exhaust which I've read may be a symptom of a dodgy CCV system. Another job added to the list :arghh:

Good news is the carpet is now dry and I've fixed the passenger wing mirror glass that was about to drop out.
 
Yes, it is number 7, I disconnected the front and taped it up for now. Is it tricky to do then? I've read @Lee's write up and it doesn't look to bad, just time consuming. It's a job that has been on the to do list for a while but now I've found that it will be one of the next ones.
 
Yes, it is number 7, I disconnected the front and taped it up for now. Is it tricky to do then? I've read @Lee's write up and it doesn't look to bad, just time consuming. It's a job that has been on the to do list for a while but now I've found that it will be one of the next ones.

Yeah can be done in place quite easily. Just fiddley. Remove all the intake bits inc the throttle body. :D
 
Back
Top