Bognor Lean-to Project

Mazza

Zorg Guru (V)
Supporter
British Zeds
The M44 Massive
Joined
Nov 1, 2017
Points
175
Location
Bognor Regis
Model of Z
Z3 1.9 M44 Roadster Z3 2.8 Project
Sunny and warmer today so made an effort.

Emptied all the parts from the car into the conservatory ….
Boot emptied…
10BF8F69-35A4-465B-BC97-ED34A18D9D4B.jpeg


seats out plus all the other parts that had been dumped in there ( ie donor car parts )
E5DD1B96-05FD-4AF5-B9A4-D9644006513F.jpeg


Oops ….bit of a mess in the conservatory …
but I can live with it…. and I can sit in the warm armed with RealOem and make sure I have everything and also find out where it all goes :whistle: :whistle: :whistle:
B02A2308-DE77-4E83-AC22-549632B29C17.jpeg


But it now gives me full access inside the car to get to all the internal roof bolts that hold it at the back.
The only difficult part as far as I can see is getting the sealant in between the metal and plastic bows on the last 200mm to the rear of the doors where it is tight. Still if that’s the only issue, I will have to find a way to sort it out.

0A3F393F-4FA3-47A5-9C27-626DAB0A5C54.jpeg

I will also have to feed the roof wire through the frame and resolder the plug on. Might have a go at that before doing the sealant.
 
Last edited:

Mazza

Zorg Guru (V)
Supporter
British Zeds
The M44 Massive
Joined
Nov 1, 2017
Points
175
Location
Bognor Regis
Model of Z
Z3 1.9 M44 Roadster Z3 2.8 Project
Started with all good intentions this morning , and found where the roof microswitch goes,

B4843D13-CCA4-4ECF-AB49-99A5B4BD3A52.jpeg


so….after 30 minutes locating the two torx screws, reattached it , and after taking down one of the net curtains to use the curtain wire as a pull through, got the wire installed down through the frame.
4B0D925F-0BE8-4EFD-B79A-B48D821BAA20.jpeg


Next was to solder and sleeve the wire to the connector lead so it’s ready to plug in. But will need to work out how it routed so I don’t make it too short…. :whistle: Thanks to @AntStark for connector with wire attached:thumbsup:
E2DF32B2-40B8-4D27-890F-A064ED0F3BD9.jpeg


At this point the postman arrived with the parts needed to repair my generator …. so decided to rebuild that instead .
Which I can say is now all done and working.

I might see if the roof lines up by doing a dummy run on bolting it up before actually putting the sealant in …. :whistle:
 
Last edited:

ktnez99

Zorg Guru (IV)
British Zeds
Joined
May 18, 2018
Points
164
Location
West Midlands
Model of Z
Z3 2.8L
Started with all good intentions this morning , and found where the roof microswitch goes, so….after 30 minutes locating the two torx screws, reattached it , and after taking down one of the net curtains to use the curtain wire as a pull through, got the wire installed down through the frame.
View attachment 352697

Next was to solder and sleeve the wire to the connector lead so it’s ready to plug in. But will need to work out how it routed so I don’t make it too short…. :whistle: Thanks to @AntStark for connector with wire attached:thumbsup:
View attachment 352695

At this point the postman arrived with the parts needed to repair my generator …. so decided to rebuild that instead .
Which I can say is now all done and working.

I might see if the roof lines up by doing a dummy run on bolting it up before actually putting the sealant in …. :whistle:
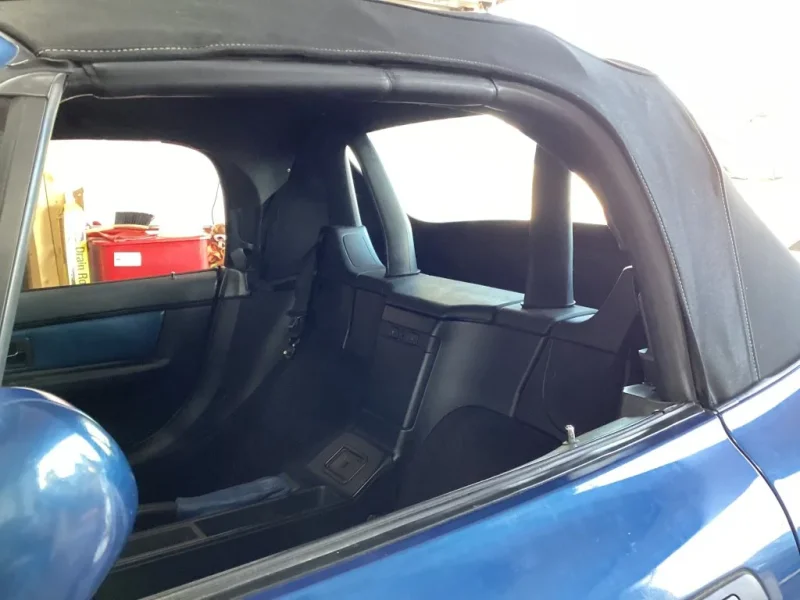
No excuses aka distractions now the generator is fixed! Let’s see the 2.8 finished now - PLEASE 🙏
 

Mazza

Zorg Guru (V)
Supporter
British Zeds
The M44 Massive
Joined
Nov 1, 2017
Points
175
Location
Bognor Regis
Model of Z
Z3 1.9 M44 Roadster Z3 2.8 Project
Put a bit of effort in today , and with the help of my mate, finally got the roof fitted.

I bought some Upol Tiger Seal but was never sure if it was the correct sealant to use ……as it was an adhesive sealant.
IMG_0328.jpeg

Anyway after chatting to Ian ( my Mate) we decided to use the butyl strip as per the manual….and it was a good decision as I think had we used the mastic it would have got everywhere……. :whistle: :whistle:

First thing was to check the plastic bow that I had previously installed. The 4 bolts were only fingertight and I found that the bow had dropped a bit so the holes didnt line up :banghead::banghead:, It was fixed with the same butyl so with a bit of persuasion managed to realign it and tightened up the 4 bolts to hold it in place.
IMG_0315.jpeg


Next was to add the butyl to the plastic bow and fortunately there is a guide to show where it goes.
IMG_0318.jpeg


This was a lot easier that last time I did it , as Ian fed out the strip from the reel and I placed it into position.

Because I didnt want to have any leaks I decided to add a second layer… so pulled off the release paper and repeated the process. (The grey butyl is 15mm wide x 2 mm thick…. So I I ended up with it 4mm thick)

IMG_0319.jpeg

Before picking up the roof to install it , I pulled back the release paper on either side to just before the bend.
This is because its really tight in this area and I didnt want the release paper to break when trying to pull it off.

Then it was the point of no return!!!! =))
We lifted it in, dropping the back in first then got the drivers side in and on the studs, then with a bit of pushing got the passenger side in..
With it in the closed position but not fixed at the windscreen, lined up the centre screw at the back and put it in finger tight.
Then added all the rest of the 15 screws that hold the metal bow ( total is 19 but the other 4 hold the plastic bow only)
Put the frame fixings in , 2 nuts and 1 bolt either side, And screwed them down, but at this point …not tight.

Next was to tighten all the bow bolts … started with the one in the middle and tightened it, then next one along on the left, then one on the right , and so on until all done.
After locking the roof shut the frame nuts and bolts were tightened.

IMG_0320.jpeg

IMG_0322.jpeg

IMG_0321.jpeg


To finish off I put the rubber seal round the back of the roof
IMG_0323.jpeg


and then connected the lead that runs to the microswitch in the roof… the mating half is fixed to a bracket held by a roof frame nut Also on the passenger side, clipped the piston to the ball joint located on the frame..

IMG_0326.jpeg


Been really dreading doing this job, but went better than I was expecting. Certainly having help made all the difference.
Thats as far as I got today… but so pleased its done. :thumbsup: And the roof seems to be nice and tight, and hopefully fully sealed :eek:

Might start to put back the interior tomorrow :whistle:
 

Mazza

Zorg Guru (V)
Supporter
British Zeds
The M44 Massive
Joined
Nov 1, 2017
Points
175
Location
Bognor Regis
Model of Z
Z3 1.9 M44 Roadster Z3 2.8 Project
Thought I would just advise this as I ran into a bit of a delay today due to some clips that I needed……….

This is the clip in question… Part number 51478236385
IMG_0330.jpeg


Is used in two places…. The piece of trim running up the side of the door, and the trim across the bottom of the door that has ‘Roadster‘ on it. 4 used on each part
IMG_0329.jpeg


After breaking a couple and not having any spares I called the local BMW dealer to get a pack of 10………
£31.30. !!!!!!! :eek: :eek: :eek: :eek:
and no stock, but could order them in

So I said I’ll think about it !!!


Looked on RealOEM and found there was an alternative in Black. part number 51478413209
This only comes in the exploded view showing the bottom of the door trim part.

Phoned the ‘Stealer’ back and quoted this number……..

65p each ( no min order) and he could get them for this afternoon…… so ordered 10 and now waiting for a call to say they are ready for collection.

How do they get away with the way they price things !!!!!!


But ….had a bit of luck as well as I took the Upol Tiger seal back and got a full refund on it…… :)
 

Mazza

Zorg Guru (V)
Supporter
British Zeds
The M44 Massive
Joined
Nov 1, 2017
Points
175
Location
Bognor Regis
Model of Z
Z3 1.9 M44 Roadster Z3 2.8 Project
Got on with getting the interior back today… but came across a few issues so didn’t get as far as I hoped :arghh:

First job was to make an adjustment to the roof….
The drivers side locking handle was a bit stiff so needed to adjust the frame fixing
Undid the two nuts and the bolt on the drivers side and fitted 3 horseshoe spacers.
IMG_0333.jpeg

Retightened and the locking handle a lot better ( not so stiff )

Next was the trim piece
IMG_0335.jpeg

Then the side trims
IMG_0336.jpeg


One thing to add here…. Fiddly getting them over the tubes and seat belts…
check that this piece on the seat belt unit has not been dislodged …..as I had done ……but noticed it and clipped it back in place
if you look back at the trim piece photo you can see its not in place

IMG_0337.jpeg


Next had to find all the screws etc that hold all this stuff in place……
Glad I bagged and labelled it all :whistle::)
IMG_0338.jpeg


I then found a part I didnt recognise but after picking up the turret tops found where it lived :thumbsup:
IMG_0339.jpeg

new bit of double sided tape….
IMG_0340.jpeg

And put back in place
IMG_0342.jpeg


IMG_0343.jpeg

OOOPS !!!!!!!
but it has previously had a repair…….
and as it turned out had the same issue with the other side :banghead:=))

So repaired…first with superglue to get it lined up
IMG_0344.jpeg

Then used my heated staple gun…
wanted to use the snake ones but too big so used 3 of the rippled ones
IMG_0345.jpeg

Really easy to do this
IMG_0346.jpeg

Just clipped them all and that was it done.

But in mounting them I found an issue that was probably the cause of the being broken in the first place.
The turret top to is held on by three lugs, the rear one being the one that was damaged. The two lugs at the front drop into the two slots as you can see below….. the problem was the lugs on the turret top are 18.50mm wide…. On the turret lower, the slot further away was 19mm wide , but the nearer one was 17.00mm…. So filed it out to 19mm and it fitted with ease!!!!
IMG_0347.jpeg


Next dropped the centre piece in
IMG_0348.jpeg

And after about 30 mins had lots of bits back on …..and got to use my new bit of kit…..
IMG_0349.jpeg


Decided I dont like the windbreak… looks like I’m drying a pair of pants !!!!=))=))=))=))
IMG_0350.jpeg


So took it off . And finished off the centre console and vacuumed the carpet
Normally the panel at the rear of the console has the roof switch…. But I extended some wires and moved it to the front so its easier to use.
IMG_0351.jpeg


just a bit of trim on the passenger side threshold to complete , then put the seats in
place ….hopefully in the morning before going to footy :whistle::whistle:=))=))

but starting to look like a car again…..
IMG_0353.jpeg
 

Attachments

Last edited:

Mazza

Zorg Guru (V)
Supporter
British Zeds
The M44 Massive
Joined
Nov 1, 2017
Points
175
Location
Bognor Regis
Model of Z
Z3 1.9 M44 Roadster Z3 2.8 Project
An early start before footy ….

Seats back in and connected up
E3771AA5-61E8-4B9E-9F42-85233FDB298B.jpeg


Made sure with the roof up=))
ABE94250-E119-418C-8921-2FB649A62625.jpeg


Had to make another repair on this piece but should be ok to put back tomorrow
379DD799-CE1B-420B-A686-C8A678938D3C.jpeg


Right that’s enough…now footy ….yippee !!!
 

Mazza

Zorg Guru (V)
Supporter
British Zeds
The M44 Massive
Joined
Nov 1, 2017
Points
175
Location
Bognor Regis
Model of Z
Z3 1.9 M44 Roadster Z3 2.8 Project
reinstalled the door trim this morning then ran into a problem :arghh:

the windows have been down for a couple of years and they have had the sliders changed in that time .
This morning I thought I would put them up and check the seal along the roof line…..
Passenger window goes up and down perfectly…. The drivers window… didnt move to start with …made a noise, then went up ok but stayed there !!!!! It wont go down ….
As they run off the same fuse I am assuming its either the motor or a bad connection which means taking the door card off and the
moisture barrier off :arghh::arghh::arghh:…….more clips to break!!!!!!

has this happened to anyone ?….just to give me a start on where to look??
 

Mazza

Zorg Guru (V)
Supporter
British Zeds
The M44 Massive
Joined
Nov 1, 2017
Points
175
Location
Bognor Regis
Model of Z
Z3 1.9 M44 Roadster Z3 2.8 Project
After having a cup of tea… and putting my brain, or whats left of it, in gear…. I remembered that I stripped the donor car of switches… some were sold but the two window switches were still in the box :)

So grabbed one and took the easy way to get the switch out … which is ease off the gear stick gaiter and push the switch from underneath…

Result …… window now works ….. and one duff switch is in the bin…… So relieved it was as simple as that as nothing on this car has been easy :banghead::arghh:

It can do with a bit of silicon spray on the rubber so will acquire some later today:thumbsup:
 
Top