that drain is fixed to the gaiter and clips onto the side of the tank
mine came off at the gaiter end and I super glued it back on
mine came off at the gaiter end and I super glued it back on
yeah but how do you fit the tube after the tank has been fitted? the route I saw just looks weird..guess as long as it's connected it doesn't matterthat drain is fixed to the gaiter and clips onto the side of the tank
mine came off at the gaiter end and I super glued it back on

thanks mate, I'll have another go next weekend!the tank was fitted , and when you install the gaiter the pipe seemed to locate itself , and from underneath just clipped it in to the clip on the side of the tank
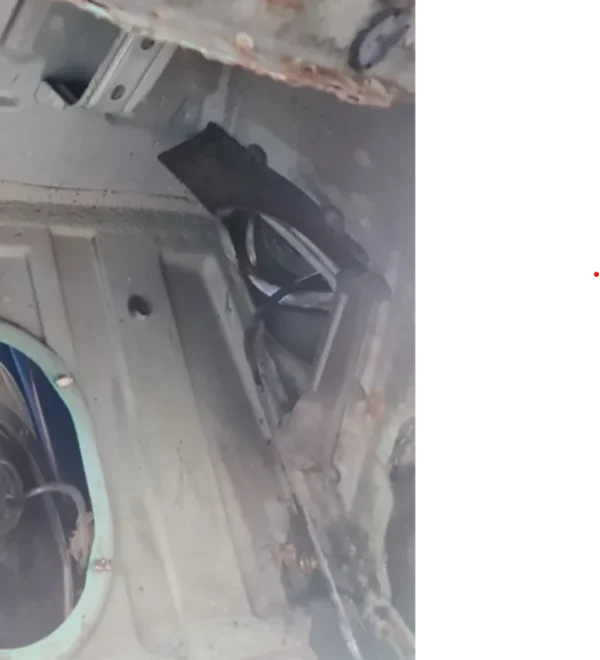
I just did my Miss Marple bit.. and found a photo of said drain hanging out the 'olethe tank was fitted , and when you install the gaiter the pipe seemed to locate itself , and from underneath just clipped it in to the clip on the side of the tank
showing off your long drainI found a picture of mine when I repaired it
That drain tube is quite long View attachment 359819
)") ... yeah I disconnected my tube from the gaiter as I didn't want to snap it off... so yesterday with just the tube tried poking through various gaps and none looked right. But it is just literally poking it where there's a gap between the tank and the body and as you say, pressing it into the clips. Now I've found the "before" photo I get it now...
... yeah I disconnected my tube from the gaiter as I didn't want to snap it off... so yesterday with just the tube tried poking through various gaps and none looked right. But it is just literally poking it where there's a gap between the tank and the body and as you say, pressing it into the clips. Now I've found the "before" photo I get it now...I’d be interested to see how the install goes on those kickplate trims. The instructions mention gluing over the top of the existing ones. That would be easy but I’m not sure how effective that would be. Looking forward to see how it goes.Another weekend comes around.... not much to really update you on this time as this morning I had the joys of rodding the sewer drain as it was blocked and water rising through the inspection cover. Thanks to neighbours slightly higher up there were about 10,000 wet wipes and a mummified nappy that actually looked like a small branch !..... anyway onto things Z3
I'm getting to the stage of the rebuild where I'm inventorying clips and fixings...
View attachment 360917
I looked at refreshing the door kickplates and they were about 400 quid !!.... found a company that actually supplied the chrome trim as a separate item.... and they look the dogs doo dah's !
Company called TuneOn Designs in Germany https://www.tuneon-design.com/en/
View attachment 360919
Then today I realised the best thing about ordering things when you've had too much to drink, it genuinely feels like Christmas
"oooooo a new shift knob for the Z3..how did you know?"
View attachment 360921
completely forgot I ordered it.....anyway..... no play tomorrow either as I'm taking the good lady out for the day..... mark W/C 4th May in your Calendars, as I'm taking the week off to hopefully, finally get the car off the jacks and back onto 4 wheels !
I'll certainly be showing it. Seems odd as the originals are just glued on. I was going to peel those off, clear off the remaining glue and stick the new ones down. I'll need to conduct some forensic analysis !I’d be interested to see how the install goes on those kickplate trims. The instructions mention gluing over the top of the existing ones. That would be easy but I’m not sure how effective that would be. Looking forward to see how it goes.
 🌤
🌤

Have you tried getting a heat gun on them?ok so it's Bank Holiday Monday....... I thought to myself "right....let's see if we can get the whole front suspension done today"
we'll come back to that statement later...
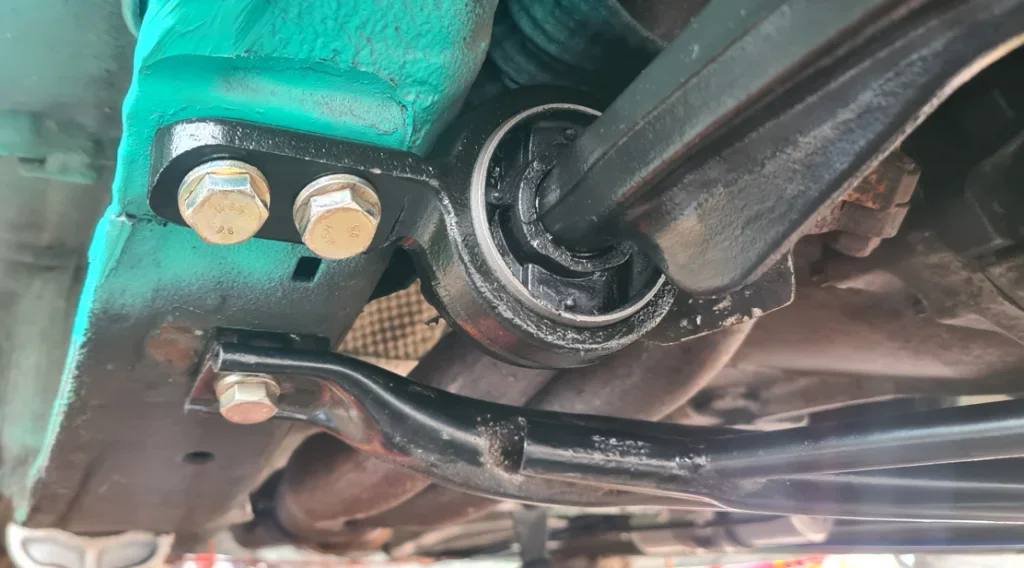
let's start with that cross member.. lovely powder coated black, freshly zinced bolts.... let's get it on there...so I did....
View attachment 361767
View attachment 361769
Then I thought.... "Right.... Anti Roll bar next".... so I did......... then took it off again...
View attachment 361771
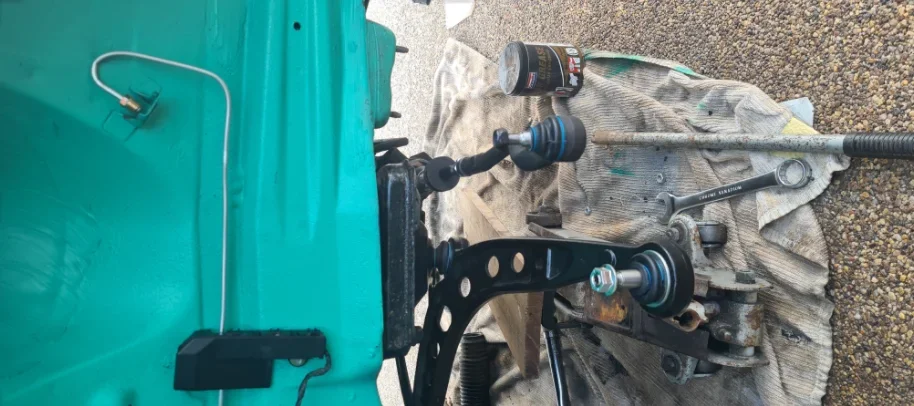
WHY !!??.. I hear you cry.... weeeeell...... I recall taking the wishbones off rather easier with nothing in the way so thought putting them back on, with nothing in the way easier as well
well.....this is where I've stalled. For the life of me, I cannot get the lolliops on the arms... they just pop off. I've used more silicon grease than an adult film. I've tried having it on the floor and using my bod and there's no way it's going i....even if I relax
View attachment 361773
I could crack on with the rest but I really want to get these on whilst there's nothing in the way..
@bmwz3tower to be honest that never crossed my mind !... in my head it was "just" a push fit... might give that a go later cheers!, plus i think I popped a rib muscle under the car so I might have to resort to alcohol !Have you tried getting a heat gun on them?
 ..so off it came again...
Great progress today Matt, looking goodok well Day 2 of my week off to get the Z3 on 4 wheels again !!..... a LOT more success than yesterday.....
Overnight I had the lollipop half on and today with renewed vigour, I decided a deep socket and a lump hammer was needed... and yes, Crocs are my PPE of choice !
View attachment 361883
View attachment 361885
There was some minor damages cause by the edges of the socket but sorted out with a bit of matt black spray
View attachment 361887
Then it was straight into it for the nearside
View attachment 361889
View attachment 361891
View attachment 361893
measured the old Tie rods from the base of the inner tie rod to the middle of the post of the outer tie rod and for me both sides were 76mm
so transferred that to the new ones
View attachment 361895
As my gaiters weren't damaged I decided to clean them up. Using brake cleaner and dustpan brush really did the trick as it's soft flexible bristles
View attachment 361897
View attachment 361899
on with the new Tie rods
View attachment 361901
Then I had my moment of little panic, the brake hose wouldn't go on.... it was then I realised I'd put a 12mm union on my extended line... aaaaargh !
soon sorted with a new 10mm, going to buy a new brake hose for the offside as that looks really tatty now
View attachment 361903
New one on the nearside
View attachment 361905
Then on with the Anti Roll bar, completely refreshed with new bushes and brackets
View attachment 361907
View attachment 361909
in with the splash guards
View attachment 361913
View attachment 361915
Then on with the offside shock
View attachment 361917View attachment 361919View attachment 361921
View attachment 361923View attachment 361925
Then it was the turn of the nearside... I was really annoyed that the bottom ball joint nut was missing from the wishbone... looked back at my photos from when I bought and sod it, it was missing from the box. So I've had to order one
View attachment 361927View attachment 361929
I was just about to torque everything down and realised I'd forgotten to put the shock top hat gasket on...
now with a gasket in place ...all back in
View attachment 361931
So there you go !.... quite a productive Day 2 of my week off.... still annoyed about that bloody missing nut though...