Time for an overhaul of my 1.9 '98 BMW Z3 Individual

It’s quite satisfying bolting up all refurbished and new stuff.
 
well... Day 3 of my week off, and a bit of a funny day as I couldn't really get going. Had some things to do around the garden and by the time I'd finished I couldn't really get into the car (and no... it's not locked.. =)) )

what I did do was tidy up, stuck in a bunch of those square clips for the 8mm hex screws (like the ones for the jack pads...

talking of which... I cleaned up the jack pads and rubbed down the screws with a scotch pad and gave them a coat of gloss black.... I know I know...but they were just staring at me all rusty n all.

1778075247979.webp

1778075275457.webp


However... I did do something useful.. I recently bought a motorbike jack, as I thought it would be far easier than my current solution.

1778075391899.webp


1778075799617.webp


Then it was a case of transferring it from my wheelie table using a combination of lifting and two jacks

1778075488568.webp


Got it high enough to slide the table jack under and Robert is your father's brother....

1778075556171.webp


If I can get an impact wrench on the turning screw (think it's about a 22mm socket), then lifting it should be a doddle... *cough*

I've ordered a new brake hose for the front offside and thing really holding me up finishing the front is that bloody missing nut from the lower control arm. Suppose I could assemble everything and then just fit it when it turns up..
 
well today is day 4 of my week off to get the car back....

went to torque up the hub nuts to the recommended torque of 288nm, and realised my torque wrench only goes to 213nm. So I'll have to treat myself to a new torque wrench... don't worry, I won't be driving on that...


1778170399901.png


I temporarily fitted my zinc plated grub screws,

1778170478622.png


et voila

1778170522348.png

1778170549980.png


I dug out the wheel bolts from various orifices and established they were really grubby

1778170611907.png


First hit them on the brass wire wheel.... then took a bit of Maguire's polish to them....

1778170709603.png


On with the jack pads... so you know what this means don't you..... we're lowering the car !!! aaaarggh !!

1778170768119.png


There was nothing remotely sketchy about my rig.... on a slope... when the car started to wobble on two opposing jack stands.....not at all a squeaky bum time.. noooooo

1778170855741.png


After much wibbly wobbly, I managed to get to a point where I could get the front wheels on.... at least that'll stop the wobble !!

1778171025118.png


I haven't fitted the front calipers yet, firstly I'm still waiting on that lower control arm nut and secondly, I dug out the old pads with plenty of meat on them, and one is missing...... somewhere somehow it's on some desert island in my garage sipping cocktails and watching cricket

The last thing of the day was delivery of the Diff oil... got it from R44 Performance.... and they gave me some sweeties !.. how lovely

1778171292816.png


So we're nearly there in terms of mechanicals, still need to :

  • Install the rear subframe
  • Install front calipers
  • Scuff up and clear coat all the body panels (currently in the attic)
  • redo the clear coat on the boot lid and wings
  • fit said body panels
  • prep and paint my new offside sill
  • check all the brake lines and connections
  • fit all the "furniture". Kick plates, trim etc...
  • refit the polished lights
  • fit the replacement offside door mirror
  • Wax the sills !

Then worry about starting the engine for the first time in nearly three years !
 
Last edited:
If you haven't already done it, you may find it easier to fit the handbrake cables before you fit the rear beam. Although if the exhaust and propshaft are off, it probably won't make any difference.
 
If you haven't already done it, you may find it easier to fit the handbrake cables before you fit the rear beam. Although if the exhaust and propshaft are off, it probably won't make any difference.
@Pingu thanks mate.... the cables are already connected to the shoes, so they're sitting on top of the subframe... I'm hoping, with my motorbike jack, I can lift and stop at certain points, feed the cables through as I go....and yes rear box is disconnected but propshaft tied up.
 
Hi Matt,

Sorted your torque wrench yet …
You can always borrow this
( fits any 1/2 drive bar and I have the socket if you need it )
I got it to do mine .
IMG_0160.webp


IMG_0159.webp
 
Drop off later this evening when the traffic has died down a bit. :thumbsup:
 
Got the 1-9 back today with a new clutch fitted … so would be rude not to try it out i. the evening sun :whistle:
 
Another 6 hours in the hoist..... but... the subframe is in!

first was to gather my war chest of parts I was going to need for the day..

1778321013324.webp


tried out the motorbike lift... and.... it was worth it's weight in gold.... I thoroughly recommend getting one if you're about to embark on a rear end refresh

1778321048099.webp


having a coffee while assembling the hoses and brake lines... very civilised being able to do it on a stool..

1778260591081.png


Then I hit my first gremlin... one of the brake flares was too shallow and even tightened fully was rattling in the union

1778260682613.png


but fear not, thanks to the hand held brake flare tool, redoing it was a doddle

1778260756895.png


There, much better !!

1778260835992.png


time to assemble everything

1778260859922.png


a moment of madness came over me and thought... let's do it now.... so wheeled it out under the car

1778260929442.png


I was having a bit of trouble with the assembly tipping slightly backward on the homemade jig.. so used a trolley jack to GENTLY support the diff

1778261016972.png


I noticed the prop shaft kept catching on the subframe but the great thing about the lift was the control you get....I managed to wiggle the prop shaft and Diff enough to get one prop shaft bolt into the diff which stopped it catching

and we're in !

1778261184354.png


Yes those shocks are being replaced !!

1778261233791.png


I'll torque everything down tomorrow and connect everything up...
 

Attachments

  • 1778260410856.webp
    1778260410856.webp
    121 KB · Views: 158
  • 1778260506662.webp
    1778260506662.webp
    138.8 KB · Views: 157
  • 1778260798444.webp
    1778260798444.webp
    35.8 KB · Views: 214
Last edited:
I wouldn't write the rear dampers off just yet. They're probably still fine, just a bit rusty.

As far as I'm concerned, Boge Sachs make the best dampers. ZF group, made in Europe and capable of big mileages.
I've had and heard of too many faulty Bilstein B4's (knocking over bumps), KYB's are fit only for instant recycling (faulty/leaking/too stiff/don't fit) and I lump them in with the Chinese eBay crap. Monroe aren't bad at all - no complaints. GSF's own brand stuff has been discontinued as they couldn't compete with the eBay shyte - a pity as they weren't bad. I don't rate TRW much either. I had a pair absolutely p*ss all their fluid out in less than a year.

If those dampers still require a good effort to compress and rebound, I'd just clean them up and prime/paint them satin black. They were made to BMW's exact specification unlike everything else.
thanks Andy...but they are shot...I can push them up and they'd stay there..the top hats have rusted out. The only reason they're still there is that I couldn't undo the nuts while the car was in the air, or else it'll be like the end scene from the Italian Job.."don'
I wouldn't write the rear dampers off just yet. They're probably still fine, just a bit rusty.

As far as I'm concerned, Boge Sachs make the best dampers. ZF group, made in Europe and capable of big mileages.
I've had and heard of too many faulty Bilstein B4's (knocking over bumps), KYB's are fit only for instant recycling (faulty/leaking/too stiff/don't fit) and I lump them in with the Chinese eBay crap. Monroe aren't bad at all - no complaints. GSF's own brand stuff has been discontinued as they couldn't compete with the eBay shyte - a pity as they weren't bad. I don't rate TRW much either. I had a pair absolutely p*ss all their fluid out in less than a year.

If those dampers still require a good effort to compress and rebound, I'd just clean them up and prime/paint them satin black. They were made to BMW's exact specification unlike everything else.
Thanks Andy, but they're shot..I can push them up and they'll stay there. The only reason they're still on the car is because the rear end was up in the air and I can't remove them like that or else it'll be like the end scene of The Italian Job... "no lads move further back...further back!".. I've got new Sachs ones to replace them with
 
Well here were are... another weekend and we're making rapid progress now.

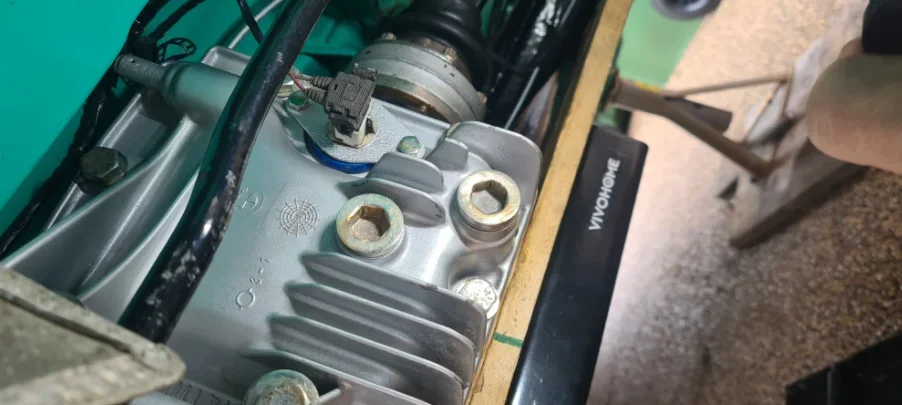
Had to tidy up that speed sensor with a hit of Hammerite Silver and zinced bolts...too much?... no ?

1778944694474.png

1778946399336.png


It was fitting it made me realise something wasn't quite right...

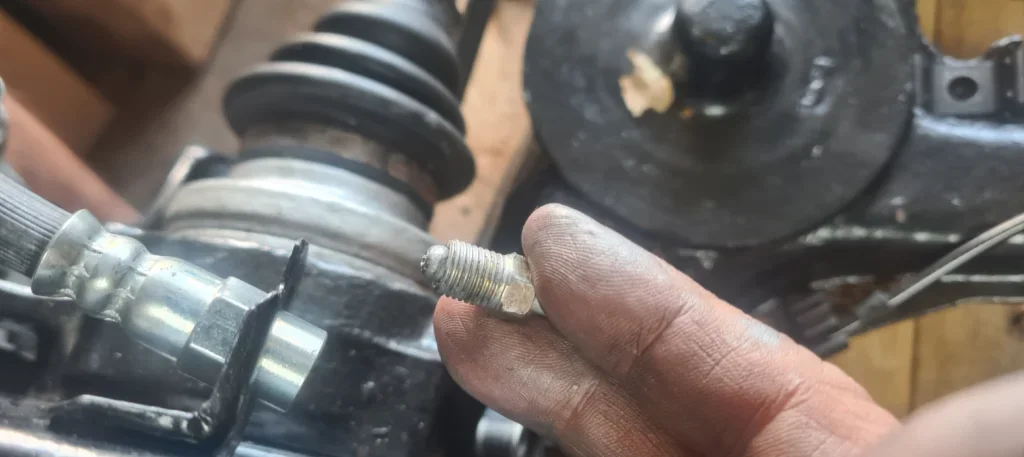
If you look at the washer on the long Diff bolt. It looks to big

1778944851837.png


Then I looked at the Diff bush bolt and realised I had no washers on it !!

1778944920743.png


ooops !... I'd put the Diff bolt washers the on the cover.... :whistle:

I realised I had two thin ones left over, and THESE are the ones for the cover bolt !

1778945050100.png


Soon rectified by taking the Diff bush bolt back out and putting the right washers on the right bolt !!... There... that's much better ! :whistle:

1778945165095.png


Then on with with subframe plates. That's not rust by the way, that the reflection off of my driveway ! =))

1778945241649.png


and t'other side

1778945326736.png


Then it was on with the Anti Roll Bar bushes and brackets

1778945421056.png

1778945446113.png


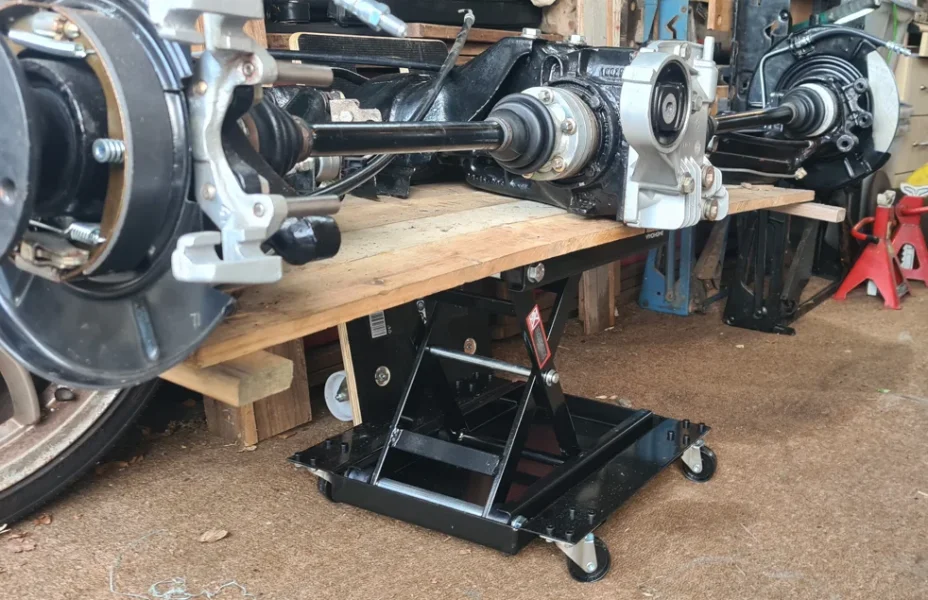
Handbrake cables fed in quite easily and popped out the top. Prop shaft looks really tatty now, but.. there's an opportunity for that I'll explain later

1778945529935.png

1778945599087.png


So with everything on the subframe now torqued up.. it was time to drop the lift! Just to show you how easy it is, just use it like a vice handle

1778945697821.png


and we're free !!.... free to roam the open roads !!.... well.... not quite yet... :whistle:

1778945774184.png

1778945794103.png


Then I hit a little snag... the propshaft flange was actually jammed... I thought I'd lined it up but a top bolt went into a bottom hole

1778945935098.png


I hope I can loosen the centre bracket of the propshaft enough to let it drop and I can feed it back in properly.

and then (technically)... we have four wheels back on !!

1778946065767.png


and just to prove it's not all smoke and mirrors !

1778946112625.png

1778946137749.png


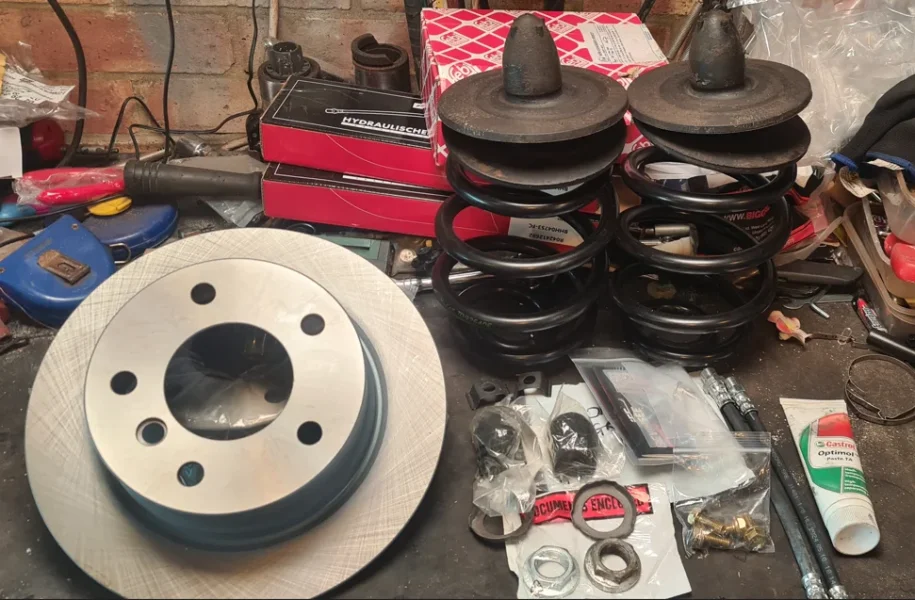
Then just some random pics of the underside, and yes I have brand new shocks to go on there !

1778946190221.png

1778946220088.png

1778946252587.png

1778946317497.png

1778946570800.png


so..... about that list of things to do....

apart from torquing the front wheels, and front calipers; connecting up the brake lines; hand brake adjust; jiggling the propshaft that's pretty much the mechanicals done.

Then it's...
  • Scuff up and clear coat all the body panels (currently in the attic)
  • redo the clear coat on the boot lid and wings
  • fit said body panels
  • prep and paint my new offside sill
  • check all the brake lines and connections
  • fit all the "furniture". Kick plates, trim etc...
  • refit the polished lights
  • fit the replacement offside door mirror
  • Wax the sills !
 

Attachments

  • 1778944769647.webp
    1778944769647.webp
    44.2 KB · Views: 203
Last edited:
The ‘Fiji Phoenix’ will soon be flying !!! 👍👍👍
 
Back
Top