FxSlin - 97 Z3M & 97 1.9 Z3

Rha

Zorg Guru (V)
Supporter
British Zeds
Joined
Oct 26, 2014
Points
181
Location
Hemel Hempstead, Hertfordshire, England.
Model of Z
Z4 coupe sport.
Great read and so glad you were able to complete your trip thanks to your persistence and help from other members. :highfive:Some good pics that tell the story. :scorecard:

RHA, Roy.:happy:.
 

5harp3y

Zorg Guru (IV)
British Zeds
Joined
Jul 10, 2015
Points
168
Location
Basingstoke
Model of Z
2.8
great update and good save

reminds me of the time we had to repair our sticking caliper in a backwater town in queensland with
4316_80819528469_6350066_n.jpg
borrowed tools
 

Rha

Zorg Guru (V)
Supporter
British Zeds
Joined
Oct 26, 2014
Points
181
Location
Hemel Hempstead, Hertfordshire, England.
Model of Z
Z4 coupe sport.
Shame @fxslin had this all too often fault so many of us have experienced, had same fault 2miles from home 6yrs ago on our way to tour Devon&Dorset, striped it down that evening, bought two new calipers next day and started out again. No probs since. (Fingers crossed.:bag:)

RHA,Roy.:happy:
 

Antm72

Zorg Expert (II)
Supporter
British Zeds
Joined
May 4, 2015
Points
246
Location
South Yorkshire
Model of Z
2.8
A great trip and a great club /team effort on the repair.
Great read and some gorgeous cars glad the trip was salvaged :thumbsup:
 
  • Like
Reactions: Rha

DavidM

Zorg Expert (I)
Supporter
British Zeds
Joined
Apr 25, 2013
Points
208
Location
Ireland
Model of Z
2.8 Roadster
A great read and great work - against all odds you successfully resolved the setback and continued. Nice work!!!
 

fxslin

Zorg Guru (I)
Norwegian Zeds
Joined
Apr 17, 2017
Points
95
Location
Oslo, Norway
Model of Z
///M & 2.8
Thx for all the nice feedback. This caliper problem has happenend to me twice now,first on with my old E53 (X5, sold now) and now with the Zeds. They both have in common that they are old, but low in mileage. So if I get an aged BMW again, this will be one of my first maintenance task.

Anyway after the nice trip, I just needed one day to get my motivation back to fix car properly. I decided to overhaul the brakes on both sides as mentioned in my last post. So Wednesday was spent to order parts for a complete overhaul.

This meant that I had some preparation todo before the new parts would arrive.

First this one had to come off, was nice and fun during the trip. Not so much anymore:)
pic01.thumb.JPG.f4eb933700f8e69caab987a9e2fb61c8.JPG

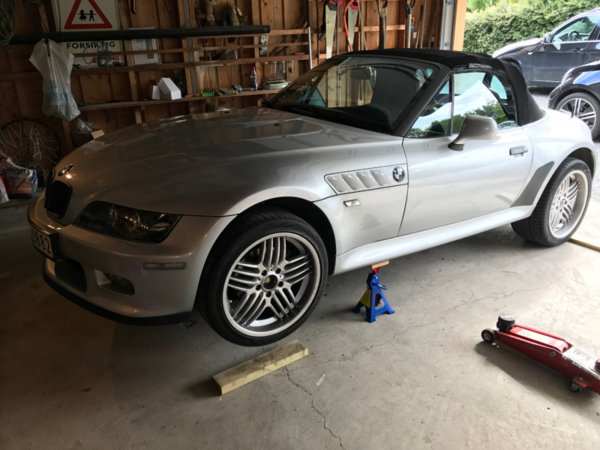
Then it was time to get airborne:

pic2.thumb.jpg.44b1125d0042e17c152e3d4122ecc0a6.jpg

This how a cheap no brand brake disc look like after about 500km with old pads. The borrowed caliper is coming off and will be returned to the owner. I guess donate the disc to a friends E46.
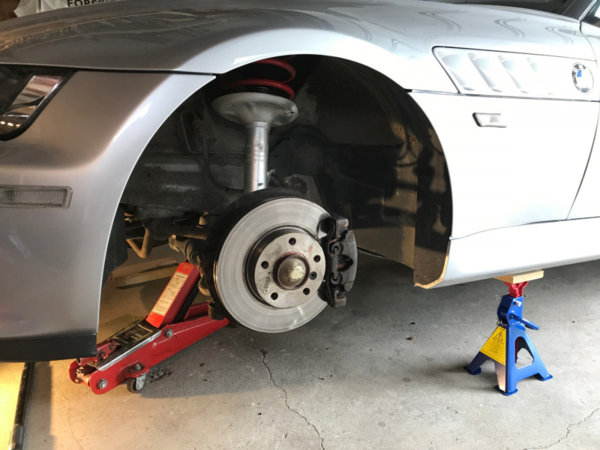
pic3.thumb.jpg.1846a738cfd479942f647d6a6ae74b46.jpg

The driver side (left) parts came of easily as all the rusty bolts had been loosened during emergency repair during the trip.
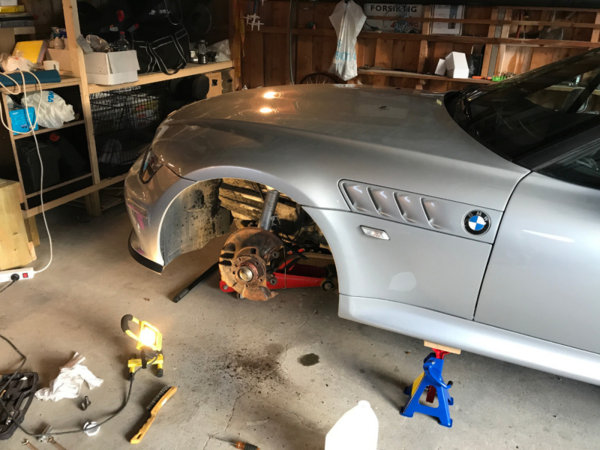
pic4.thumb.jpg.f35cf5fd02ffc84c42bf1cbff7220ba9.jpg

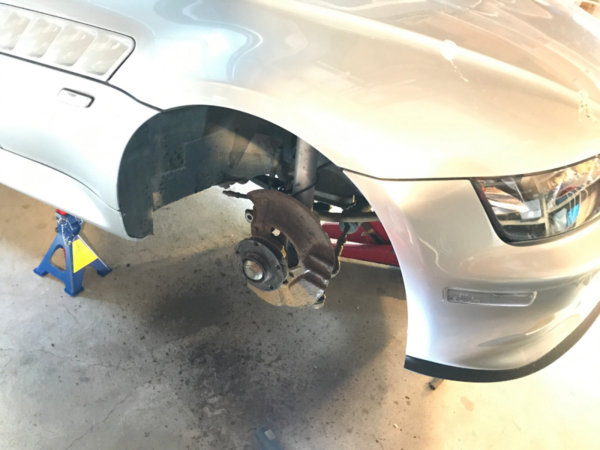
However the right side was more tricky. But some elbow grease and much willpower (WD40) always wins!
pic5.thumb.jpg.f070762ea6c501f8bf30c8c6c214b473.jpg

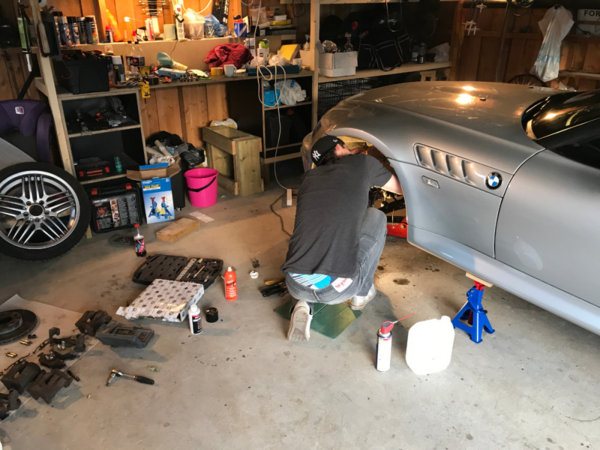
I had a mate over to help me, very grateful for this. A brake overhaul is indeed a one mans job, but it is really a lot easier when one got 4 hands to work with.
pic6.thumb.jpg.8a01ec7b5800a4495b7a35c432c168a3.jpg

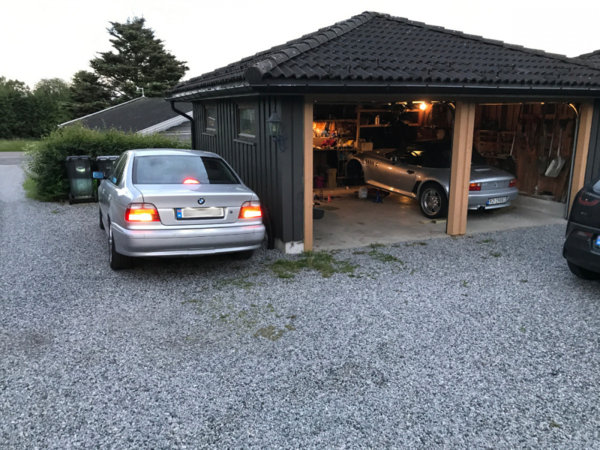
However he did go fast when the preparation task was done and it was time for tidy and clean up the garage :)

He is a big fan of E39 and is currently overhauling the one on the picture. It is in mint condition in my opinion, however he always finds minor things to improve:)

pic7.thumb.jpg.d0b6d566f32b65d7ca2d984ea39cfa6a.jpg

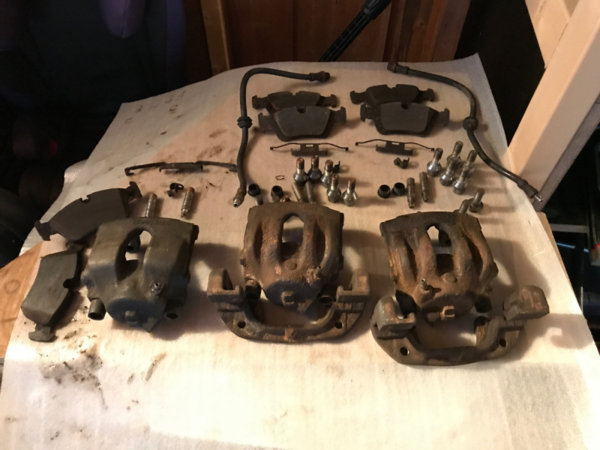
Before calling it a night I did a minor organizing of the used parts. The borrowed caliper is the one to left. You can notice a different in that one compare to the ones I had on my car. Even tough the part number is the same, it did fit perfectly tough.
pic8.thumb.jpg.b1f57d1a24321bf9bc6252882092c132.jpg

Anyway, I did order almost everything new. Did not want to put old rusty screws or other rusty part back on the zed.

My order list:
  • Disc (OEM)
  • Pads (OEM)
  • Calipers (OEM - overhauled, swap in solution where I hand in my old ones for the new ones)
  • Brake hoses - wanted braided hoses. However was long delivering time on these. So I bought some cheap ones and will change to braided ones during the winter.
  • New bolts for all parts
  • Calliper carrier - Not ordered, but I did delivered them in for sandblasting. Will paint them my self.
  • Brake shields - Realized that on the Zed that I needed to take out the whole bearing to change them. So they are added to my todolist, when I change bearings sometime.

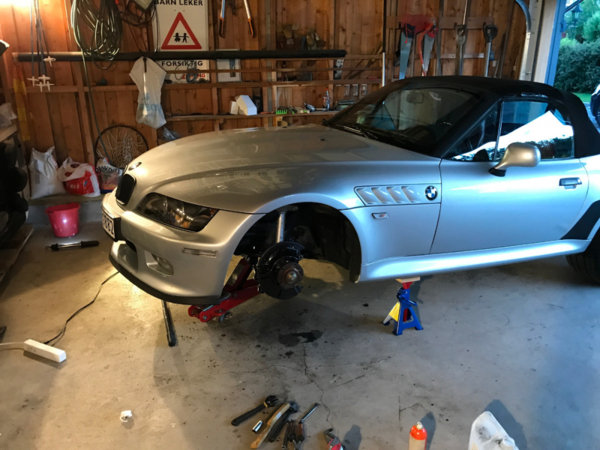
So I left the Zed for the night like this:
pic11.thumb.jpg.b6f8ce422c8038954503a9b94e0c3523.jpg

Thursday morning before work, my caliper carriers where delivered to my indy and later that day the same indy called me with message "your parts arrived and the carriers are ready as well".

Picked up the parts on my way home from work and after some mandatory family time, I was allowed by the wife some garage time. (Actually she said, "shouldn't you be working on the car?")

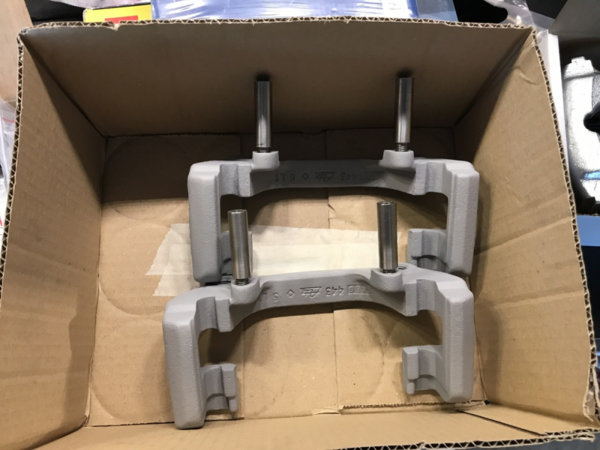
This how my "new" calipers carries looked like after the sandblasting, could even read the part number now:)

IMG_2145.thumb.jpg.6194fbd0454ab315e48ac7dbcc49e420.jpg

And the box with the new parts, love working with clean and new parts! Such a motivation boost!
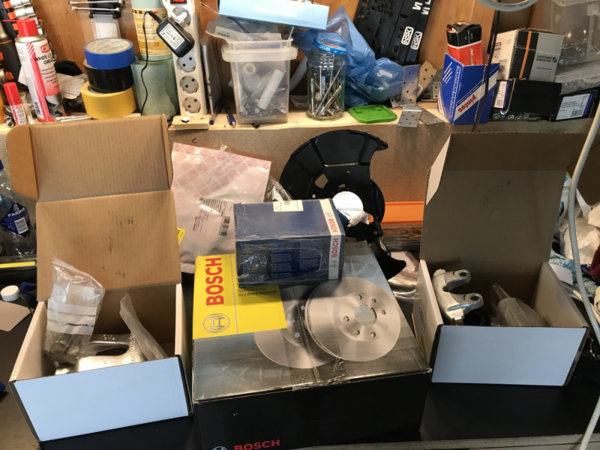
IMG_2142.thumb.jpg.58e7254447218ca1c306539f03bade8b.jpg

Frst I needed to paint my caliper carries:
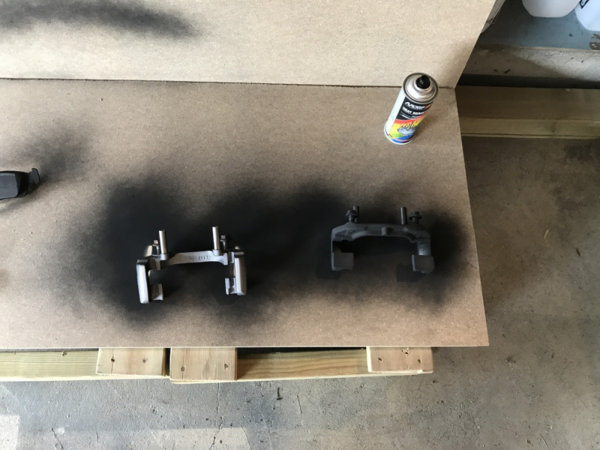
IMG_2147.thumb.jpg.aaed67acf38e616cd0a4d1e1a8b7897c.jpg

However the paint I used needed to be cocked for some time, I misread that when I bought the paint. So I figured I use the heat gun to harden the paint, will digging out the gun I realized that I had a old kitchen stove that we used when we renovated the kitchen. So I figured why not try that ;-)

Preparing the stove:
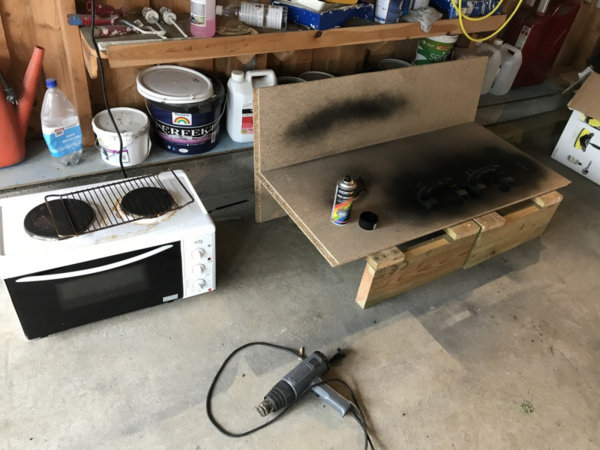
IMG_2149.thumb.jpg.67034caedcbad844c711fb20e73f4e1a.jpg

After one hour on 160 degrees it looked like this. I was a bit surprised how well this worked out. First time I'm doing this kind of painting. Actually this was my first time overhauling brakes, learned everything during the weekend when the crisis happened.
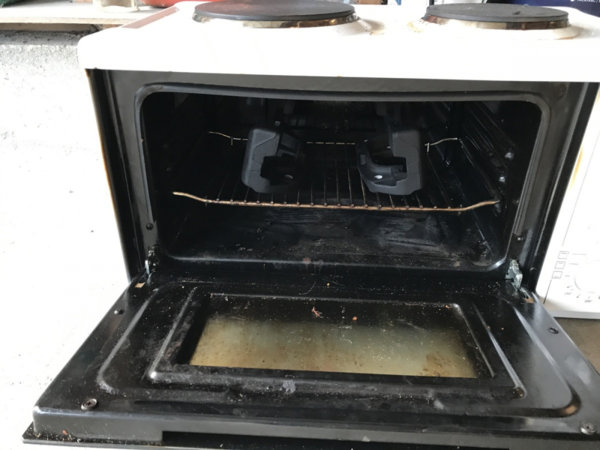
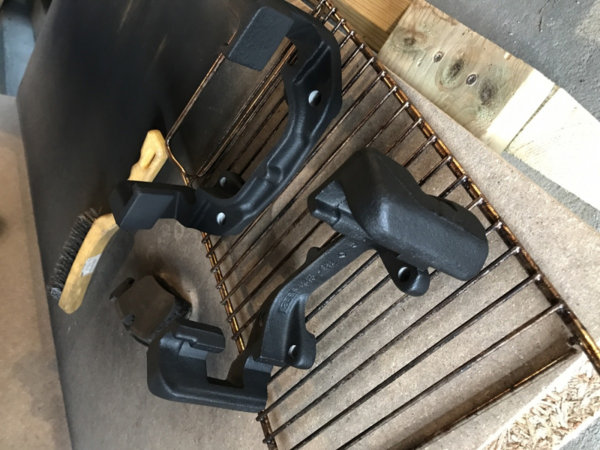
IMG_2164.thumb.jpg.f52a54e462351e90555b6d667d4571e4.jpg

IMG_2171.thumb.jpg.89a91d03d4961e694037e0ea3db1b73c.jpg

As mentioned earlier I also wanted to replace the brake shields. However this meant the bearing parts needed to come off, which I didn't have tools or skills (yet) to do . I decided to just rust work and paint the current shields on the car. As they looked bad, but still is fully functionally.
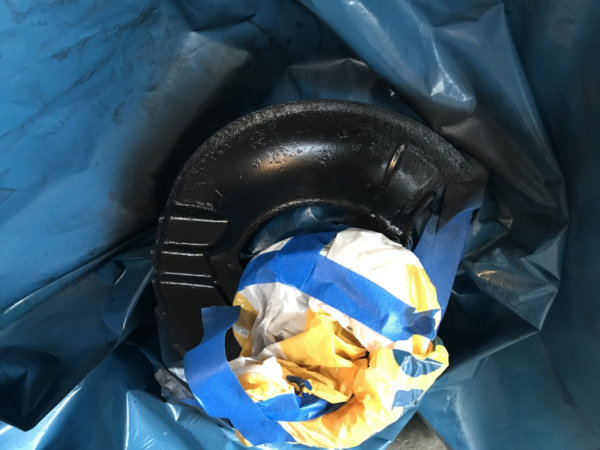
IMG_2153.thumb.jpg.269275ae4ee83e32cd1ff846cf733713.jpg

I also did originally plan to paint the new calipers, however when I saw how good the looked and that to paint them properly meant dismantling them (which is exactly what I wanted to avoid by buying new ones). I decided to see how black carries with silver caliper would look like. In worst case they (carriers) can come off during the winter and get some silver paint, when I plan to overhaul the rear brakes.

After some work I had this result, new disc, pads, calipers, painted carriers, new bolts here and there and new brake hoses on.
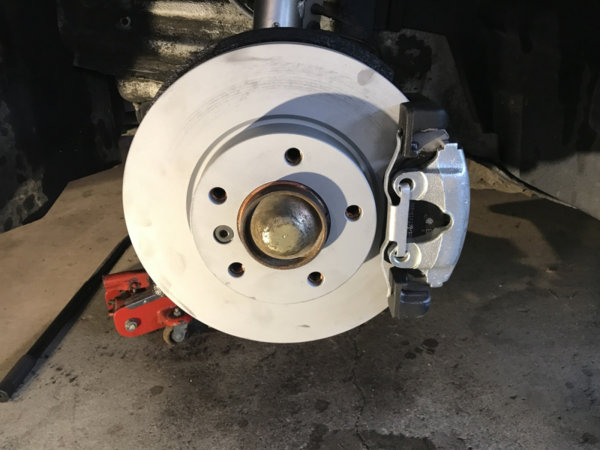
IMG_2173.thumb.jpg.93c58ff9fbeb952e9466aa352f4eb11a.jpg

Only remaining task was to refill with brake fluid and air out the system. This was postponed to next day as my mate could come over and help out ( I offered him free beer :) ).

The day after we finished the whole project with refilling and some serious airing. A quick test drive did reveal that the everything worked perfectly again, the brakes of course need some time to bed in.
Now I can continue the season knowing that I have reliable brakes again (at least in the front).
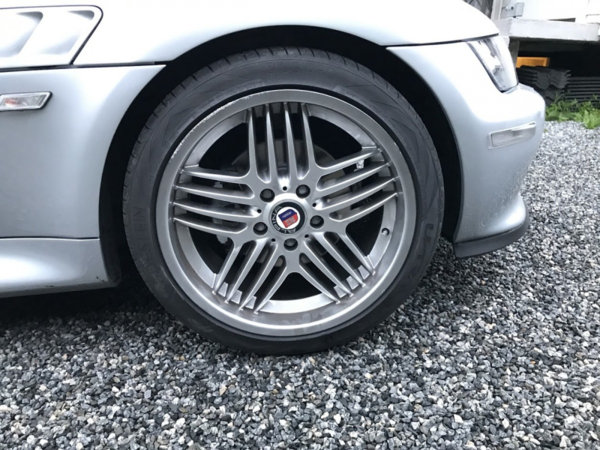
IMG_2181.thumb.JPG.b6edb896dc52990143d9b0bb425146f4.JPG
 

fxslin

Zorg Guru (I)
Norwegian Zeds
Joined
Apr 17, 2017
Points
95
Location
Oslo, Norway
Model of Z
///M & 2.8
G'day folks. It summer time and I hope most of you are able to enjoy topless days in your Zeds!

I know I do. However human nature is that to always want more?

Some time ago a thought came up and has kinda followed me for some time and evolved into a dream over time.

This resulted that I have for some time monitored the Norwegian and European car market for this dream car. However turned out that it was quite difficult find a reasonable priced car with good history. Especially it seems that the market has turned for these cars and their prices is raising. However once in a while a good candidate would appear i.e. in Germany or other countries. In Norway I have not been able to locate any of these cars at all, which I could buy.

So a few weeks ago I got a shoot on a total overhauled car in Nederland, I had a good dialog with seller and we had agreed on a "price range" that we could work out something from. So a mate and myself planned a roadtrip to Nederland to inspect and hopefully bring the car back to Norway. But a the week before depature I got a tip from one of the biggest sportscar dealers in Norway, that it was maybe one person sitting on a car with good history which might one to sell. So I phoned the person and asked him politely if I could maybe buy his car? The first answer was "No, she's a keeper". However after some minutes of talking and it turned out that we were both members of the same club. I also told him about my 2.8 car. Then he said "well, you can come and have look at it and try it if you want".

A few days later I met up with him. He in the his car and my self in my car. After some test driving and tire kicking, we managed to settle a deal that I think both sides finds fair and reasonable for the car. Needless to say that the road trip to Nederland was canceled quickly:)

Yesterday the car was delivered home to me "MOT" ready and with a lot of OEM spare parts.

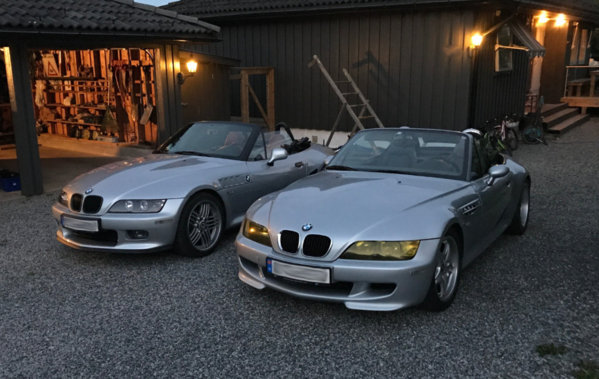
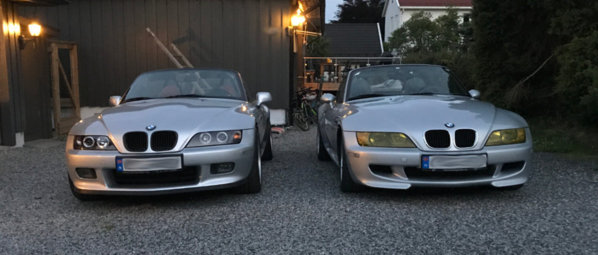
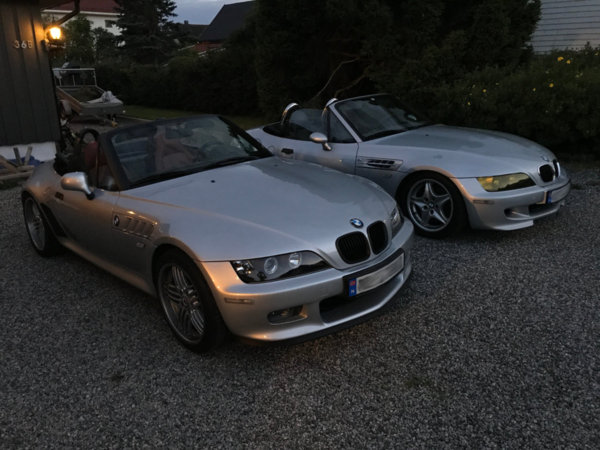
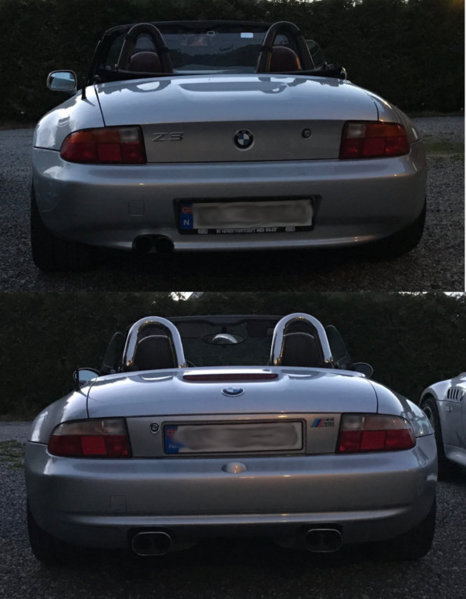
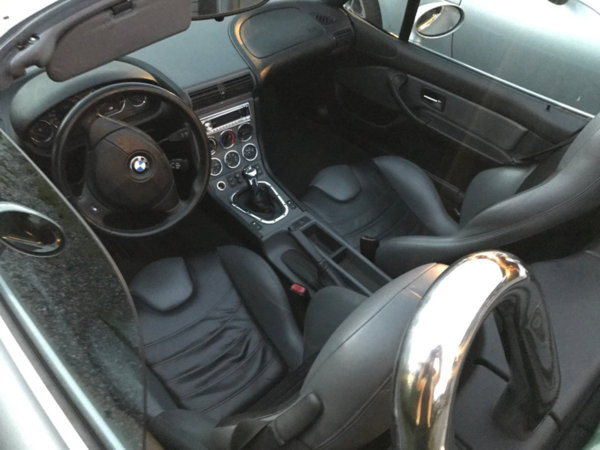
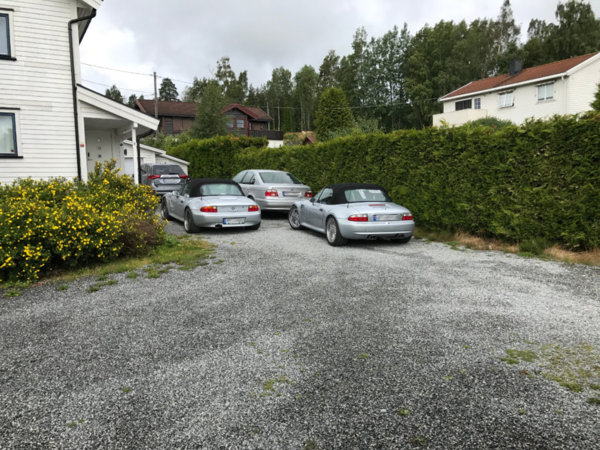
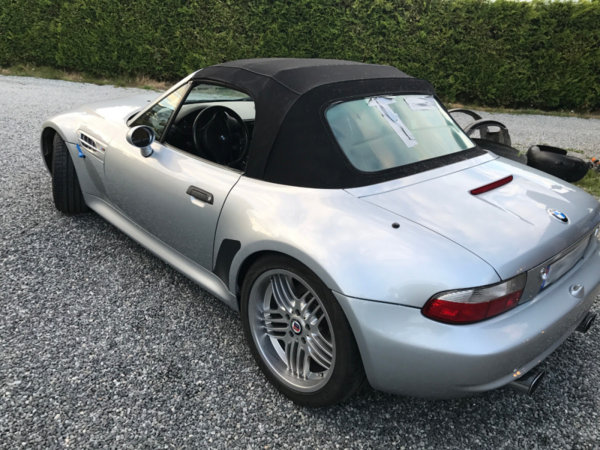
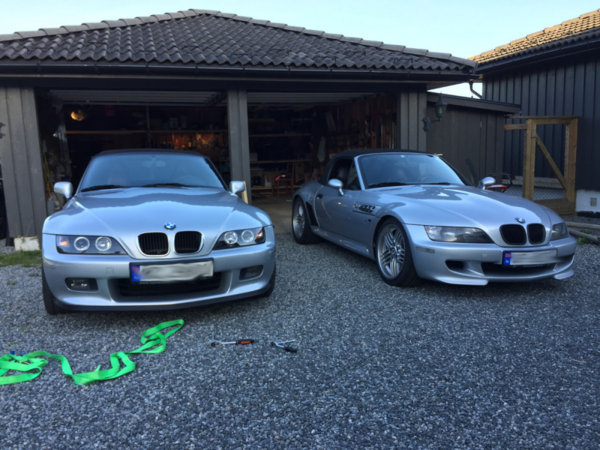
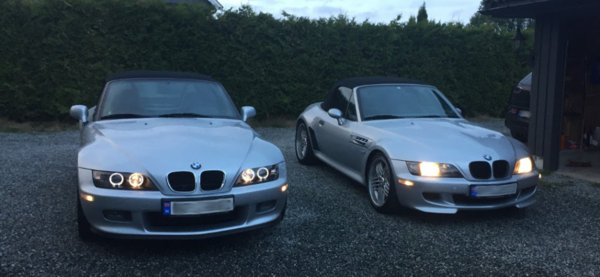
So now I'm a proud owner of a 97 Z3 M Roadster.

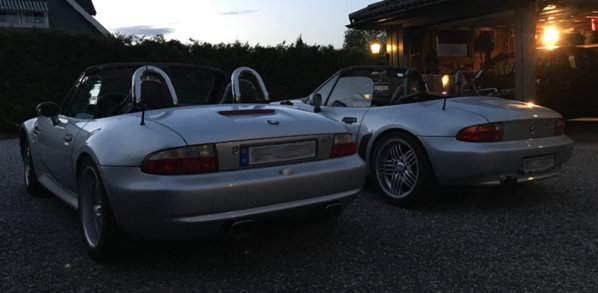
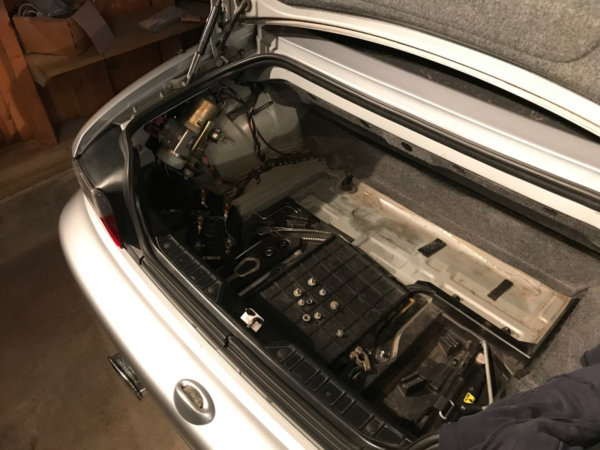
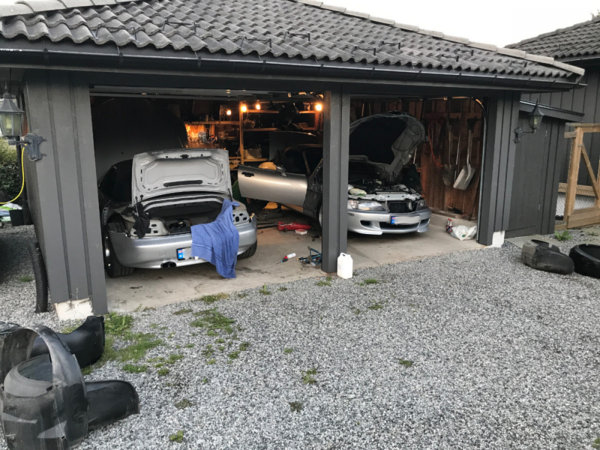
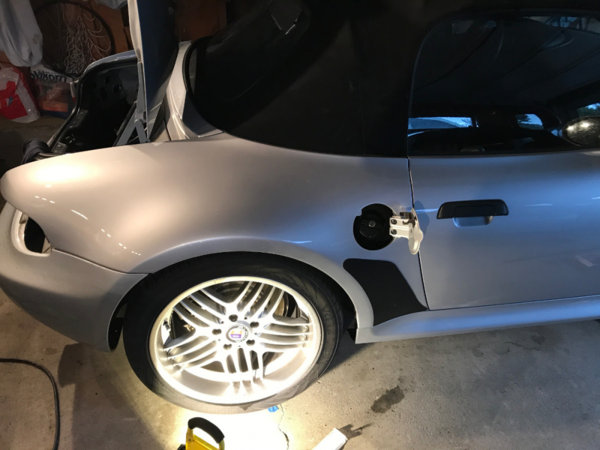
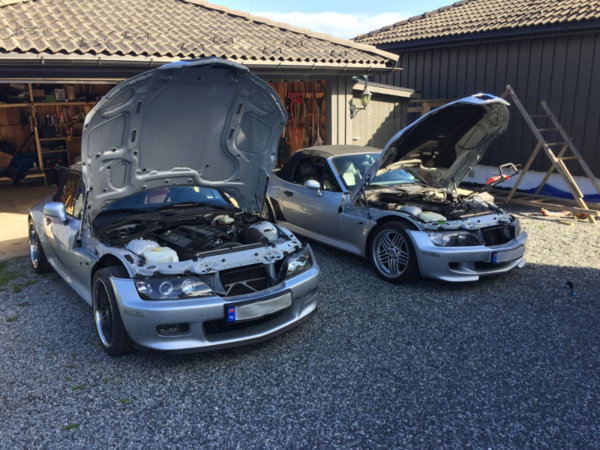
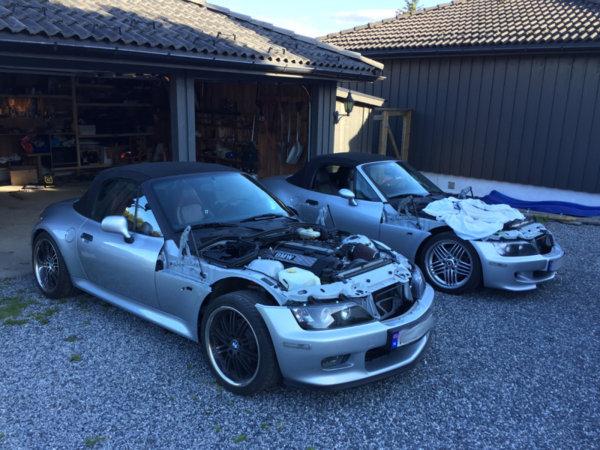
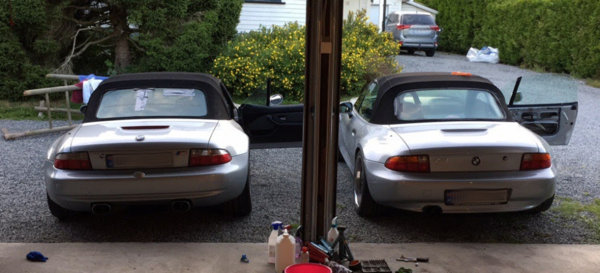
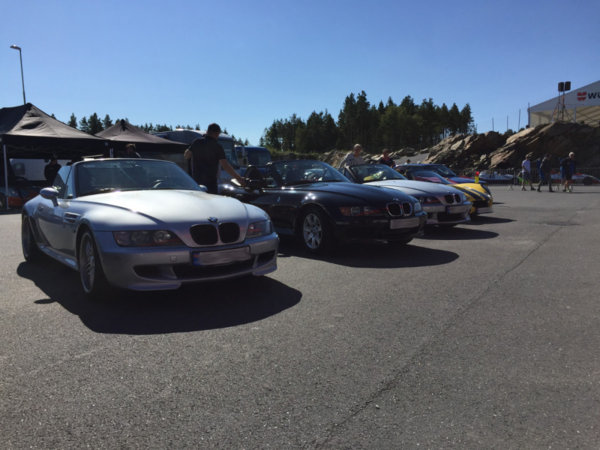
A few pics of her together with the 2.8
pic1.jpg
pic2.jpg pic3.jpg pic4.jpg :
pic5.jpg
pic6.jpg

A few words about the car. Technically it is in good condition. However the paintwork has a few stone chirps here and there. The previous owner has 8 cars and was honest that although he maintained the cars technically good (by his workshop), he was not that good a cleaning them and keep them in show and shine condition. So the car need a little TLC to get it's glory back. However the car has never been winter driven and look very good underneath.

The car has a good equipment level, it has both cruise control and automatic top. I guess that where two only extra option one could pick when buying a new car at the time :)

The color combo of this car has only been produced 11 out 3557 as far I know. (Color combo: ARKTISSILBER METALLIC (309) with LEDER WALK NAPPA/GRAU (Q6TT) interior)

This one has the S50 engine and I could not find any symptoms for vanos issues and the rear weakness on these cars had been resolved and enforced.

Mods on the car:
  • AC Schnitzer RS adjustable suspension
  • AC Schnitzer exhaust
  • Hamann roll hoops
I also got a heaps of the OEM parts for the car including AC Schnitzer short shift and pedal set.

My plan for the car is to go through the car make sure it is technical sound and the long term plan is to get back into state as the my current 2.8 is.
 
Last edited:

DavidM

Zorg Expert (I)
Supporter
British Zeds
Joined
Apr 25, 2013
Points
208
Location
Ireland
Model of Z
2.8 Roadster
Great purchase on the Z3M and another great project to get into! Look forward to seeing how this one develops too! Good luck!
 

DaveP

Zorg Guru (III)
British Zeds
Joined
Mar 26, 2016
Points
128
Location
Reading
Model of Z
Z3 2.2 Kobra rebody (see pic)
Sweet ride :)

You overhauling the brakes ? ;)
 

fxslin

Zorg Guru (I)
Norwegian Zeds
Joined
Apr 17, 2017
Points
95
Location
Oslo, Norway
Model of Z
///M & 2.8
Time update my thread again, lots have happened since my last post. (warning a lot of pictures)

Now over the summer I've been sitting with two Zeds and only one was really being used. So I found my self in a position what to do with the 2.8? I did put it up for sale just to test the market, however the market i Norway is very small for these cars and you have find the right buyer. Which I knew, but wanted to see if anything happened. Got a few interested people, however I kinda had decided after publishing the ad to not sell the car. But a few weeks ago, a good friend told me that he wanted to buy the car. (He has been working on the car together with me since I got the car, he has the green Z3 that can be seen on some of my pictures) So after a few rounds in howto reach a good "pal" price, we decided that I could move the panels from the 2.8 over to the Z3M (The panels on the 2.8 was painted professionally last winter).

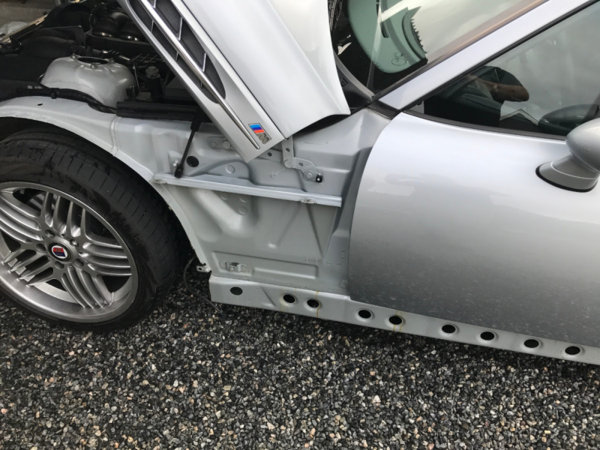
To allow me to "move" my paint cost over to the Z3M. The panels on the Z3M where not to extremely bad, however there was a lot stonechips, small dents and was developing rust at the sills. Pretty much what one would expect from 20 years old car that has been used and would cost me a lot to get sorted out again. (The 97 2.8 and 97 Z3M share all parts number on the panels except from the bumpers and luggage hood and both car had the same color from fabric).
This "insane" solution would also allow me to do my planned check/maintenance of the issues underneath the panels and verify that it has not been winter driven (which is rust dead for most older car here in Norway).

So Sunday two weeks ago we started out and worked every afternoon to get the project done and to be ready for club trip the following Sunday.

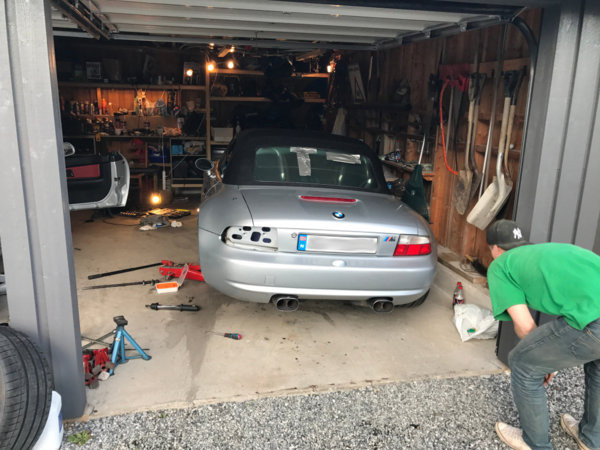
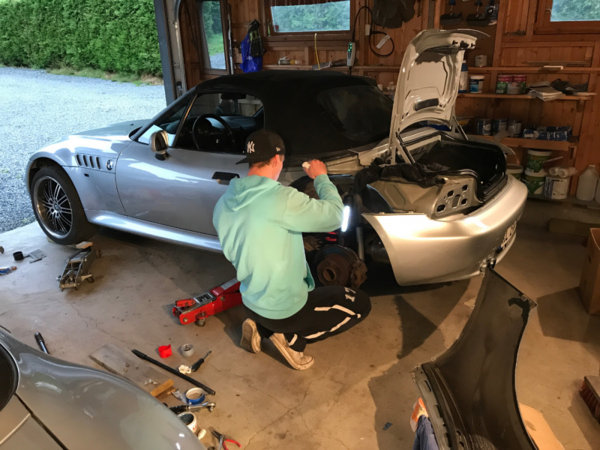
First my garage needed to be cleaned out and ready for such a job, so all cars where parked at my neighboor:)

pic1.jpg.a5736dab870734623406ad6b54b8ee90.jpg

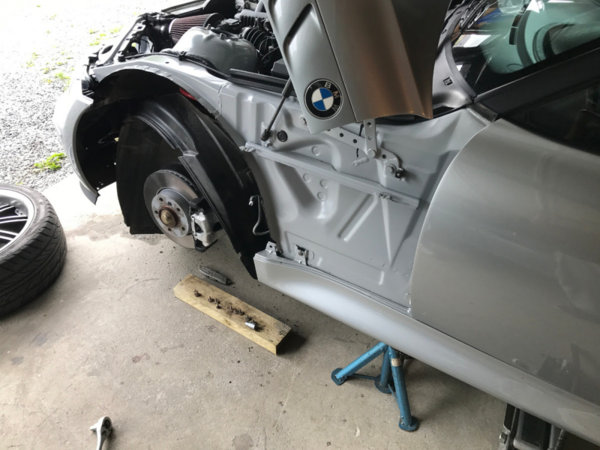
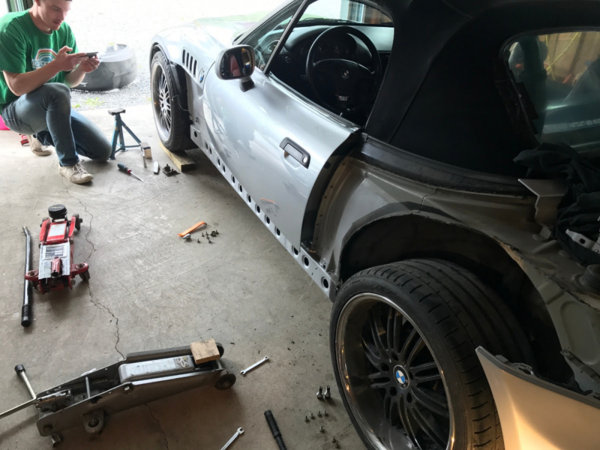
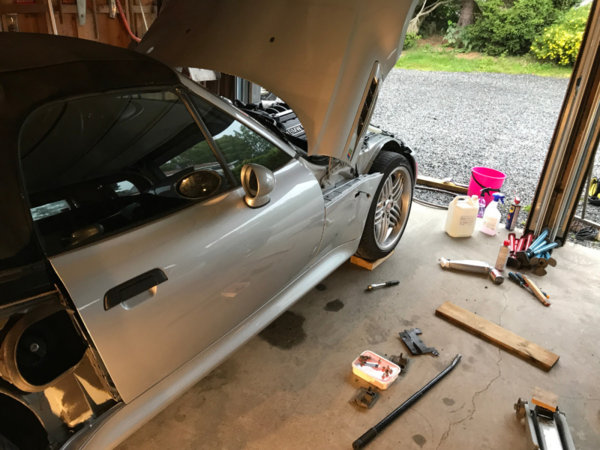
We jumped straight into it, plan was to get the 2.8's driver side stripped first. Here you can see that last years job still was holding up, nice and clean underneath the panels:

pic2.thumb.jpg.e68c957aa3a125941a0e879f557db225.jpg
After a small hours all panels where off, screws and clips where tracked and sorted out. We bought new screws and clips for all panels and would change these out with fresh ones.
pic4.thumb.jpg.b49664e28c2504661512e3cabc633321.jpg

Here we test fit the rear panel from the Z3M on the 2.8. To inspect the color differences, we had a hard time to see the difference between the colors. (20years separating them, door was painted last year).

pic5.thumb.jpg.90eb73df009b251c4043409af685124f.jpg

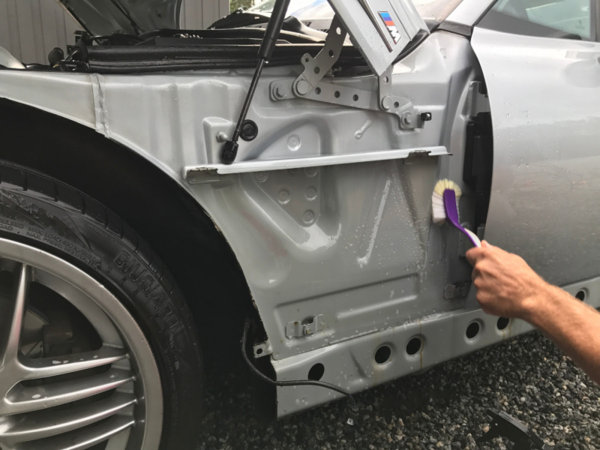
I was very glad and happy that I could not find any rust on the Z3M's frame and this confirmed the sellers statement. Did find evidence of the car been rust proofed twice.

pic7.thumb.jpg.a0f40302eb60defa362d1478cf57d407.jpg

Some rust proof solution still present on the rear:
pic8.thumb.jpg.3baec502578537a046bd3ba0ad502a33.jpg

Looked really neat and tidy after a little cleaning. Did not bother with scrub away old rust proof stuff.
pic10.thumb.jpg.94e2561a724d90930dab79dd8d9cda04.jpg

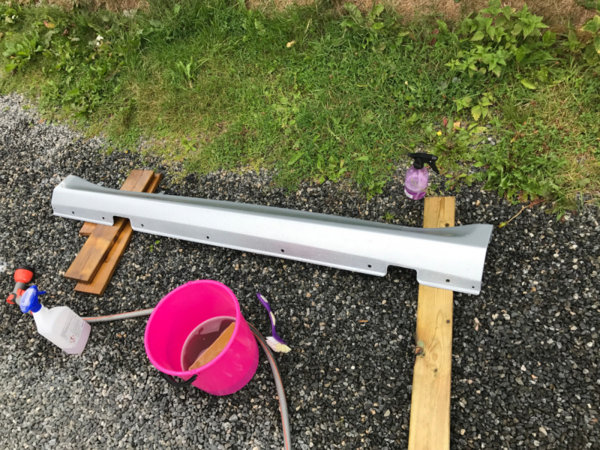
A job like this does involve a lot of cleaning:)
pic13.thumb.jpg.2235a6836adb343d3cc1b331750b1539.jpg

Two rear drivers side panels drying up in the sun:

pic11.thumb.jpg.35f54f8429a6a60649801cab839c625b.jpg

After the cleaning we started to mount panels back on the Z3M, my mate checking alignment and lines:

pic14.thumb.jpg.4a7f82afaeb7c9aabff54be5f6eaab85.jpg

Drivers side panels, sills and rear panel on the Z3M (the final alignment would be done at the last day).

pic16.thumb.jpg.20bcf272cf6458b55809abfd4c6efea7.jpg

Also confirmed that the Z3M had the sub frame reinforcement kit installed.

pic18.thumb.jpg.cb99034715ad7adcc67a684248c0b5ca.jpg

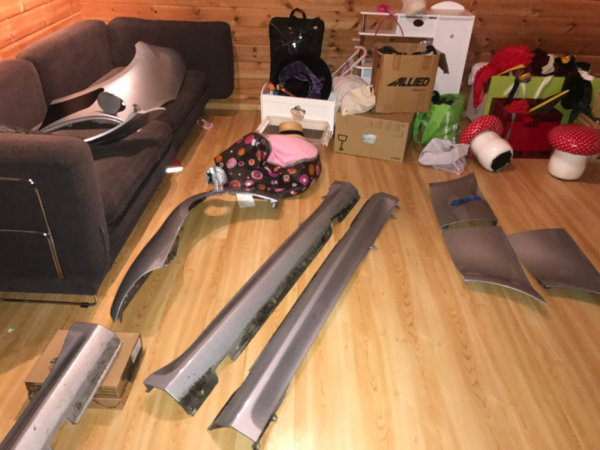
With the drivers side done, we started on passenger side. Note: we could not start mount on the 2.8 yet as we needed to some rust work and minor paint work on the panels coming of the Z3M.

pic17.thumb.jpg.5ce439371da96853698d7d6ce6e6ecfb.jpg

Used the basement a storage for parts, luckly wife and kids where away on holidays the whole week.
pic19.thumb.jpg.d91ba2d537ac60cf209941b535293421.jpg

To be continued...
 

fxslin

Zorg Guru (I)
Norwegian Zeds
Joined
Apr 17, 2017
Points
95
Location
Oslo, Norway
Model of Z
///M & 2.8
So the following days we manage to get most of the passenger side mounted on the Z3M:

pic1.thumb.jpg.67a5928c7848d70460457a396605526c.jpg

Rear panel on:
pic3.thumb.jpg.ff0e87ef08f7c2fcb872c63f429513fa.jpg

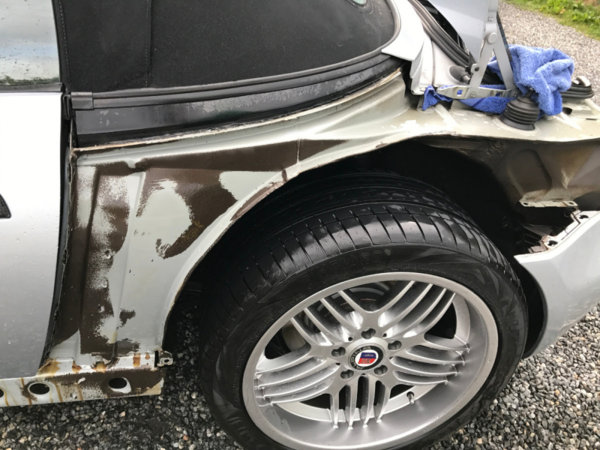
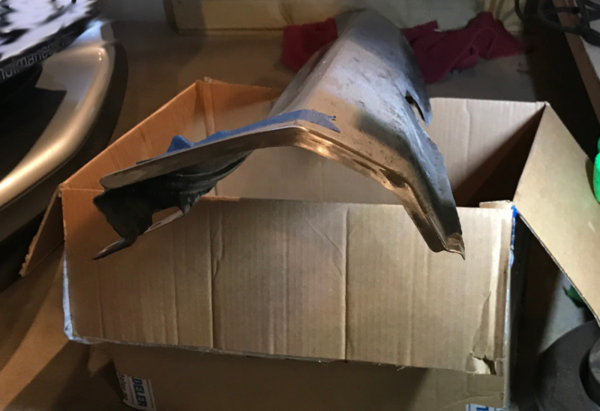
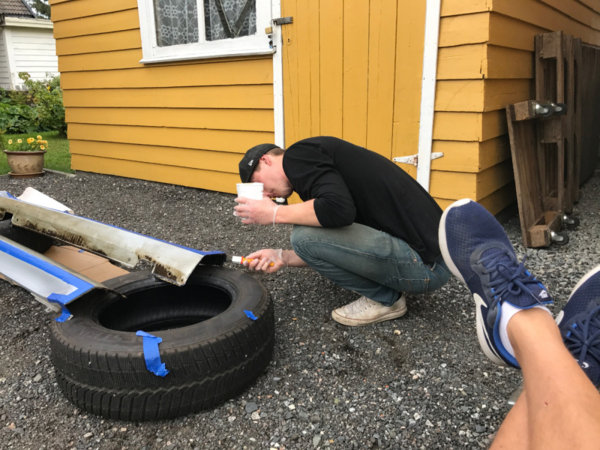
The the rust work on the old Z3M sills started:
pic2.thumb.jpg.ed152fdb5cb75f39d74fec4d0ef33b2a.jpg

Since the my mate had done this before I was just chilling:)

pic4.thumb.jpg.c0e68bf1239a15bbfe3f0a57a73fbe34.jpg

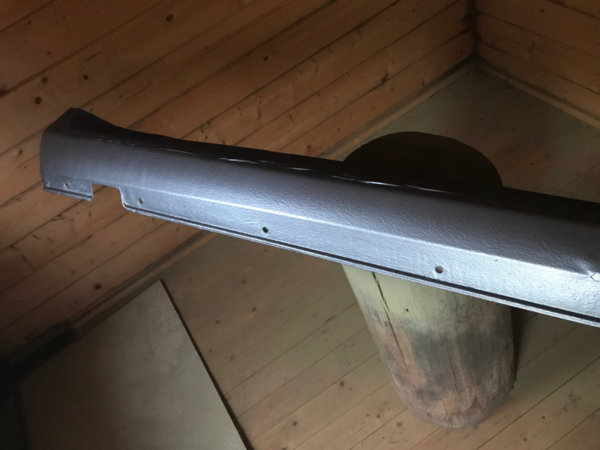
We decided to repaint the whole underside of the sills after giving it a new layer of "stone chip proctection" (don't know english word for this) in our professional paint workshop :)

pic5.thumb.jpg.33d8977e1185bef3b7477d83c7b1083f.jpg

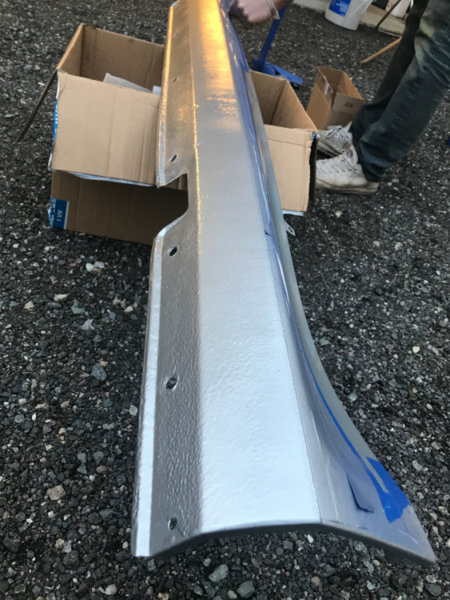
Did turn out good and a massive improvement to how it looked like before.
pic6.thumb.jpg.bf3acae6e71adc6e53b3e5f0068910cc.jpg

After the rust/paint work on the sills where done, we continued with mounting the parts back the cars.

We manage mount all the panels back on the 2.8 in a few hours and adjust the alignment pretty good.

pic8.thumb.jpg.6d96538e04b6eb2e9bed11d9354033a7.jpg

At this stage, both cars had side panels, sills and rear panels swaped over (wednesday night). Now only the hood and the doors remained to be swapped over.

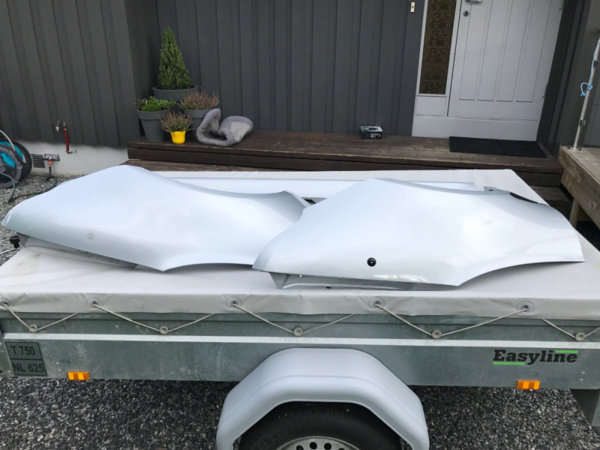
Thursday we started with hoods after getting the neighboor to help us out ( a lot easier job with three people):
pic1.thumb.jpg.04babd38234a35dea6205bd277778807 (1).jpg

Two Zeds naked :)

pic2.thumb.jpg.489bff60155adb792840d7bea13e7d16.jpg

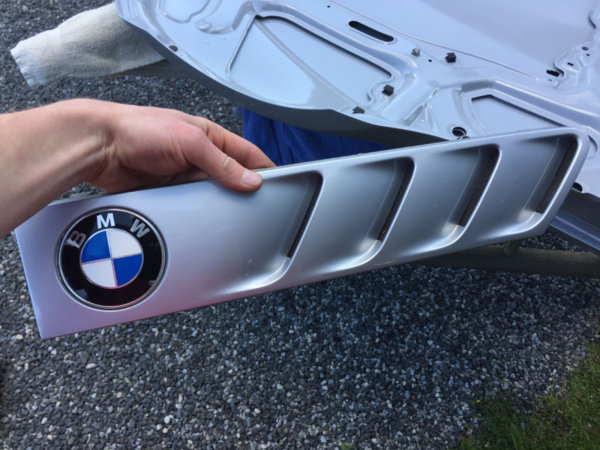
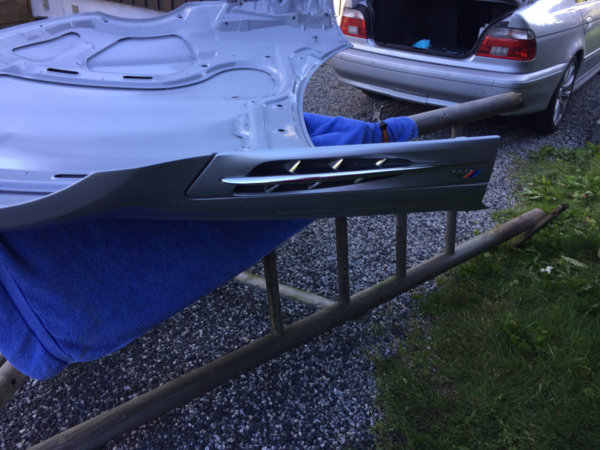
Important to get the correct details over to the correct car :)
pic3.thumb.jpg.6ad234d9e8603043954c595c9b7ca168.jpg pic4.thumb.jpg.b84c58a6449941adc608c0e9e515d217.jpg

The whole hood operation went quite fast, we faced no real issues here. Except from the tedious alignment to get things line up and get the hood "releaser" working good.

Hood over "moment":
pic5.thumb.jpg.a445288eb30ef92a6f6e7d4e46fac6e8.jpg

We wanted to start on the doors, however at this time all our energy was used. We both had worked hard the whole week in addition to our normal day jobs. Our knees and back started to complain as well:)
So that night we where not really able to figure out a good and simple plan for swapping doors. We were also afraid of what issues that could meet us, since the Z3M has remote key and 2.8 did not. And the realoem listed a change in the parts number in the month the Z3M was produced compared to the 2.8 (2 months separates them).

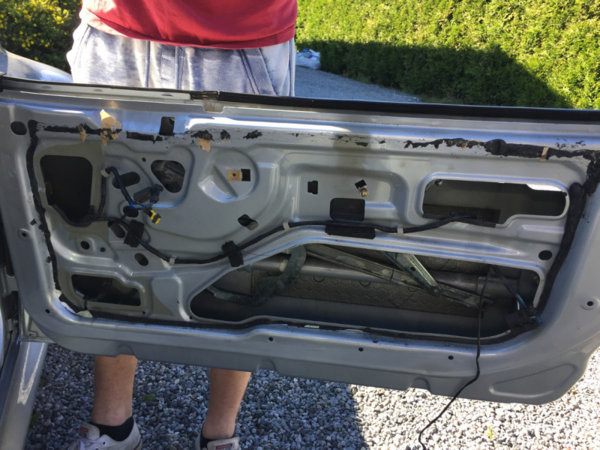
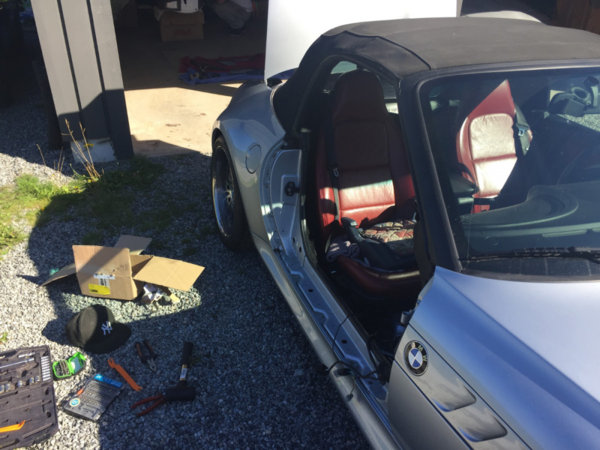
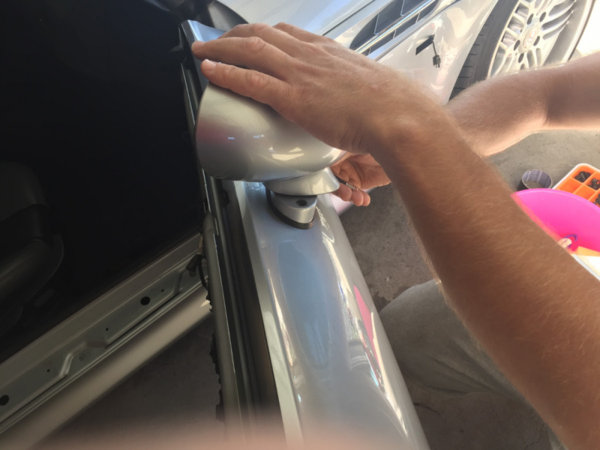
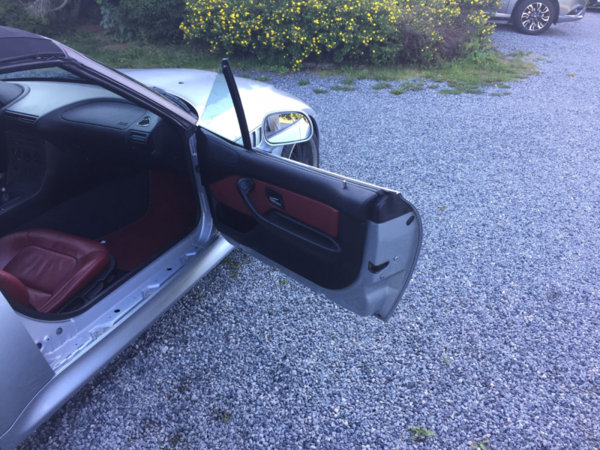
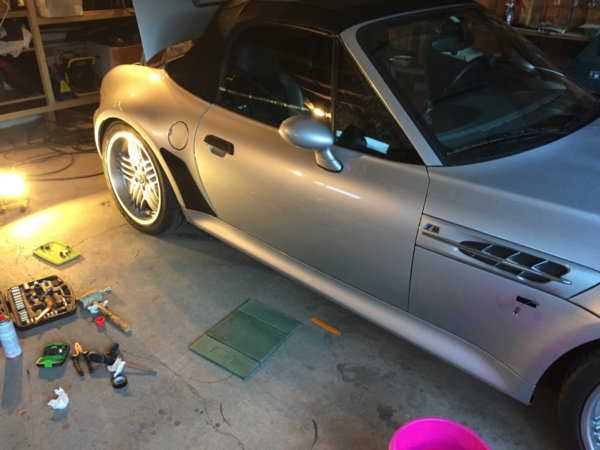
Anyway early friday afternoon we were both back in "attack" mode and now we had plan. We would not move windows, wires, locking mechanism, mirrors and door handle. So basically only door and window lift would be swapped over.

Ready set go:
pic6.thumb.jpg.121c8701910e3b922097e1984a13f994.jpg

One striped door, only the wire left to loosen up (2.8 door):
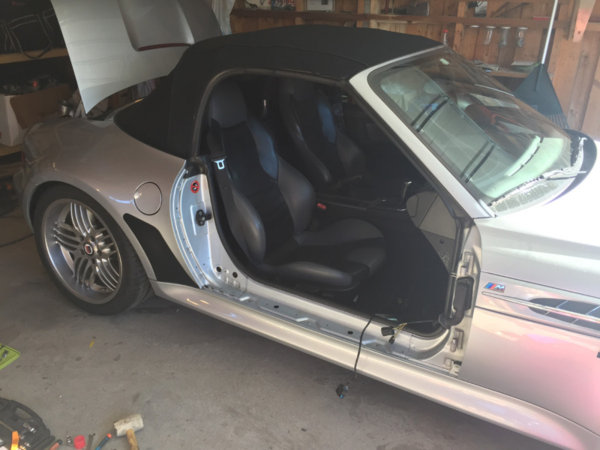
pic7.thumb.jpg.03509fc0df30cf21c1cd6fac5e3067c8.jpg

First door completely off and now we were on fire. It went really easy to dismantle the door and we ready for next door.

pic8.thumb.jpg.9c6d24f0bd28dbd4eafdde409372ab7c.jpg

Attacking the Z3M door:

pic9.thumb.jpg.91fa19d0fc24729defc2f26d17ef57c4.jpg

A few moments and swear words later we had this result:

pic10.thumb.jpg.d4129c3ed0c121edd263231e6c2d29cd.jpg

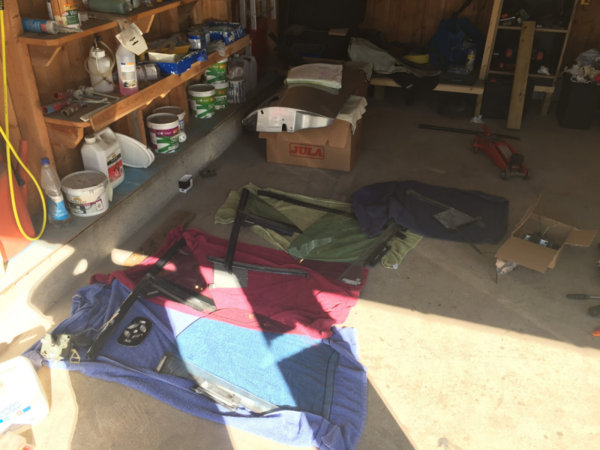
When two doors is striped, you get this result:

pic20.thumb.JPG.053adf1141720f467b7cda99b9721c60.JPG

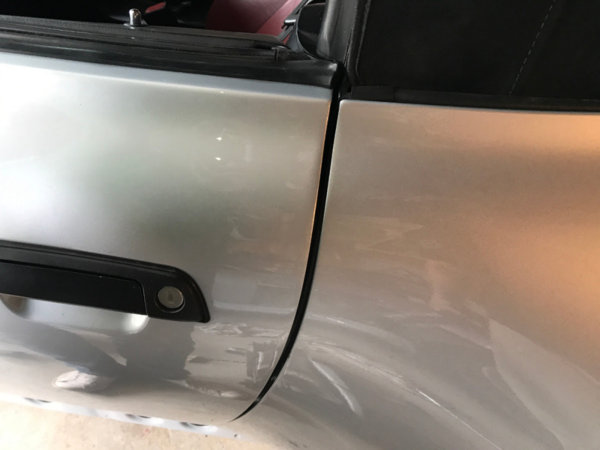
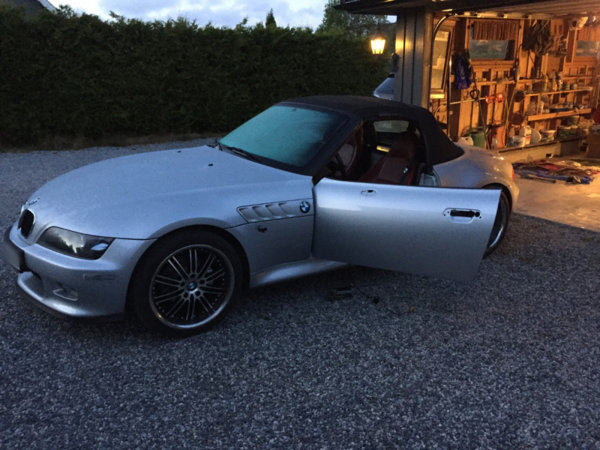
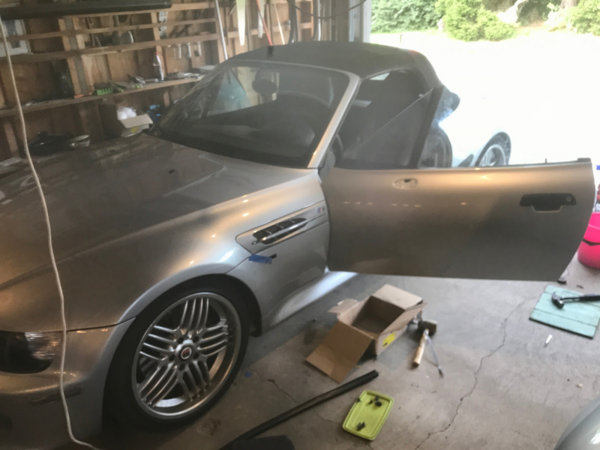
With a little "small finger work" and will power we got the Z3M's old door mounted on the 2.8 and it did line up perfectly.

pic11.thumb.jpg.02d007c283b5ed36b8c71eb72c80fbad.jpg

The same result on the Z3M (2.8 door on the Z3M)

pic21.thumb.JPG.cbc3de8657353998e10e39e2ff642a14.JPG

To be continued.....
 

fxslin

Zorg Guru (I)
Norwegian Zeds
Joined
Apr 17, 2017
Points
95
Location
Oslo, Norway
Model of Z
///M & 2.8
That Friday night we managed to swap both doors over and have them fully mounted.

pic12.thumb.jpg.2196d338ff191e8691a6d60379d09945.jpg

So now our plan for Saturday was to install all the minor things like antenna, door sills, lights, wheel sills (lokari?) final alignment of panels+++ nice little things:)
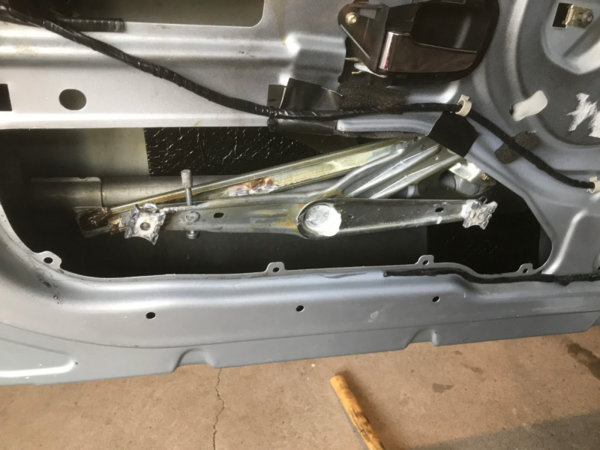
However I was a bit disapointed with the window lift mechanism in Z3M "new" driver door. It would not go smooth and started show signs of wears. It would most likely cause me issues in the future, so Saturday morning I decided to check the window clips and replace them with some new ones I had in my "part" storage.

So I had to dismantle a "finish" mounted door again:-(

pic13.thumb.jpg.4b056a36f2d8ae4727c78e180c62c67c.jpg

After inspecting the clips, I got my confirmation that these where on they last leg. So time to swap them out.

pic14.thumb.jpg.77efc431740fc0da5581958872d5ab26.jpg

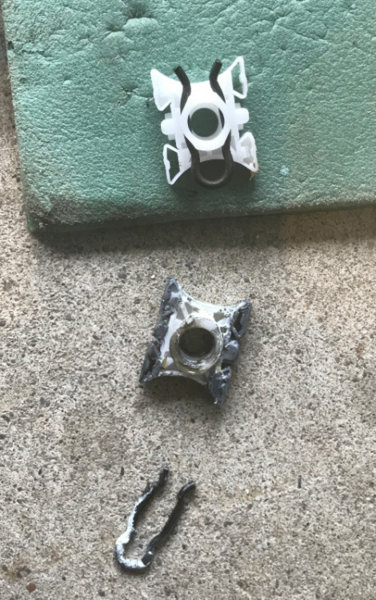
New vs Old part:

pic15.thumb.jpg.120a8c8553b6d422b8eb3b5aa0e5faad.jpg

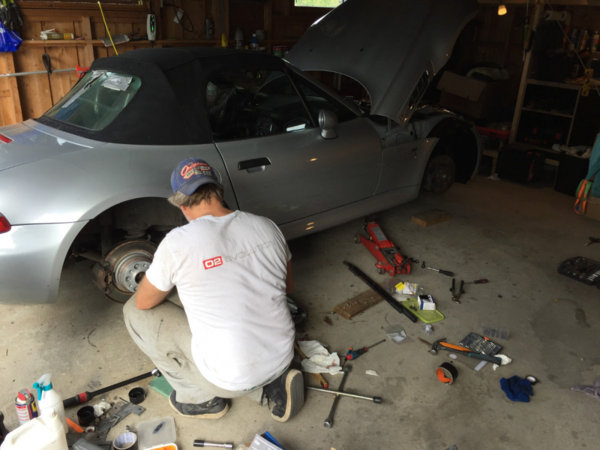
After the "window job" we continued to mount the rest of little things on each our cars. Did not take many pictures of this, however here is proof that we did some work :)

pic17.thumb.jpg.6c2fc148fc97b6f38a4d27df67d62eaf.jpg

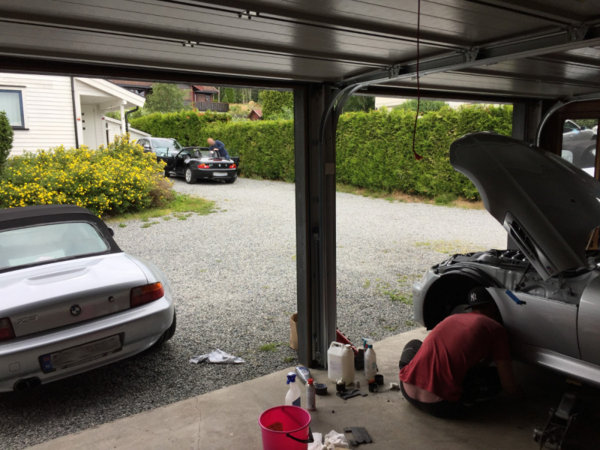
At this stage the neighboor toke his Z3 out and started to wash his car in front of us.... getting ready for the Sundays club trip.

pic18.thumb.jpg.a1923624f694ffa3efd4ec8fd037bcf5.jpg

A few hours later ( many hours ) and some test driving. We finally had this result. Vi manage to reach our goal with two ready cars on Saturday evening.
pic19.thumb.jpg.e032a33a1904bb4f412b31e7de634ab0.jpg

And we manage to attend the club trip and display ours cars on the Sundays trip.

pic22.thumb.JPG.eeba4d7680906a4ed025f88d853c6c57.JPG

A few after match words:

Was it worth it? Well if you ask us, yes. We went from one car in really good condition (my old 2.8) and a car in "shabby" condition (my new Z3M) to one car in really good condition (my new Z3M) and a one car in very good condition ( my old 2.8 ).
In addition we also managed to fix a lot minor along the ways as we face them (change screws, clips. Wires that needed tlc and check). The Z3M also received new jack mounts and front wheel inner lining.

I have to admit selling the 2.8 was hard, however the car only moved two streets down from me and ended up at a very good friend of me.
So in end, this was win/win situation for both of us. Financial I went about zero. Since the biggest investment was the paint job and with this solution I just moved the investment over to the Z3M. And my Z3M funding did grow nicely, so I can get the front/rear bumpers stonechips repaired and repainted professionally this winter.

I was planning to repaint the luggage door panel as well, but it is nearly impossible to see any difference in the color and it's condition is great.
 

ZTec

Zorg Guru (IV)
Supporter
British Zeds
The M44 Massive
Joined
Oct 18, 2014
Points
171
Location
Llantwit Major
Model of Z
Z3
A lot of hard work there, but worth it in the end, well done.
 

fxslin

Zorg Guru (I)
Norwegian Zeds
Joined
Apr 17, 2017
Points
95
Location
Oslo, Norway
Model of Z
///M & 2.8
I did exactly the same when I bought my 2.8, everything was swapped over from the 2.0. Even the exhaust, brakes, interior and dash.
Yes I know:) I have been reading your thread a few times, you have done a lot cool stuff and I like your oem+ style. I might copy a few of your mods to the Z3M!
 
Top