I'm still waiting for my reversing lights to arrive. As Dan mentioned, I'm having the ones that sit under my rear lights. Originally went with Pirans one of each but then backtracked to 2 reversing and 1 central fog light under the bumper. Gone for vw t2 reversing lights as they look similar to the original 507
You are using an out of date browser. It may not display this or other websites correctly.
You should upgrade or use an alternative browser.
You should upgrade or use an alternative browser.
Rebody Another 507 build
- Thread starter Piran
- Start date
Fog lights yes...min 100mm away.just thinking about those ones - don't they have to 100mm from the brake lights to avoid confusion?
Reversing lights no
Dxbolton
Zorg Guru (III)
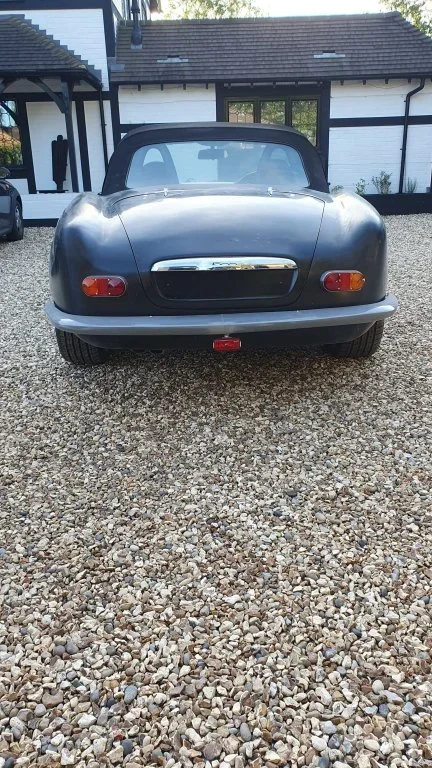
Short term I just extended the pipes with a cover to direct fumes out the rear..
I also need to move the exhaust pipes as they're currently pointing into the rear body work
New stainless system due to be built soon
Ok,so some gelcoat repair and the fuel flap to finish off the back, sort out the fuel filler flap. While I'm waiting for parts I've started looking at the headlight wiring.
I can just take the wires (once I've worked out what's what) from the drivers side and run the bulbs in parallel or I can run wire from both sides of the car to the lights (running wires from both the drivers and passengers sides back to the hinge, onto the bonnet and then along the bonnet). would be interested in hearing what others have done?
I can just take the wires (once I've worked out what's what) from the drivers side and run the bulbs in parallel or I can run wire from both sides of the car to the lights (running wires from both the drivers and passengers sides back to the hinge, onto the bonnet and then along the bonnet). would be interested in hearing what others have done?
Ok,so some gelcoat repair and the fuel flap to finish off the back, sort out the fuel filler flap. While I'm waiting for parts I've started looking at the headlight wiring.
I can just take the wires (once I've worked out what's what) from the drivers side and run the bulbs in parallel or I can run wire from both sides of the car to the lights (running wires from both the drivers and passengers sides back to the hinge, onto the bonnet and then along the bonnet). would be interested in hearing what others have done?
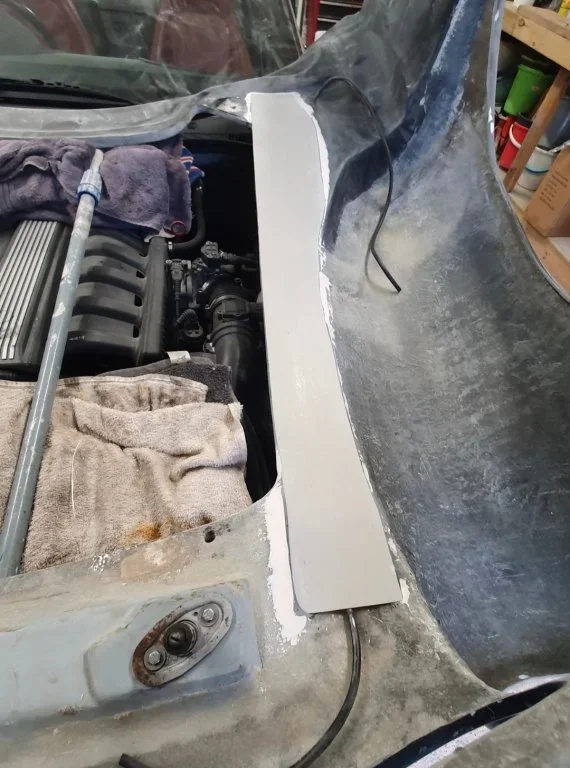
I ran my cables from each side. I didn't want to see the cables under my bonnet so made a template and cut some thin fibreglass sheet which I tiger sealed to the hollow in the bonnet having put draw cables in 1st.
The pic shows the bonnet flipped over as it was easier to do this way. Front headlight and indicators are connected up now. I've left another draw cable in each side so that I can put front fog lights in at a later date.
Everything will be flowcoated black when finished
Attachments
- Joined
- Dec 8, 2011
- Points
- 165
Each headlight is individually switched from the switch, and individually fused before the switch. Look at the wiring diagram to see what you are changing. If you are going to make changes, do it with the knowledge of what you are changing.
I see each bulb has it's own fuse too (7.5a), I guess that provides some redundancy, but not enough to run two bulbs, so separate wiring it is. I'm surprised how low the fuse is, I'd expected nearer 16amps.Each headlight is individually switched from the switch, and individually fused before the switch. Look at the wiring diagram to see what you are changing. If you are going to make changes, do it with the knowledge of what you are changing.
- Joined
- Dec 26, 2016
- Points
- 144
- Location
- Spaldingski, Lincs
- Model of Z
- 3 litre Z3 pretending to be Italian exotica. Two previous E89 Z4s.
Headlights are fused separately for obvious driving safety reasons. A 12v 55w bulb only pulls around 4.5amps plus a bit for sidelight, say 5 amp max.I see each bulb has it's own fuse too (7.5a), I guess that provides some redundancy, but not enough to run two bulbs, so separate wiring it is. I'm surprised how low the fuse is, I'd expected nearer 16amps.
Given my other project car is a Triumph Herald - which doesn't have any fuses ...Headlights are fused separately for obvious driving safety reasons. A 12v 55w bulb only pulls around 4.5amps plus a bit for sidelight, say 5 amp max.
- Joined
- Dec 26, 2016
- Points
- 144
- Location
- Spaldingski, Lincs
- Model of Z
- 3 litre Z3 pretending to be Italian exotica. Two previous E89 Z4s.
I'm confused. Why didn't you just use the existing wiring and extend it where necessary? I am planning on doing this and running another cable in parallel with the high beam for spots (or if I do fogs use the existing fog light wiring).I used 16.5a 7 core trailer cable (recommended by Dan).....3 for headlight, 2 for parking light and 2 for indicator. Also ran a 2 core for spot lights
I do like trailer wire, prewrapped loom is very handy. Although I do have some ESA spec wire that I have to use somewhere.I used 16.5a 7 core trailer cable (recommended by Dan).....3 for headlight, 2 for parking light and 2 for indicator. Also ran a 2 core for spot lights
I'm confused. Why didn't you just use the existing wiring and extend it where necessary? I am planning on doing this and running another cable in parallel with the high beam for spots (or if I do fogs use the existing fog light wiring).
I found it simpler to run new 7 core cables from the old headlight position using waterproof connectors back towards the hinges and then hidden behind a fibreglass panel that i bonded in the clamshell exiting where the new headlights are.
Plus side for me is that there was no stripping of the old loom, no different length cables to extend and tgen tape up. I have 4 waterproof connectors per side (2 at the old headlight position, 2 at the new).
If I have issues in the future it'll be at the easily accessible connectors as the rest of it is brand new continuous cable from the old headlight position to the new one. No stripping back the taped up loom for faults.
At the end of the day, you'll do your car your way and I'll do mine my way. We both end up with the same results.
Piran was asking what people had done.
No doubt he'll take the different methods on board and will work out which method works best for him.
- Joined
- Dec 26, 2016
- Points
- 144
- Location
- Spaldingski, Lincs
- Model of Z
- 3 litre Z3 pretending to be Italian exotica. Two previous E89 Z4s.
Thanks for clearing that up!The Tribute kits have hinged front end s so the wiring loom needs to be re routed and extended.
The 250 California has a fixed front so the wiring just needs a small modification.

So is that a common earth for all the circuits? I noticed that you can get 7 core 16.5amp with one 25 amp .I used 16.5a 7 core trailer cable (recommended by Dan).....3 for headlight, 2 for parking light and 2 for indicator. Also ran a 2 core for spot lights
In a 7-core the white wire is the earth. Usually the thickest of the 7.
Tony.
Tony.
Yep, I used white as the earthIn a 7-core the white wire is the earth. Usually the thickest of the 7.
Tony.
Yep, that's the size I got. Think I ordered 10m roll...about £29So is that a common earth for all the circuits? I noticed that you can get 7 core 16.5amp with one 25 amp .