
Bognor Lean-to Project
- Thread starter Mazza
- Start date
The trip out yesterday ‘ up t’norff ‘. wasn’t too bad and didn’t really get held up at all, which was what I was dreading.
The guy I went to see ( John Palmer ) is a really nice guy and loads of Z3 stuff from cars he has broken.
After lifting the complete axle assembly into the Kia.....( bloody heavy with just two of us ), I tied down an Exhaust system I was collecting for Andy. And then home via Woking to drop the exhaust off.
Early start this morning as I had to strip the lot in the car and lift out bit by bit.
Started at 7.30 ....and what time was the car empty????

A personal best)") !!
!!
Starting position...

Took off the ARB and then the NS arm


Next was the OS arm ( the one I want)

Just leaving this

Then 4 bolts and the car was empty
Glad I bought two sheets of hardboard, to sit it on....the only damage to the Kia.....
Two dinks on the plastic bumper....I’ll get some touch up paint and sort those....and I have two stone chips on the front bumper that I will do as well.

Then It was a case of dismantling the arms....
But checked with my precision vernier........

Yep, they line up.....
All the nuts and bolts came undone really easily except for the handbrake support block.... and it sheared off

And bugger me the same thing happened on the other one

And the hand brake cable didn’t make it either......really tight so cut it off....cut off the back plate ( rusty) and knocked it out
The other side came out no problem...
Still thats the bit I need..... and I dont even want the axle.....but I need Lee and Co with the nugger gun and extractor tools to finish stripping it completely. Then sand blast , powder coat new bushes and bearing.......and back to where I was about 5 weeks ago

These are the bits I dont need....but may be worth getting them all cleaned as could be useful to someone.
Beam will need new bushes, so will get those replaced if I get it powder coated

There is also the diff ....which I may swap over as it does appear to be better and newer than the current one.
The guy I went to see ( John Palmer ) is a really nice guy and loads of Z3 stuff from cars he has broken.
After lifting the complete axle assembly into the Kia.....( bloody heavy with just two of us ), I tied down an Exhaust system I was collecting for Andy. And then home via Woking to drop the exhaust off.
Early start this morning as I had to strip the lot in the car and lift out bit by bit.
Started at 7.30 ....and what time was the car empty????
A personal best
!!Starting position...
Took off the ARB and then the NS arm
Next was the OS arm ( the one I want)
Just leaving this
Then 4 bolts and the car was empty
Glad I bought two sheets of hardboard, to sit it on....the only damage to the Kia.....
Two dinks on the plastic bumper....I’ll get some touch up paint and sort those....and I have two stone chips on the front bumper that I will do as well.
Then It was a case of dismantling the arms....
But checked with my precision vernier........
Yep, they line up.....
All the nuts and bolts came undone really easily except for the handbrake support block.... and it sheared off
And bugger me the same thing happened on the other one
And the hand brake cable didn’t make it either......really tight so cut it off....cut off the back plate ( rusty) and knocked it out
The other side came out no problem...
Still thats the bit I need..... and I dont even want the axle.....but I need Lee and Co with the nugger gun and extractor tools to finish stripping it completely. Then sand blast , powder coat new bushes and bearing.......and back to where I was about 5 weeks ago
These are the bits I dont need....but may be worth getting them all cleaned as could be useful to someone.
Beam will need new bushes, so will get those replaced if I get it powder coated
There is also the diff ....which I may swap over as it does appear to be better and newer than the current one.
Last edited:
- Joined
- Jul 18, 2020
- Points
- 123
- Location
- Portchester, Fareham
- Model of Z
- 1998 BMW Z3 Individual 1.9 M44 B19
nice work Malc... at least you don't have a drift car anymore !
All good intentions today to remove the two broken bolts from the arms...........But realised you need to remove the hubs to have straight access.......... so that didnt happen.... as dont have the gear to do it  Leeeeeeee,,,,,,!!,,,,,,,
So something I could do was to remove the bushes from the arms....

Socket wasn’t long enough to do it in one go.....so cut it and pulled the rest out

So onwards and decided to refit all the door parts.
The new window sliders are two per side......

So why did I get 8 of them ????

Got the quarterlight back in and it fitted really well...

Which was a real shame.......I should have put the window in first so you can slide it forward and then back onto the new plastic parts Oh well its good practice .....and will not make the same mistake on the other side
At least I hope I don’t
Leeeeeeee,,,,,,!!,,,,,,,So something I could do was to remove the bushes from the arms....
Socket wasn’t long enough to do it in one go.....so cut it and pulled the rest out
So onwards and decided to refit all the door parts.
The new window sliders are two per side......
So why did I get 8 of them ????
Got the quarterlight back in and it fitted really well...
Which was a real shame.......I should have put the window in first so you can slide it forward and then back onto the new plastic parts
Oh well its good practice .....and will not make the same mistake on the other sideAt least I hope I don’t
Attachments
-
 150.8 KB Views: 12
- Joined
- Jul 18, 2020
- Points
- 123
- Location
- Portchester, Fareham
- Model of Z
- 1998 BMW Z3 Individual 1.9 M44 B19
I did exactly the same thing when I replaced my window regulator. Nice cleaned up quarter light in and tightened up..went to put the window in...and...b*llocks...out comes quarter light...not sure what your fixings are like but might be a good opportunity to do the bracket mod that I did to hold the bottom regulator nut in place..All good intentions today to remove the two broken bolts from the arms...........But realised you need to remove the hubs to have straight access.......... so that didnt happen.... as dont have the gear to do it
So something I could do was to remove the bushes from the arms....
View attachment 265739
Socket wasn’t long enough to do it in one go.....so cut it and pulled the rest out
View attachment 265741
So onwards and decided to refit all the door parts.
The new window sliders are two per side......
View attachment 265745
So why did I get 8 of them ????
View attachment 265751
Got the quarterlight back in and it fitted really well...
View attachment 265747
Which was a real shame.......I should have put the window in first so you can slide it forward and then back onto the new plastic parts
At least I hope I don’t
Small update...

Took out the quarter light, greased the new sliders and put the window in and slid it into position. Also sprayed the window rubber with silicon.
Quarter light back in And then did the drivers side.
A quick hook up off the battery and yippee they both worked.
Ordered some 8mm dia butyl cord so I can put the door liner back in .....but not before I get the wing mirrors resprayed and assembled back on the doors. Also want to connect the radio and all the speakers at some point, to make sure it all works before I put all the door cards back....
Also got to take the seats out at some point to get the switches working the right way round.....dont know if that is just a plug round the wrong way or the motor needs turning round. Either way not really a problem.
Not doing much this week ( mind you , I could say that every week)
as an important gig at the weekend for Armed Forces Day.......and got to make sure everything is working properly and each of the 4 sets is timed correctly as there is a rigid program through the day.
Not that I’m nervous or anything.....

Took out the quarter light, greased the new sliders and put the window in and slid it into position. Also sprayed the window rubber with silicon.
Quarter light back in And then did the drivers side.
A quick hook up off the battery and yippee they both worked.
Ordered some 8mm dia butyl cord so I can put the door liner back in .....but not before I get the wing mirrors resprayed and assembled back on the doors. Also want to connect the radio and all the speakers at some point, to make sure it all works before I put all the door cards back....
Also got to take the seats out at some point to get the switches working the right way round..
...dont know if that is just a plug round the wrong way or the motor needs turning round. Either way not really a problem.Not doing much this week ( mind you , I could say that every week
)as an important gig at the weekend for Armed Forces Day.......and got to make sure everything is working properly and each of the 4 sets is timed correctly as there is a rigid program through the day.
Not that I’m nervous or anything.....
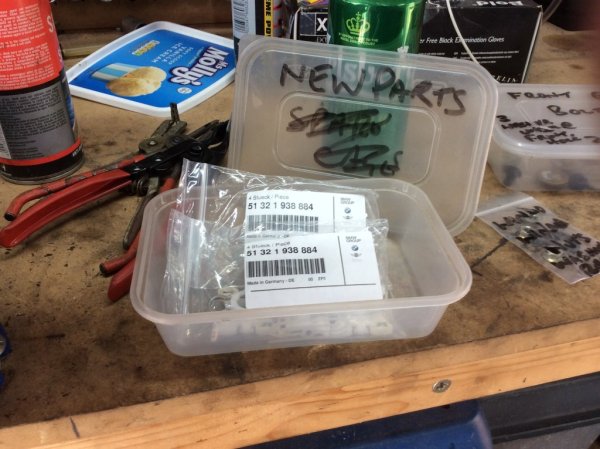
Another hot day down here on the South Coast..... so on to another job
Turn the contents of this box into two Blue Wing mirrors.....

Contents.....

First get these two sandblasted and filled castings nice and smooth....
Wet and Dry...and lots of water needed

But two hours later....and 3 coats of grey primer...

While they were drying took the silver drivers side plastic covers, and cleaned them with a scotch pad to give them a key..
Then first coat of Topaz Blue

Followed by lots more coats.......together with the now dry castings

And finally..... a lacquer coat added

Now 4pm.... so leave them for a couple of hours in the sun then put them in the garage.
Then tomorrow if hardened off, they can be assembled with the new stainless steel hinge pins....and put back on the doors.
If not, then I could sort the seats out....
I also need to get on with the trailing arms but got saturday gigs for the next two weeks so cant get up to Zedshed HQ to get them sorted out.
Turn the contents of this box into two Blue Wing mirrors.....
Contents.....
First get these two sandblasted and filled castings nice and smooth....
Wet and Dry...and lots of water needed
But two hours later....and 3 coats of grey primer...
While they were drying took the silver drivers side plastic covers, and cleaned them with a scotch pad to give them a key..
Then first coat of Topaz Blue
Followed by lots more coats.......together with the now dry castings
And finally..... a lacquer coat added
Now 4pm.... so leave them for a couple of hours in the sun then put them in the garage.
Then tomorrow if hardened off, they can be assembled with the new stainless steel hinge pins....and put back on the doors.
If not, then I could sort the seats out....
I also need to get on with the trailing arms but got saturday gigs for the next two weeks so cant get up to Zedshed HQ to get them sorted out.
Last edited:
I find paint dries better when you have a beer in your hand Malc!
Tony.
Tony.
Now you tell me
Glad you're moving back in the right direction Malc
- Joined
- Jul 18, 2020
- Points
- 123
- Location
- Portchester, Fareham
- Model of Z
- 1998 BMW Z3 Individual 1.9 M44 B19
I really should get some of those upgraded mirror posts you have. My driver mirror wobbles more than a bowl of jelly !Another hot day down here on the South Coast..... so on to another job
Turn the contents of this box into two Blue Wing mirrors.....
View attachment 266459
Contents.....
View attachment 266457
First get these two sandblasted and filled castings nice and smooth....
Wet and Dry...and lots of water needed
View attachment 266461
But two hours later....and 3 coats of grey primer...
View attachment 266463
While they were drying took the silver drivers side plastic covers, and cleaned them with a scotch pad to give them a key..
Then first coat of Topaz Blue
View attachment 266465
Followed by lots more coats.......together with the now dry castings
View attachment 266467
And finally..... a lacquer coat added
View attachment 266469
Now 4pm.... so leave them for a couple of hours in the sun then put them in the garage.
Then tomorrow if hardened off, they can be assembled with the new stainless steel hinge pins....and put back on the doors.
If not, then I could sort the seats out....
I also need to get on with the trailing arms but got saturday gigs for the next two weeks so cant get up to Zedshed HQ to get them sorted out.
Another hot day in Paradise
so more bits to do…. And today was a good day
Started by sorting out the seats ….. up and down fine, but forwards and backwards was doing the opposite to the switch.
Had a look on the 1.9 and then checked the 2.8…. Motors round the wrong way…. Must have been because I installed them when the seat was upside down
But didnt have to take the seats out….. just got to the torx screws that hold the motor and removed them then the motor just pulls forward and because the two drive shafts are flexible you can disconnect it and turn it round quite easily
1.9 showing how the motor should be…

2.8 passenger side wrong way round

the wiring end of the motor should be toward the passenger door ( RHD)

Drivers side same but also a bit laboured as it moved… and didnt sound right…..
So checked to see if the seat was square to the rails and it was out by about 2.50mm.
So motor off, and connected a drill to that side shaft and got it back in line. ( both sides measuring the same. From the ref points I used

then turned the motor round and reconnected it. Sounded much better… and working properly now

That was a good start … so onwards and sort the mirrors out…
Assembled all the bits with the tooling
Then its just wind the tooling up until you can see the circlip groove and then locate the circlip.

then undo the tooling and its done


Then fit the cable back in and connect the 4 wires. ( I took a picture so I would know where every colour went…. But wearing my glasses today I realised the colours are actually written on the plastic housing

Then screw it all together…and fit it back on the car .
The four hex screws were a bit crap but luckily I had some black ones exactly the same size

and a bit of grease and a hex driver later and just to prove that the new stainless steel pivot pins work……


And this one was the old one off my 1.9


and I have received the butyl rubber cord, so thats the next job… finish building up the doors.

I thought it would be black like it showed in the picture on ebay…. but its grey.
Still I suppose it doesn’t matter really… its not seen!!!
so more bits to do…. And today was a good day
Started by sorting out the seats ….. up and down fine, but forwards and backwards was doing the opposite to the switch
.Had a look on the 1.9 and then checked the 2.8…. Motors round the wrong way…. Must have been because I installed them when the seat was upside down
But didnt have to take the seats out….. just got to the torx screws that hold the motor and removed them then the motor just pulls forward and because the two drive shafts are flexible you can disconnect it and turn it round quite easily
1.9 showing how the motor should be…
2.8 passenger side wrong way round
the wiring end of the motor should be toward the passenger door ( RHD
)Drivers side same but also a bit laboured as it moved… and didnt sound right…..
So checked to see if the seat was square to the rails and it was out by about 2.50mm.
So motor off, and connected a drill to that side shaft and got it back in line. ( both sides measuring the same. From the ref points I used
then turned the motor round and reconnected it. Sounded much better… and working properly now
That was a good start … so onwards and sort the mirrors out…
Assembled all the bits with the tooling
Then its just wind the tooling up until you can see the circlip groove and then locate the circlip.
then undo the tooling and its done
Then fit the cable back in and connect the 4 wires. ( I took a picture so I would know where every colour went…. But wearing my glasses today I realised the colours are actually written on the plastic housing
Then screw it all together…and fit it back on the car .
The four hex screws were a bit crap but luckily I had some black ones exactly the same size
and a bit of grease and a hex driver later and just to prove that the new stainless steel pivot pins work……
And this one was the old one off my 1.9
and I have received the butyl rubber cord, so thats the next job… finish building up the doors.
I thought it would be black like it showed in the picture on ebay…. but its grey.
Still I suppose it doesn’t matter really… its not seen!!!
- Joined
- Jul 18, 2020
- Points
- 123
- Location
- Portchester, Fareham
- Model of Z
- 1998 BMW Z3 Individual 1.9 M44 B19
you're a perfectionist...some people just use masking tape!Another hot day in Paradise
so more bits to do…. And today was a good day
Started by sorting out the seats ….. up and down fine, but forwards and backwards was doing the opposite to the switch
Had a look on the 1.9 and then checked the 2.8…. Motors round the wrong way…. Must have been because I installed them when the seat was upside down
But didnt have to take the seats out….. just got to the torx screws that hold the motor and removed them then the motor just pulls forward and because the two drive shafts are flexible you can disconnect it and turn it round quite easily
1.9 showing how the motor should be…
View attachment 266547
2.8 passenger side wrong way round
View attachment 266549
the wiring end of the motor should be toward the passenger door ( RHD
View attachment 266553
Drivers side same but also a bit laboured as it moved… and didnt sound right…..
So checked to see if the seat was square to the rails and it was out by about 2.50mm.
So motor off, and connected a drill to that side shaft and got it back in line. ( both sides measuring the same. From the ref points I used
View attachment 266555
then turned the motor round and reconnected it. Sounded much better… and working properly now
View attachment 266557
That was a good start … so onwards and sort the mirrors out…
Assembled all the bits with the tooling
Then its just wind the tooling up until you can see the circlip groove and then locate the circlip.
View attachment 266571
then undo the tooling and its done
View attachment 266573
View attachment 266575
Then fit the cable back in and connect the 4 wires. ( I took a picture so I would know where every colour went…. But wearing my glasses today I realised the colours are actually written on the plastic housing
View attachment 266577
Then screw it all together…and fit it back on the car .
The four hex screws were a bit crap but luckily I had some black ones exactly the same size
View attachment 266579
and a bit of grease and a hex driver later and just to prove that the new stainless steel pivot pins work……
View attachment 266581
View attachment 266589
And this one was the old one off my 1.9
View attachment 266583
View attachment 266585
and I have received the butyl rubber cord, so thats the next job… finish building up the doors.
View attachment 266591
I thought it would be black like it showed in the picture on ebay…. but its grey.
Still I suppose it doesn’t matter really… its not seen!!!
Got out into the garage this morning for a tidy up….. but got side tracked….

Put the near side disc and calliper back on and connected the brake lines.
Bit of an accident when I trod on this and so had to ‘gorillatise’ the end back on

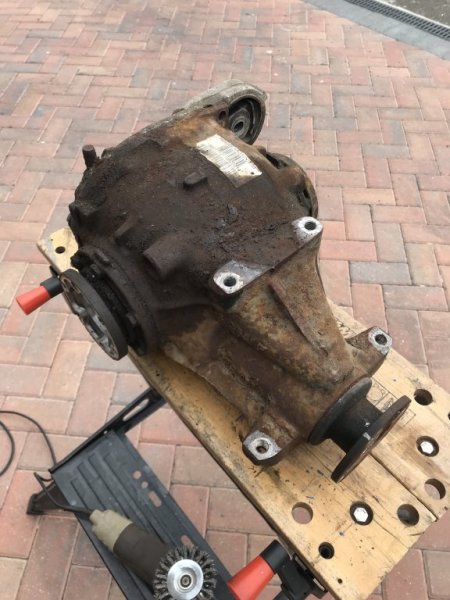
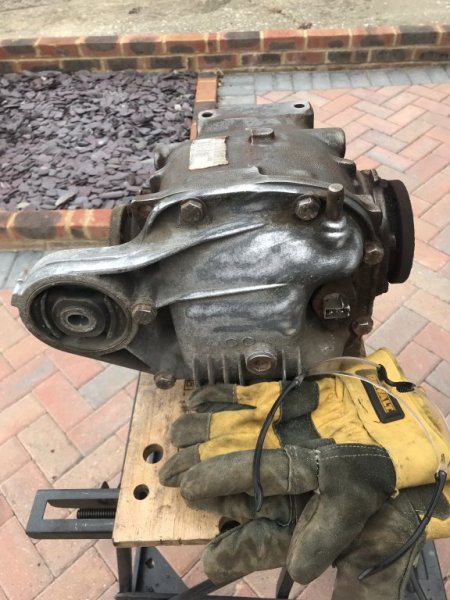
Then thought I see how well the spare diff would clean up…..


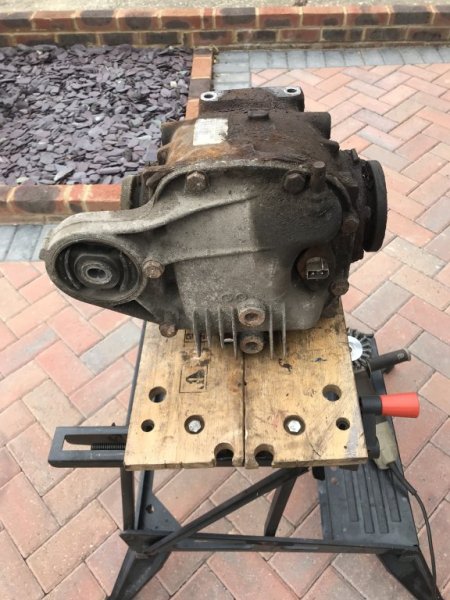
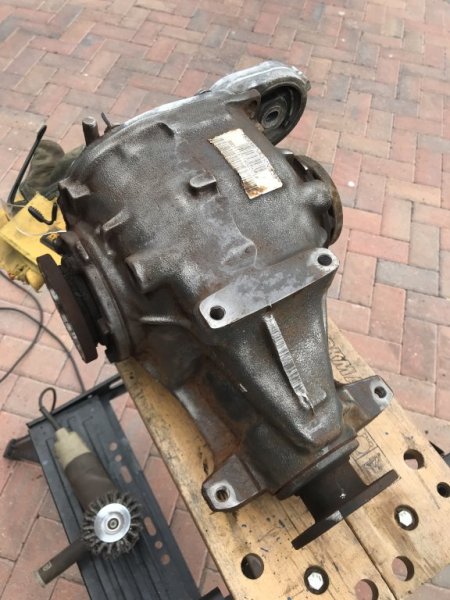
Ten minutes the wire brush


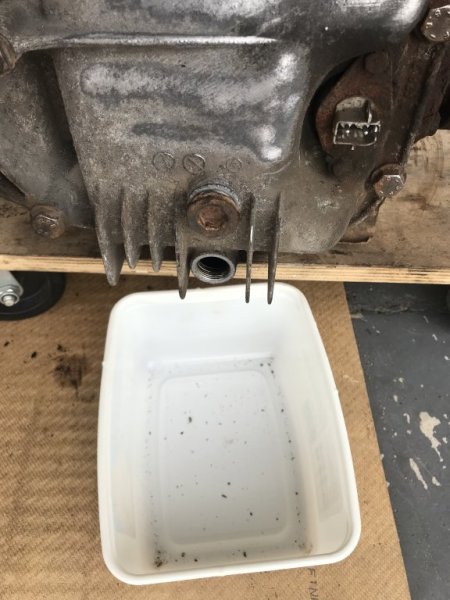
Thought I better drain the oil before turning it upside down….

Hmmmmm… thought there would be more than that
I think it was upside down in some photos when I bought it …. Must have already drained…. Saved me the job
Put the near side disc and calliper back on and connected the brake lines.
Bit of an accident when I trod on this and so had to ‘gorillatise’ the end back on
Then thought I see how well the spare diff would clean up…..
Ten minutes the wire brush
Thought I better drain the oil before turning it upside down….
Hmmmmm… thought there would be more than that
I think it was upside down in some photos when I bought it …. Must have already drained…. Saved me the job
Attachments
-
 98.7 KB Views: 9
 -
 113.9 KB Views: 13
 -
 104.5 KB Views: 13
 -
 108.9 KB Views: 11
 -
 89.9 KB Views: 10
Good job you checked if you are considering using it! ... would have been a very short and noisy first drive otherwiseThought I better drain the oil before turning it upside down….
Must have already drained…. Saved me the job
- Joined
- Jul 18, 2020
- Points
- 123
- Location
- Portchester, Fareham
- Model of Z
- 1998 BMW Z3 Individual 1.9 M44 B19
I know you get Dry Sump sports cars...first I've heard of a Dry Diff one!Got out into the garage this morning for a tidy up….. but got side tracked….
View attachment 267247
Put the near side disc and calliper back on and connected the brake lines.
Bit of an accident when I trod on this and so had to ‘gorillatise’ the end back on
View attachment 267249
Then thought I see how well the spare diff would clean up…..
View attachment 267251View attachment 267253
Ten minutes the wire brush
View attachment 267255View attachment 267257
Thought I better drain the oil before turning it upside down….
View attachment 267259
Hmmmmm… thought there would be more than that
I think it was upside down in some photos when I bought it …. Must have already drained…. Saved me the job


Bloody hope not !!!!