Z3cades S50 Progress Journal

z3cade

Zorg Guru (III)
East Anglian Crew
Joined
Dec 4, 2011
Points
137
Location
Peterborough
The new addition is my 98 S50 //M


ai866.photobucket.com_albums_ab225_cade37_DSC02990.jpg


ai866.photobucket.com_albums_ab225_cade37_DSC02992.jpg


ai866.photobucket.com_albums_ab225_cade37_DSC02997.jpg


ai866.photobucket.com_albums_ab225_cade37_DSC02994.jpg


ai866.photobucket.com_albums_ab225_cade37_DSC03000.jpg


ai866.photobucket.com_albums_ab225_cade37_M_20Roadster_DSC03092.jpg


The engine bay =p~

ai866.photobucket.com_albums_ab225_cade37_M_20Roadster_DSC03096.jpg


ai866.photobucket.com_albums_ab225_cade37_M_20Roadster_DSC03095.jpg
 

Macca

Zorg Guru (II)
Supporter
British Zeds
East Anglian Crew
Joined
Dec 5, 2011
Points
114
Location
Wisbech St. Mary
Model of Z
2.5l Msport
Re: Z3cades S50 Thread

I can't wait to see it in the flesh Liam. Hope your bringing it to the Feb meal.
 

Macca

Zorg Guru (II)
Supporter
British Zeds
East Anglian Crew
Joined
Dec 5, 2011
Points
114
Location
Wisbech St. Mary
Model of Z
2.5l Msport
Re: Z3cades S50 Thread

badman gee said:
Macca said:
I can't wait to see it in the flesh Liam. Hope your bringing it to the Feb meal.
richard, you will see it in the metal and will have to settle for that!!!!!!!
Ooooo, very good. you coming in yours Mark?
 

EnthuZiaZT

Zorg Guru (V)
British Zeds
East Anglian Crew
Joined
Dec 6, 2011
Points
193
Location
Heacham Norfolk
Model of Z
Z4 28i Msport
Re: Z3cades S50 Thread

Oh no, looks like I shall have to get to work on ours now, just to keep up the the Jones's s:rolleyes
Looks good in the pics. Liam. Hoping for good Feb weather for spotting Zeds and walking in Sandringham. s:mrgreen
 

z3cade

Zorg Guru (III)
East Anglian Crew
Joined
Dec 4, 2011
Points
137
Location
Peterborough
Re: Z3cades S50 Thread

Thanks for your comments guys, can we keep this thread just on my car progress please, hence why I've started a new journal thread, Ta. ;)
 

EnthuZiaZT

Zorg Guru (V)
British Zeds
East Anglian Crew
Joined
Dec 6, 2011
Points
193
Location
Heacham Norfolk
Model of Z
Z4 28i Msport
Sorry Liam, Will do.
Have you decided whether you are going to change the colour of the wheels back to standard or not yet?
 

z3cade

Zorg Guru (III)
East Anglian Crew
Joined
Dec 4, 2011
Points
137
Location
Peterborough
EnthuZiaZT said:
Sorry Liam, Will do.
Have you decided whether you are going to change the colour of the wheels back to standard or not yet?
Dont worry ;) No i think the car is going to stay as it is for the moment as the wheels are perfect condition and it would be a waist of money changing them back.. plus i love the finish of them with the Estroil fleck, its nice to be different
 
B

badman gee

Guest
z3cade said:
EnthuZiaZT said:
Sorry Liam, Will do.
Have you decided whether you are going to change the colour of the wheels back to standard or not yet?
Dont worry ;) No i think the car is going to stay as it is for the moment as the wheels are perfect condition and it would be a waist of money changing them back.. plus i love the finish of them with the Estroil fleck, its nice to be different
you are different mate ;)
 

z3cade

Zorg Guru (III)
East Anglian Crew
Joined
Dec 4, 2011
Points
137
Location
Peterborough
After surfing the net i managed to find some instructions for the Alpine headunit that came with the car and found out the illumination could be changed.. The blue was to bright at night but the red matched the rest of the dash lights... result!!

ai866.photobucket.com_albums_ab225_cade37_IMG_1257.jpg
 

z3cade

Zorg Guru (III)
East Anglian Crew
Joined
Dec 4, 2011
Points
137
Location
Peterborough
Sill removal and rust prevention

Today the sills were removed so i could remove the mud and muck that had collected over the years on the sills, i also treated the areas so there should be no problems in the future for rust s:mrgreen

Sill removal

Jack up the car and place on axle stands
Remove wheels
remove rear arch liner

ai866.photobucket.com_albums_ab225_cade37_sill_20fix_DSC03118.jpg


Remove kick pannel trim and door rubber

ai866.photobucket.com_albums_ab225_cade37_sill_20fix_DSC03119.jpg


remove kick pannel plastic plug

ai866.photobucket.com_albums_ab225_cade37_sill_20fix_DSC03120.jpg


Remove kick pannel by lifting up

ai866.photobucket.com_albums_ab225_cade37_sill_20fix_DSC03121.jpg


You may brake some plastic clips so remove broken clips from holes

ai866.photobucket.com_albums_ab225_cade37_sill_20fix_DSC03123.jpg


Remove front arch liner

ai866.photobucket.com_albums_ab225_cade37_sill_20fix_DSC03124.jpg


Remove screw from front arch, top front of sill (use 10mm ratchet)

ai866.photobucket.com_albums_ab225_cade37_sill_20fix_DSC03125.jpg


Remove three screws for the small side pannel, detatch side repeater and remove

ai866.photobucket.com_albums_ab225_cade37_sill_20fix_DSC03127.jpg


Get a friend to help, but a good friend not a nutter... s:rolleyes

ai866.photobucket.com_albums_ab225_cade37_sill_20fix_DSC03128.jpg


Remove screws from under the sill

ai866.photobucket.com_albums_ab225_cade37_sill_20fix_DSC03130.jpg


Remove screw from rear arch

ai866.photobucket.com_albums_ab225_cade37_sill_20fix_DSC03131.jpg


Remove small plastic trim from inside door and remove bolts that hold rear arch to allow better access for the screw behind it

ai866.photobucket.com_albums_ab225_cade37_sill_20fix_DSC03132.jpg


Remove final bolts from top of the sill that were under the kick pannel and remove sill

ai866.photobucket.com_albums_ab225_cade37_sill_20fix_DSC03133.jpg


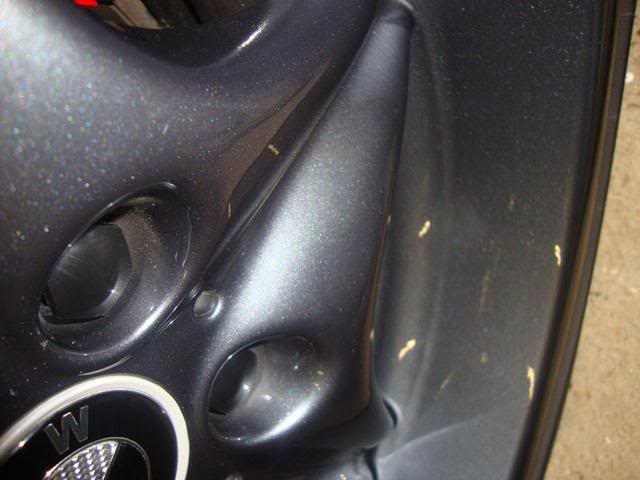
Clean up box section and check for rust

ai866.photobucket.com_albums_ab225_cade37_sill_20fix_DSC03137.jpg


Treat areas with rust with your prefered products

ai866.photobucket.com_albums_ab225_cade37_sill_20fix_DSC03138.jpg


I used zinc 182 primer, clear waxoyl spray for inside box sections and original waxoyl underseal

ai866.photobucket.com_albums_ab225_cade37_sill_20fix_DSC03139.jpg


Treated rear box section

ai866.photobucket.com_albums_ab225_cade37_sill_20fix_DSC03140.jpg


Treated front box section

ai866.photobucket.com_albums_ab225_cade37_sill_20fix_DSC03141.jpg


Sand down any rust found on the sill and treat with your desired products

ai866.photobucket.com_albums_ab225_cade37_sill_20fix_DSC03143.jpg

ai866.photobucket.com_albums_ab225_cade37_sill_20fix_DSC03144.jpg


Now just reverse the removal process and replace the sill, Job done :-bd

Luckly mine wasnt bad at all with rust but im glad ive done them so its now protected for the future.. i would recomend doing them
 

z3cade

Zorg Guru (III)
East Anglian Crew
Joined
Dec 4, 2011
Points
137
Location
Peterborough
Fitted today are my new gaitors with blue stitching and a Storm lighter plug to finish off the center console :x

ai866.photobucket.com_albums_ab225_cade37_M_20Roadster_IMG_1276.jpg


ai866.photobucket.com_albums_ab225_cade37_M_20Roadster_IMG_1273.jpg
 

shantybeater

Dedicated Member
Joined
Dec 16, 2011
Points
29
Great job on the sills liam, noticed last night whilst changing my rear brake pads that a bit of surface rust is showing. I think I will be carrying out the same job at some point soon. Did the panels all line up ok when you put the car back together?


Car looks mint BTW and the storm bits get a thumbs up from me
 
B

badman gee

Guest
we did mine shanty last week

the panels line up, but you need to pay attention when you do it.

its a job worth doing on all the zeds.

mark
 
Top