How To Guide MOD ..How to Stop the Dirt Getting into Your Sills (Maybe)

andz zed3

Dedicated Member
British Zeds
Joined
Feb 1, 2017
Points
33
Location
higher bebington wirral.
Model of Z
z3 1.9
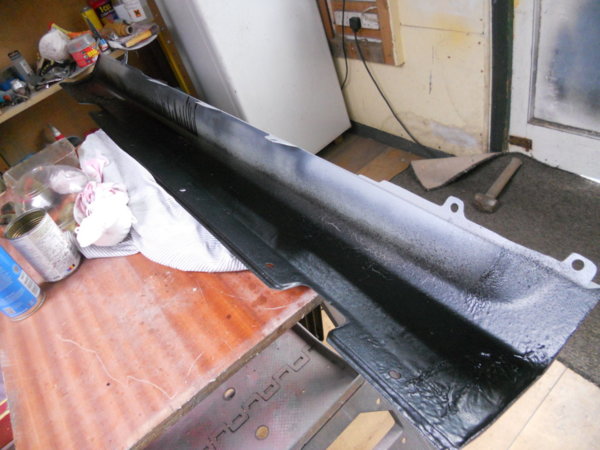
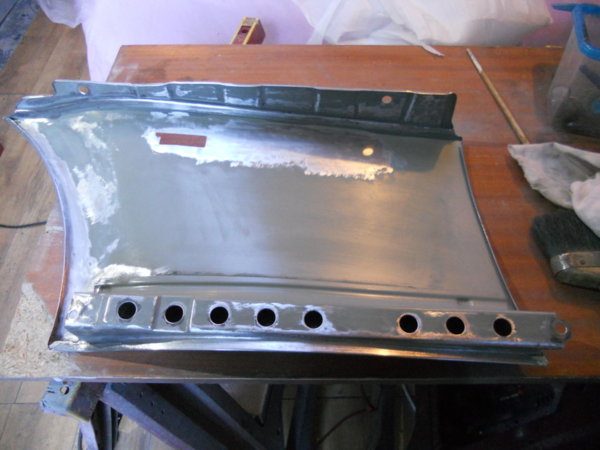
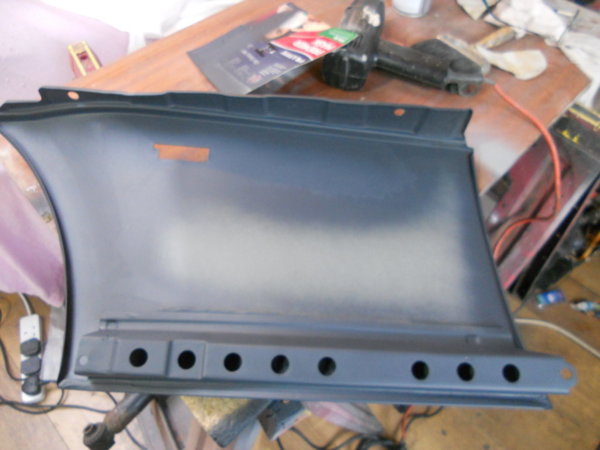
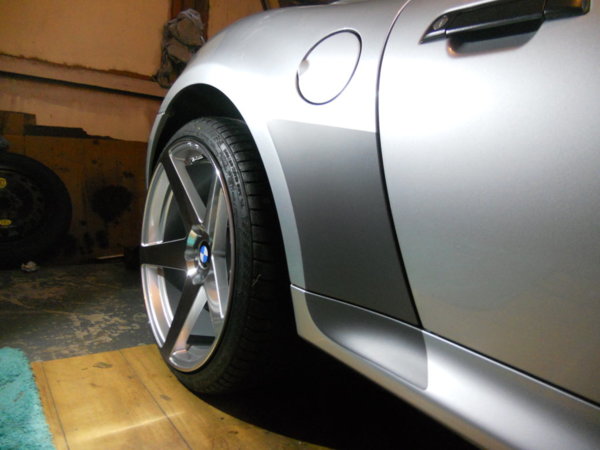
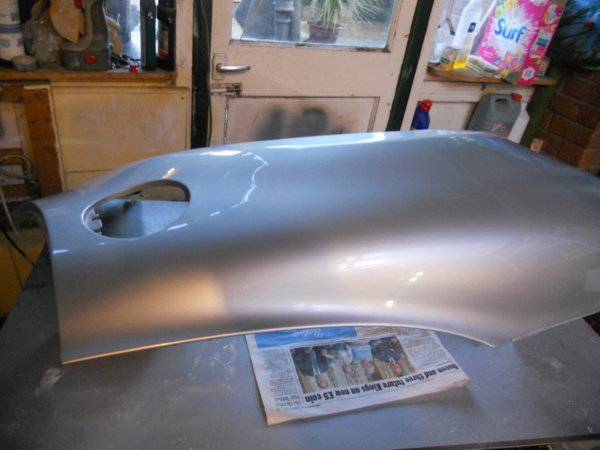
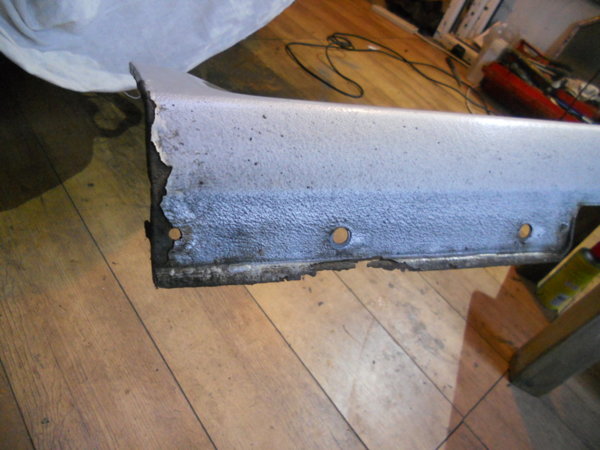
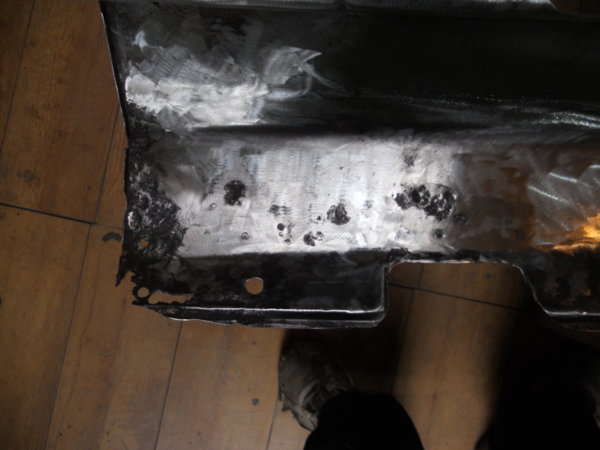
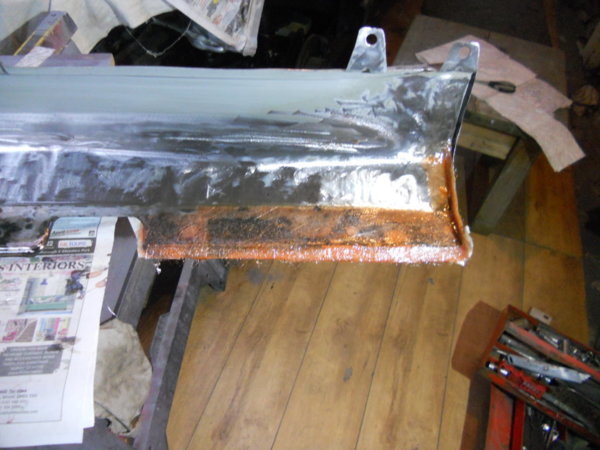
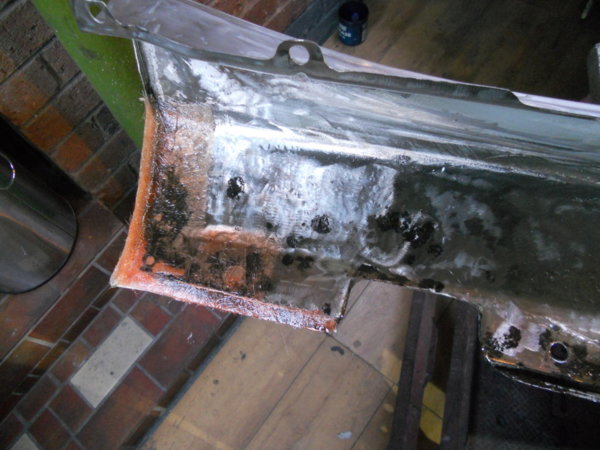
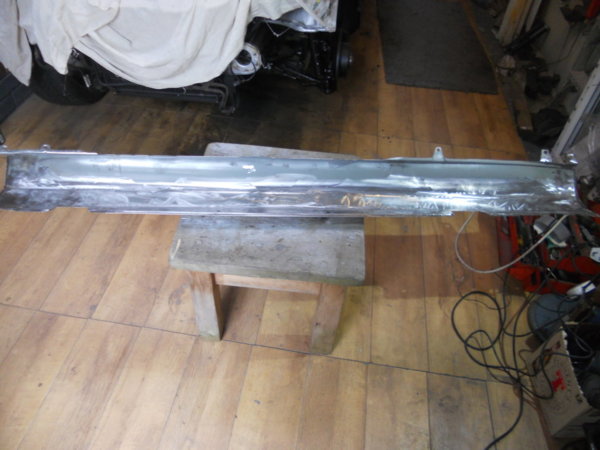
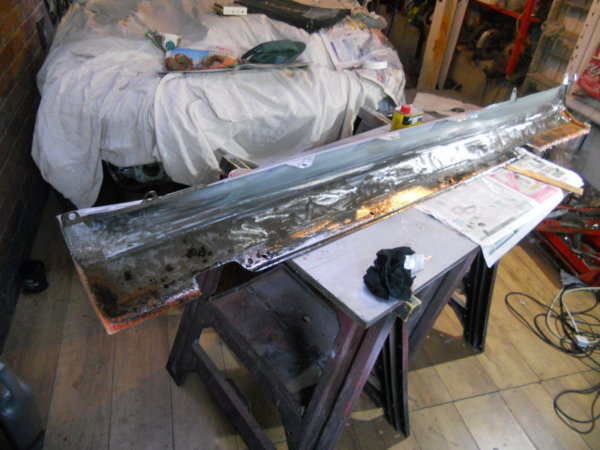
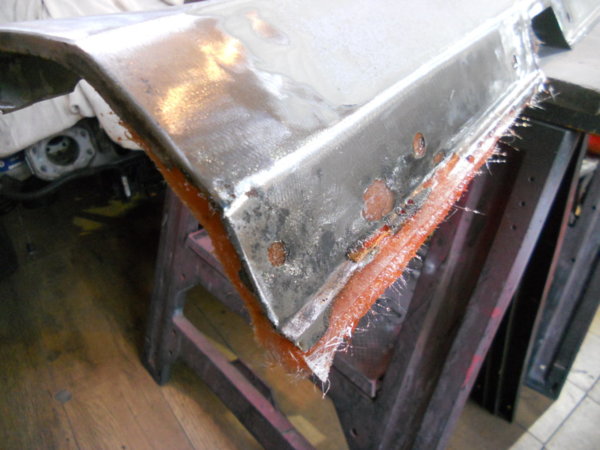
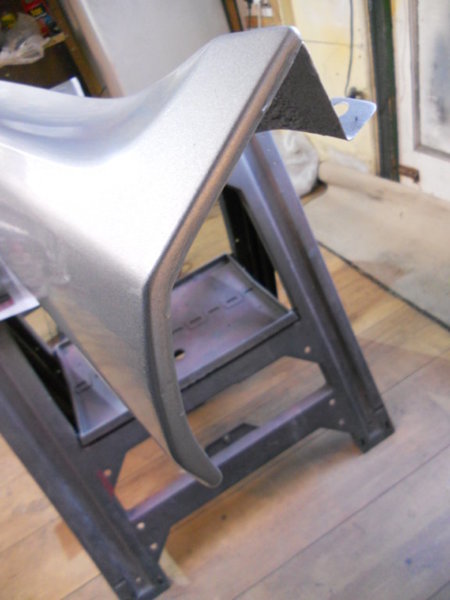
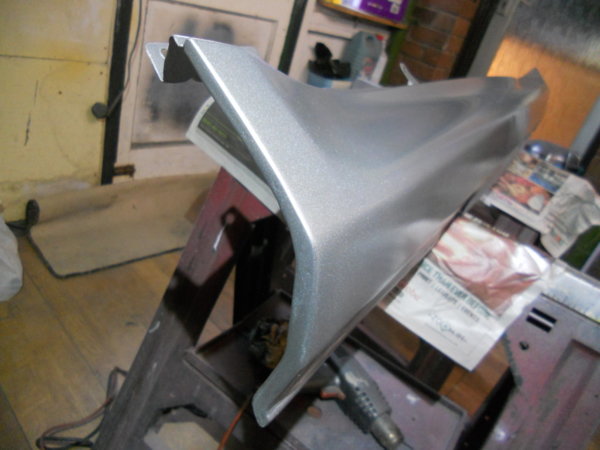
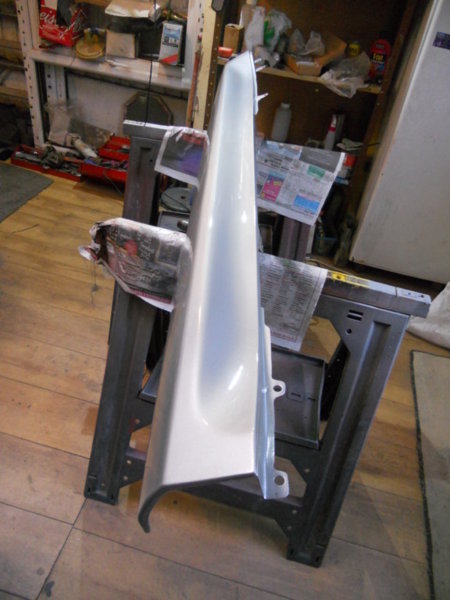
Great thanks for that, what a good piece of kit. I have done a lot of work already to the car removed all arch liners prepped inner arches and undersealed. also, sill sections, on my 2002 one sill almost lost the return edge so I decided to reinstate it with glass fiber hoping to get a few years out of it it looks like new, inside the sill was quite pitted, taken down to bare metal I coated with two coats of resin and two coats of underbody seal and sprayed silver, it looks like new, i removed the rear arch sorted blisters inside n out and stone chips where you can see the stone guard protector, and resprayed the rear arch with aerosols delighted with the result. The main chassis sill sections where caught in time. I have used butyl strips off a big role I had sealing in sinks/cookers to the worktop and sealed arch liners in especially the big hols BMW left all over the place to stop all the road dirt getting back in again,
 

Attachments

andz zed3

Dedicated Member
British Zeds
Joined
Feb 1, 2017
Points
33
Location
higher bebington wirral.
Model of Z
z3 1.9
I refitted the plastic jack supports with a deep bed of butyl squeezed it with the jack, them re-screwed them in place. now no more crap building up deteriorating a major point.
 

Nodzed

Zorg Expert (II)
Supporter
British Zeds
M Power
Joined
Feb 18, 2016
Points
231
Location
Forest of Dean, Gloucestershire, England
Model of Z
Z3M Imola and Z4 (e89)
Nice write up and information :thumbsup:

I’m currently in the process of replacing the outer sills on my Blue 2.8 as the are badly rusted at the ends. Also a bit concerned about the condition of the inner sills as the jacking points are not looking good at all.

Once everything is hopefully sorted and put back together I’ll definitely be looking to seal the ends up, so your info is going to be very useful. Don’t suppose you kept any templates?
No mate I didnt, but @roadvoyager1 has some for the front I believe, but to be honest they are so simple to make you wont have any problem doing it I don't think.
 

Jjim

Zorg Guru (IV)
British Zeds
Joined
Jul 21, 2017
Points
168
Location
Mansfield
Model of Z
1.9 Roadster

Nodzed

Zorg Expert (II)
Supporter
British Zeds
M Power
Joined
Feb 18, 2016
Points
231
Location
Forest of Dean, Gloucestershire, England
Model of Z
Z3M Imola and Z4 (e89)
Great thanks for that, what a good piece of kit. I have done a lot of work already to the car removed all arch liners prepped inner arches and undersealed. also, sill sections, on my 2002 one sill almost lost the return edge so I decided to reinstate it with glass fiber hoping to get a few years out of it it looks like new, inside the sill was quite pitted, taken down to bare metal I coated with two coats of resin and two coats of underbody seal and sprayed silver, it looks like new, i removed the rear arch sorted blisters inside n out and stone chips where you can see the stone guard protector, and resprayed the rear arch with aerosols delighted with the result. The main chassis sill sections where caught in time. I have used butyl strips off a big role I had sealing in sinks/cookers to the worktop and sealed arch liners in especially the big hols BMW left all over the place to stop all the road dirt getting back in again,
Looks nice :thumbsup:
 

Dino D

Zorg Guru (V)
British Zeds
Joined
Mar 28, 2014
Points
176
Location
Kent
Model of Z
2.8 Manual
Great thanks for that, what a good piece of kit. I have done a lot of work already to the car removed all arch liners prepped inner arches and undersealed. also, sill sections, on my 2002 one sill almost lost the return edge so I decided to reinstate it with glass fiber hoping to get a few years out of it it looks like new, inside the sill was quite pitted, taken down to bare metal I coated with two coats of resin and two coats of underbody seal and sprayed silver, it looks like new, i removed the rear arch sorted blisters inside n out and stone chips where you can see the stone guard protector, and resprayed the rear arch with aerosols delighted with the result. The main chassis sill sections where caught in time. I have used butyl strips off a big role I had sealing in sinks/cookers to the worktop and sealed arch liners in especially the big hols BMW left all over the place to stop all the road dirt getting back in again,
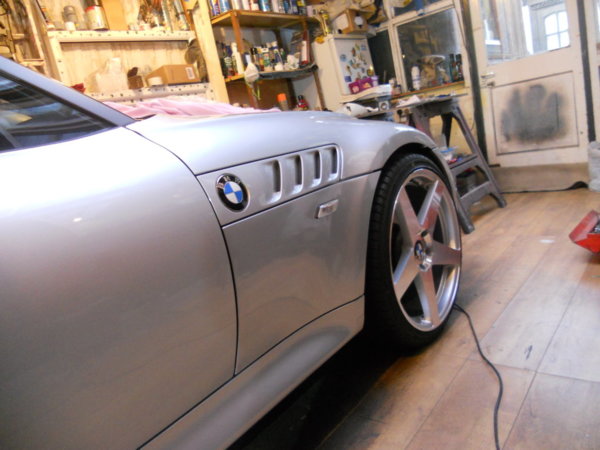
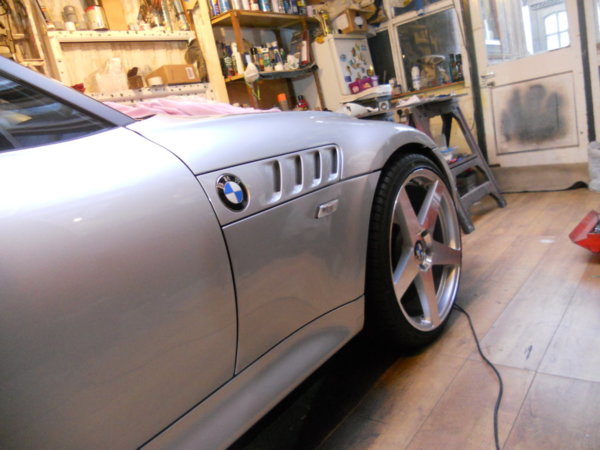
Those wheels look great, more pics of those please :)
 

Dino D

Zorg Guru (V)
British Zeds
Joined
Mar 28, 2014
Points
176
Location
Kent
Model of Z
2.8 Manual
I refitted the plastic jack supports with a deep bed of butyl squeezed it with the jack, them re-screwed them in place. now no more crap building up deteriorating a major point.
This is a good idea.
I wasn’t wondering if it was water coming down from the roof channels that causes the rust on the actual jacknpoints but it seems it is the muck coming up from the road?

Did you use the ‘liquid’ type butyl from a tube or the more ‘putty’ type on a roll?
 

andz zed3

Dedicated Member
British Zeds
Joined
Feb 1, 2017
Points
33
Location
higher bebington wirral.
Model of Z
z3 1.9
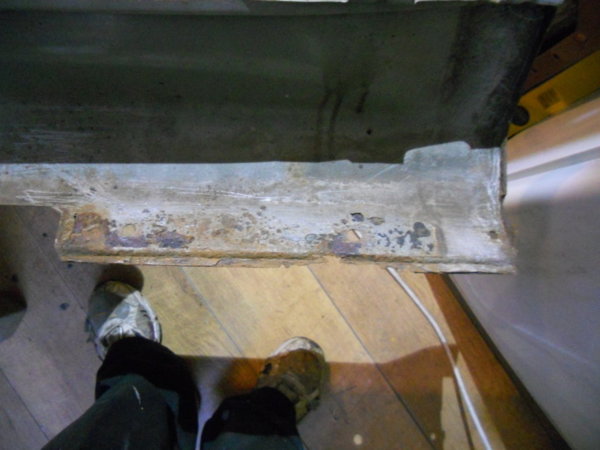
My sills probably like most cars not good, ground back l rebuilt returns sandwiched in fiberglass, retained the frail lower part needing to build onto. If I still had my MIG welder I would have replaced all the bad steel. anyhow its encased and I'm sure I will get quite a few years out of them. as you can see they now look mint, and I no longer have to worry about rust on the return edges.
 

Attachments

Jack Ratt

Zorg Expert (I)
Supporter
British Zeds
The West Country
Joined
Dec 3, 2013
Points
200
Location
TRURO, CORNWALL
Model of Z
2.8i AUTO and 2.8i MANUAL
Nice work
 

Mnbrennan

Zorg Guru (IV)
British Zeds
M Power
#ZedShed
Joined
Jul 25, 2015
Points
153
Location
Aylesbury
Model of Z
BMW M Coupe / 2.8 roadster
Any updates on the effectiveness of these Niall?
 

Bozzy

Zorg Guru (V)
Supporter
British Zeds
Joined
May 21, 2015
Points
191
Location
Long Eaton.
Model of Z
3 2.8
Nice work
My sills probably like most cars not good, ground back l rebuilt returns sandwiched in fiberglass, retained the frail lower part needing to build onto. If I still had my MIG welder I would have replaced all the bad steel. anyhow its encased and I'm sure I will get quite a few years out of them. as you can see they now look mint, and I no longer have to worry about rust on the return edges.
Wow you've made a fantastic job on those sills, top work :thumbsup:.

Steve .
 
Last edited:

Bazza

Zorg Guru (IV)
Supporter
British Zeds
The West Country
Joined
Oct 15, 2013
Points
156
Location
Verwood Dorset
Model of Z
2.8 Roadster
My sills probably like most cars not good, ground back l rebuilt returns sandwiched in fiberglass, retained the frail lower part needing to build onto. If I still had my MIG welder I would have replaced all the bad steel. anyhow its encased and I'm sure I will get quite a few years out of them. as you can see they now look mint, and I no longer have to worry about rust on the return edges.
Top job, I thought mine were bad :whistle:a job for everyone I think:thumbsup:
 

andz zed3

Dedicated Member
British Zeds
Joined
Feb 1, 2017
Points
33
Location
higher bebington wirral.
Model of Z
z3 1.9
just an update, I never got around to making plastic end caps for the sills, as a year on since rebuilding with fiberglass and resin( no body filler) they are still looking like brand new with no signs of any deterioration what so ever so I'm well chuffed.
 

Nodzed

Zorg Expert (II)
Supporter
British Zeds
M Power
Joined
Feb 18, 2016
Points
231
Location
Forest of Dean, Gloucestershire, England
Model of Z
Z3M Imola and Z4 (e89)
Any updates on the effectiveness of these Niall?
Yup, had the liners out earlier in the year and both ends of the sills were crud free and the sill ends are on as new condition. So a success I would say. :thumbsup:
 

ktnez99

Zorg Guru (IV)
British Zeds
Joined
May 18, 2018
Points
164
Location
West Midlands
Model of Z
Z3 2.8L
Yup, had the liners out earlier in the year and both ends of the sills were crud free and the sill ends are on as new condition. So a success I would say. :thumbsup:
Sounds a good solution and easy to do. Thanks for this @Nodzed
 

Jack Ratt

Zorg Expert (I)
Supporter
British Zeds
The West Country
Joined
Dec 3, 2013
Points
200
Location
TRURO, CORNWALL
Model of Z
2.8i AUTO and 2.8i MANUAL
Thanks for reposting this thread, I was looking for it now my car is on jack stands
 

len crissell

Regular Member
Joined
Nov 3, 2013
Points
22
I've been doing some long overdue maintenance on the Titan over the past week in as much I have had the sills and wings off a job I have been putting off for the past two years, firstly to check out the condition and secondly to give everything underneath a darn good clean and several coats of Waxoyl. (other brands of anti-rust products are available ;)) And luckily, no rust on the inner sills and just some surface rust on the inside of the outer, these were replaced with new ones as I had them ready, the old ones will get re-sprayed and go on another members Zed.
The Waxoyl was put on by brush (3 coats drying in between) then a liberal spaying of rattle can Waxoyl.
The arches front & back were also done.
Here's a few pics
View attachment 73642 View attachment 73643 View attachment 73644


OK this isn't a thread about that and I'm not going into any detail about sill removal as there are very informative and helpful threads already posted that can be better utilised. This is about what happened after.

So I'd spent money and time getting this job done, and I would (as I'm sure all other owners who have treated their sills would too) strongly advise all that haven't to get the sills off and treat the underside, it's not a difficult job it just takes a bit of time. It's pretty scary how much muck gets in and sits there rotting your sills from the inside out ..... UNSEEN. So I was saying I had spent time and money doing this but then got to thinking, it's going to happen again, OK I have treated everything but surely there is a way to improve this poor design that BMW has left us all with.

So I thought I'd make some covers that stop the crud getting into the sill via the poor fit of the wheel arch liners, as are two of them on my Zed.
View attachment 73665


And here's what I came up with.

I used;
1 plastic seed tray (strong but flexible plastic)
16 self tappers with washers (same as found on the Z3)
A dremel (but a junior hacksaw will do)
Sandpaper
A marker pen
Auto black silicon sealant
All the parts (excluding the dremel) came to under £20

Here's the seed tray, cost £4.75

View attachment 73647

First job (once the car is up off the ground and the wheels are off is to cut the flat base out of the tray.
View attachment 73648

As you can see the plastic is flexible, not solid and brittle I am assuming brittle plastic wouldn't last long against stone damage.

View attachment 73649


Once I had my sheet I cut a square piece, bigger that I needed for the first panel. I put it in place and then drew the outline of the sill on it and marked any other cuts I needed, then set to work with the Dremel (btw if you do this and use a Dremel beware the hot molten plastic bits flying off the cutting wheel, they burn :arghh::arghh:

So I ended up with this.
View attachment 73650

I then spent a few minutes fettling it with sandpaper to get the best fit I could

View attachment 73651


Now the beauty of spending extra time on the first one is, the opposite side is identical, just reversed so once you are happy just trace around the first on the plastic sheet before you fit it to create the second.


View attachment 73652


Clean up the edges with sandpaper and fit.

First job here is to place on the car and drill the holes for the self tappers before putting any sealant on.

I decided to use some sealant on the edges of the cover not touching the sills and to put extra waxoyl on the leading edge of the sill and the cover where it touches the sill.

View attachment 73653
View attachment 73654


Next job, screw it on, and I added a little more sealant to the covers edges, again only where plastic touches plastic.

View attachment 73655


For the rears its the same process just a different shape.

View attachment 73656

I have absolutely no idea if this will work, but this is how I view it.

The muck gets in there anyway and cant get out, anything that helps to stop this must be an improvement in my book, plus these covers will also protect the leading edges of the sills from stone chips and grit blasting from the wheels, again helping to keep the rust at bay, also its totally reversible if you need / want to remove it.
I haven't blocked any waterways so water that does get in can still drain out.

And though its not the prettiest solution, once the wheels are back on, and all the new shiny plastic has got as scarred and dirty as the rest of the liner you cant really see it.

View attachment 73657

Hope this is of some use and I have explained the process successfully.
 
Top