
You are using an out of date browser. It may not display this or other websites correctly.
You should upgrade or use an alternative browser.
You should upgrade or use an alternative browser.
Introducing... Smurf!!!
- Thread starter Mnbrennan
- Start date


TWO
Zorg Guru (I)
Hi TWO
The DAS6 is a dual action polisher, meaning that it has 2 planes of motion. This makes it much safer than a rotary...especially over panel edges. The most damage you can do really is to drop the machine on the car. It's what I first started out with
Its a perfectly adequate machine, it will just take longer to cut into the paint. The rotary creates more heat and as a result it can correct paint quicker. The downside is it's much easier to burn the paint.
My reference to not enough cut was in reference to the level of correction (swirls/scratches ) . Always start on the least level of cut possible and work your way up until you're happy. In my case that was a finishing pad plus medium Polish. Then to the finishing pad and medium Polish. The next level would have been a light cutting pad plus finishing polish. Then medium Polish etc.
Megs 101 and 102 polishes are what I first used. Always be conscious (in lieu of a paint thickness gauge) of the thickness of the paint. Generally a DA (like the DAS) will be safe on paint.
Oh and be sure to thoroughly clean and the clay the paint first. I forgot to mention I did that!
I'm by no means a pro, just an enthusiast by the way!
Cheers Martin........the confidence has now increased


Now then Martin, when will you start fitting the anti roll cage and stripping out the passenger seat and carpets. No good making it look good, after a few laps of the track it will be dirty again anyway!
Mike
Mike

Whahoooo! @Mnbrennan is going racing!! JIM

I wish Jim
Today I started out by painstakingly filling the hundreds of stone chips on the front bumper. I'll get it resprayed at some point.
Some cake modelling tools from tesco were the perfect... Tools...

Heres the before and after

Not perfect but fine for now!
I spent most of the rest of the day polishing the remainder of the car, sorry no pictures as I ended up with Polish dust everywhere. I'll take some pics once I've cleaned it!
I also replaced the number plates with some pressed metal ones


Finally I test fitted a spare Simota cone filter, which I never thought I'd get use of. Sounds great but needs a bracket!

Today I started out by painstakingly filling the hundreds of stone chips on the front bumper. I'll get it resprayed at some point.
Some cake modelling tools from tesco were the perfect... Tools...
Heres the before and after
Not perfect but fine for now!
I spent most of the rest of the day polishing the remainder of the car, sorry no pictures as I ended up with Polish dust everywhere. I'll take some pics once I've cleaned it!
I also replaced the number plates with some pressed metal ones
Finally I test fitted a spare Simota cone filter, which I never thought I'd get use of. Sounds great but needs a bracket!

Looks good, love the color!


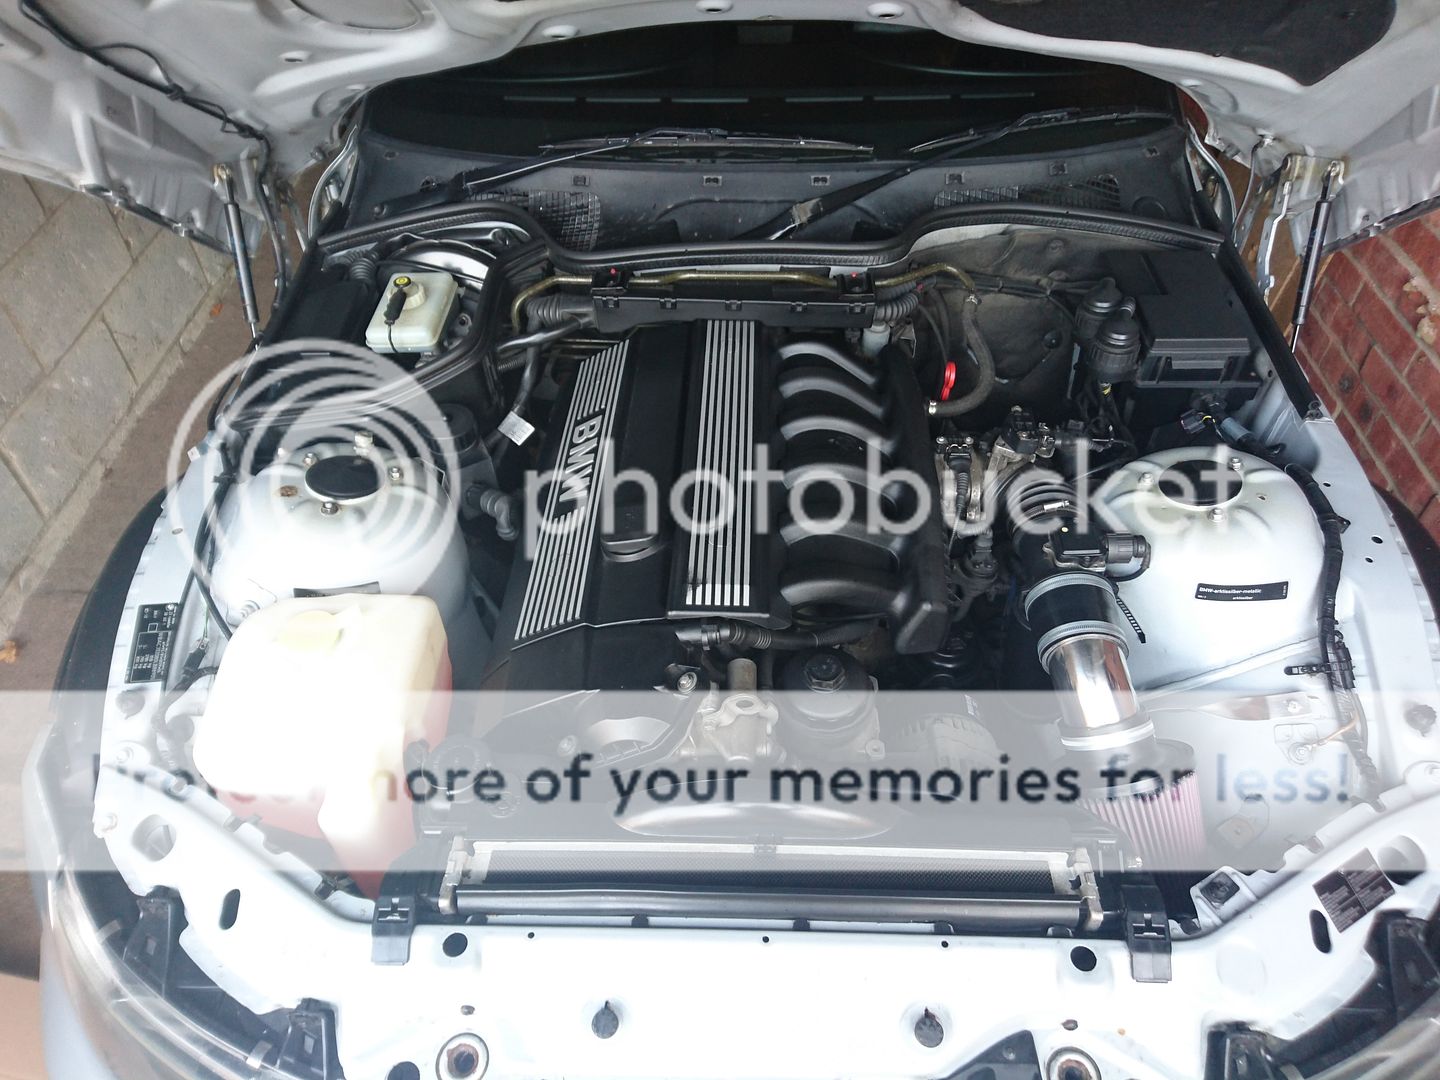
Your engine bay is a right mix of M52 and M52tu its must be right on the turn nearly everything looks M52 apart from the engine.
Bmw had a strange parts bin.!
Bmw had a strange parts bin.!

Your engine bay is a right mix of M52 and M52tu its must be right on the turn nearly everything looks M52 apart from the engine.
Bmw had a strange parts bin.!
looks identical to mine and thats a s reg m52
cars looking ace Martin, metal plates are a must for a cleaner look.
Mines a T Reg .Inlet throttle body rad washer bottle rad expansion etc all different.
If the car has the M52tu engine with the M52 manifold i wonder how it fairs with an M50 manifold conversion being Dual vanos.
The inlet being the restrictive bit on the M52 ?
Martins engine is just a standard M52 by the looks of it
just like mine
just like mine

Have relooked and my bad just seen the lump for the single vanos 
 Slowly steps away
Slowly steps away
Have relooked and my bad just seen the lump for the single vanos
either way they are all 2.8 beasties!
Today I cooked the headlights.... To attempt to install angles eyes and take the Amber lense out
Before

During

After


Unfortunately only the outer ring is working on both headlights
Before
During
After
Unfortunately only the outer ring is working on both headlights

Have you stuck them back together Martin?...Unfortunately only the outer ring is working on both headlights...

Err... Yeah...Have you stuck them back together Martin?
Might a have to give it 8 minutes at 85 degrees again!
In whose oven?Err... Yeah...
Might a have to give it 8 minutes at 85 degrees again!

They look great with just one ring per side.Today I cooked the headlights.... To attempt to install angles eyes and take the Amber lense out
Before
View attachment 56083
During
View attachment 56084
After
View attachment 56085
View attachment 56086
Unfortunately only the outer ring is working on both headlights

They are not Z3 specific ones are they? It looks like the inner ring has been bent slightly when its been pushed in, which could have broke the CCFL tube. They are very fragile and break easy, I know from experience
I have 2 new CCFL spares for the inner rings which are made for Z3 headlight's if you want them? They may not be as bright I can't remember what they are like and I don't think I have any inverters to test them, but if you want them give me a shout. Or try some LED ones, they need cutting down but are very bright and will last a lot longer than the CCFL ones.
I have 2 new CCFL spares for the inner rings which are made for Z3 headlight's if you want them? They may not be as bright I can't remember what they are like and I don't think I have any inverters to test them, but if you want them give me a shout. Or try some LED ones, they need cutting down but are very bright and will last a lot longer than the CCFL ones.