Rebody 250 California build thread for dummies

Pond

Zorg Guru (III)
British Zeds
Joined
Dec 26, 2016
Points
144
Location
Spaldingski, Lincs
Model of Z
Z3 project and E89 Z4
Driving the car on and off the trailer will double it's mileage in the last 15 months!
It hasn't moved since October 2023 and then I just reversed it into the garage from the trailer.

I am quite looking forward to seeing what a 3 litre Z3 goes like TBH. ;)
 

ruan

Dedicated Member
British Zeds
Joined
Apr 26, 2024
Points
38
Location
Berkshire
Model of Z
3
Sounds like you are going to have a busy few months, but it is all coming together.
 

Pond

Zorg Guru (III)
British Zeds
Joined
Dec 26, 2016
Points
144
Location
Spaldingski, Lincs
Model of Z
Z3 project and E89 Z4
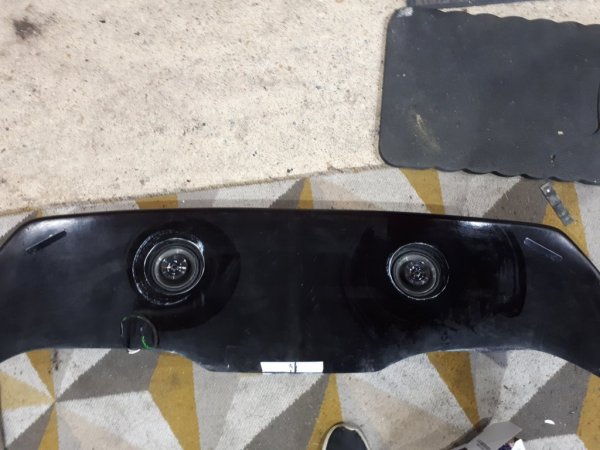
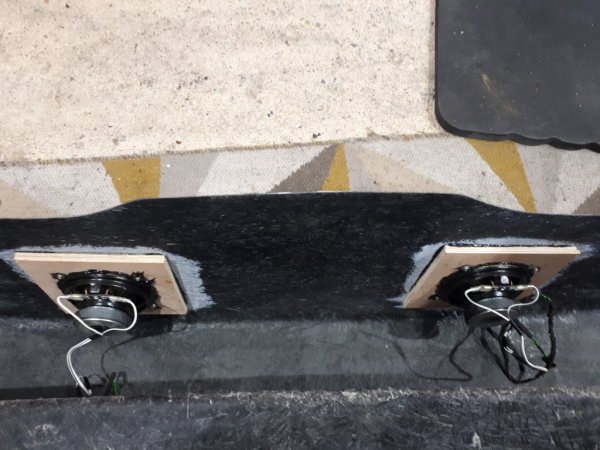
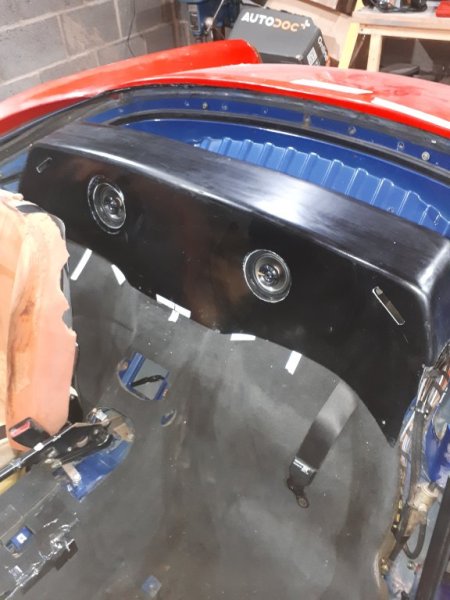
I tackled mounting my rear speakers in the rear cover yesterday and this morning.
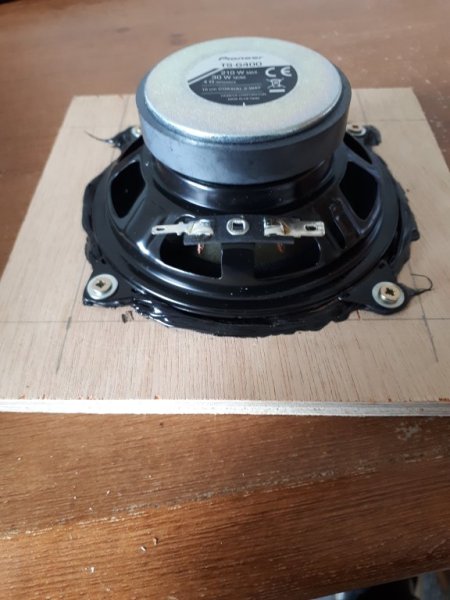
I bought a cheap pair of 4" Pioneers, as one of my BMW ones was blown anyway.
I needed to fit the speakers from the rear, as I want my upholsterer to cover the fronts and punch holes in the leather. I don't want speaker grilles.
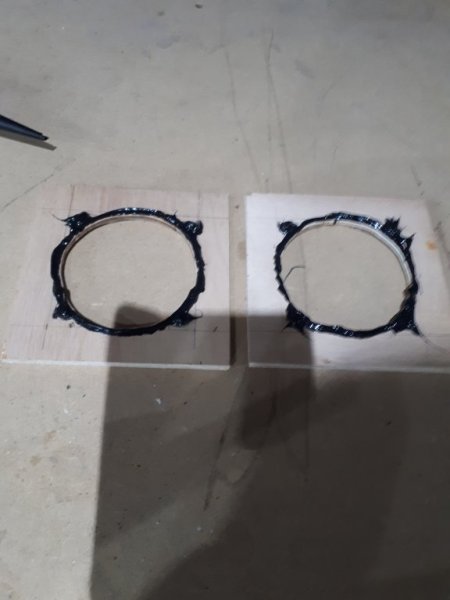
So I cut 4 squares of 5mm ply, two with 100mm holes and two with 96mm holes. I glued one of each together to give me a 10mm thick plate with a 'stepped hole'. I then put PU adhesive around the edge of the smaller hole at the rear and left that to cure.
Then I mounted the speakers onto the set PU adhesive, which effectively rubber mounts them, as PU sets like hard rubber.
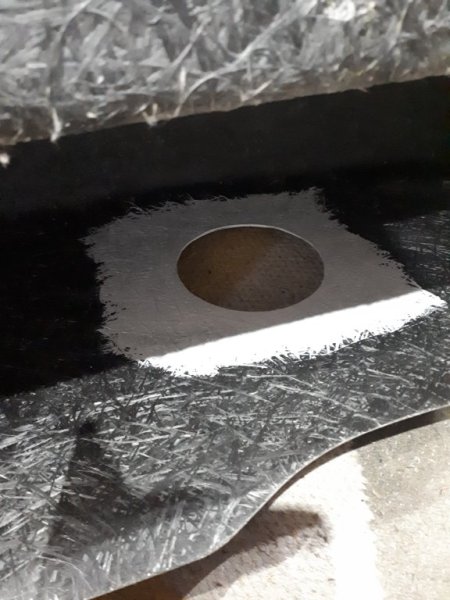
The whole lot was then PU glued to the inside of the cover, which also effectively rubber mounts the plates.
I have yet to try them but hopefully vibration and distortion should be significantly reduced than it would have been.
20250324_213444.jpg20250325_102339.jpg20250324_213531.jpg20250325_151543.jpg20250325_151640.jpg
 

Pond

Zorg Guru (III)
British Zeds
Joined
Dec 26, 2016
Points
144
Location
Spaldingski, Lincs
Model of Z
Z3 project and E89 Z4
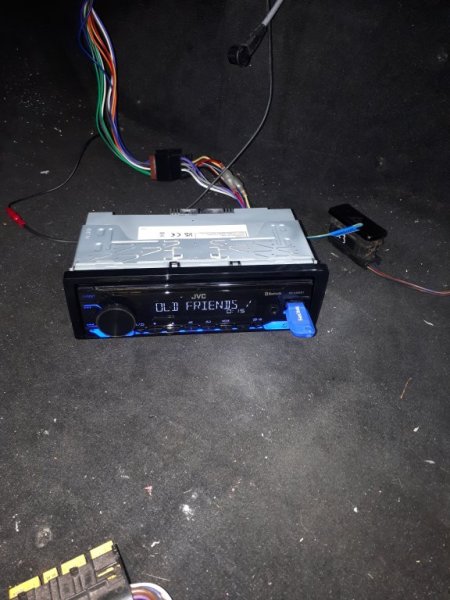
Plugged the speakers in and connected up the stereo. All good. A very small amount of vibration but it is a huge lump of thin GRP. I couldn't hear it, just feel it. More than happy with that.


20250325_163059.jpg20250325_163110.jpg
 

Pond

Zorg Guru (III)
British Zeds
Joined
Dec 26, 2016
Points
144
Location
Spaldingski, Lincs
Model of Z
Z3 project and E89 Z4
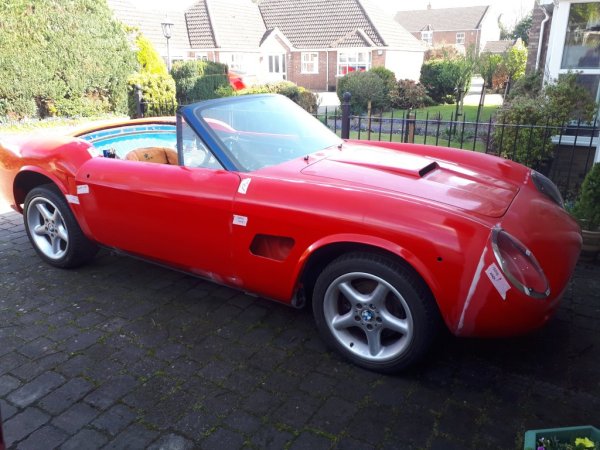
After 17 months of sitting in a dark, dingy garage, she sees the light of day for the first time.
She moves under her own steam too!
She 'hunts' a bit on tickover, but I am hoping that is due to stale fuel (God knows how old it is) and/or just lack of use.
20250326_122432.jpg20250326_122454.jpg
 

Pond

Zorg Guru (III)
British Zeds
Joined
Dec 26, 2016
Points
144
Location
Spaldingski, Lincs
Model of Z
Z3 project and E89 Z4
With my car away being made to look pretty by much more skillful people than me (hopefully), I have been doing a few jobs in it's absence.

First was to tidy my garage; it was a tip!

Second was to fill and sand all the imperfections in the dashboard and interior trim pieces, ready for upholstering.

Then I tackled my centre gauge pod housing. It is aluminium and was supplied to me straight off the milling machine, so was in a terrible state. Rough machining marks covering it's entirety. It was supplied with two pieces of 3D printed black plastic to sit behind the gauges. However, typical of the seller I bought it all from; they were terrible quality, different sizes and didn't fit anyway. So I resigned those to the bin.
I have never polished any metal before, so was a little nervous.
I started sanding the housing with 320 grit paper but it was taking too long, so I changed to 120 grit. This got most of the machining marks off, then went to 180, 320, 600 and finally 1200. It took a long while and was very fiddly.
Then I used my Dremel with little cotton wheels on and some polishing compound sticks or different grades I bought from eBay. This was trial and error, so I did the rear of the housing, which won't be seen, to practice.
I would say it took the best part of 12 hours to get the entire piece to a mirror shine, but well worth it. I then painted the inside rear with self-etching primer and four thin coats of satin black from a rattle can. The masking took a while too, as it needed to have clean lines as these will be seen.
I am extremely pleased with the results. Not sure if I am ready for stainless polishing yet, but aluminium.....sorted.

20250330_114452.jpg
20250330_191443.jpg
20250330_191620.jpg
 
Top