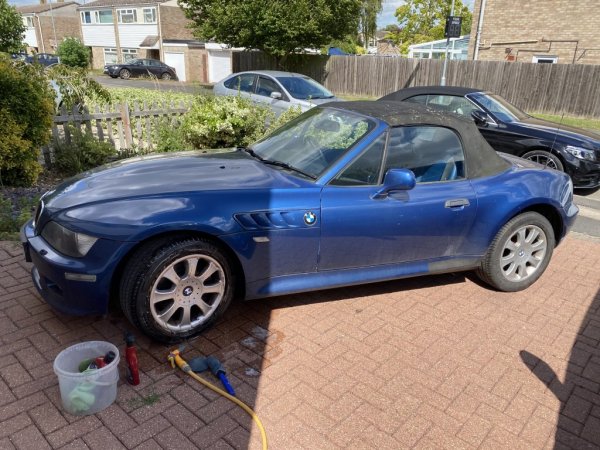
Z3 3.0 2000 “Project White Elephant”

Martin Sullivan

www.ZEDonist.com - ZED Parts
Supporter
British Zeds
Joined
Jul 7, 2020
Points
67
Location
Cambridge, United Kingdom
Model of Z
3.0 Roadster
Hi All,

I thought I’d write up a thread to share what’s going on with my 3.0 2000 Z3.
My plan is to include all the parts I’m using, my logic behind the choice and the ongoing cost (rounded to the nearest £5 or so).

The vehicle was owned by my parents and has been passed on, sold to, inherited by? yours truly.
The care from the “previous owners” is slightly patchy and the condition, patchy.
Everything on it is original. Servicing and essential work has been carried out.
My intention is to subtly improve it but keep the car as true to original specs. I say that now, but....


I took the Z3 on about 4 months ago and the first task was to go down to our Indy garage for an interim service and to get a stamp in the book. Job done. £120.


Second task. Oils.
There was no record of any oil changes other than engine oil.
I spent too long looking at all of this and got quite sick of it. As with so many things everyone has an opinion. America vs Europe vs Track vs Road vs OEM vs DIY mixes.
I settled on:
Gearbox Oil - BMW MTF LT2 - 2 litres £58 total
I was spending too long looking at it, BMW wasn’t much more expensive overall and it doesn’t get changed often. Ask for a discount.

Differential Oil - Castrol Syntrax Limited Slip 75W-140 Fully Synthetic - 2 litres £33 total
This was an obvious choice based and is recommended for the Z3 (according to the blurb on Opie)

There was (and still is) a noticeable whine from the steering when at full lock.
I thought it prudent to replace the power steering reservoir which has a built in filter (apparently) and the fluid.
Reservoir Meyle £16
Fluid - Fuchs Titan ATF 4000 Multifunctional Automatic Transmission Fluid - 1 litre £7.50

(I should have flushed the cooling system at this point.)


Third task. Fill it up with Shell V power, adding a bottle of cleaning additive (£5), then blast around! This is purely an R&D exercise. I obviously needed to fully assess the driving characteristics prior to carrying out any work. Right. Done. Fill it up again and off we go, further “assessment” needed.


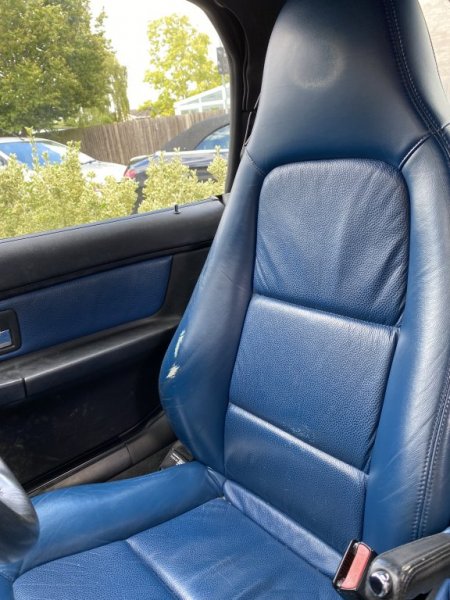
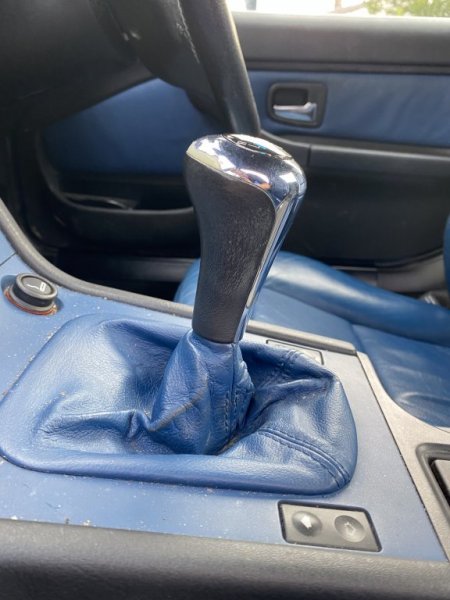
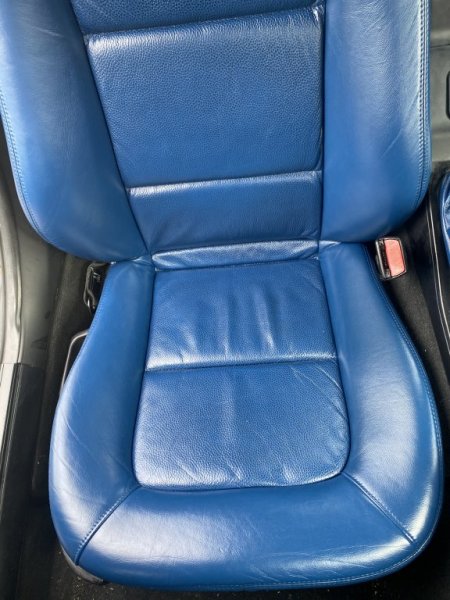
The first thing which really bugged me was the wear and tear of the interior. Nothing catastrophic, colour faded bolsters and gaiters, broken gear knob, filthy steering wheel.
I used the Colour Lock “Leather Dye Kit with Mild Cleaner”, I also got the “Leather Cleaning Spirit” £75. I spent about 2 hours on each seat and an hour on the gaiters.
The mild cleaner was strong enough to clean all the dirt and grime with patience and perseverance.
The amount of each product supplied in the kit is more than enough to do the the interior including door cards.
The dye would cover 4 seats easily.

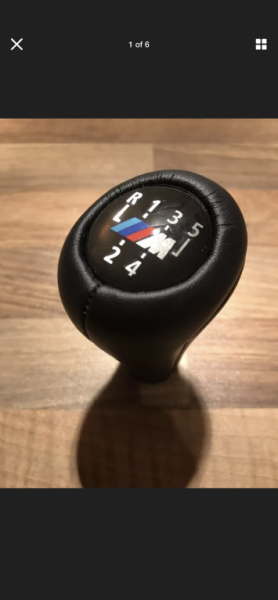
I found an aftermarket replica gear stick (5 speed with M logo as per original) on eBay for £21, the first one supplied didn’t fit properly (manufacturing error) but the seller was excellent and sorted it out. It is shorter than the original and all black, it has a much nicer throw and feel.

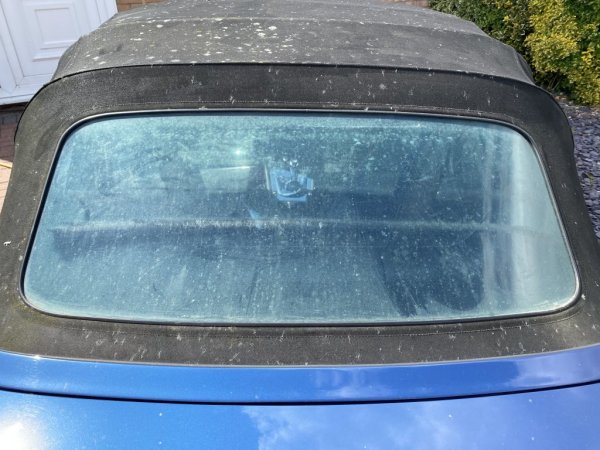
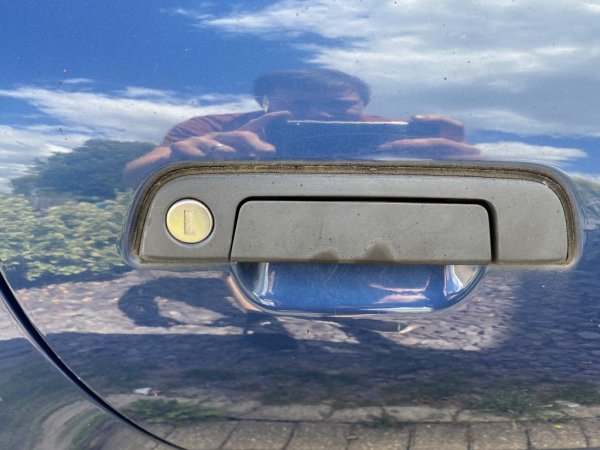
The whole car was pretty filthy inside and out. You can see the state of the soft top in the photos.
Renovo products have helped but it really needs replacing. £45.
I spent a bomb on a load of cleaning stuff as well. None of it has been used properly yet.

Having realised it drives like a bit of a jalopy and now it’s getting cold wet, I thought I’d look to make some mechanical improvements....
 

Attachments

Last edited:

Martin Sullivan

www.ZEDonist.com - ZED Parts
Supporter
British Zeds
Joined
Jul 7, 2020
Points
67
Location
Cambridge, United Kingdom
Model of Z
3.0 Roadster
Thanks Spurs. I don’t doubt I’ll take you up on that.
There’s tonnes of good stuff on this forum including other people’s projects.

Is power steering whine when at hard full lock normal? There’s no adverse effect or feeling.
 

Martin Sullivan

www.ZEDonist.com - ZED Parts
Supporter
British Zeds
Joined
Jul 7, 2020
Points
67
Location
Cambridge, United Kingdom
Model of Z
3.0 Roadster
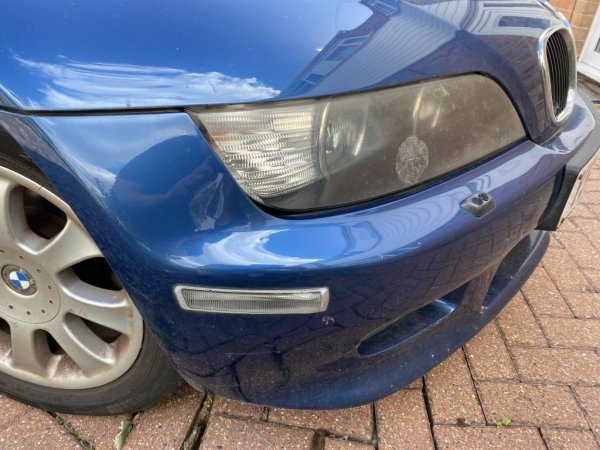
I also forgot to add that I’ve polished the headlights. They were pretty milky and unfortunately one of them is stained from having a European headlight adjustment sticker left on.

Autoglym headlight polisher - £25

995DB6A8-866D-4C43-8990-A0C8AA08EF88.jpeg


F6962532-2661-42E6-A900-485EB65F709D.jpeg

I did the few cosmetic bits first because why not and it also meant the other half could feel a little more special when driving.
 

SimonT

Dedicated Member
Joined
Sep 21, 2020
Points
34
Location
East SUSSEX
Model of Z
z3
Good advice/info with the oils, it is easy to get bogged down with all of the different choices.
Starting a similar tidy up with mine, sills first!.
 

ktnez99

Zorg Guru (IV)
British Zeds
Joined
May 18, 2018
Points
164
Location
West Midlands
Model of Z
Z3 2.8L
@Martin Sullivan interesting read and looking forward to more of your write ups on how you are working on your car. Got to ask: what benefit is there to adding cleaning additive to a full tank of Shell V?
 

Nodzed

Zorg Expert (II)
Supporter
British Zeds
M Power
Joined
Feb 18, 2016
Points
231
Location
Forest of Dean, Gloucestershire, England
Model of Z
Z3M Imola and Z4 (e89)
Differential Oil - Castrol Syntrax Limited Slip 75W-140 Fully Synthetic - 2 litres £33 total
You don't need to use LSD oil in your diff as its a Torsen diff (No clutch plates) standard 75W 90 diff oil will be fine.
 
  • Agree
Reactions: Lee

Martin Sullivan

www.ZEDonist.com - ZED Parts
Supporter
British Zeds
Joined
Jul 7, 2020
Points
67
Location
Cambridge, United Kingdom
Model of Z
3.0 Roadster
You don't need to use LSD oil in your diff as its a Torsen diff (No clutch plates) standard 75W 90 diff oil will be fine.
Thanks for the advice. I spent a while trying to work this out and found no definitive answer, other than dismantle your diff.
From what I understand the Castrol I used will be fine for it.
I’m perfectly happy to be corrected if I am wrong.
 

Nodzed

Zorg Expert (II)
Supporter
British Zeds
M Power
Joined
Feb 18, 2016
Points
231
Location
Forest of Dean, Gloucestershire, England
Model of Z
Z3M Imola and Z4 (e89)
Thanks for the advice. I spent a while trying to work this out and found no definitive answer, other than dismantle your diff.
From what I understand the Castrol I used will be fine for it.
I’m perfectly happy to be corrected if I am wrong.
It's fine just going forward trying to save you a few quid ;)
 

Martin Sullivan

www.ZEDonist.com - ZED Parts
Supporter
British Zeds
Joined
Jul 7, 2020
Points
67
Location
Cambridge, United Kingdom
Model of Z
3.0 Roadster
@Martin Sullivan interesting read and looking forward to more of your write ups on how you are working on your car. Got to ask: what benefit is there to adding cleaning additive to a full tank of Shell V?
Hi
The car has mainly run on supermarket fuel rather than anything premium. I haven’t had any issues with the engine so I’ve had no reason to use fuel additive, it’s just something I do.
I’m sure there’s plenty of “evidence” for and against it’s use some of which I believe, some not so much.

We once had an old petrol Corsa which was a bit rough, the fuel additive made a marked difference after a tank with additive had been through.
I’ve also had a number of diesel work vehicles which have exceeded 250,000miles. All have had additive used every 50-60k Miles.
I’m not saying my Z3 needed it or advocating fuel additives to anyone, it’s simply something I do once in a while as a personal choice.
 

Martin Sullivan

www.ZEDonist.com - ZED Parts
Supporter
British Zeds
Joined
Jul 7, 2020
Points
67
Location
Cambridge, United Kingdom
Model of Z
3.0 Roadster
It's fine just going forward trying to save you a few quid ;)
Definitely wish I’d checked on here / asked before hand. I’m not fussed about the extra few quid but I could have spent several hours doing or researching something more constructive! Time is something we are all short of.
 

Nodzed

Zorg Expert (II)
Supporter
British Zeds
M Power
Joined
Feb 18, 2016
Points
231
Location
Forest of Dean, Gloucestershire, England
Model of Z
Z3M Imola and Z4 (e89)
Definitely wish I’d checked on here / asked before hand. I’m not fussed about the extra few quid but I could have spent several hours doing or researching something more constructive! Time is something we are all short of.
Always ask here first, there is always someone who has suffered your pain in the past and now has an answer. ;) =))
 

t-tony

Zorg Expert (II)
Supporter
British Zeds
#ZedShed
Joined
Dec 31, 2013
Points
226
Location
Torksey Lock,Lincoln, England
Model of Z
E89 Z4 23i Auto
Thanks Spurs. I don’t doubt I’ll take you up on that.
There’s tonnes of good stuff on this forum including other people’s projects.

Is power steering whine when at hard full lock normal? There’s no adverse effect or feeling.
The power steering system has a relief valve where when in full lock it releases the fluid back around the system. That is probably what you are hearing. If, with slight movement off full lock, it stops that is what it is.

Tony.
 

Martin Sullivan

www.ZEDonist.com - ZED Parts
Supporter
British Zeds
Joined
Jul 7, 2020
Points
67
Location
Cambridge, United Kingdom
Model of Z
3.0 Roadster
The power steering system has a relief valve where when in full lock it releases the fluid back around the system. That is probably what you are hearing. If, with slight movement off full lock, it stops that is what it is.

Tony.
It is exactly as you’ve described. Thanks for clarifying that.
 

t-tony

Zorg Expert (II)
Supporter
British Zeds
#ZedShed
Joined
Dec 31, 2013
Points
226
Location
Torksey Lock,Lincoln, England
Model of Z
E89 Z4 23i Auto
No worries Martin, happy to help.

Tony.
 

Martin Sullivan

www.ZEDonist.com - ZED Parts
Supporter
British Zeds
Joined
Jul 7, 2020
Points
67
Location
Cambridge, United Kingdom
Model of Z
3.0 Roadster
The next steps:

Having seen under the car when it was being serviced I knew roughly what I was in for at the front end and with the sills, the back looked hard and scary.

At this point of my project I discovered this fantastic forum. It is a superb guide and confidence builder. You’re not alone in your project and you can trust the advice. Phew!

So.
Rust.

Before the sills were off I knew they were condemned. They’re shot to bits and both sides have had patches welded in. The patches had some sort of Waxoyl covering inside and out which was just horrible. So so horrible.

EC71DF04-043D-4111-B480-5355413F8E80.jpeg

CD4A5655-5C58-47F7-9998-07998401E0ED.jpeg

I’m fortunate that my dad has a habit of buying just about every tool so that’s keeping my capital costs down. The challenge is finding them all!

Jacking up the car I’m using a cheap euro car parts 2 tonne trolley jack. It’s alright but the 3 tonne jack is better.
The axle stands I’m using are a pair of 2 tonne jacks and a pair of 3 tonne. Again. The 3 tonne are far more reassuring.

When removing the wheel arch liners I broke some of the threaded studs holding the liner in place. Oops.
I’ve since learnt you should cut the plastic retaining nuts off with a dremmel or butcher them off with a pair of side cutters to avoid snapping the threaded stud.
I’ve also learnt to fix this you can grind the stud back to bare metal then drill and fix a threaded rivet.
https://zroadster.org/threads/threaded-studs-wheel-well-and-underbody.40273/

There’s plenty of YouTube videos and threads on how to remove the sills
https://zroadster.org/articles/bmw-z3-sill-removal-and-protection.67/
View: https://m.youtube.com/watch?v=U7pYIbwNZt0


With the sills off they’re as expected and dead.
BMW have quoted £130 inc VAT per sill bare.

Having got the arch liners off you begin to realise why things go rusty!

13AD9679-08E1-4969-8620-5087C57AF938.jpeg


With access to the chassis I got to work with the wire brushes in a drill and grinder. This is a loooong task but worth doing well. I’m working on my drive, with the car on 4 stands, lying on my back. It’s a chore but I’m enjoying it.
If you’re going to work like this make sure you wear a decent FFP2 or 3 mask (screwfix 1344K £2.91), goggles (screwfix 36877 £11.66) and decent preferably cut resistant gloves. The muck that comes off you don’t want in your eyes or lungs.
82CA25C7-E21A-4CB4-BA2A-8F435ECB65CA.jpeg

@Woodsta888 2.0 Refurb Project is a worthwhile read. He’s doing a similar project and he’s doing a good write up. I stole some of his ideas. He has a bucket of grinding pads etc which I’ve copied the use of.

https://zroadster.org/threads/2-0-refurb-project.37507/


The parts I used / copied:
I strongly recommend an angle grinder, I’ve borrowed one from my father in law.
I was going to buy a Mac Allister or Erbauer grinder. Cheap and cheerful. I’ve taken walls down and refurbished a house with a battery Mac Allister SDS so don’t underestimate the brand for DIY use.

Screwfix:
970GF or 763FV angle grinder £24.99-£34.99(what I was going to buy, cheap and cheerful for what I need)
868JG flap disc 120 grit £3.49 x1
346JG flap disc 80 grit £3.49 x1
7650G flap disc 60 grit £3.49 x1
61401 Abrasive flap wheel 60 grit £4.49 x1
289JJ Spindle flap wheel 80 grit £4.49 x1
415JG Crimped wire wheel 50mm £1.99 x1
644JF Norton crimped wire wheel 50mm £3.49 x2
380JF Norton preparation brush set 25-50mm 3 piece £7.99

In brief. The angle grinder flap wheels are great for covering all the flat areas as well as some of the angles, for making sparks and feeling like a boss!
60 grit is too rough but was great at removing the Waxoyl as were the wire brushes.
80 grit is good for the rustiest ends.
120 grit is good for getting rid of the existing paint.
The wire brushes are essential for all the bits and bobs especially the crimped wire wheel. I used the wire wheel more than anything, it’s especially good at getting rid of seam sealer on the underside.
The abrasive flap wheel is alright for getting around things but overall I prefer the wire brushes.

Any surface rust was taken back to bare metal.
All deep rust has been ground back to solid metal ready for the rust inhibiter.
All the flat painted areas were gone over with the wire brushes or flap wheels to remove any developing rust spots and etch the existing paint (which seems very thin).

Unfortunately the front ends of my sills have rusted through around the 25mm grommet. I’ll need to cut this section out and weld in a small patch on both sides. I’ve painted it for the time being.

E251972C-8CE3-4EDA-B492-2D2B96F5FE2A.jpeg

Rust treatment and paint:

I spent sometime reading about what paint and rust inhibitor to use. It got boring.
I have experience using Jenolite, I’ve got a bit left but needed a lot more.
Having spent a while looking about and comparing I decided to go with a 2 part epoxy paint.
I’m using everything from Rustbuster (www.rust.co.uk). I liked their website it’s very informative so check it out.
They’re a UK based company, reasonably priced and well regarded in the classic car world. I had a couple of questions so rang them, they were responsive, keen and informed.

I got their “Chassis Restoration Value Pack” which contains a degreaser, rust inhibitor and the epoxy paint with thinners £79.99
I also bought some measuring / paint mixing cups from them, 10 for £3. Cheaper than amazon and quicker than ebay.

Typically I use 100ml (50ml of Part A and B) of the 2 part epoxy with 5% thinners to generously cover one sill and a bit extra here and there. It’s about 15degrees and it goes on like treacle.
I’ve brushed it on with a 2” brush £2, which gets thrown out afterwards.
(If I wasn’t getting odds and sods powder coated I suspect the quantity of paint in this kit would cover all control arms, chassis, sills and back end tasks).

One alternative was Por15 which a friend is using to restore a TVR. He really likes it. To me it seems expensive and I don’t buy into “paint direct over rust” claims.
688F2B62-F634-4723-BF6E-B2394B28B35F.jpeg

C2EF66FE-ADA7-4F39-BF34-F59A3389B22A.jpeg


I’m tempted to give everything a second coat with white (for contrast) hammerite smooth for a belt and braces approach.
Once I’m done with the painting I’ll cover all necessary areas with paint on seam sealer (G+Pro 1kg ebay £16.49).
I’m also pondering wether to dust over the areas with some Topaz blue spray paint on the more visible areas just for a closer to OEM finish and for my own satisfaction.

I’ve bought cavity waxes (penetrator and active) from Rustbuster but I haven’t got to this job yet.
 
Last edited:

t-tony

Zorg Expert (II)
Supporter
British Zeds
#ZedShed
Joined
Dec 31, 2013
Points
226
Location
Torksey Lock,Lincoln, England
Model of Z
E89 Z4 23i Auto
Don’t forget that these sill covers are exactly that, they are covers. They are not structural in any way and are only “body work” it is the inner sill box sections that are important and need to structurally soun. You could take the car for MOT without the outer sill covers on and assuming the inner box sections were solid it would pass the test.

Tony.
 

Michael Burridge

Zorg Guru (II)
Supporter
Joined
Sep 25, 2019
Points
100
Model of Z
3.0
Don’t forget that these sill covers are exactly that, they are covers. They are not structural in any way and are only “body work” it is the inner sill box sections that are important and need to structurally soun. You could take the car for MOT without the outer sill covers on and assuming the inner box sections were solid it would pass the test.

Tony.
Good advice Tony. Do you know if the wheel arc
The next steps:

Having seen under the car when it was being serviced I knew roughly what I was in for at the front end and with the sills, the back looked hard and scary.

At this point of my project I discovered this fantastic forum. It is a superb guide and confidence builder. You’re not alone in your project and you can trust the advice. Phew!

So.
Rust.

Before the sills were off I knew they were condemned. They’re shot to bits and both sides have had patches welded in. The patches had some sort of Waxoyl covering inside and out which was just horrible. So so horrible.

View attachment 160129
View attachment 160131
I’m fortunate that my dad has a habit of buying just about every tool so that’s keeping my capital costs down. The challenge is finding them all!

Jacking up the car I’m using a cheap euro car parts 2 tonne trolley jack. It’s alright but the 3 tonne jack is better.
The axle stands I’m using are a pair of 2 tonne jacks and a pair of 3 tonne. Again. The 3 tonne are far more reassuring.

When removing the wheel arch liners I broke some of the threaded studs holding the liner in place. Oops.
I’ve since learnt you should cut the plastic retaining nuts off with a dremmel or butcher them off with a pair of side cutters to avoid snapping the threaded stud.
I’ve also learnt to fix this you can grind the stud back to bare metal then drill and fix a threaded rivet.
https://zroadster.org/threads/threaded-studs-wheel-well-and-underbody.40273/

There’s plenty of YouTube videos and threads on how to remove the sills
https://zroadster.org/articles/bmw-z3-sill-removal-and-protection.67/
View: https://m.youtube.com/watch?v=U7pYIbwNZt0


With the sills off they’re as expected and dead.
BMW have quoted £130 inc VAT per sill bare.

Having got the arch liners off you begin to realise why things go rusty!

View attachment 160137

With access to the chassis I got to work with the wire brushes in a drill and grinder. This is a loooong task but worth doing well. I’m working on my drive, with the car on 4 stands, lying on my back. It’s a chore but I’m enjoying it.
If you’re going to work like this make sure you wear a decent FFP2 or 3 mask (screwfix 1344K £2.91), goggles (screwfix 36877 £11.66) and decent preferably cut resistant gloves. The muck that comes off you don’t want in your eyes or lungs.
View attachment 160133
@Woodsta888 2.0 Refurb Project is a worthwhile read. He’s doing a similar project and he’s doing a good write up. I stole some of his ideas. He has a bucket of grinding pads etc which I’ve copied the use of.

https://zroadster.org/threads/2-0-refurb-project.37507/


The parts I used / copied:
I strongly recommend an angle grinder, I’ve borrowed one from my father in law.
I was going to buy a Mac Allister or Erbauer grinder. Cheap and cheerful. I’ve taken walls down and refurbished a house with a battery Mac Allister SDS so don’t underestimate the brand for DIY use.

Screwfix:
970GF or 763FV angle grinder £24.99-£34.99(what I was going to buy, cheap and cheerful for what I need)
868JG flap disc 120 grit £3.49 x1
346JG flap disc 80 grit £3.49 x1
7650G flap disc 60 grit £3.49 x1
61401 Abrasive flap wheel 60 grit £4.49 x1
289JJ Spindle flap wheel 80 grit £4.49 x1
415JG Crimped wire wheel 50mm £1.99 x1
644JF Norton crimped wire wheel 50mm £3.49 x2
380JF Norton preparation brush set 25-50mm 3 piece £7.99

In brief. The angle grinder flap wheels are great for covering all the flat areas as well as some of the angles, for making sparks and feeling like a boss!
60 grit is too rough but was great at removing the Waxoyl as were the wire brushes.
80 grit is good for the rustiest ends.
120 grit is good for getting rid of the existing paint.
The wire brushes are essential for all the bits and bobs especially the crimped wire wheel. I used the wire wheel more than anything, it’s especially good at getting rid of seam sealer on the underside.
The abrasive flap wheel is alright for getting around things but overall I prefer the wire brushes.

Any surface rust was taken back to bare metal.
All deep rust has been ground back to solid metal ready for the rust inhibiter.
All the flat painted areas were gone over with the wire brushes or flap wheels to remove any developing rust spots and etch the existing paint (which seems very thin).

Unfortunately the front ends of my sills have rusted through around the 25mm grommet. I’ll need to cut this section out and weld in a small patch on both sides. I’ve painted it for the time being.

View attachment 160135
Rust treatment and paint:

I spent sometime reading about what paint and rust inhibitor to use. It got boring.
I have experience using Jenolite, I’ve got a bit left but needed a lot more.
Having spent a while looking about and comparing I decided to go with a 2 part epoxy paint.
I’m using everything from Rustbuster (www.rust.co.uk). I liked their website it’s very informative so check it out.
They’re a UK based company, reasonably priced and well regarded in the classic car world. I had a couple of questions so rang them, they were responsive, keen and informed.

I got their “Chassis Restoration Value Pack” which contains a degreaser, rust inhibitor and the epoxy paint with thinners £79.99
I also bought some measuring / paint mixing cups from them, 10 for £3. Cheaper than amazon and quicker than ebay.

Typically I use 100ml (50ml of Part A and B) of the 2 part epoxy with 5% thinners to generously cover one sill and a bit extra here and there. It’s about 15degrees and it goes on like treacle.
I’ve brushed it on with a 2” brush £2, which gets thrown out afterwards.
(If I wasn’t getting odds and sods powder coated I suspect the quantity of paint in this kit would cover all control arms, chassis, sills and back end tasks).

One alternative was Por15 which a friend is using to restore a TVR. He really likes it. To me it seems expensive and I don’t buy into “paint direct over rust” claims.
View attachment 160139
View attachment 160141

I’m tempted to give everything a second coat with white (for contrast) hammerite smooth for a belt and braces approach.
Once I’m done with the painting I’ll cover all necessary areas with paint on seam sealer (G+Pro 1kg ebay £16.49).
I’m also pondering wether to dust over the areas with some Topaz blue spray paint on the more visible areas just for a closer to OEM finish and for my own satisfaction.

I’ve bought cavity waxes (penetrator and active) from Rustbuster but I haven’t got to this job yet.
Good job you're doing there.
 

Michael Burridge

Zorg Guru (II)
Supporter
Joined
Sep 25, 2019
Points
100
Model of Z
3.0
Sorry Tony - my post should have read - Do you know if wheel arch liners need to be in place for the MOT? I'm guessing not??
 

t-tony

Zorg Expert (II)
Supporter
British Zeds
#ZedShed
Joined
Dec 31, 2013
Points
226
Location
Torksey Lock,Lincoln, England
Model of Z
E89 Z4 23i Auto
Hi Michael, no they do not, but bear in mind the leaving them off gives the tester visual access to part they would not normally see.
In some cases that could be a good thing.

Tony.
 
Top