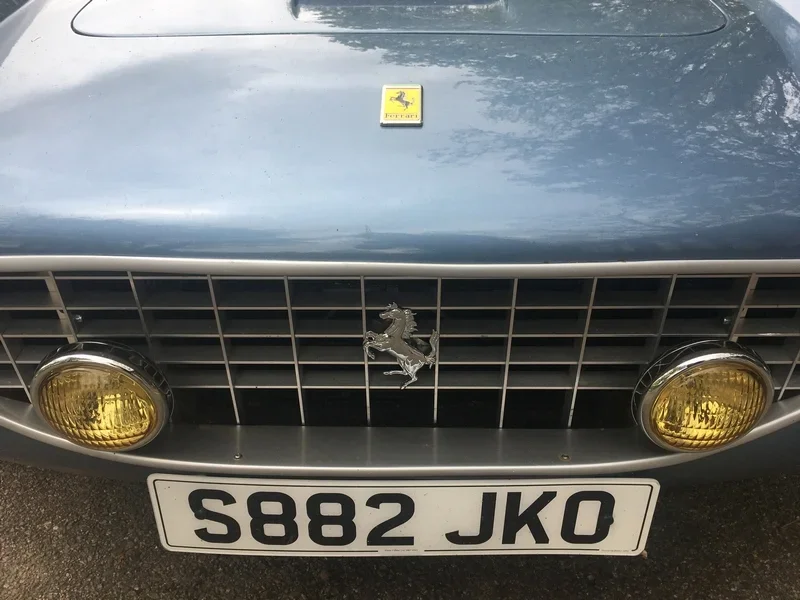
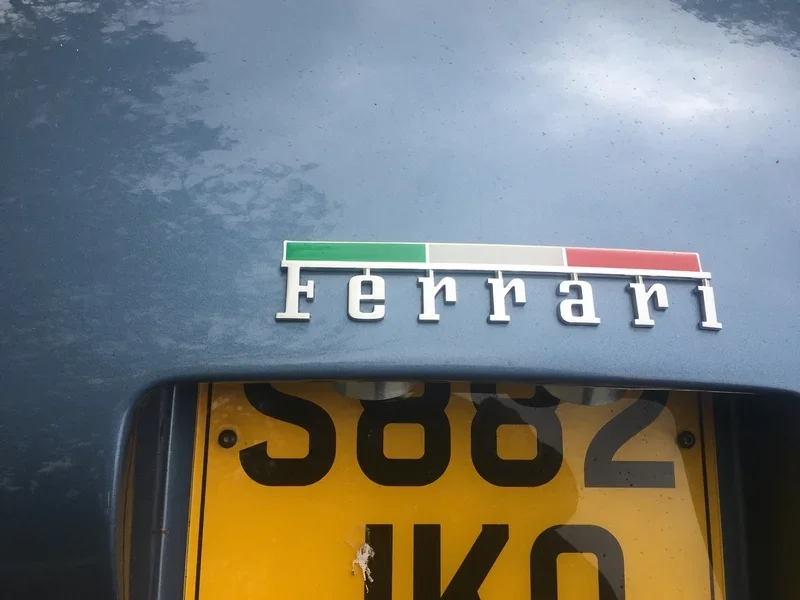
Rebody Z3 2.8 Based Ferrari 250 Build

The Exterior:

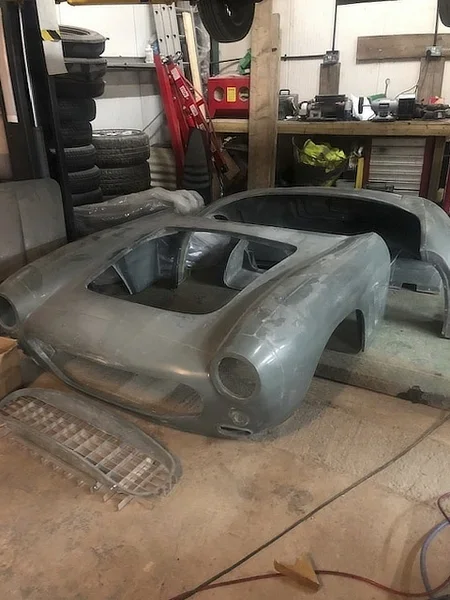
I get a phone call from Classic Coachworks 3-weeks ahead of schedule saying they have had a cancellation from a European customer as they cannot deliver to Europe (C-19 restrictions) and do I want the kit early - Duhhh!!!

Remaining kit payment is made, van is hired, another trip to Little London (Basingstoke) is underway to pick up the kit, No sign of @Lee and his dad this time though. All goes in a Puegeot Boxer van easily and we are homeward bound ("i wish i was, homeward bound" - Simon & Garfunkel - Never liked them!).

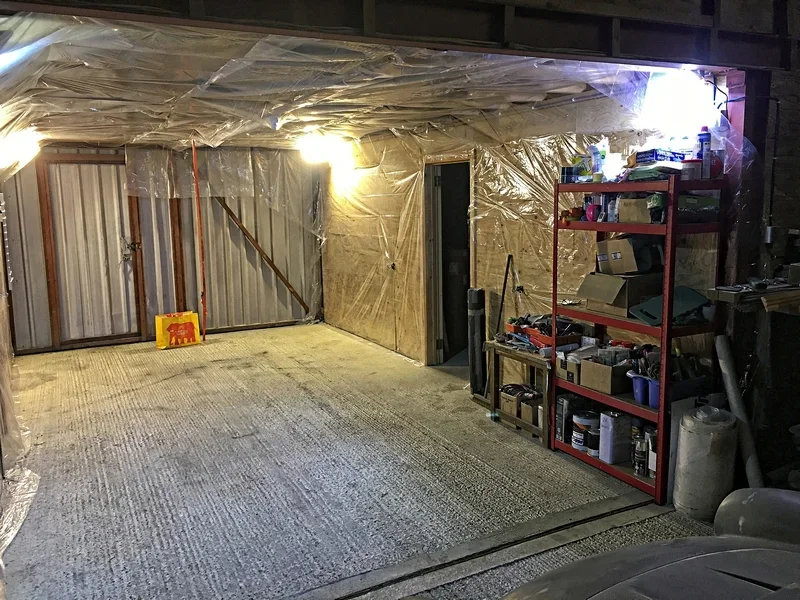
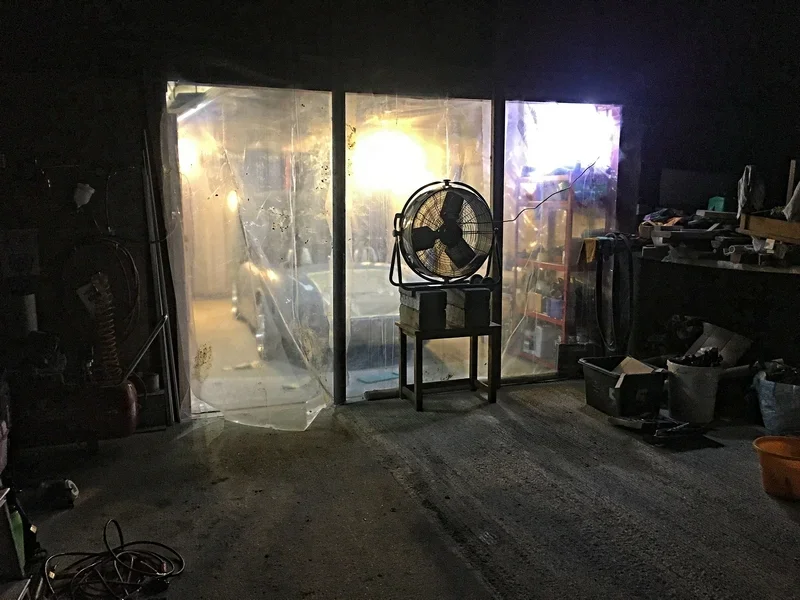
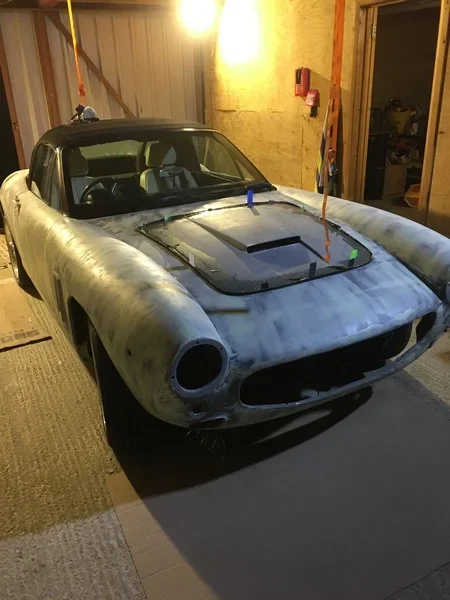
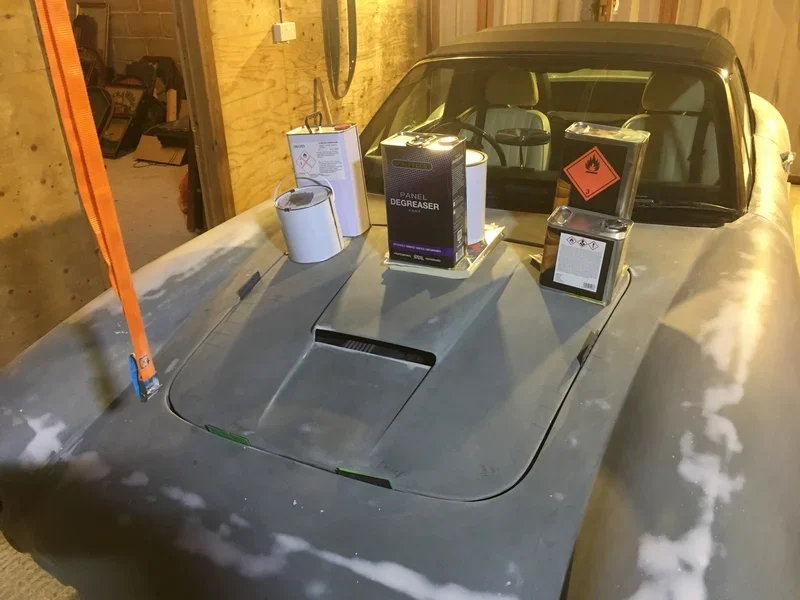
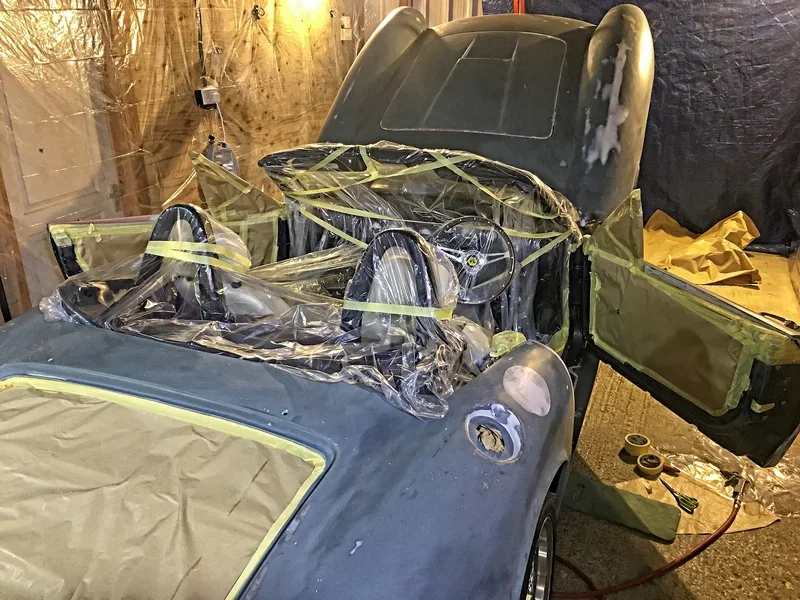
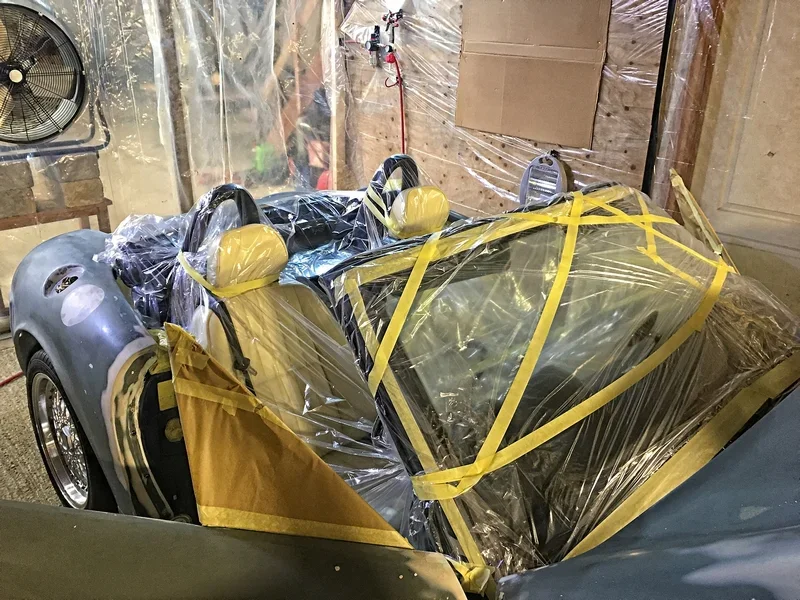
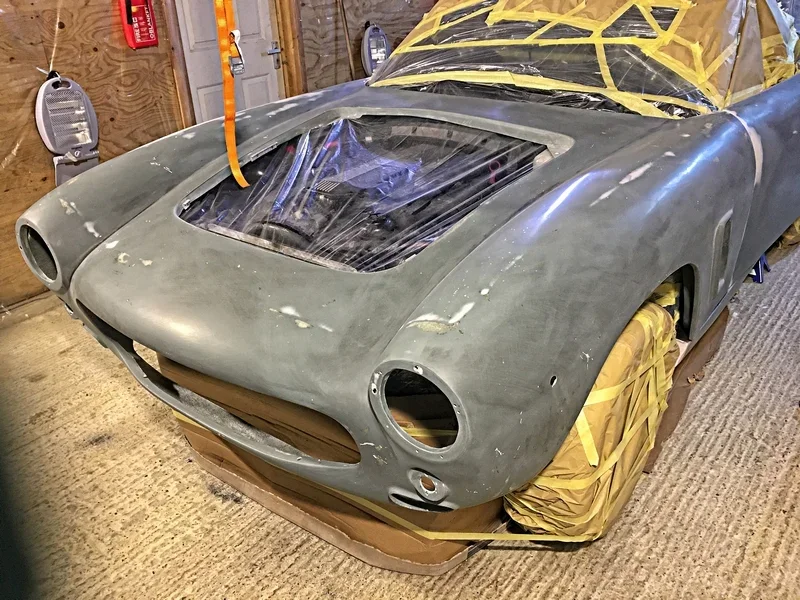
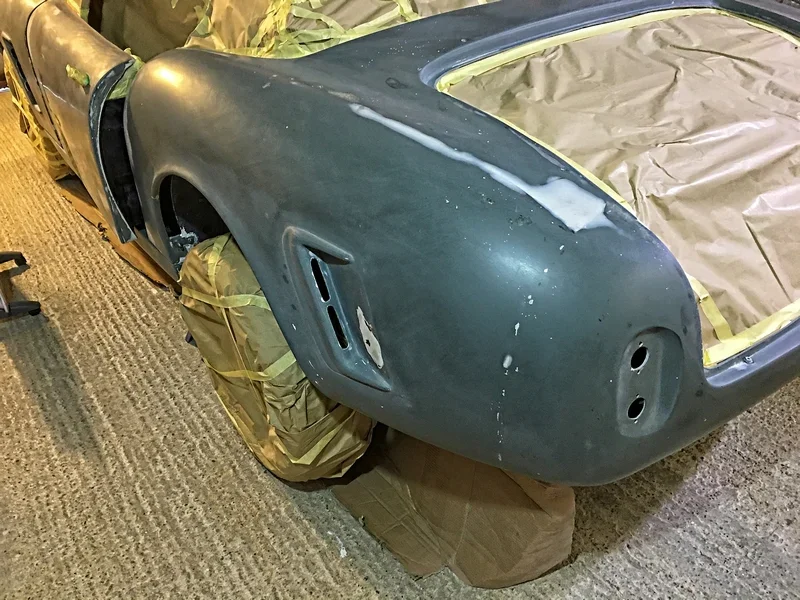
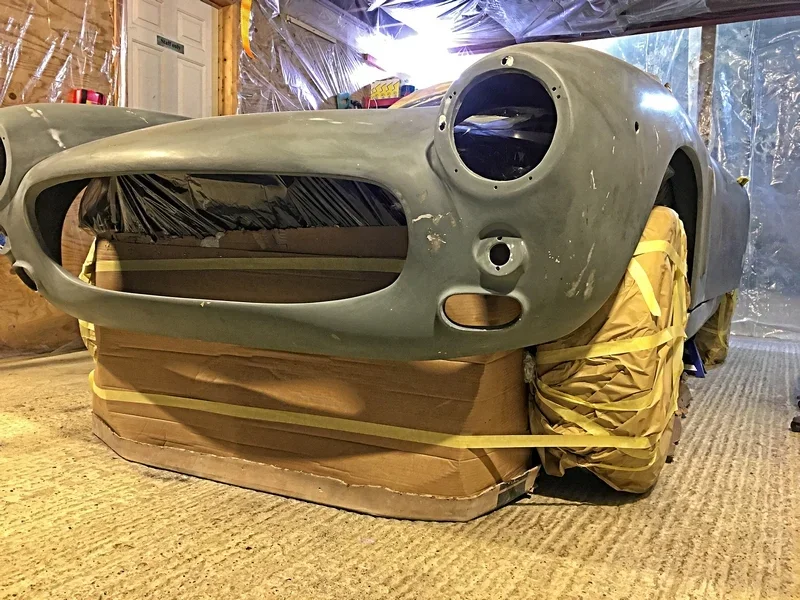
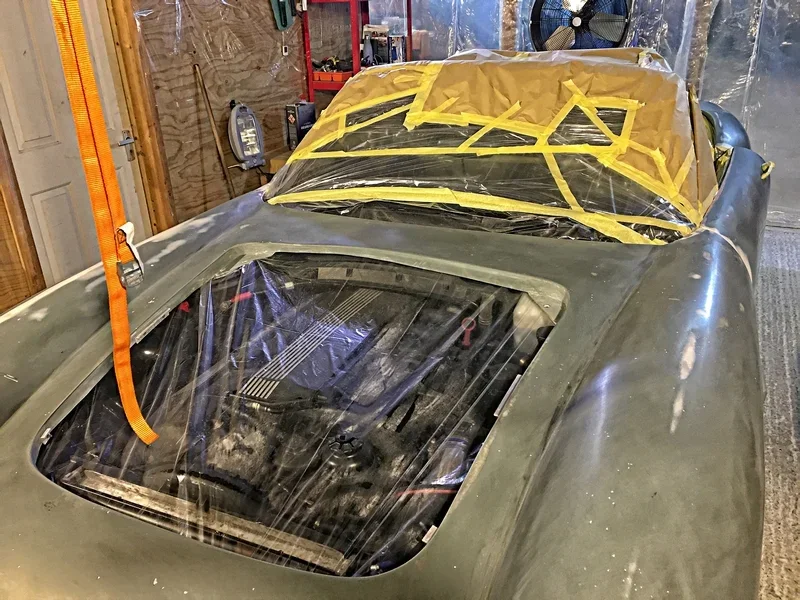
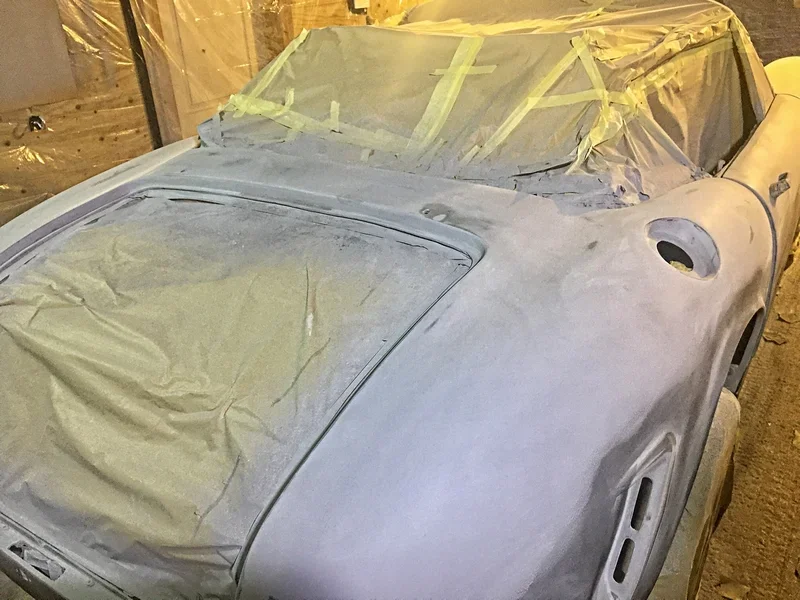
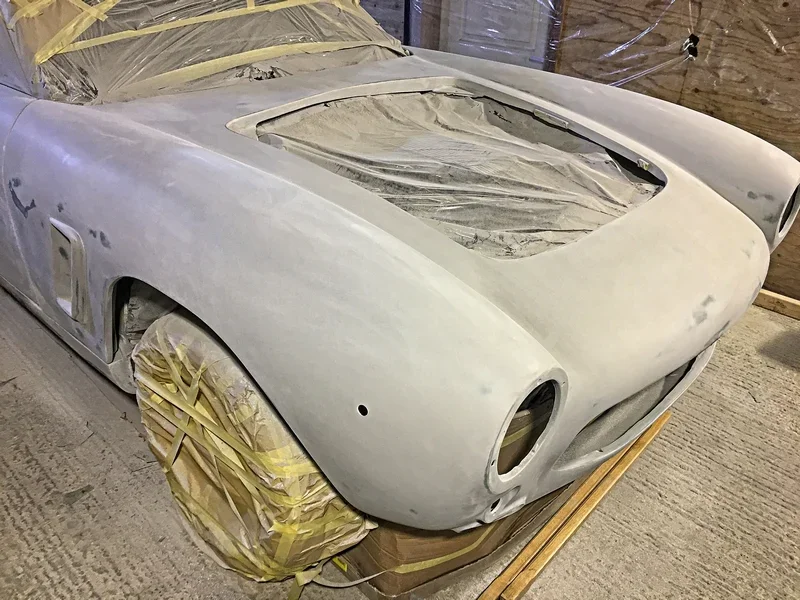
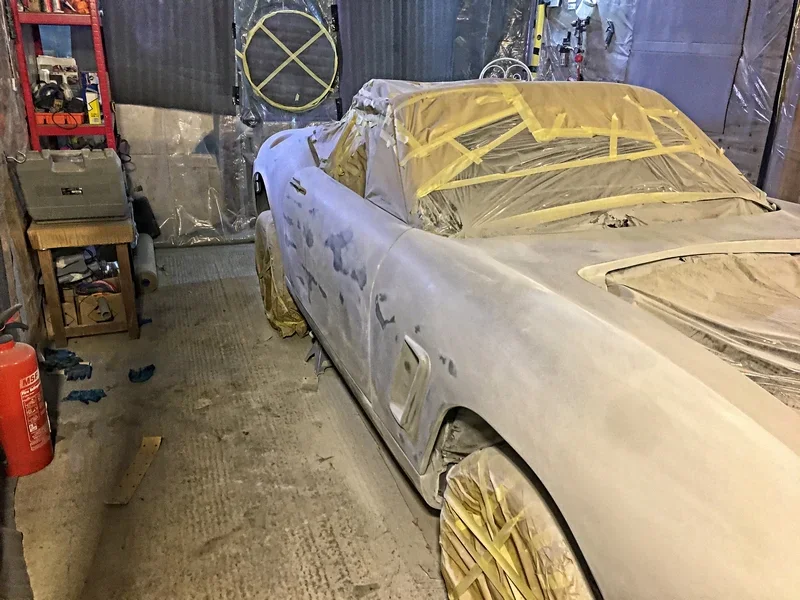
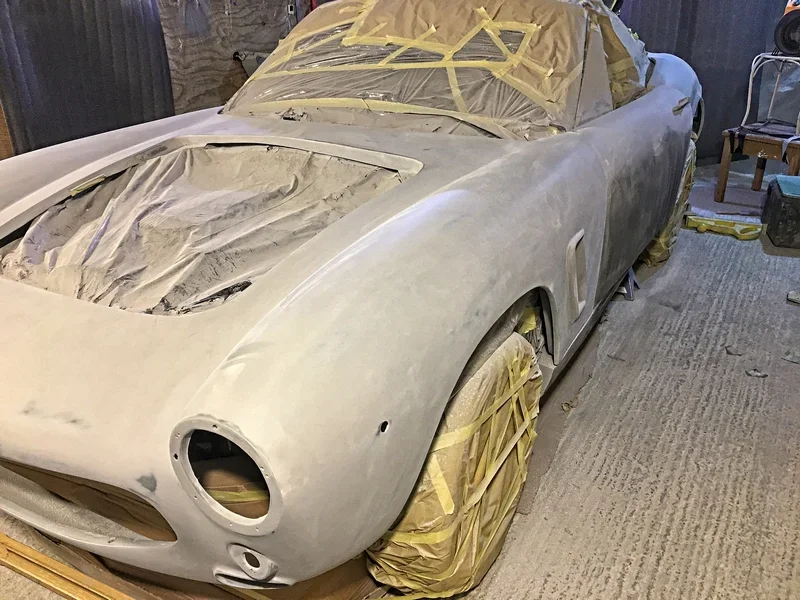
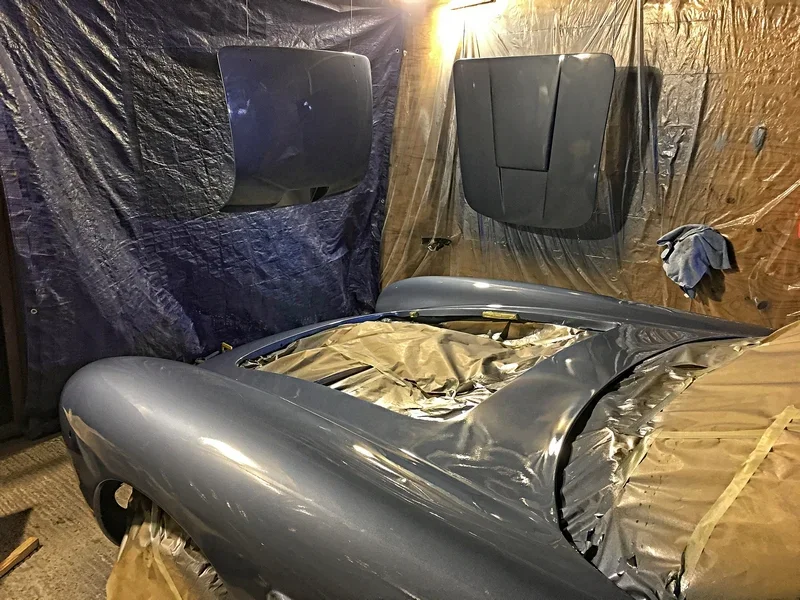
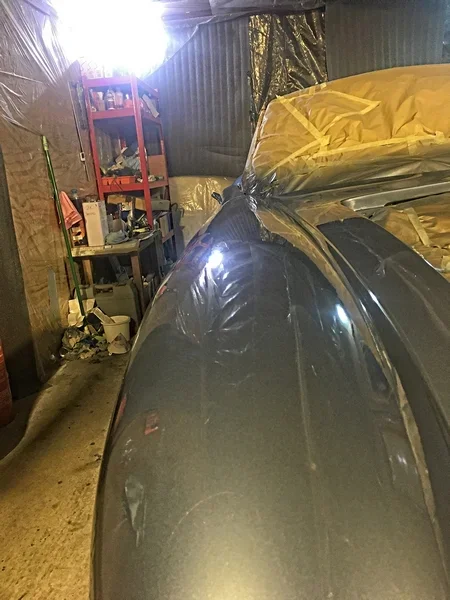
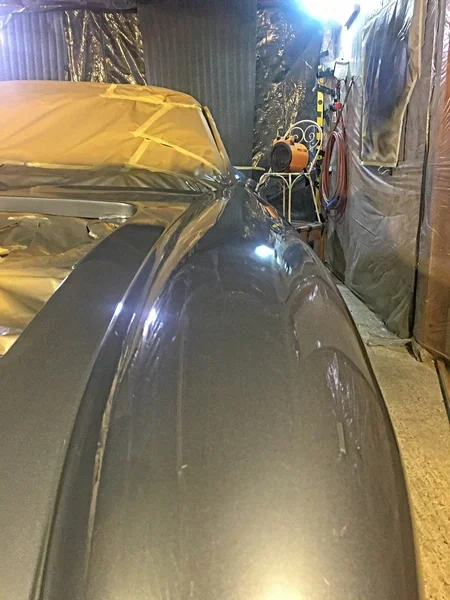
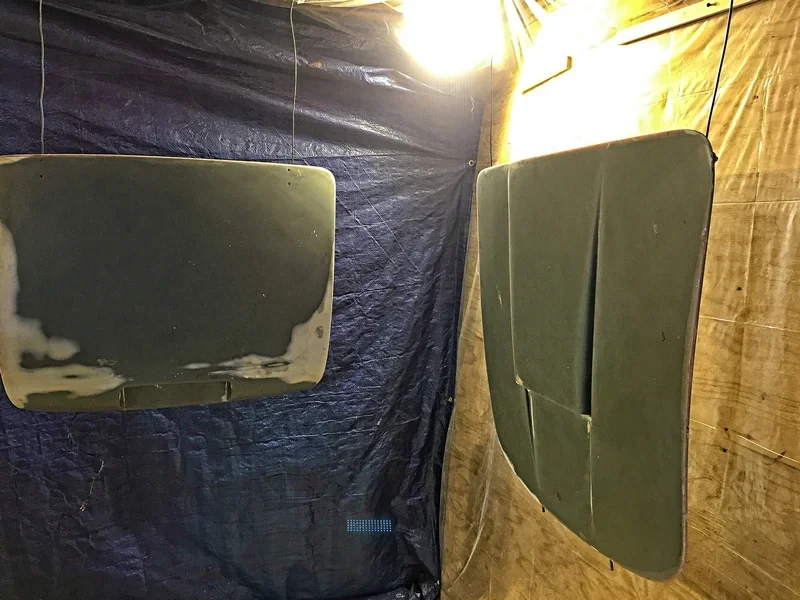
As this is now going to be an intensive build I spend a day sorting out my workshop (would never have atempted this build without it) and sectioning off a 22' by 18' area with polythene sheet and 4 daylight LED lamps, added a few double sockets whilst i was at it.

Now to build:

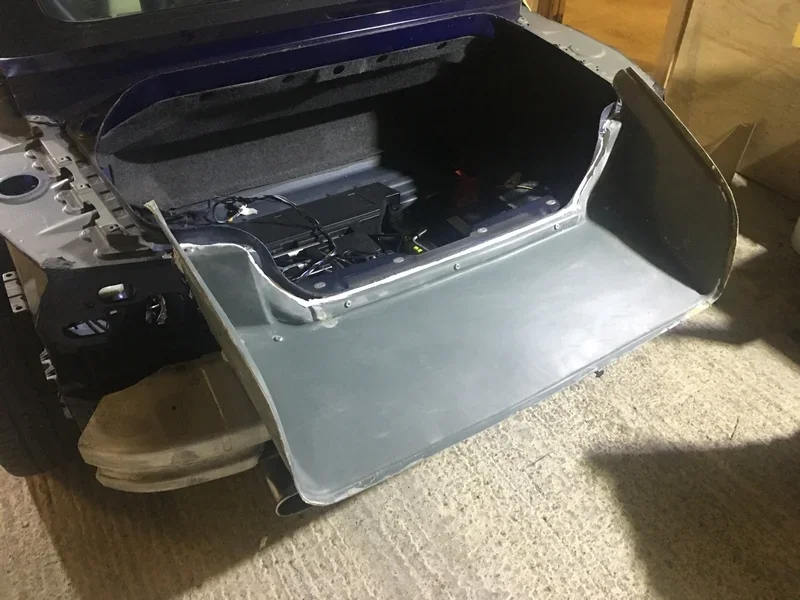
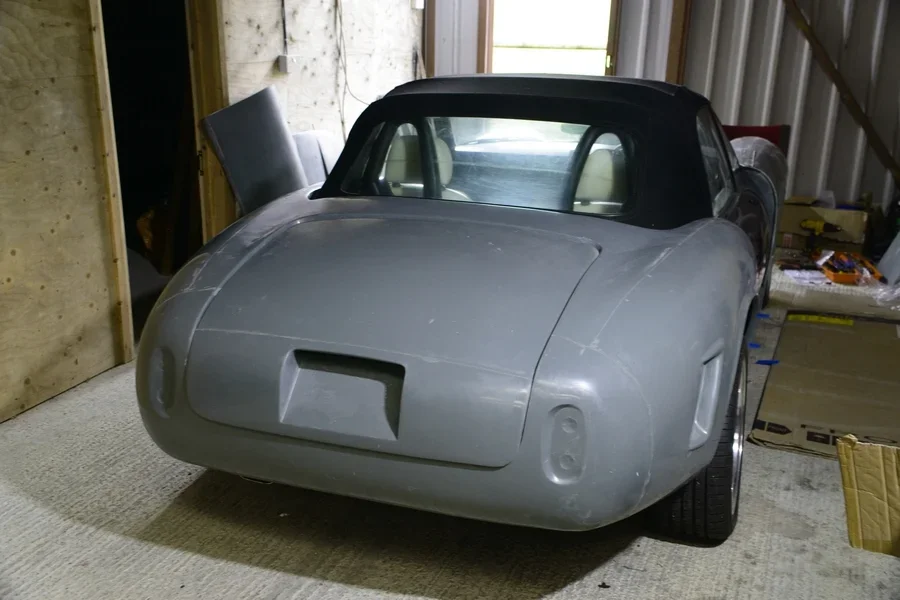
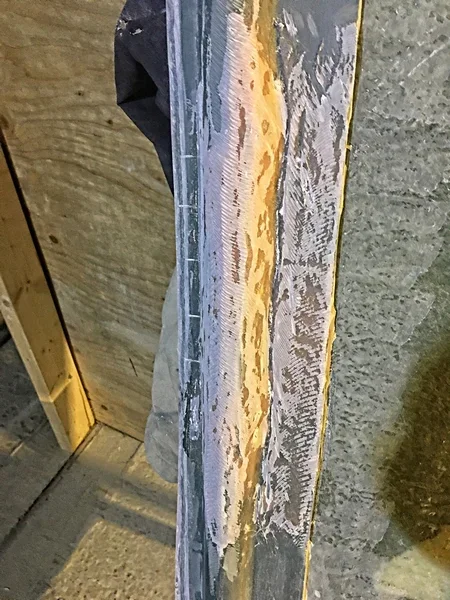
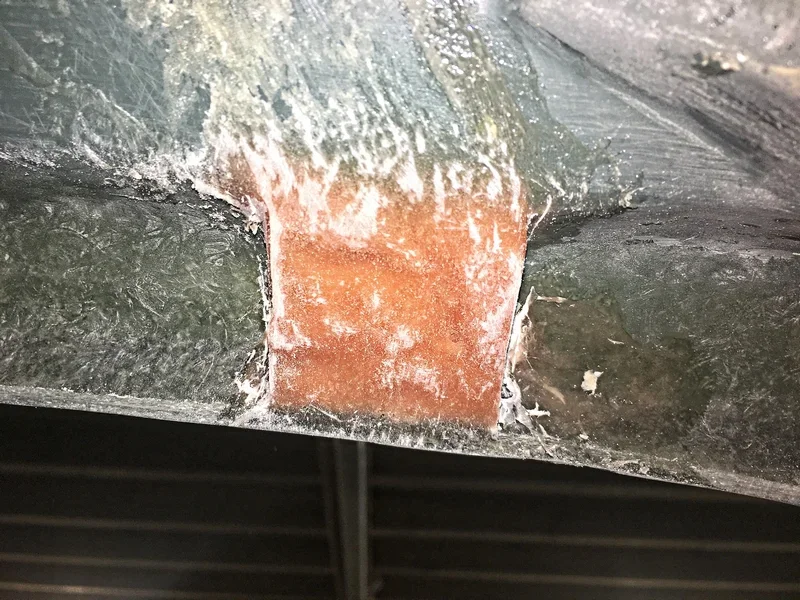
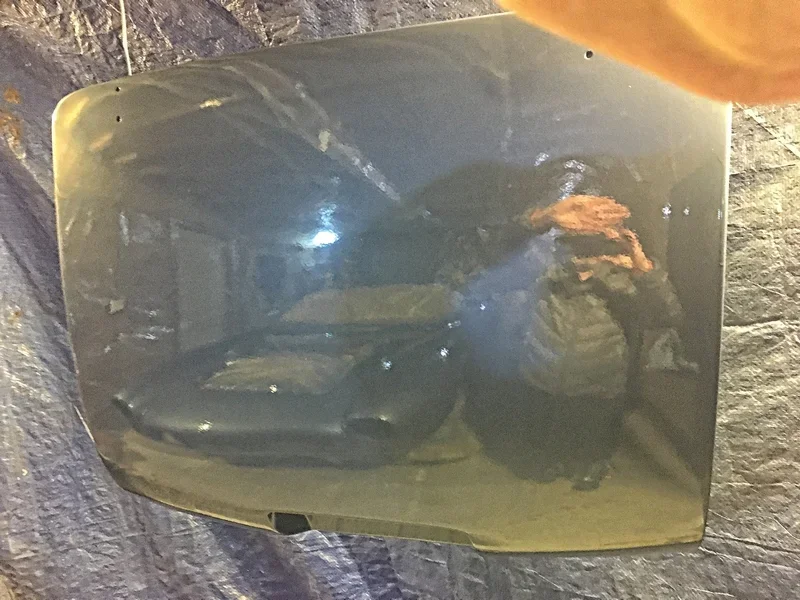
Cannot wait to see what it looks like so start with the easiest bit and glue/bolt the boot extension tray in place. Right that is enough for one day..... not..... Get the rear end and sills trial fitted to look at gaps etc (which are bloody awful). Grind a few fits, lever a few other bits and i'm happier.

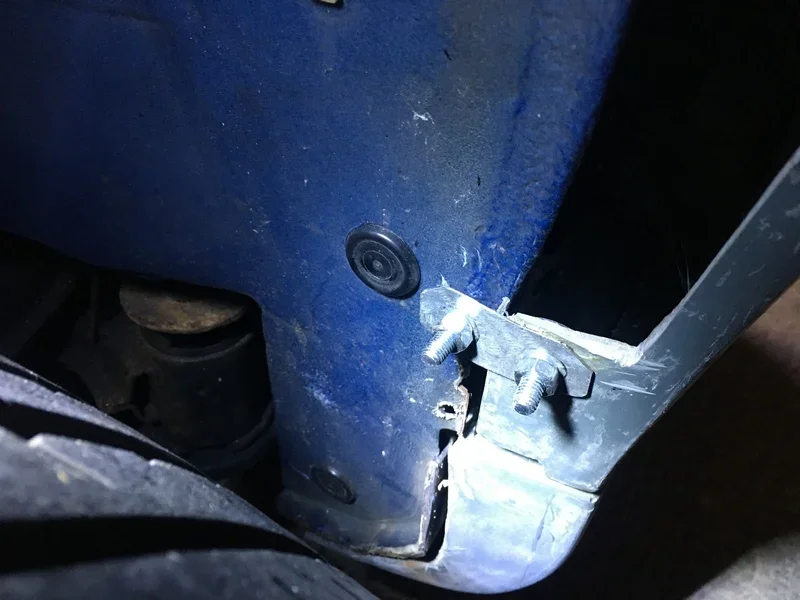
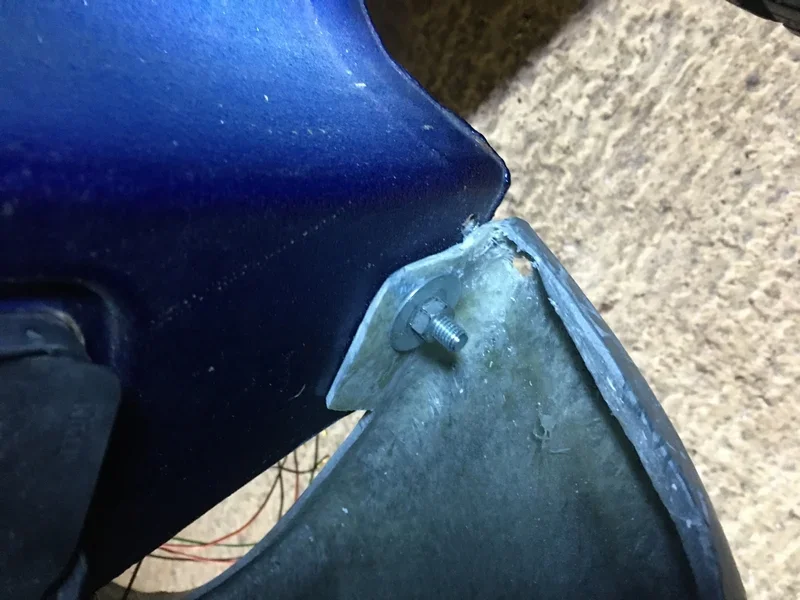
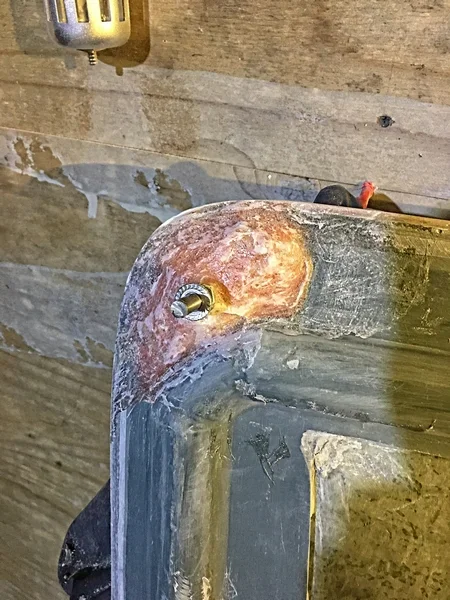
So off come the sills and the rear end (one piece and heavy) only to be immediately put back on again but this time fully bonded with Tiger Seal and all the original Z3 screw-bolts re-fitted. The rear section and sills are pre-drilled from the factory to fit the original bolts holes (which they do, almost).

As I was doing this Cock-Up number one on the bodywork nearly happened. I had not fitted the extended fuel filler tube needed to move the fuel filler further back in the car. This was remedied immediately and the arse-end re-fitted and glued.

Top Tip: I chose to elongate the holes in the GRP to allow for some wiggle room on the fit, makes things so much easier to get it lined up. Also do not forget the fuel hose!

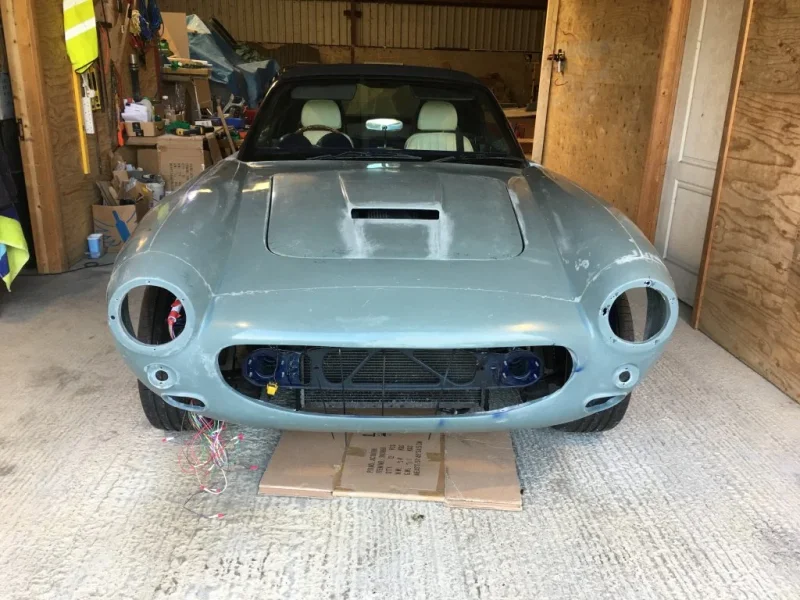
Now the arse-end is one I sit the bootlid in place and sit the front clam shell and baby-bonnet in place to get an idea of how it all looks. Answer great but with some pretty big panel gaps (more on that later).

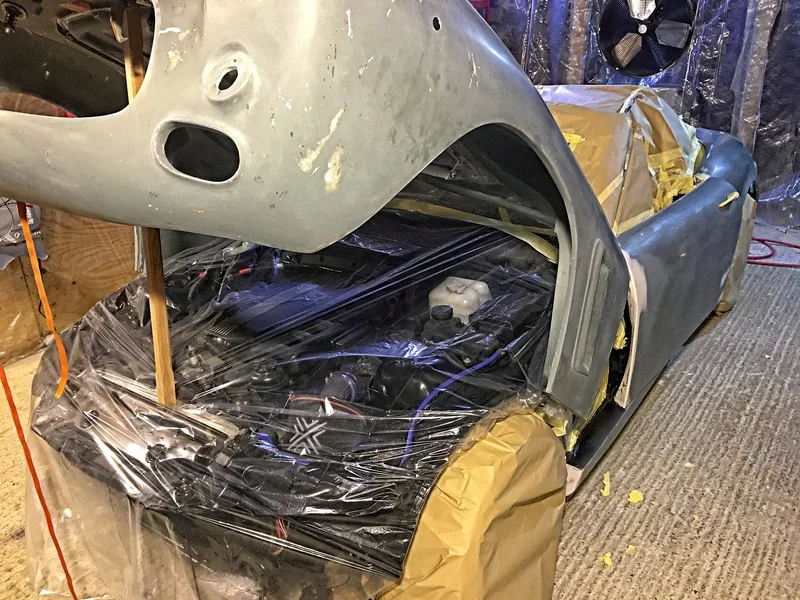
I fix the calm shell hinges in place (original Z3) but leave the gas struts off for now, they are nowhere near man enough to hold this up anyway (not without a very large blue pill!). All under bonnet work for the next few weeks is done by propping up the clam shell with two Oak stair spindles.

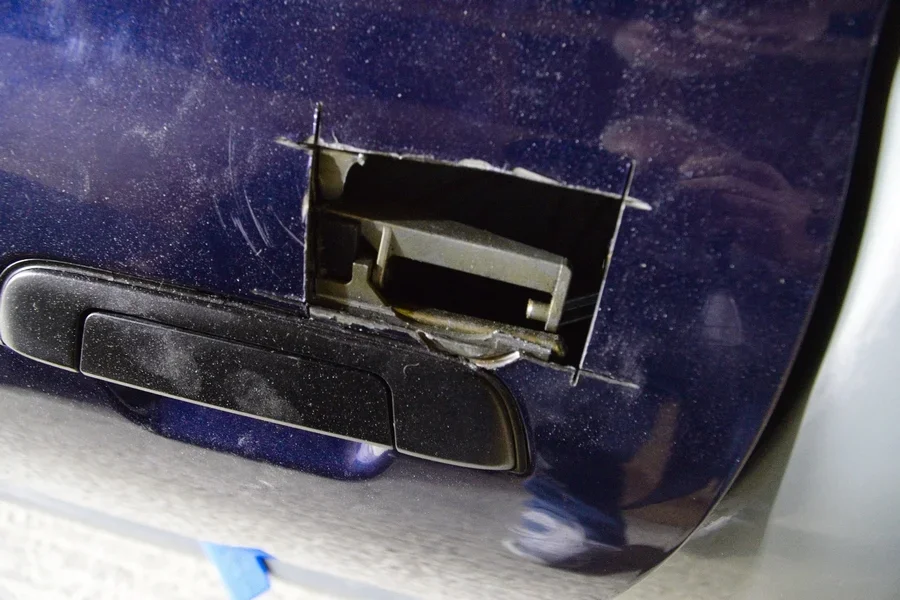
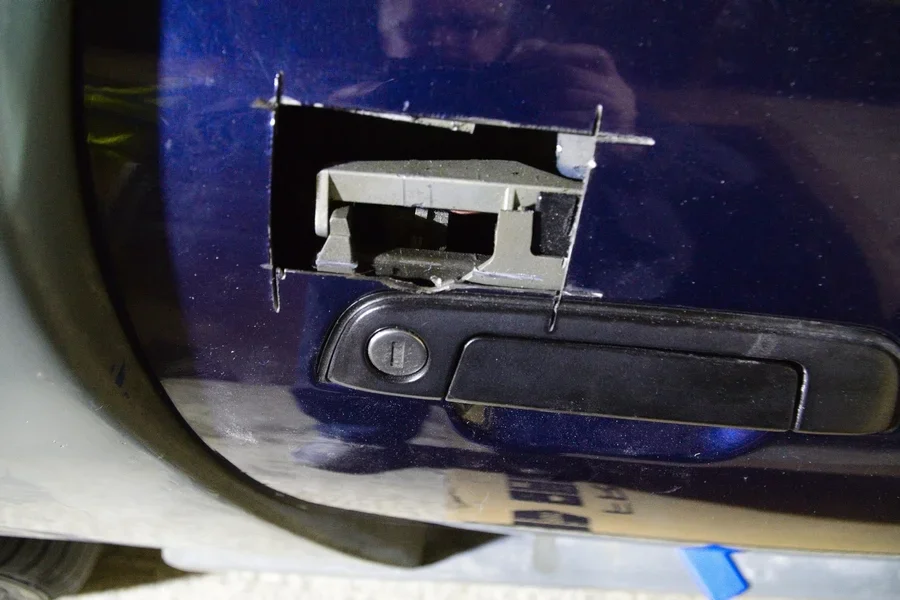
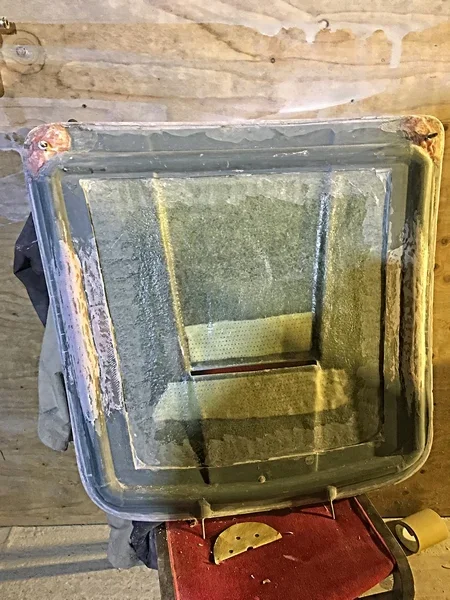
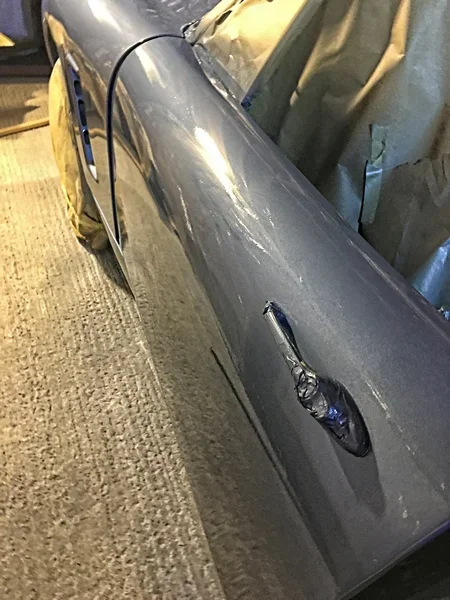
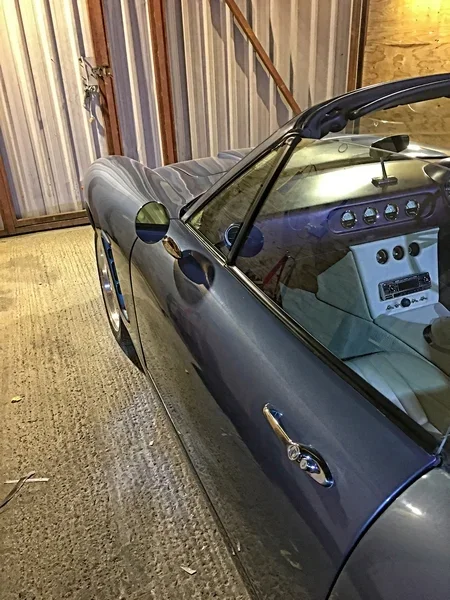
I cannot fit the door skins over the original Z3 doors yet as i need to open up holes in each door. The Ferrari door handles (MkII Mini) have a pushrod which needs to act on the bar inside the Z3 door via an aluminium plate.

Top Tip: Put some self adhesive felt pads on the Aluminium plate to stop rattles. (No pics of this).

Now i bolted the door handles onto the door skin from the inside and fixed the door sking with rivnuts into the GRP and hex head bolts through the outer edges of the Z3 door skin to bolt it all up along with lashings of ginger beer... i mean tiger seal adhesive... hope the hell I do not ever need to get this door skin off it is going to be nigh on impossible.

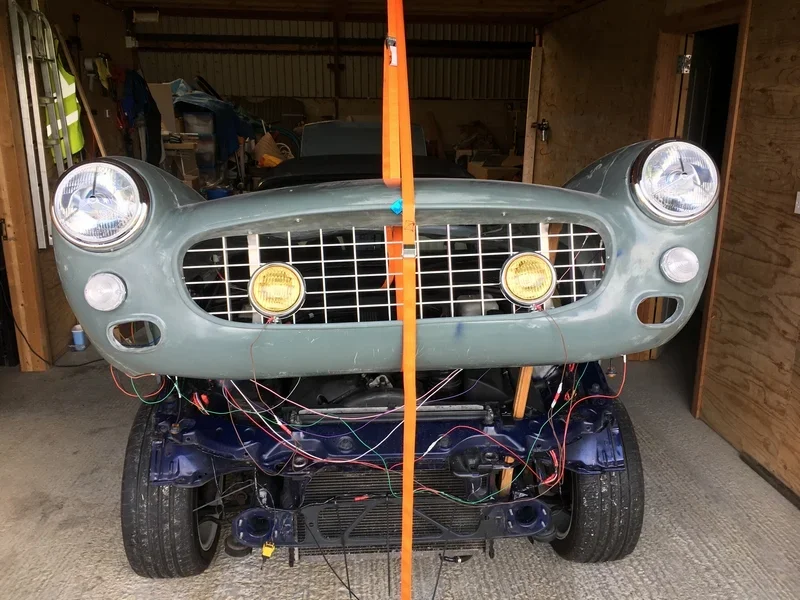
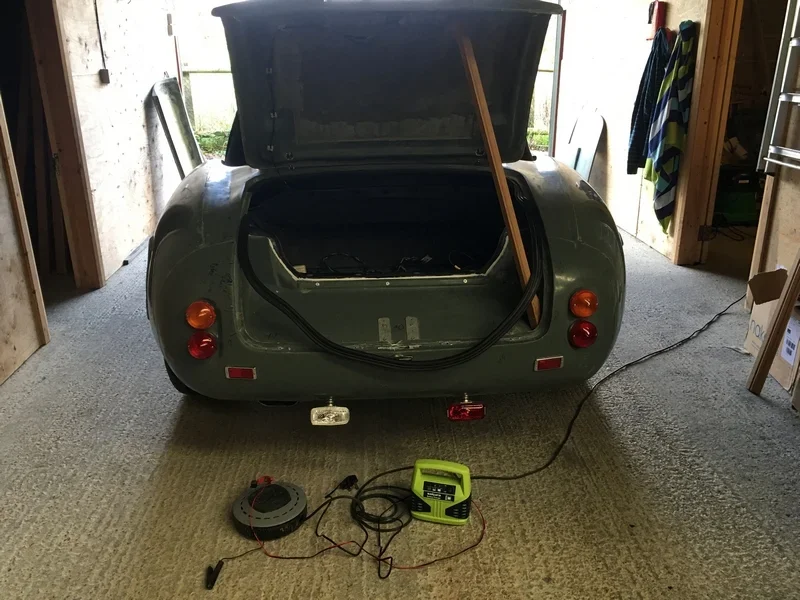
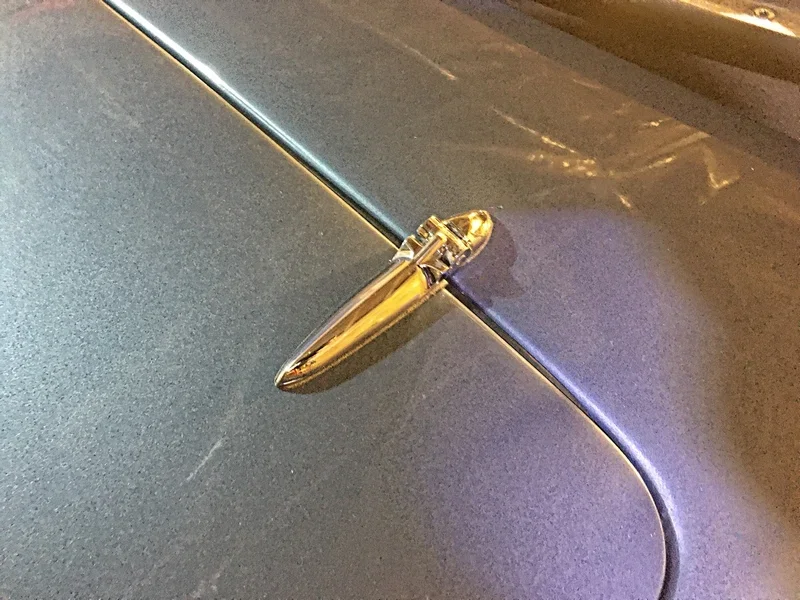
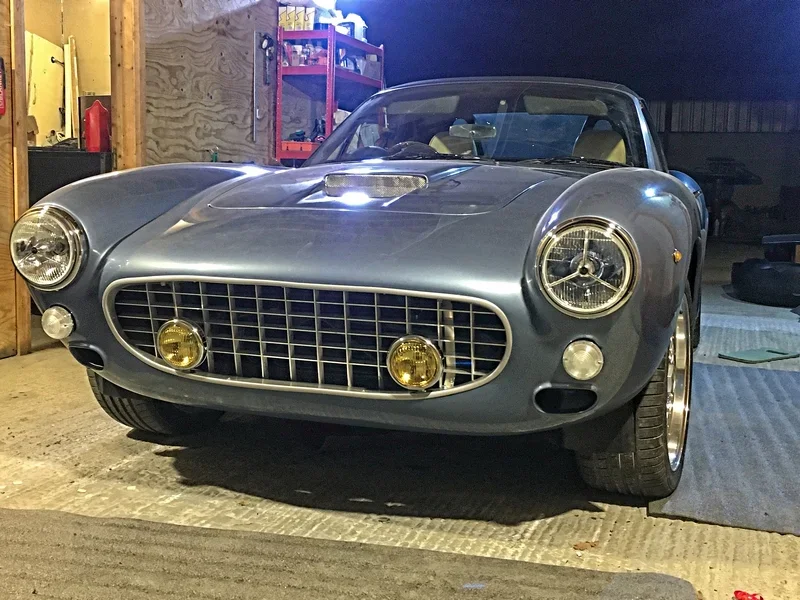
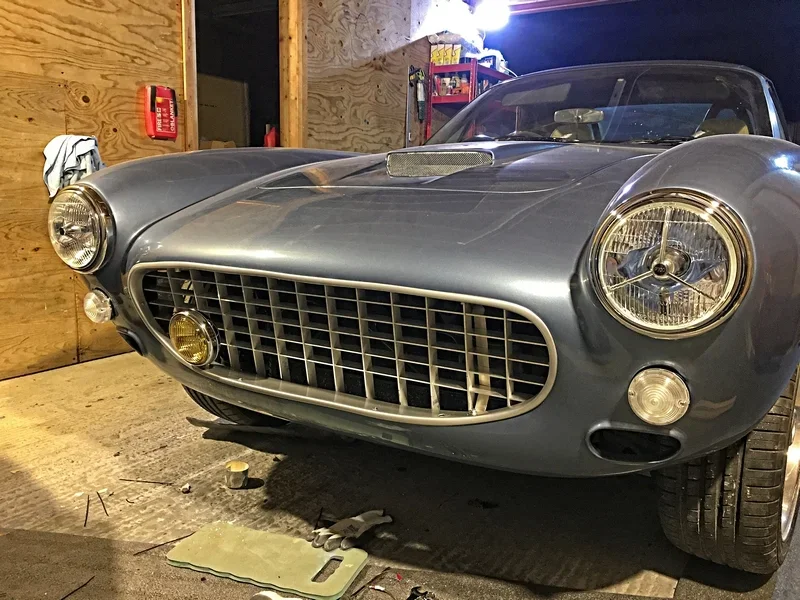
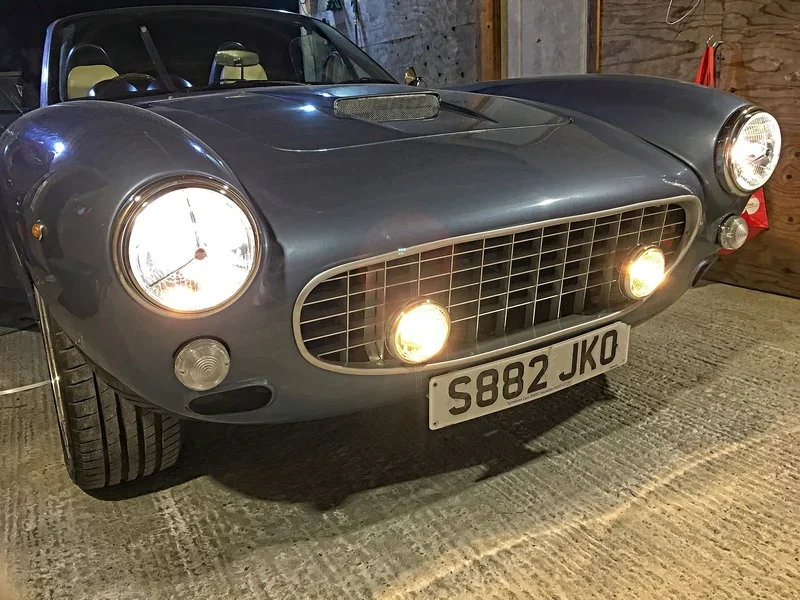
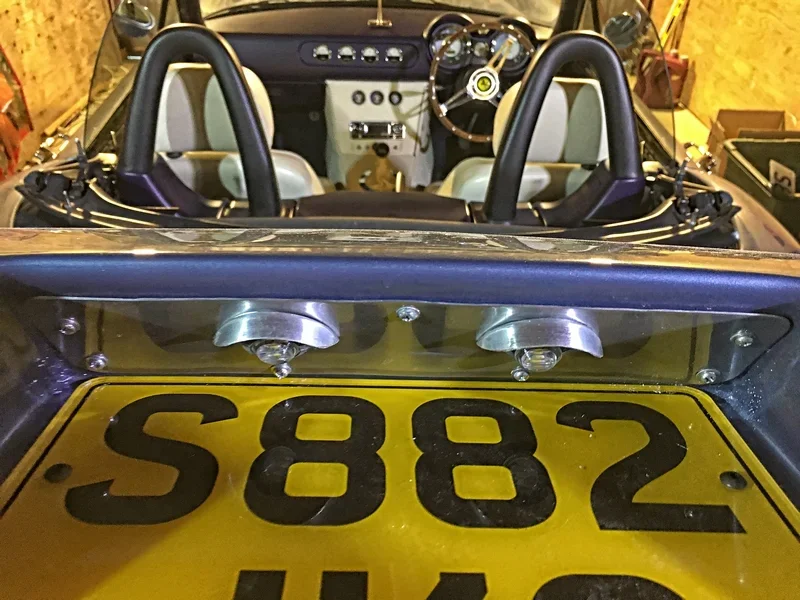
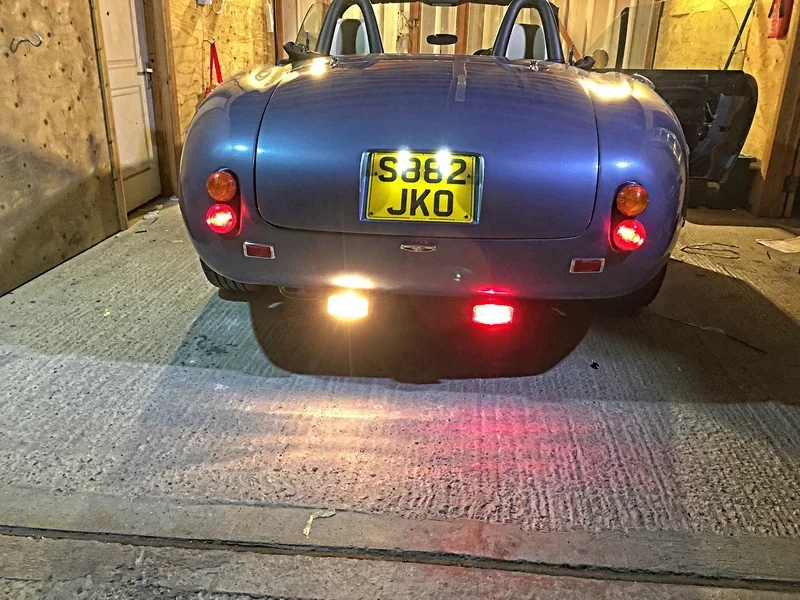
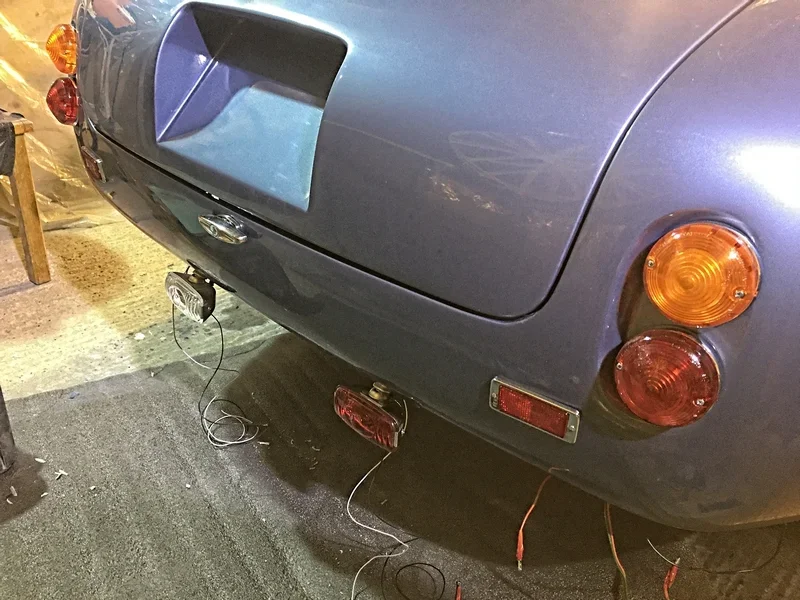
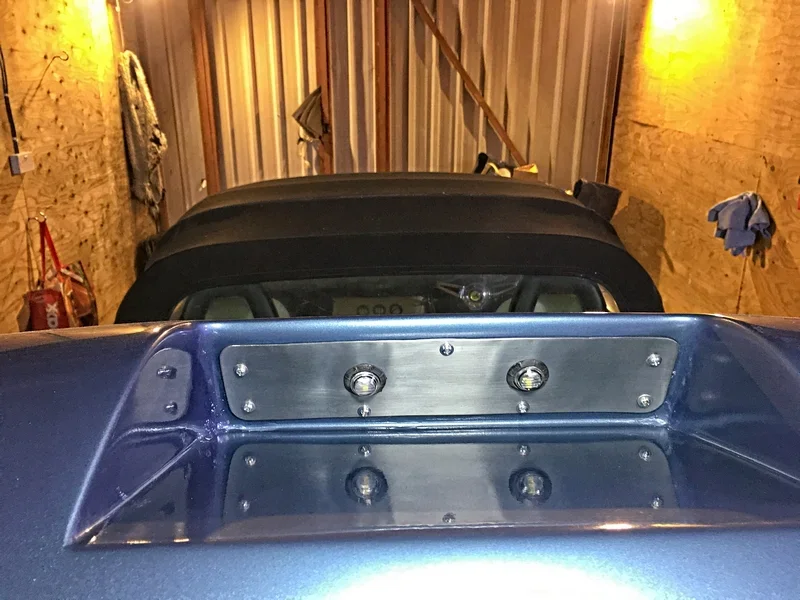
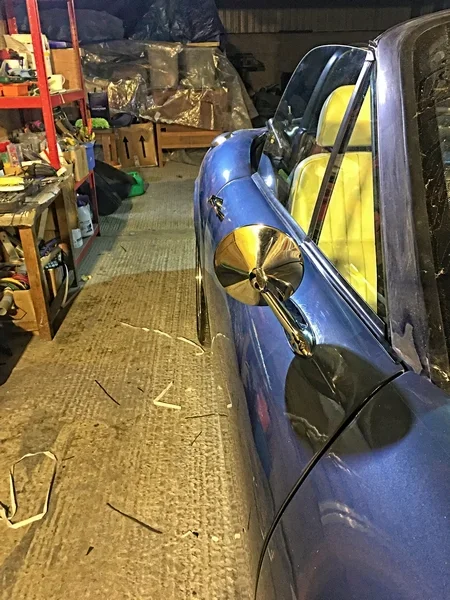
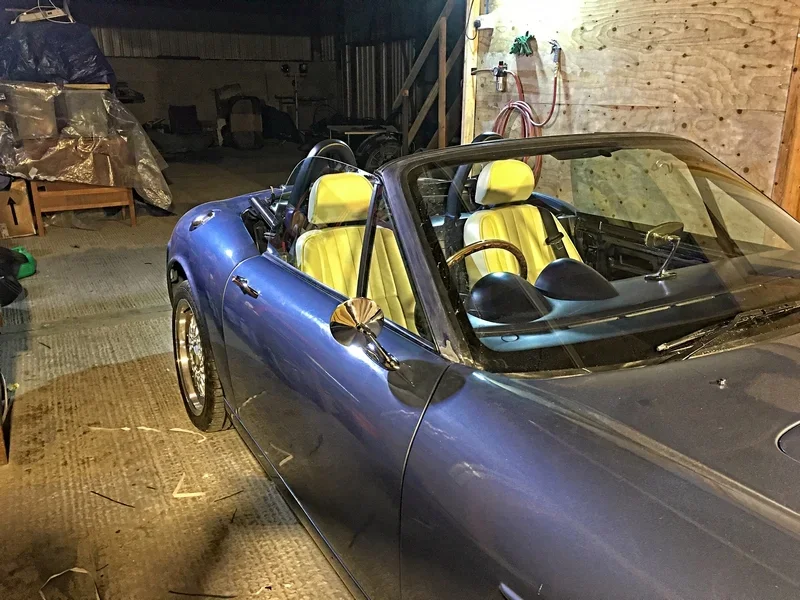
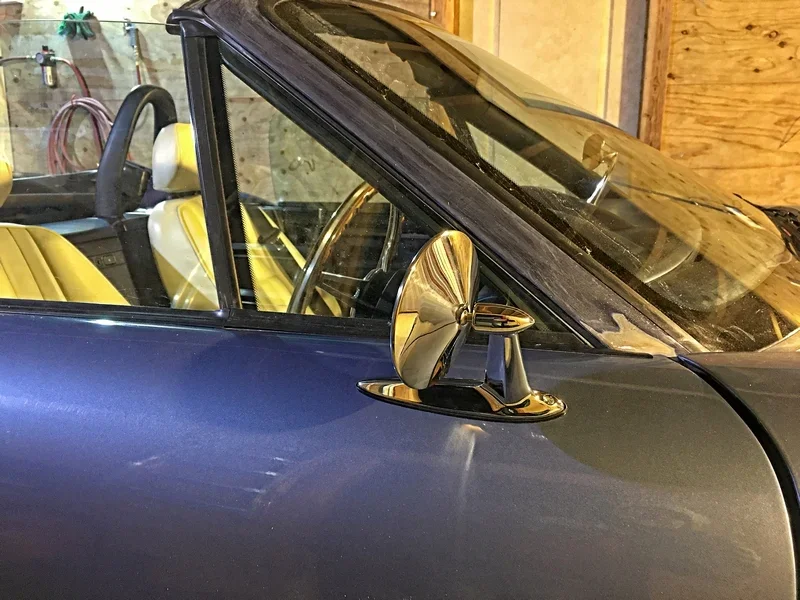
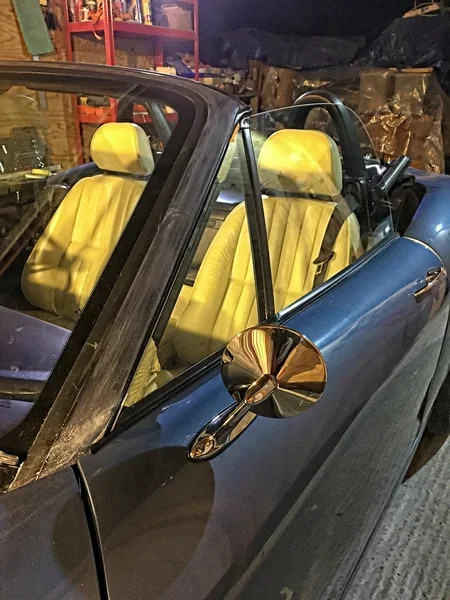
Now all the panels are on or placed in position it is time to trial run all of the bling and drill all the necessary holes. I do not want to be doing this on fresh paint! So I fit all of the front lights (Lucas P700 Tripod style with modern reflectors and bulbs), rear lights (Lucas 681), door mirrors (Alfa Romeo), boot hinges (From a Standard 8/10).

Whilst all this was in place I decided to wire it all up to make sure everything was working and I could suss out the wiring OK. Very time consuming.

Top Tip: Every little wire and connector both inside and outside the car was marked with masking tape and a bloody big marker when I stripped the Z3. Without this and my multimeter I would have been days trying to figure it out.

Apart from a bit of dodgy wiring on my part with the fog light switches under the dash (forgot I needed to run the switch to the Lucas warning light then to ground) which took an hours to work out, everything worked well. These headlights are really powerful, nothing like the useless 60's 7" types I used to have on my Cooper S.

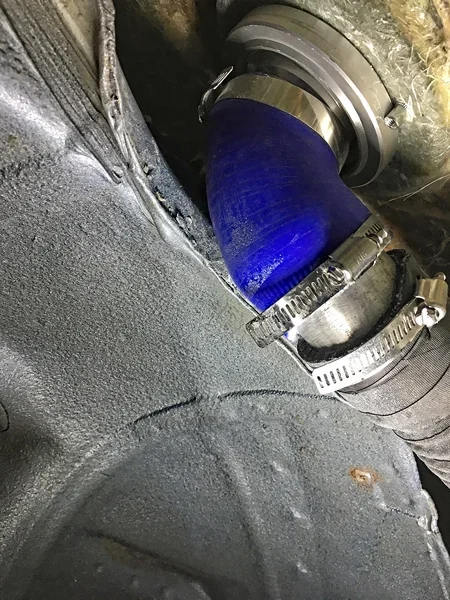
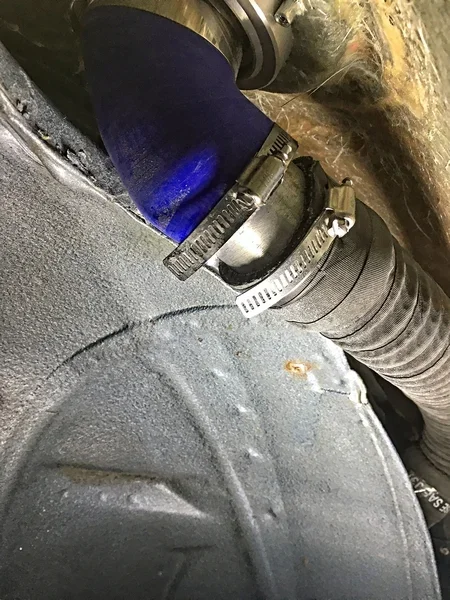
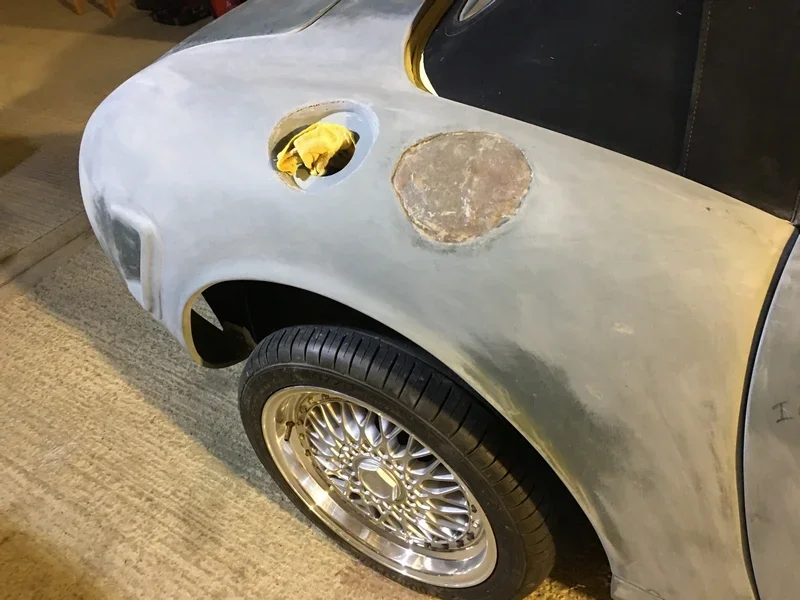
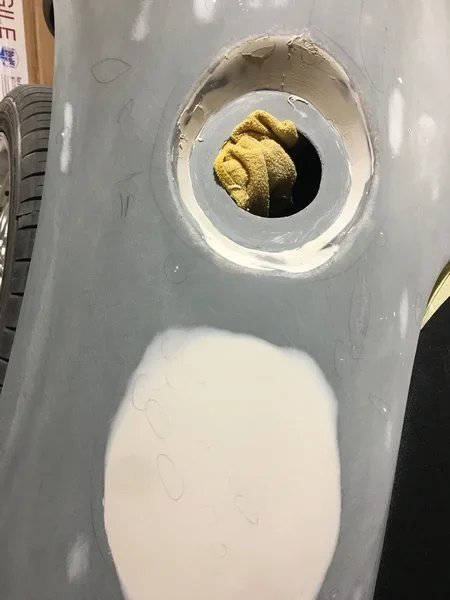
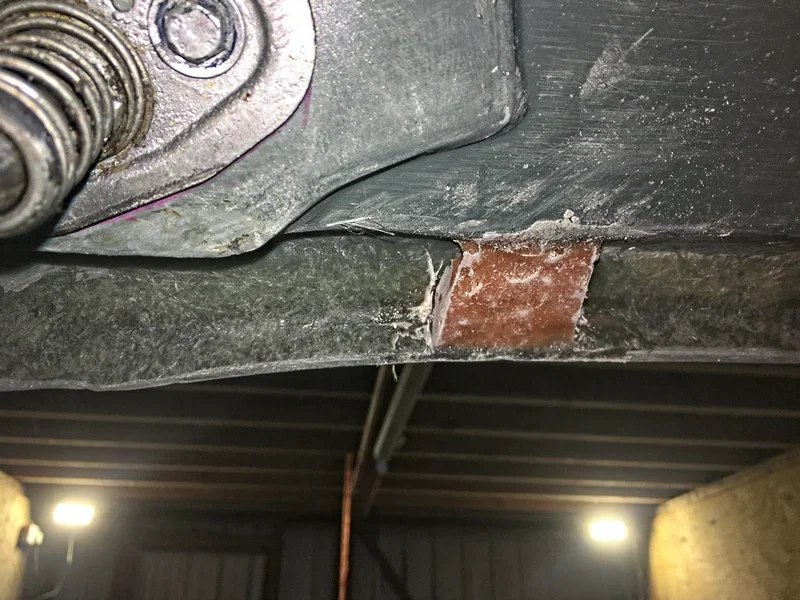
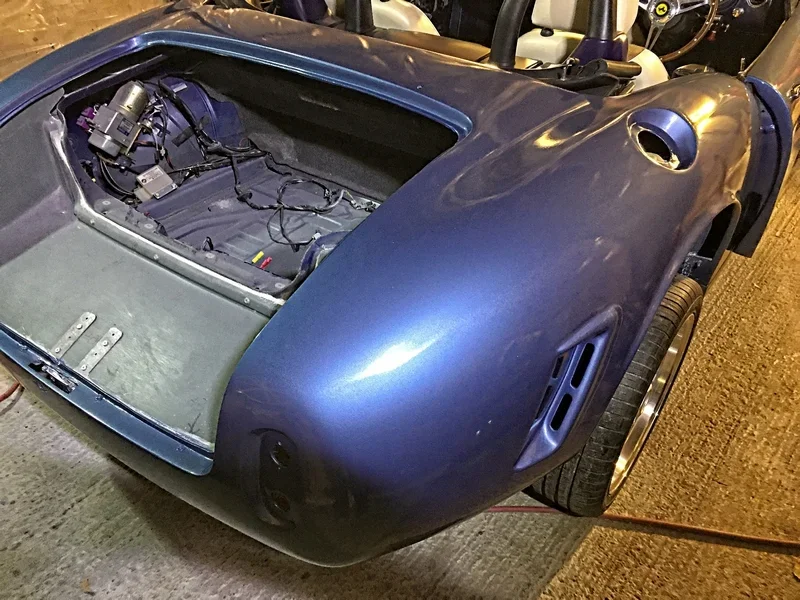
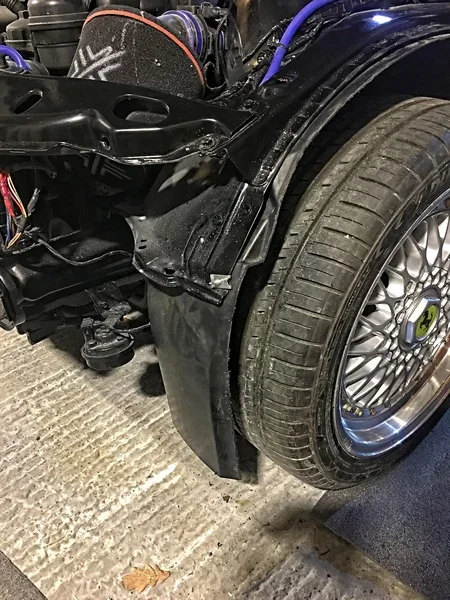
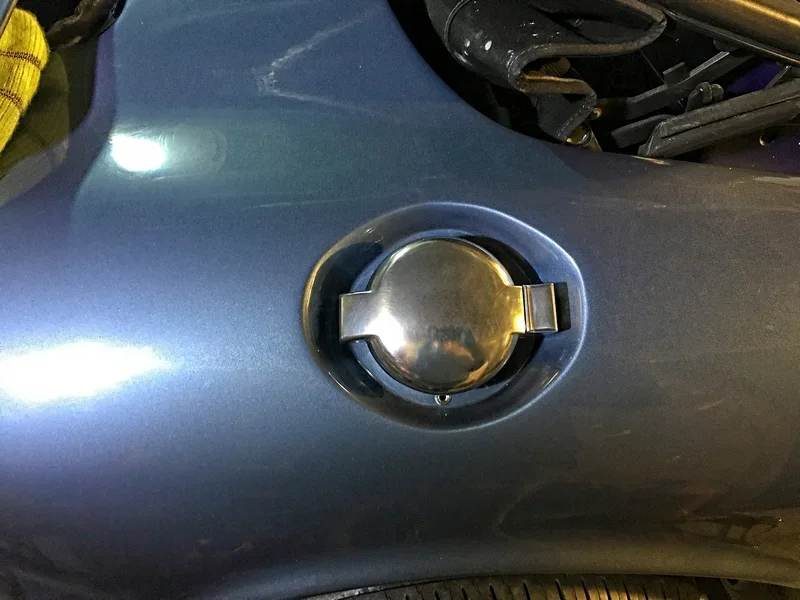
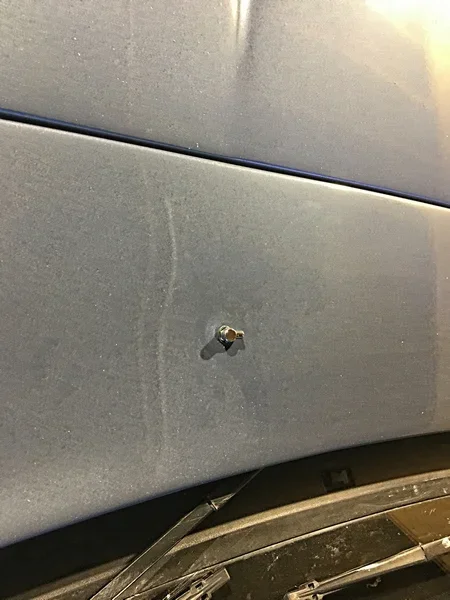
The hardest part under the rear section of the body was sorting the fuel pipe run out. I initially cut a big hole in the wing to fit the little Fuel Filler GRP panel that comes with the kit and then discovered the Aston Style fuel filler fouled the chassis member with the silicone elbow fitted.

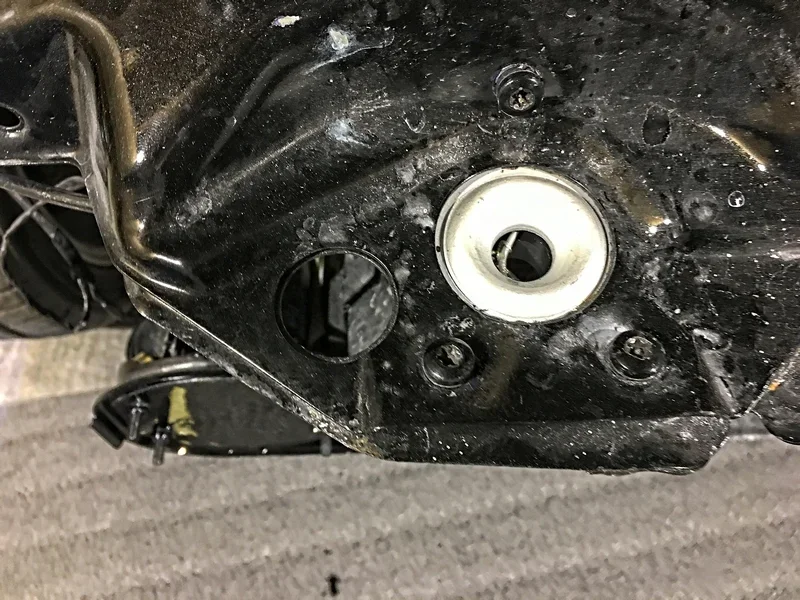
That hole had to be fibreglassed over from behind and filled. A new one was cut further back and the fuel outlet still hit the chassis member Grrr........ This time though i could get to the welded seam of the chassis with a 1" metal bar and a lump hammer to belt it round a bit so the silicone hose could pass. You can just see the modification in the pics from underneath. Result.... well, not exactly... it leaked from the hose and need an hour of fiddling to stop it.

Fuel is slow to fill but it is not a problem as you cannot get away from everybody on the forecourt asking you about the car anyway!!!

Onwards and upwards.
 

Attachments

  • Exterior Body Kit at the Factory.webp
    Exterior Body Kit at the Factory.webp
    46 KB · Views: 1,042
  • Exterior Build Paint Prep Booth Build 1.webp
    Exterior Build Paint Prep Booth Build 1.webp
    130.3 KB · Views: 1,039
  • Exterior Build Paint Prep Booth Build 2.webp
    Exterior Build Paint Prep Booth Build 2.webp
    77.7 KB · Views: 1,054
  • Exterior Build Boot Tray 1.webp
    Exterior Build Boot Tray 1.webp
    64.4 KB · Views: 1,063
  • Exterior Build Trial Fit Bling (2).webp
    Exterior Build Trial Fit Bling (2).webp
    54 KB · Views: 1,057
  • IMG_1980.webp
    IMG_1980.webp
    147.5 KB · Views: 1,038
  • Exterior Build Door Lock Mechanism 4.webp
    Exterior Build Door Lock Mechanism 4.webp
    89.2 KB · Views: 1,097
  • Exterior Build Door Lock Mechanism 5.webp
    Exterior Build Door Lock Mechanism 5.webp
    63.9 KB · Views: 1,087
  • Exterior Build Fuel  Piping 84.webp
    Exterior Build Fuel Piping 84.webp
    84.4 KB · Views: 1,037
  • Exterior Build Fuel Piping 85.webp
    Exterior Build Fuel Piping 85.webp
    75.3 KB · Views: 1,057
  • Exterior Build Rear Clam Fixings-Front 2.webp
    Exterior Build Rear Clam Fixings-Front 2.webp
    49 KB · Views: 1,051
  • Exterior Build Rear Clam Fixings-Rear 3.webp
    Exterior Build Rear Clam Fixings-Rear 3.webp
    58.4 KB · Views: 1,039
  • Exterior Trial Fit Bling Lights Front 2.webp
    Exterior Trial Fit Bling Lights Front 2.webp
    97.9 KB · Views: 1,094
  • Exterior Trial Fit Bling Lights Rear 3.webp
    Exterior Trial Fit Bling Lights Rear 3.webp
    86.9 KB · Views: 1,089
  • Exterior Build Fuel Filler Cock Up 2.webp
    Exterior Build Fuel Filler Cock Up 2.webp
    61.5 KB · Views: 1,025
  • Exterior Build Fuel Filler 3.webp
    Exterior Build Fuel Filler 3.webp
    23.9 KB · Views: 1,034
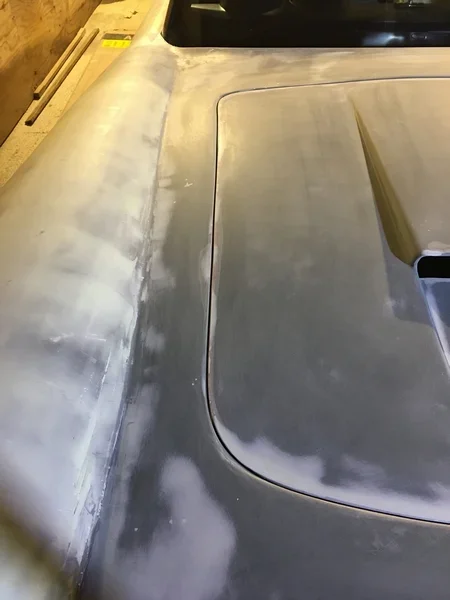
Time for the gutty bit, getting the crappy panel gaps tighter and everything looking right.

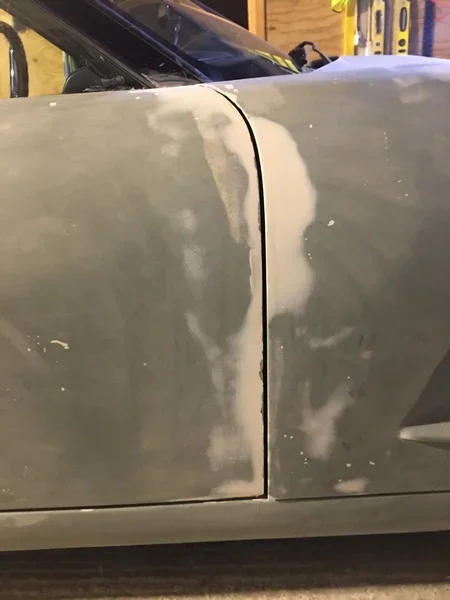
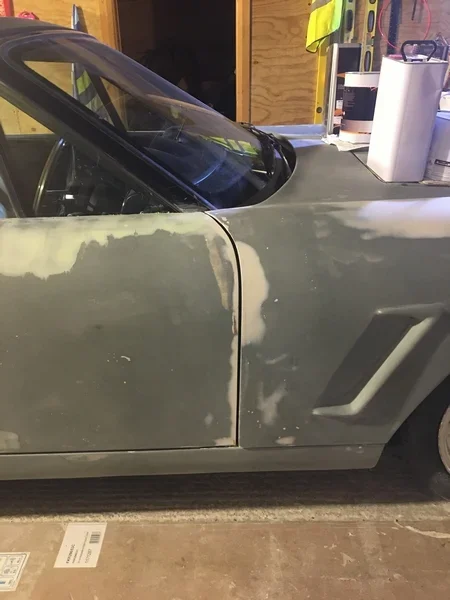
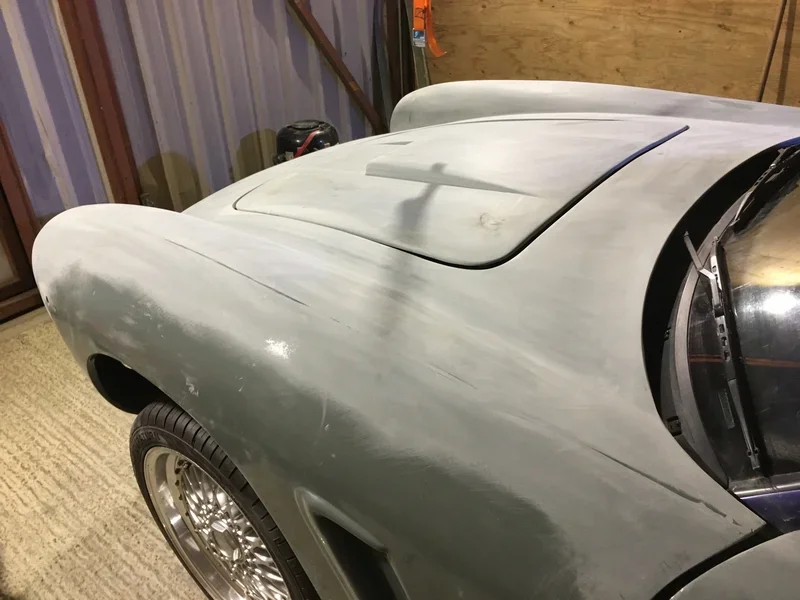
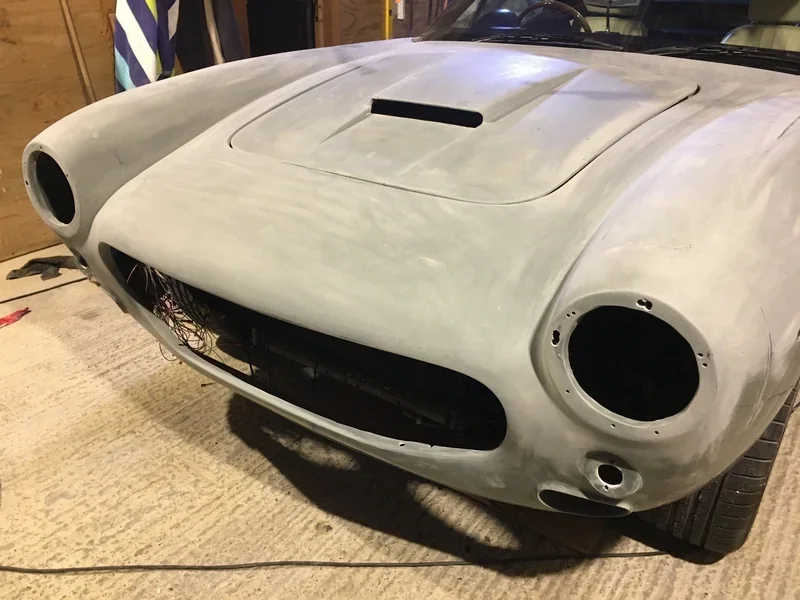
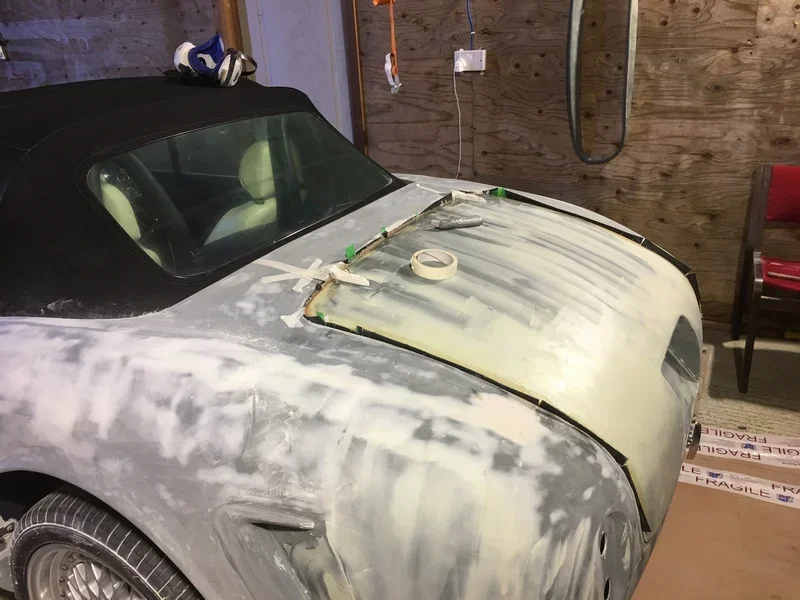
Don't get me wrong I am not after fag-paper panel gaps and razor sharp edges. This is supposed to look like a 1961 Ferrari not a brand new Lexus after all. 3mm panel gaps will do just fine, trouble is a lot of them are 5-10 at the moment or more in the case of the front edge of the door where it meets (I think Covid-19 social distancing rules must apply to this) the front clam.

This is a son of a beach to sort out and the work around came from our very own forum favourite @jaguartvr (thanks Steve) who has built one of these beauties as well. The answer is on Mad About Kit Cars forum.


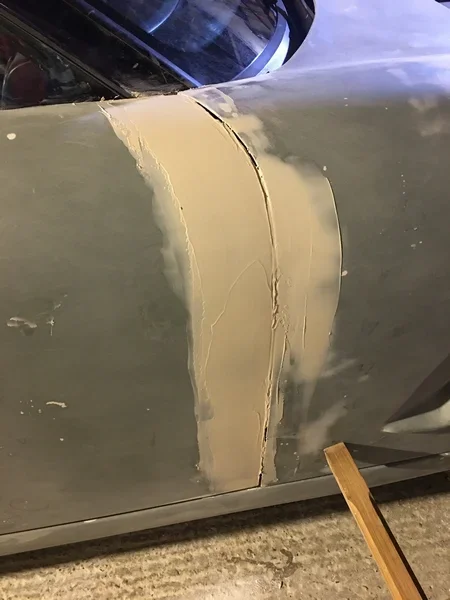
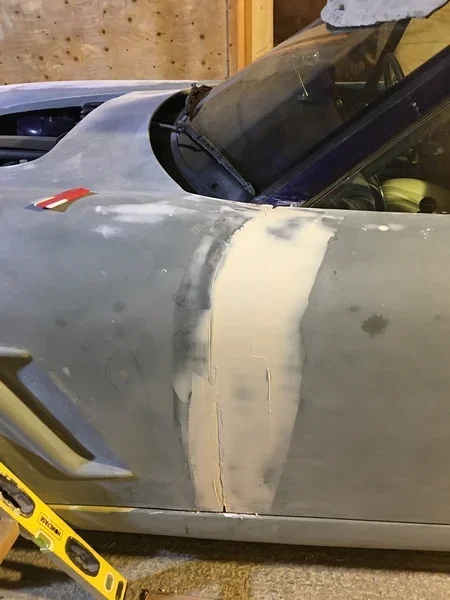
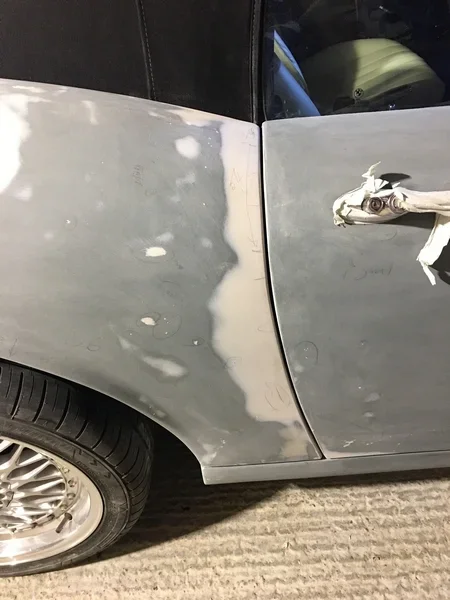
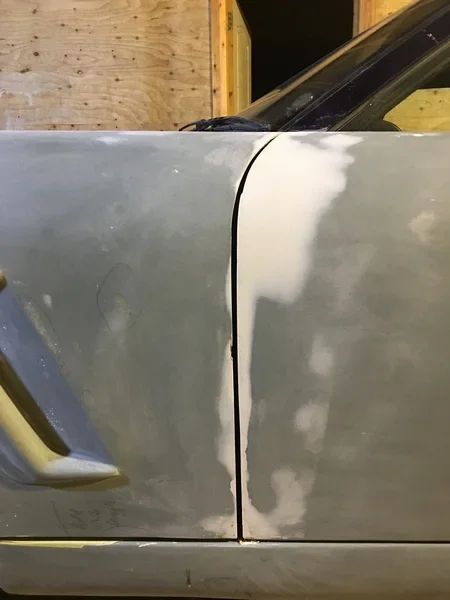
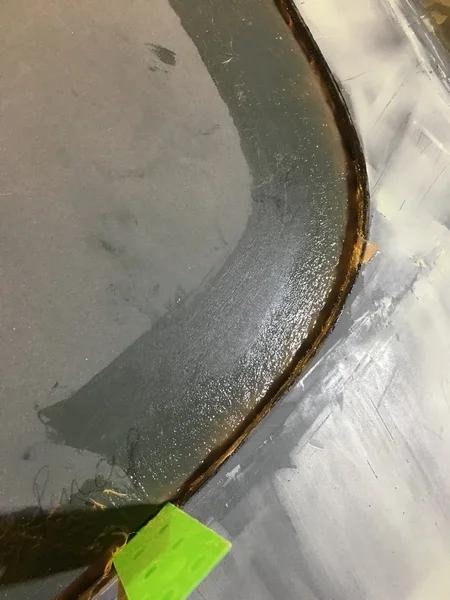
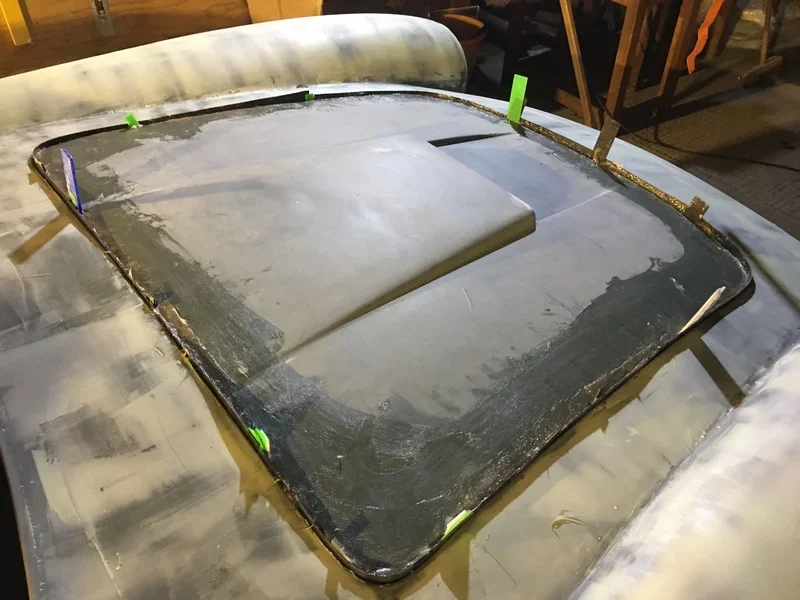
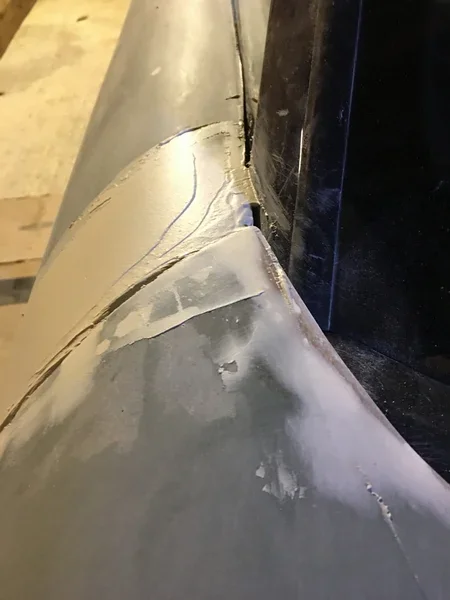
This involves some drywall screws, fibreglass paste and filler using a plastic L section as backing to hold the paste in place. The drywall screws act like re-enforcing rods in concrete. Pics of the later stages of this method attached and the result is a neat 6mm gap (impossible to get tighter as the door will foul as it opens due to the arc of the leading edge of the door being wider than the Z3.

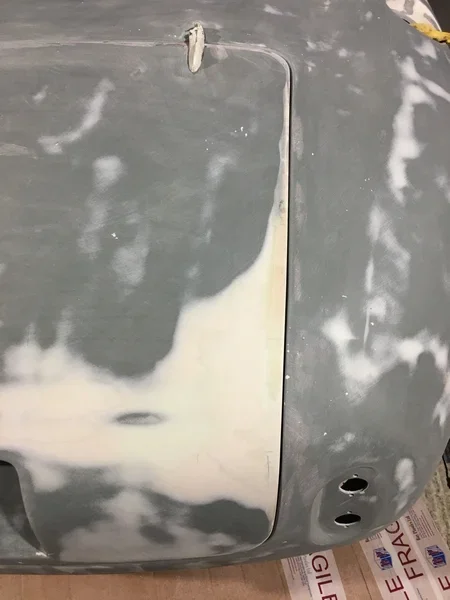
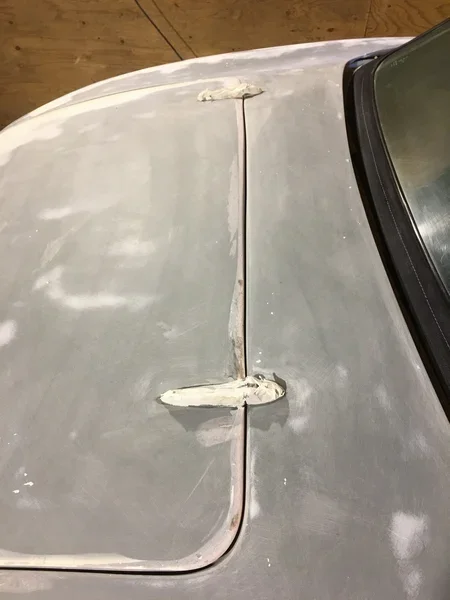
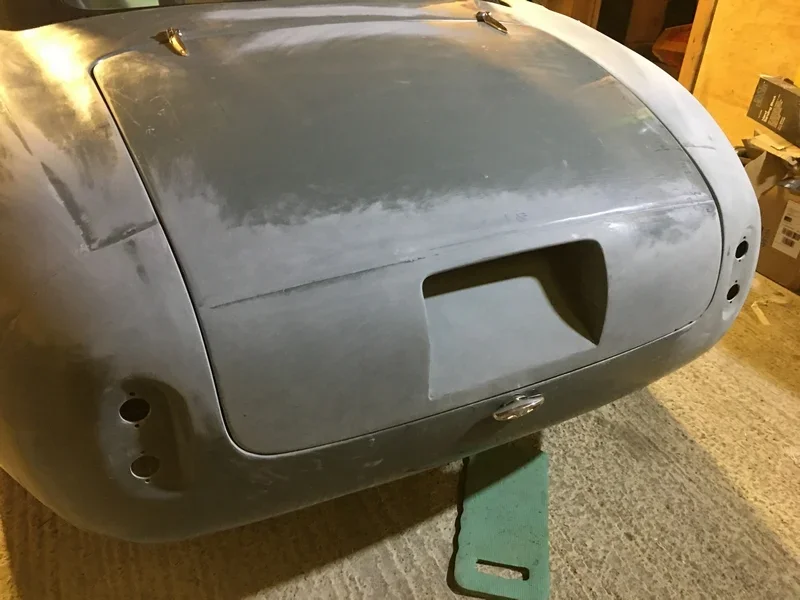
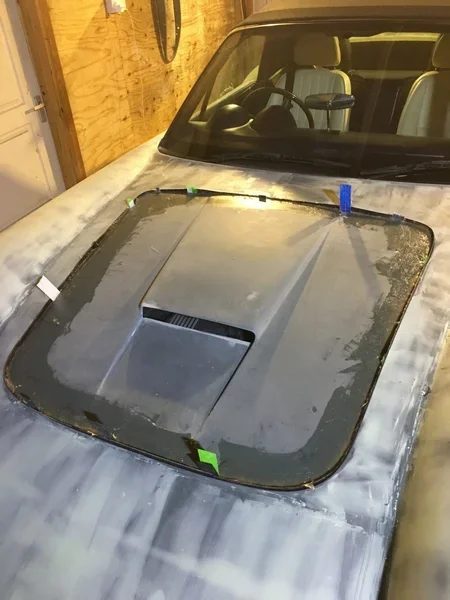
I also used similar methods (without the screws) for the boot lid gaps, baby bonnet gaps which were from 3-10 mm on the kit especially on the corners. They are now 2mm. In the pictures you can see I have used 2mm ABS strips as packers and stuffed fibreglass past down the gaps, once set it can be fine filled ready for paint.

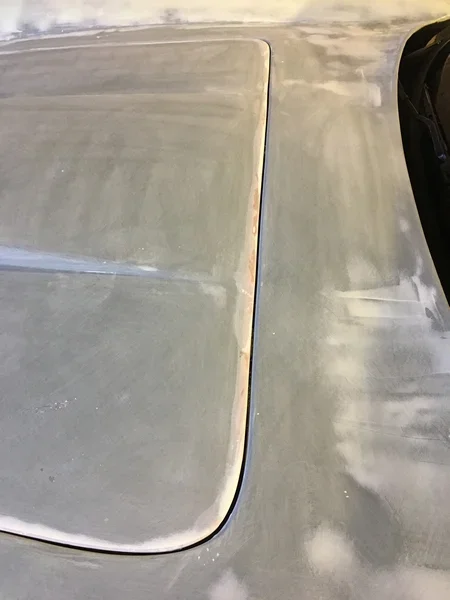
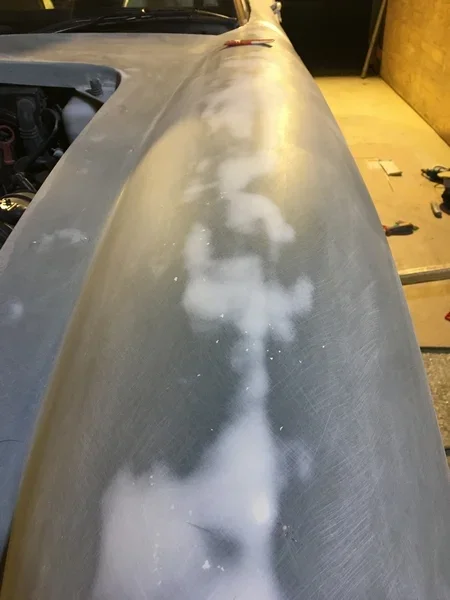
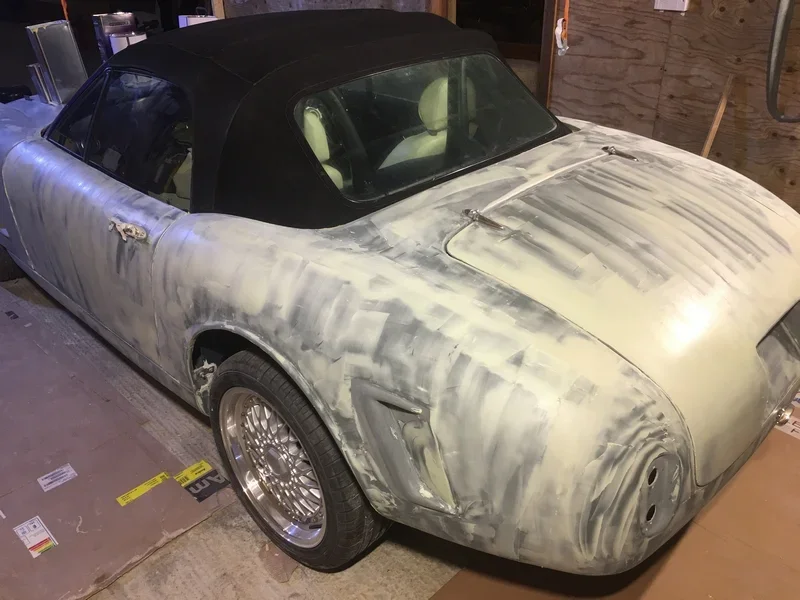
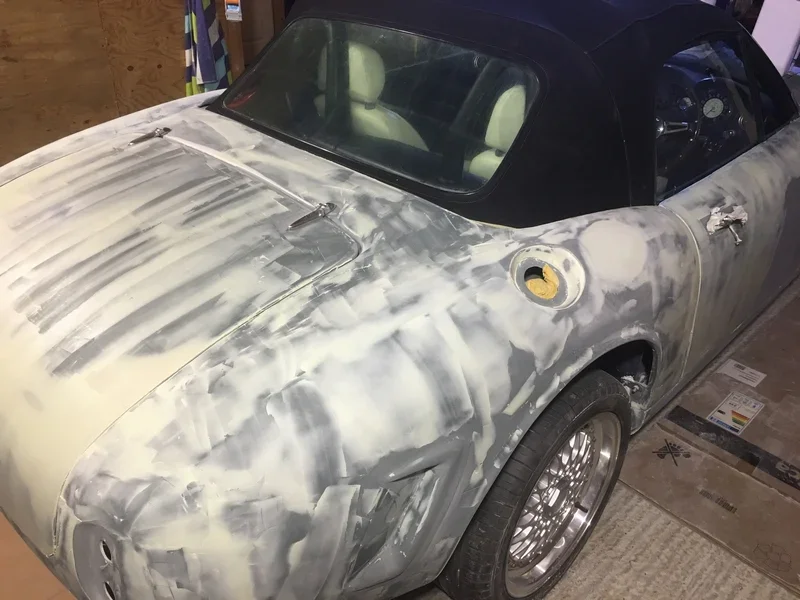
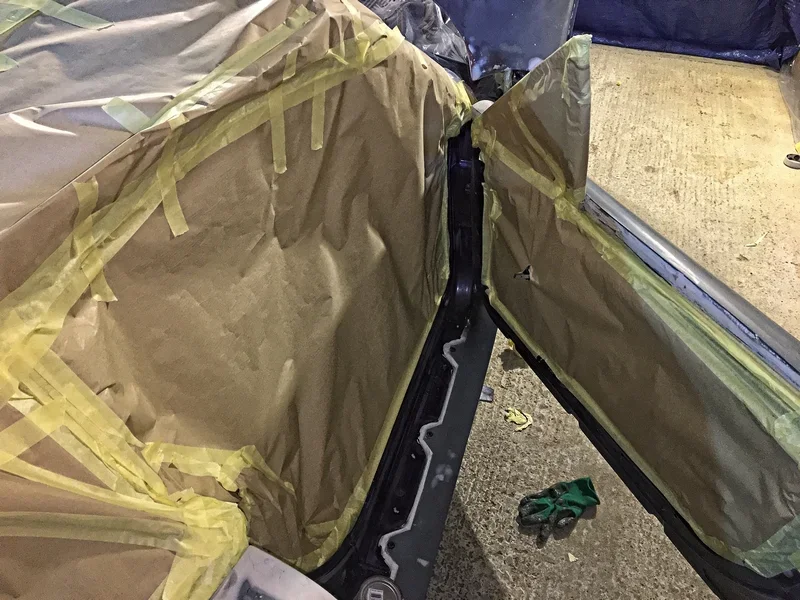
All the prep done by hand a I was concerned about a DA sander being too agressive and I wanted to feel the finish.

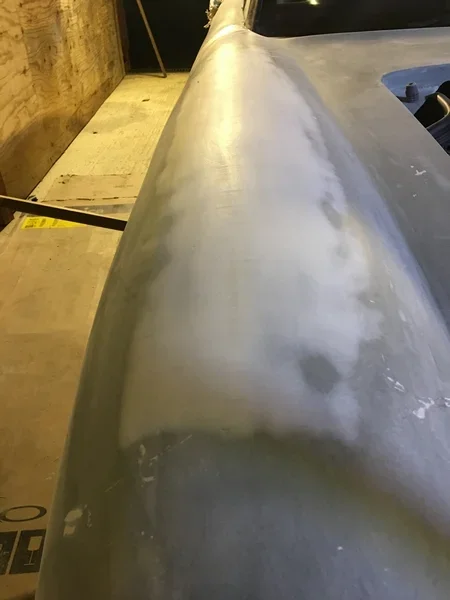
Top Tips: buy a good quality long-block sander (420 x 68 ish) they are a life saver for getting the panels flat. Also, get a plant sprayer and mist the panel with water when you think it is good (it isn't), shine an led light down it and look along the panel... sigh ... and continue to sand. Guide coat is your friend here.

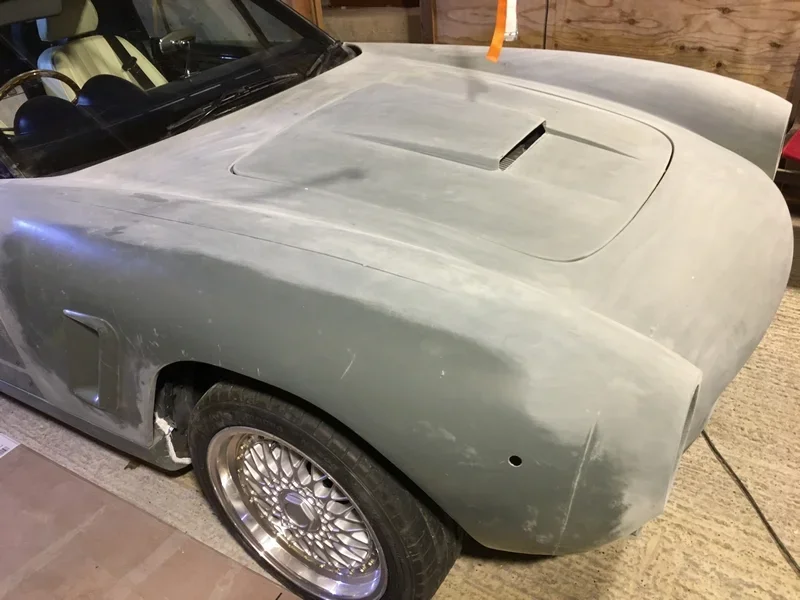
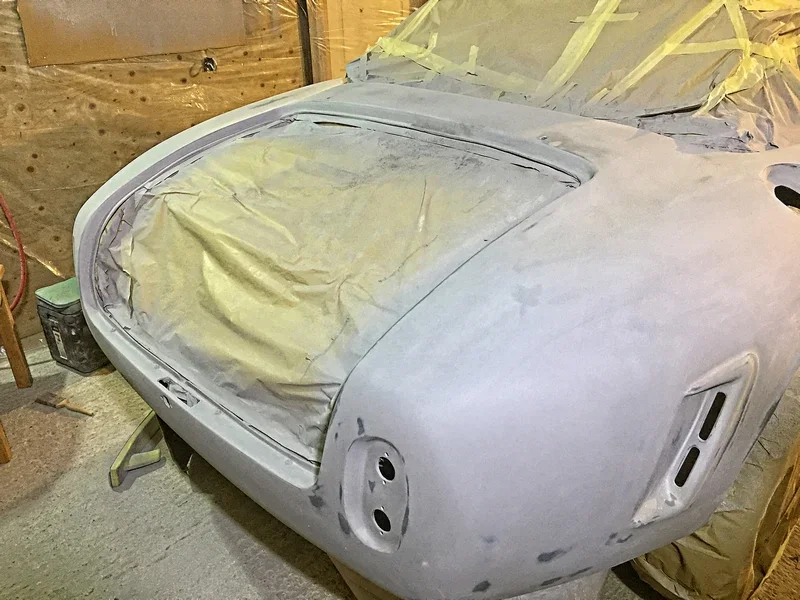
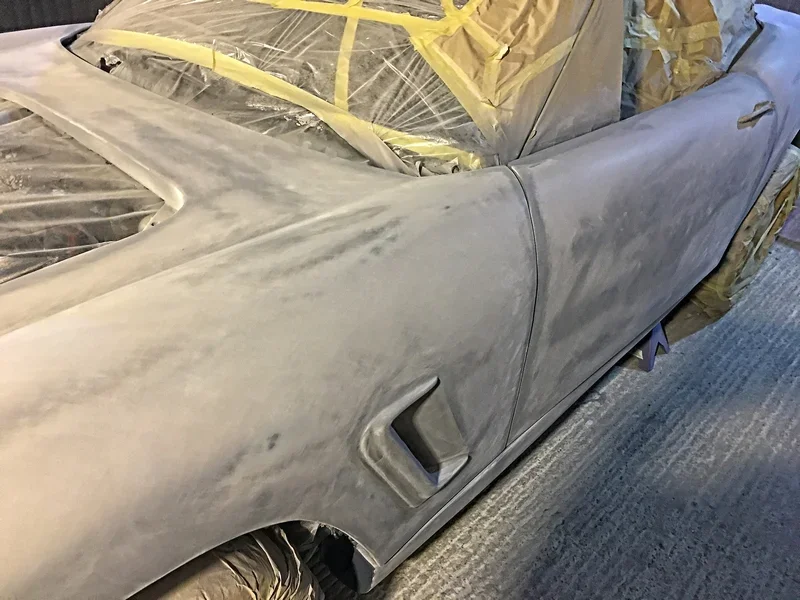
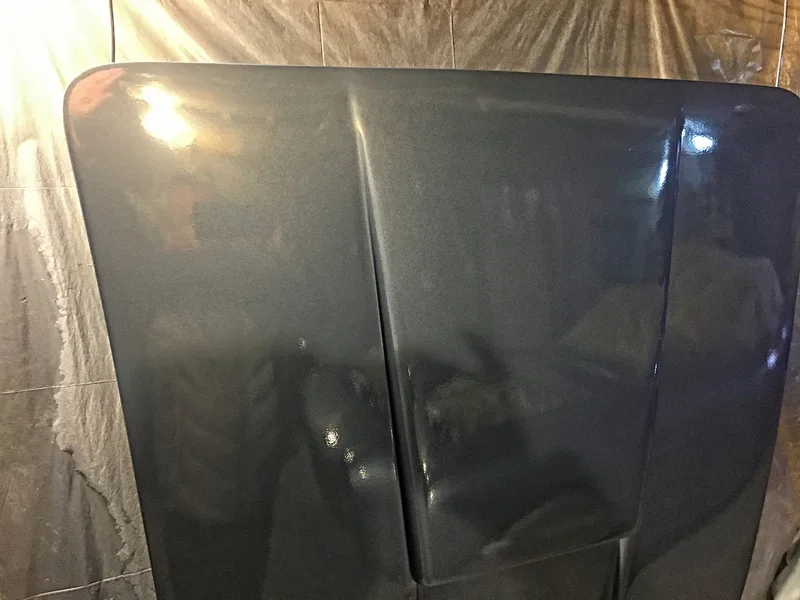
This Italian Pininfarina design is very curvy so trying to sand eveything corectly without wavy panels is tough (having been a carpenter in a past life helped). Eventually after sanding, filling, guide coat, block sanding, Dolphin Glaze fine filling, guide coat and block sanding and it looks ready for paint.

Nearly forgot, the baby bonnet had a shallower curve (front to back) than the adjacent panel and so had to be kerf-cut (look it up), pulled with ratchet straps to the right curve, fixed in place with galvanised builder band and back-filled with GRP paste. This did not stress the top surface at all and sorted the problem.
 

Attachments

  • Exterior Build Door Gaps 1.webp
    Exterior Build Door Gaps 1.webp
    29 KB · Views: 789
  • Exterior Build Door Gaps 4.webp
    Exterior Build Door Gaps 4.webp
    32.2 KB · Views: 808
  • Exterior Build Door Gaps 2.webp
    Exterior Build Door Gaps 2.webp
    35.1 KB · Views: 781
  • Exterior Build Door Gaps 5.webp
    Exterior Build Door Gaps 5.webp
    20.8 KB · Views: 825
  • Exterior Build Door Gaps 6.webp
    Exterior Build Door Gaps 6.webp
    19.3 KB · Views: 773
  • Exterior Build Door Gaps 7.webp
    Exterior Build Door Gaps 7.webp
    29.2 KB · Views: 775
  • Exterior Build Panel Gap Boot 4.webp
    Exterior Build Panel Gap Boot 4.webp
    23.8 KB · Views: 781
  • Exterior Build Panel Gap Boot 5.webp
    Exterior Build Panel Gap Boot 5.webp
    24.5 KB · Views: 770
  • Exterior Build Panel Gaps Baby Bonnet 1.webp
    Exterior Build Panel Gaps Baby Bonnet 1.webp
    50.3 KB · Views: 786
  • Exterior Build Panel Gaps Baby Bonnet 2.webp
    Exterior Build Panel Gaps Baby Bonnet 2.webp
    61.9 KB · Views: 773
  • Exterior Build Panel Gaps Boot 1.webp
    Exterior Build Panel Gaps Boot 1.webp
    49 KB · Views: 795
  • Exterior Build Panel gaps Baby Bonnet 3.webp
    Exterior Build Panel gaps Baby Bonnet 3.webp
    51.7 KB · Views: 779
  • Exterior Build Baby Bonnet Fixings 1.webp
    Exterior Build Baby Bonnet Fixings 1.webp
    73.5 KB · Views: 745
  • Exterior Build Baby Bonnet Fixings 2.webp
    Exterior Build Baby Bonnet Fixings 2.webp
    75.6 KB · Views: 743
  • Exterior Build Baby Bonnet Fixings 3.webp
    Exterior Build Baby Bonnet Fixings 3.webp
    77.3 KB · Views: 760
  • Exterior Build Baby Bonnet Fixings 4.webp
    Exterior Build Baby Bonnet Fixings 4.webp
    97.8 KB · Views: 783
  • Exterior Build Baby Bonnet Fixings 5.webp
    Exterior Build Baby Bonnet Fixings 5.webp
    124.2 KB · Views: 758
  • Exterior Build Baby Bonnet Gaps  9.webp
    Exterior Build Baby Bonnet Gaps 9.webp
    20.6 KB · Views: 747
  • Exterior Build baby Bonnet Gaps  8.webp
    Exterior Build baby Bonnet Gaps 8.webp
    36.6 KB · Views: 779
  • Exterior Build Baby Bonnet Gaps 4.webp
    Exterior Build Baby Bonnet Gaps 4.webp
    50.5 KB · Views: 768
  • Exterior Build Baby Bonnet Gaps 5.webp
    Exterior Build Baby Bonnet Gaps 5.webp
    33.7 KB · Views: 725
  • Exterior Build Baby Bonnet Gaps 6.webp
    Exterior Build Baby Bonnet Gaps 6.webp
    39.7 KB · Views: 747
  • Exterior Build Baby bonnet Gaps 7.webp
    Exterior Build Baby bonnet Gaps 7.webp
    59.2 KB · Views: 772
  • Exterior Build Baby Bonnet Gaps 10.webp
    Exterior Build Baby Bonnet Gaps 10.webp
    24 KB · Views: 728
  • Exterior Build Front Filling 2.webp
    Exterior Build Front Filling 2.webp
    19.7 KB · Views: 734
  • Exterior Build Front Filling 3.webp
    Exterior Build Front Filling 3.webp
    24.8 KB · Views: 742
  • Exterior Build Front Wing Filling 1.webp
    Exterior Build Front Wing Filling 1.webp
    22.5 KB · Views: 734
  • Exterior Build Paint Prep Rear 1.webp
    Exterior Build Paint Prep Rear 1.webp
    58.7 KB · Views: 771
  • Exterior Build Paint Prep Rear 3.webp
    Exterior Build Paint Prep Rear 3.webp
    60.7 KB · Views: 754
  • Exterior Build Paint Prep Rear 5.webp
    Exterior Build Paint Prep Rear 5.webp
    61.8 KB · Views: 758
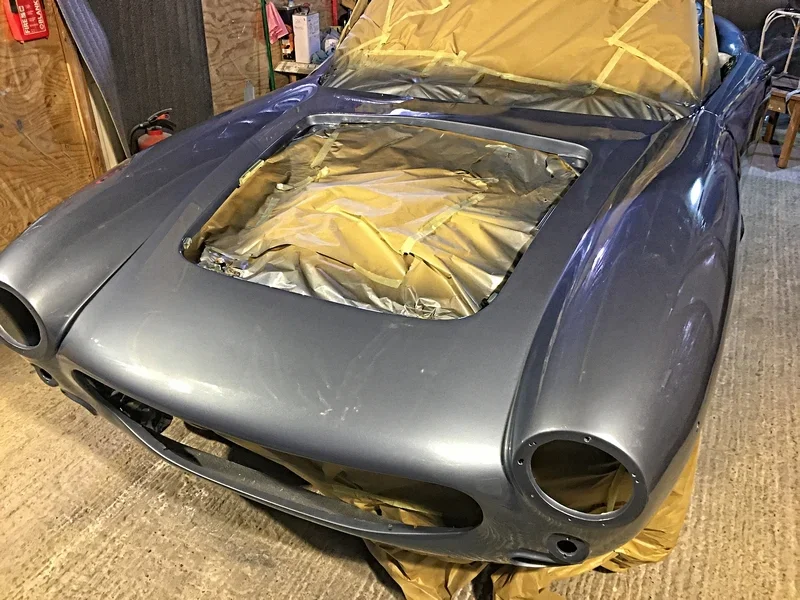
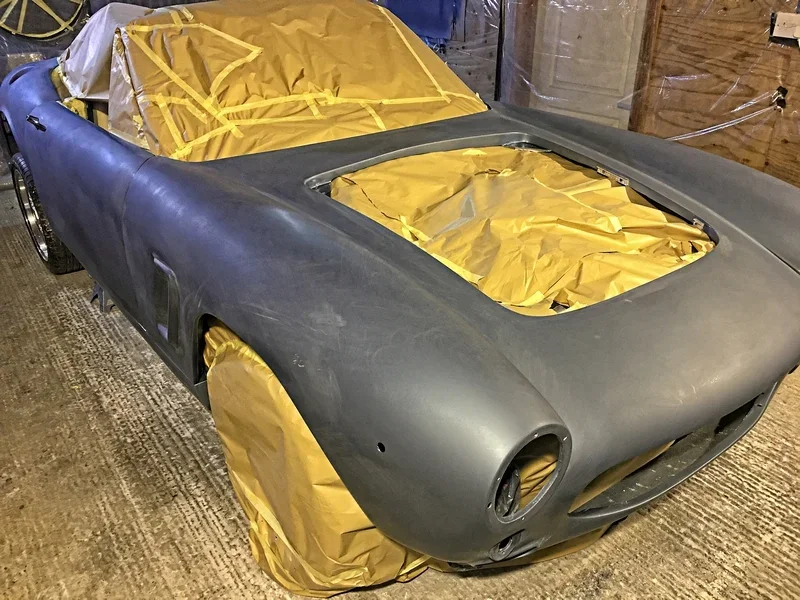
It's Primer Time!!!!!

Now comes the first test of my bodywork.... the car's not mine.... mine has been shot for years!

Bought a 100litre compressor, a good quality LVLP spray gun with 1.8mm (primer) and 1.3mm (base coat and clear coat) jets. 2 x 10 metre air hoses, an inline water filter/gauge. Just about to put it up for sale if anyone fancies coming to get it!

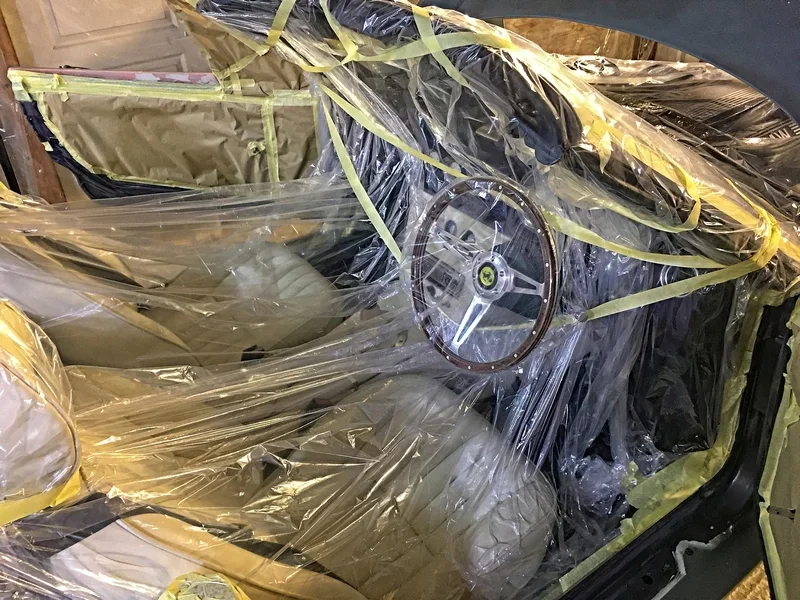
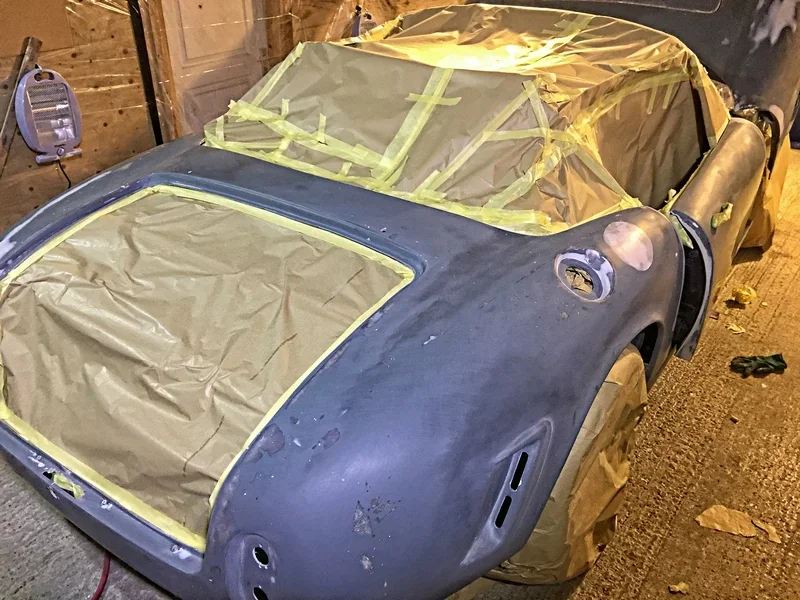
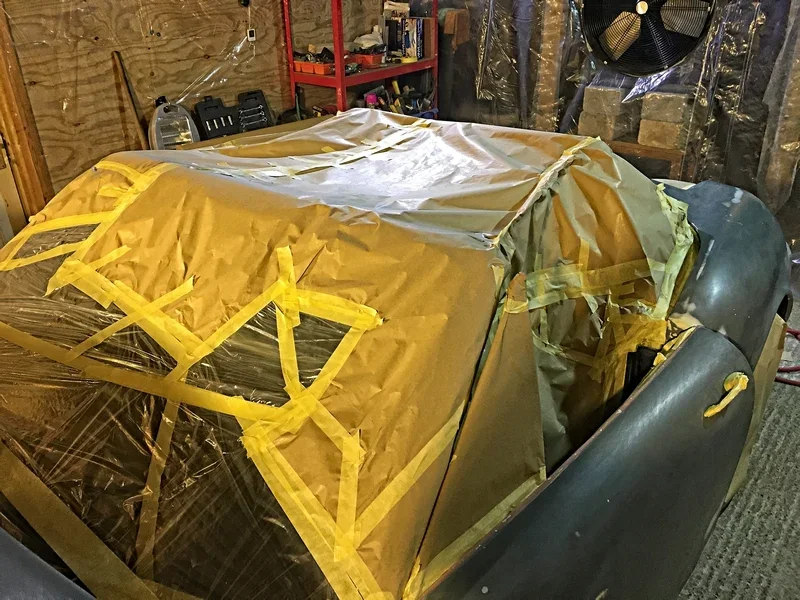
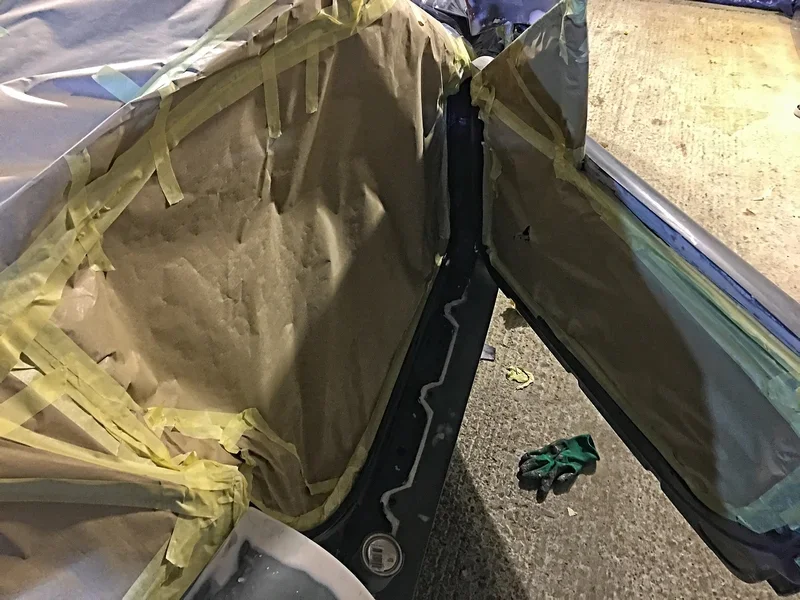
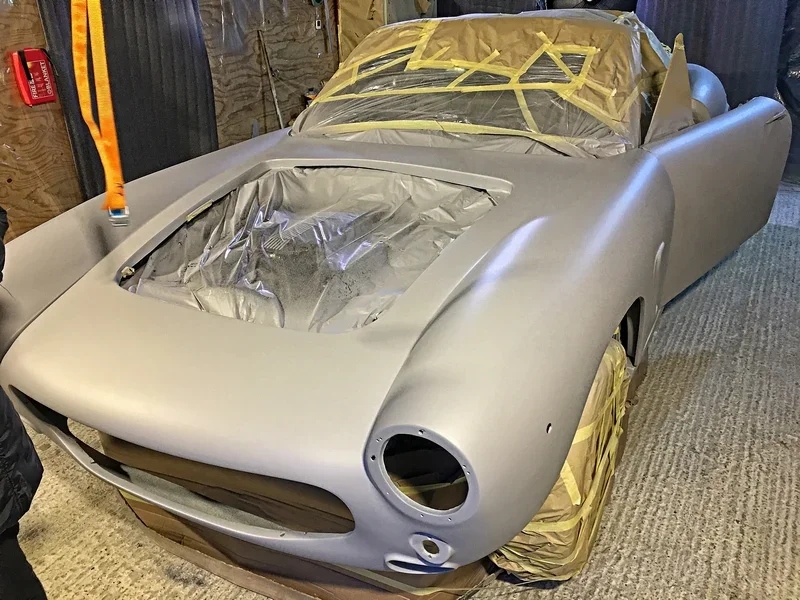
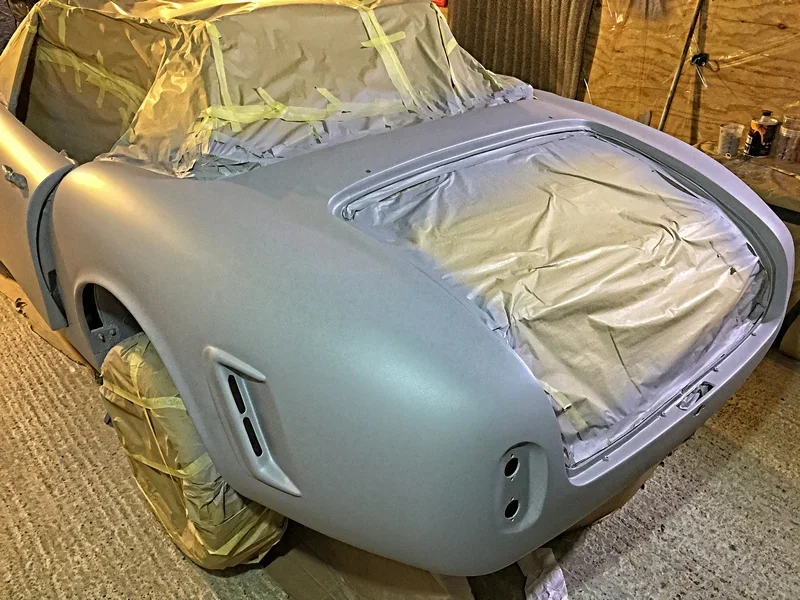
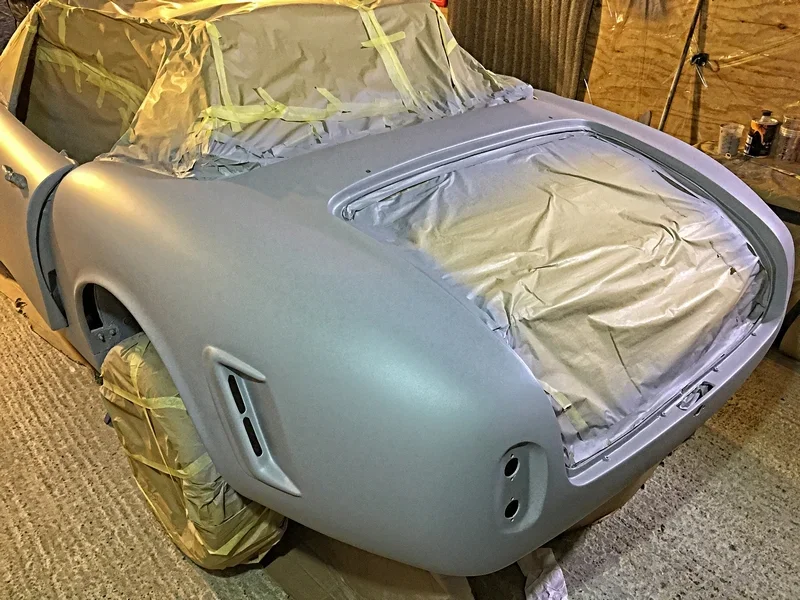
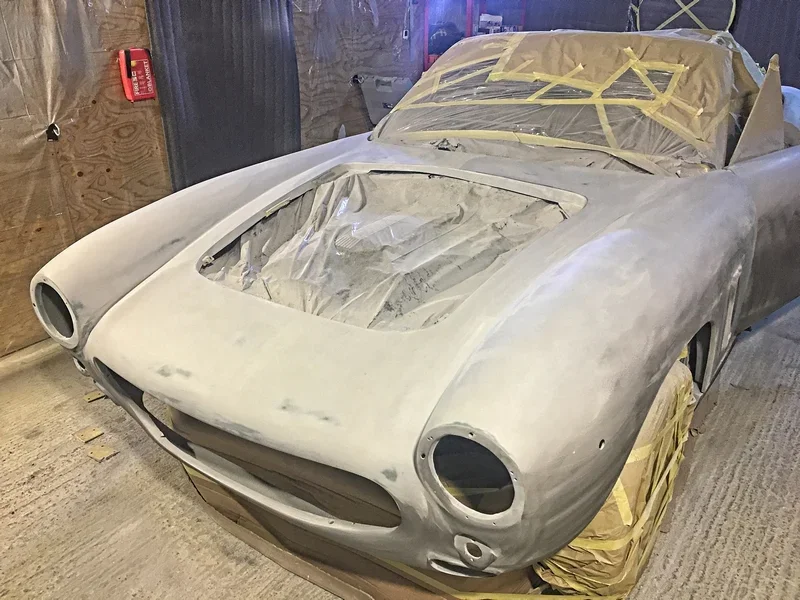
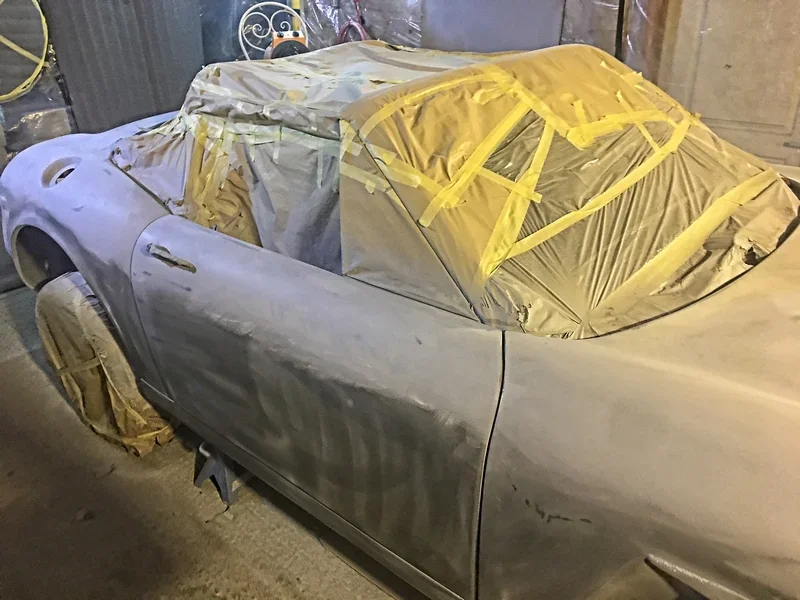
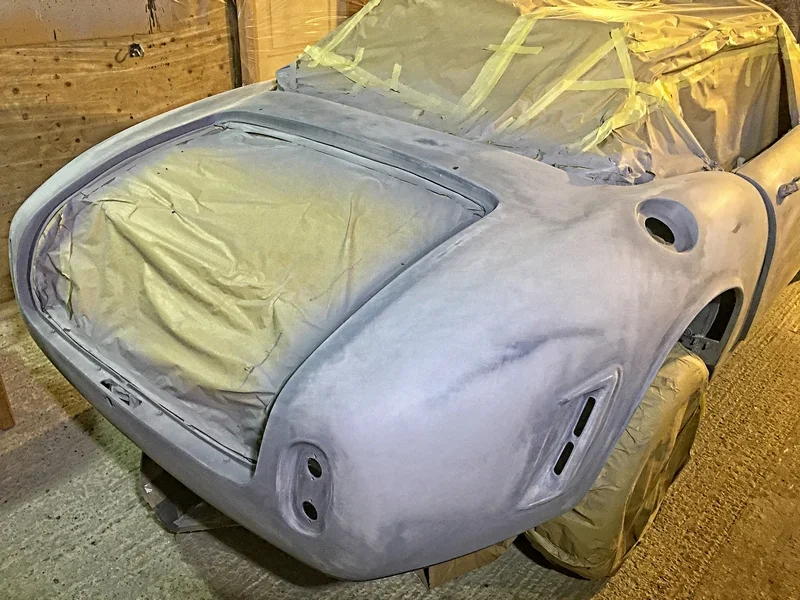
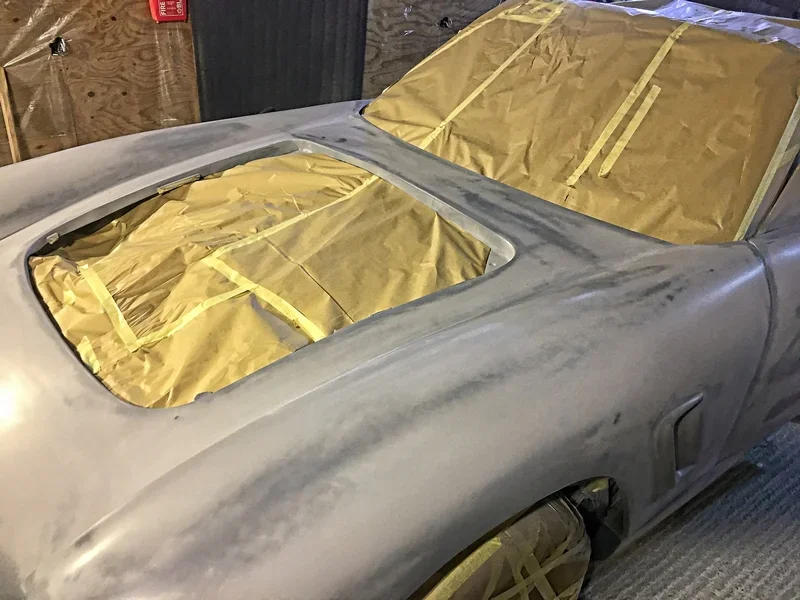
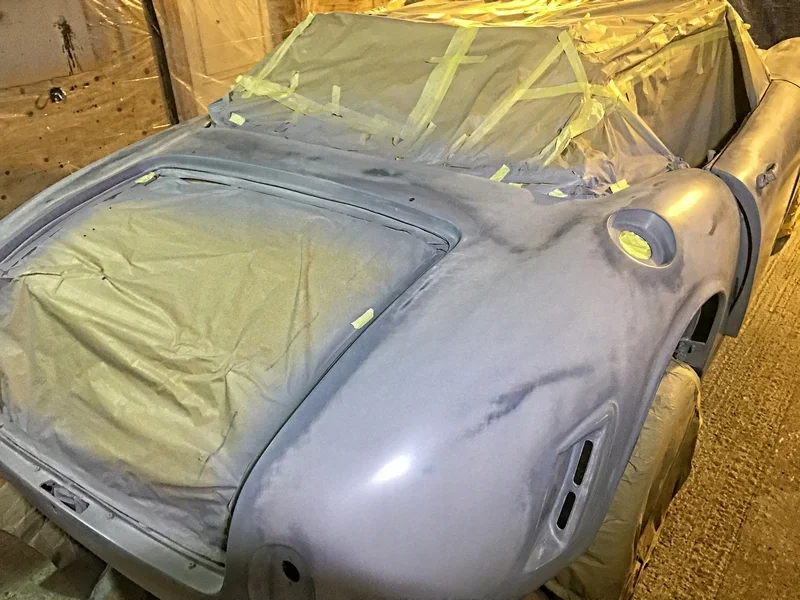
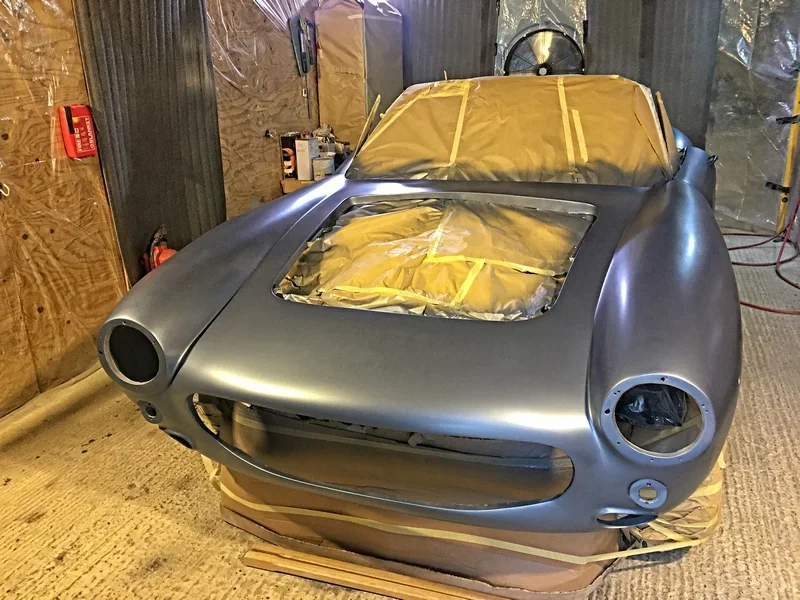
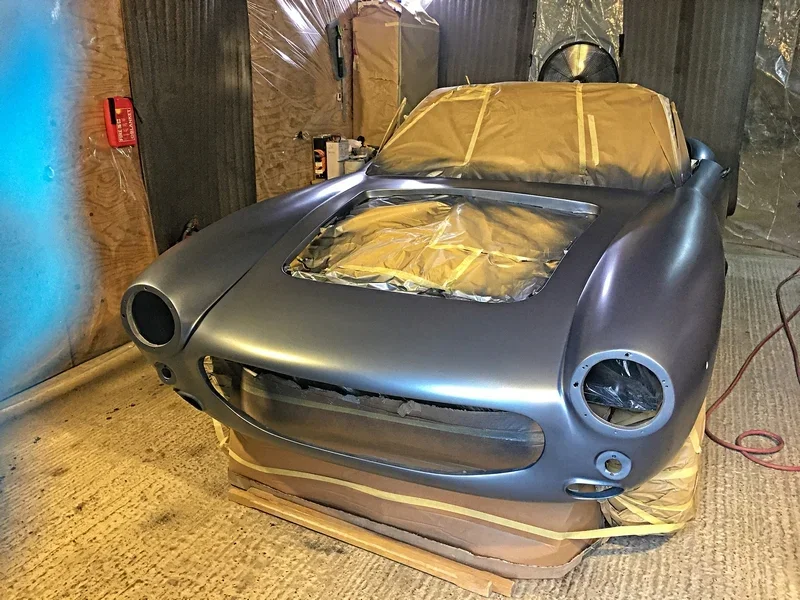
Cleaned my makeshift spray booth thouroughly. Spent ages masking the car in polythene and paper (took 2 hours). Got suited up (nomex spray suit, full air fed mask that I made from a proper filter, airbed pump with speed control circuit, a dyson vacuum hose and a snorkel mask. See this guy for how to do it:

View: https://www.youtube.com/watch?v=cX-glTu6tz0


Would be handy for Covid also if was not positive pressure (air you breathe out is expelled through holes in the bottom of the mask by the air pump).

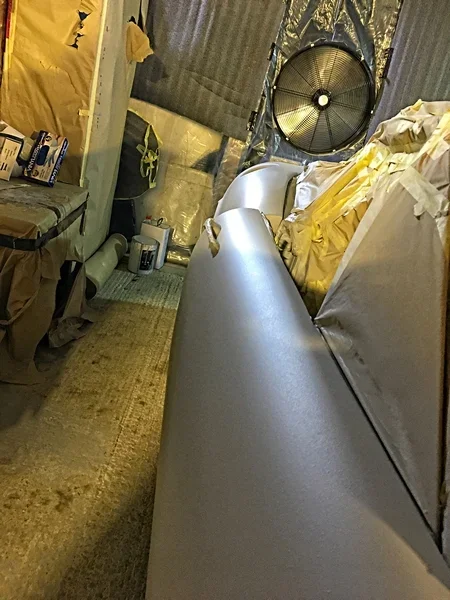
Mixed some 2k Primer, fired up the 24" industrial fan one end of my booth and opened the door 12" at the other (nothing would have kept it shut anyway with that fan blowing), loaded the spray gun fired up the compressor and thought......

shoot, i have not sprayed anything for 30-years (Cellulose on my 1969 Cortina 1600E - Amber Gold Metallic, fantastic car) maybe I should practice on an old panel?...

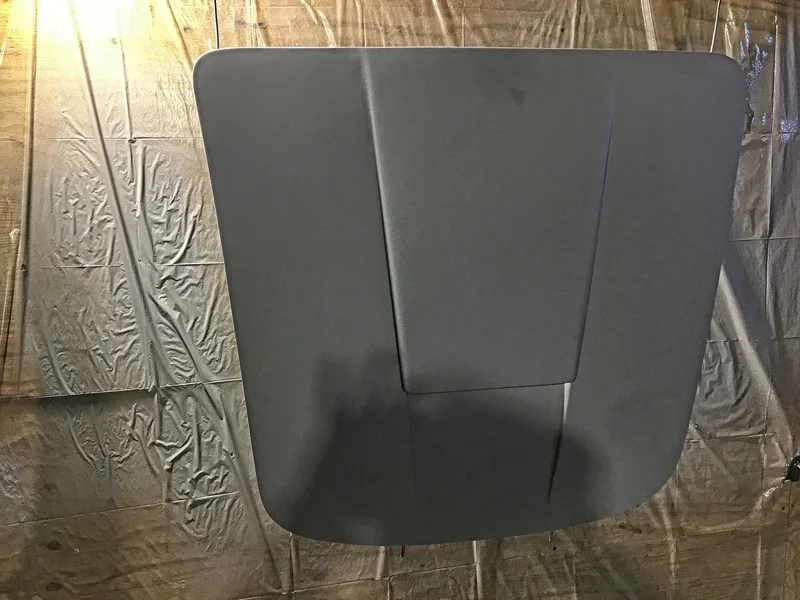
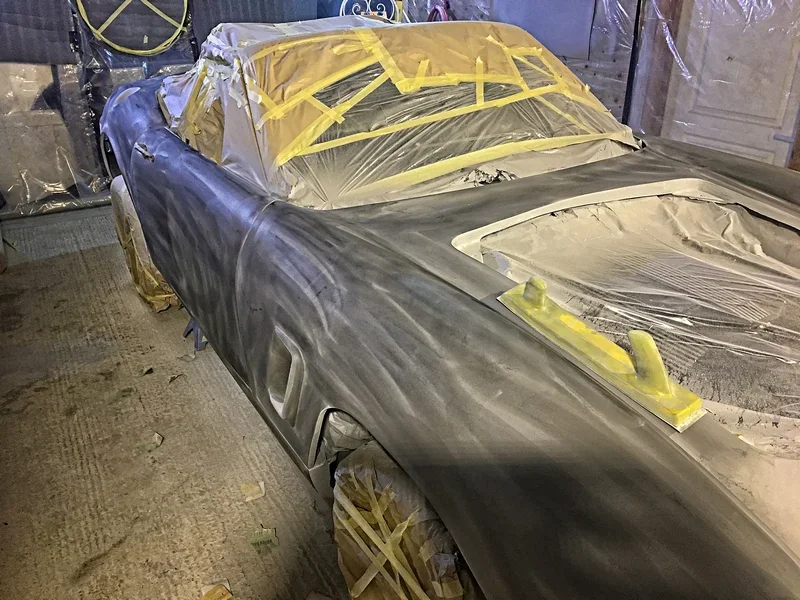
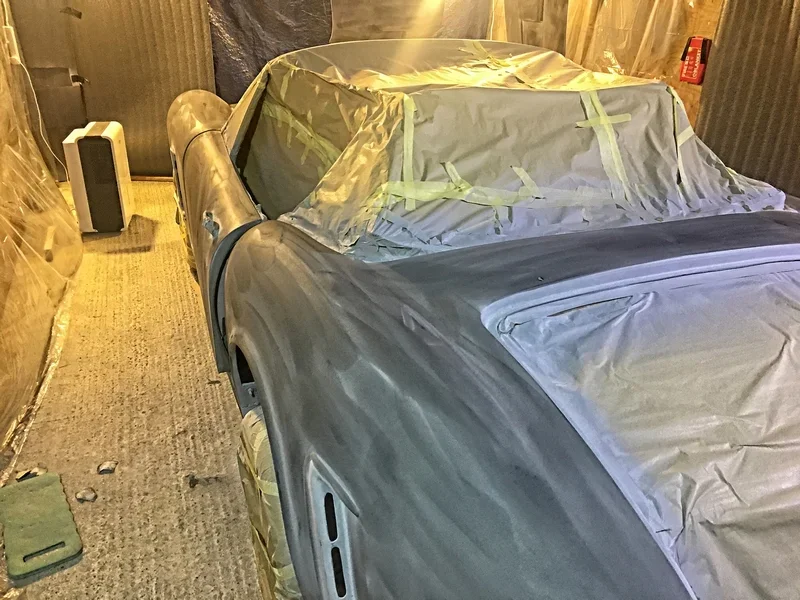
Nah!.... started spraying the primer 6" from panel, lovely wide spray pattern and going on really well..... bloody hell these things chuck out some paint, 18 minutes and 1.2l of primer/hardner/thinners later the whole car had a coat of primer!

Resisting the temptation to poke and prod at it, I hang up my six-shooter and go for coffee.... flash time of the primer 30-40 minutes.

Coffee finished and a strict 40-minutes later (ish), I refill the gun and hit the car with another coat. So tempting just to leave it this pale grey primer colour and be done with it but the show.. or at leat teh colour... must go on!
 

Attachments

  • Exterior Build Painting 3.webp
    Exterior Build Painting 3.webp
    119.9 KB · Views: 749
  • Exterior Build Painting 4.webp
    Exterior Build Painting 4.webp
    131.3 KB · Views: 739
  • Exterior Build Painting 6.webp
    Exterior Build Painting 6.webp
    128.2 KB · Views: 742
  • Exterior Build Painting 7.webp
    Exterior Build Painting 7.webp
    108.5 KB · Views: 746
  • Exterior Build Painting 8.webp
    Exterior Build Painting 8.webp
    116.4 KB · Views: 758
  • Exterior Build Painting 9.webp
    Exterior Build Painting 9.webp
    125.3 KB · Views: 749
  • Exterior Build Painting 10.webp
    Exterior Build Painting 10.webp
    85.5 KB · Views: 688
  • Exterior Build Painting 11.webp
    Exterior Build Painting 11.webp
    101.2 KB · Views: 752
  • Exterior Build Painting 12.webp
    Exterior Build Painting 12.webp
    78.9 KB · Views: 731
  • Exterior Build Painting 13.webp
    Exterior Build Painting 13.webp
    131.6 KB · Views: 715
  • Exterior Build Painting 14.webp
    Exterior Build Painting 14.webp
    112.2 KB · Views: 732
  • Exterior Build Painting 15.webp
    Exterior Build Painting 15.webp
    121.8 KB · Views: 723
  • Exterior Build Painting 16.webp
    Exterior Build Painting 16.webp
    119.8 KB · Views: 745
  • Exterior Build Painting Primer 19.webp
    Exterior Build Painting Primer 19.webp
    102.8 KB · Views: 682
  • Exterior Build Painting Primer 20.webp
    Exterior Build Painting Primer 20.webp
    65.4 KB · Views: 637
  • Exterior Build Painting Primer 22.webp
    Exterior Build Painting Primer 22.webp
    56.2 KB · Views: 654
  • Exterior Build Painting Primer 23.webp
    Exterior Build Painting Primer 23.webp
    37.8 KB · Views: 693
  • Exterior Build Painting Primer Coat 17.webp
    Exterior Build Painting Primer Coat 17.webp
    106.8 KB · Views: 721
Really interesting well written post. You should be very proud of it.
 
  • Agree
Reactions: Lee
Two steps forward, one step back.

The primer looks fantastic, thick , even and no runs. I am stunned!

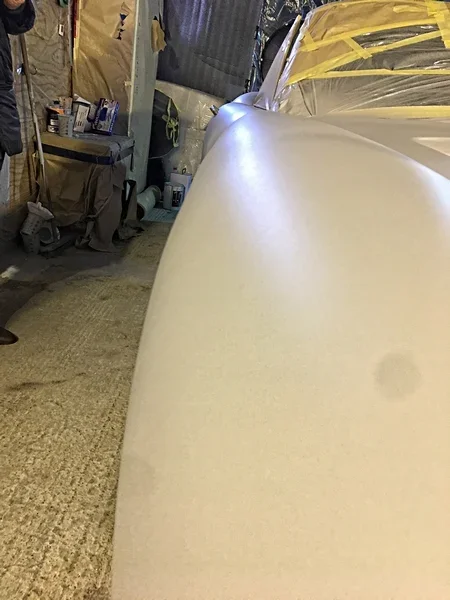
Now it is time go make it all look like crap again, because it is Guide Coat (I used the powder puff version) and Block sanding time.... again... I have arm and shoulder muscles like Bruce Lee from the last batch of sanding and no finger prints either (and I had gloves on).

Oh well, "Things can only get better" - D-Ream. Then again look what that did for the labour party!!!
 

Attachments

  • Exterior Build Painting Primer Coat 17.webp
    Exterior Build Painting Primer Coat 17.webp
    106.8 KB · Views: 627
  • Exterior Build Painting Primer Flatted Back 27.webp
    Exterior Build Painting Primer Flatted Back 27.webp
    93.2 KB · Views: 623
  • Exterior Build Painting Primer Flatted Back 28.webp
    Exterior Build Painting Primer Flatted Back 28.webp
    68.9 KB · Views: 581
  • Exterior Build Painting Primer Flatted Back 29.webp
    Exterior Build Painting Primer Flatted Back 29.webp
    82.9 KB · Views: 601
  • Exterior Build Painting Primer Flatted Back 30.webp
    Exterior Build Painting Primer Flatted Back 30.webp
    100.7 KB · Views: 601
  • Exterior Build Painting Primer Flatted Back 31.webp
    Exterior Build Painting Primer Flatted Back 31.webp
    91.7 KB · Views: 586
  • Exterior Build Painting Primer Flatted Back 32.webp
    Exterior Build Painting Primer Flatted Back 32.webp
    100 KB · Views: 591
  • Exterior Build Painting Primer Flatted Back 33.webp
    Exterior Build Painting Primer Flatted Back 33.webp
    88.5 KB · Views: 586
  • Exterior Build Painting Primer Guide coat 25.webp
    Exterior Build Painting Primer Guide coat 25.webp
    112.2 KB · Views: 577
  • Exterior Build Painting Primer Guide coat 26.webp
    Exterior Build Painting Primer Guide coat 26.webp
    100.9 KB · Views: 624
  • Exterior Build Painting Primer Scuffed 39.webp
    Exterior Build Painting Primer Scuffed 39.webp
    76.6 KB · Views: 565
  • Exterior Build Painting Primer Scuffed 40.webp
    Exterior Build Painting Primer Scuffed 40.webp
    105.4 KB · Views: 599
  • Exterior Build Painting Primer Scuffed 41.webp
    Exterior Build Painting Primer Scuffed 41.webp
    68.7 KB · Views: 612
  • Exterior Build Painting Primer Scuffed 42.webp
    Exterior Build Painting Primer Scuffed 42.webp
    87.5 KB · Views: 587
Really interesting well written post. You should be very proud of it.

Which, the post or the car? In either case, thanks for the vote of confidence. It was brilliant fun, if a bit gutty at times, and passed the "lockdown" time nicely.
 
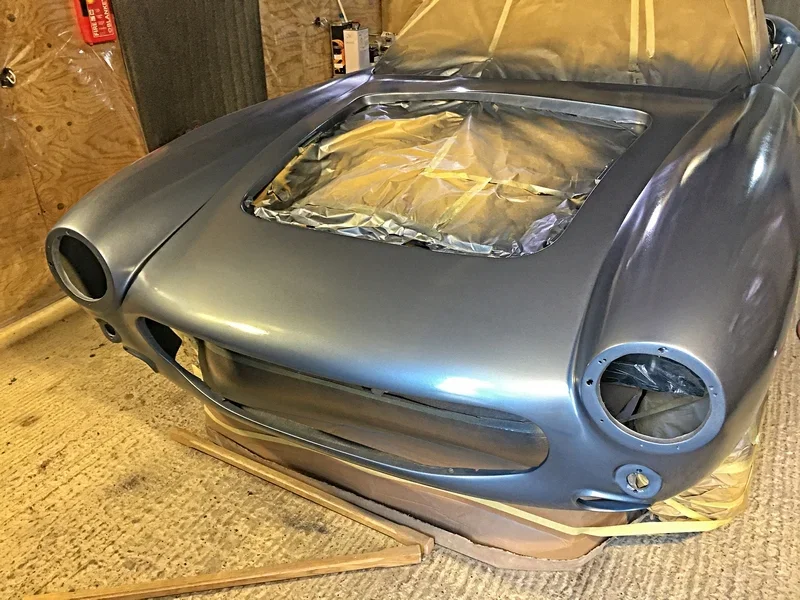
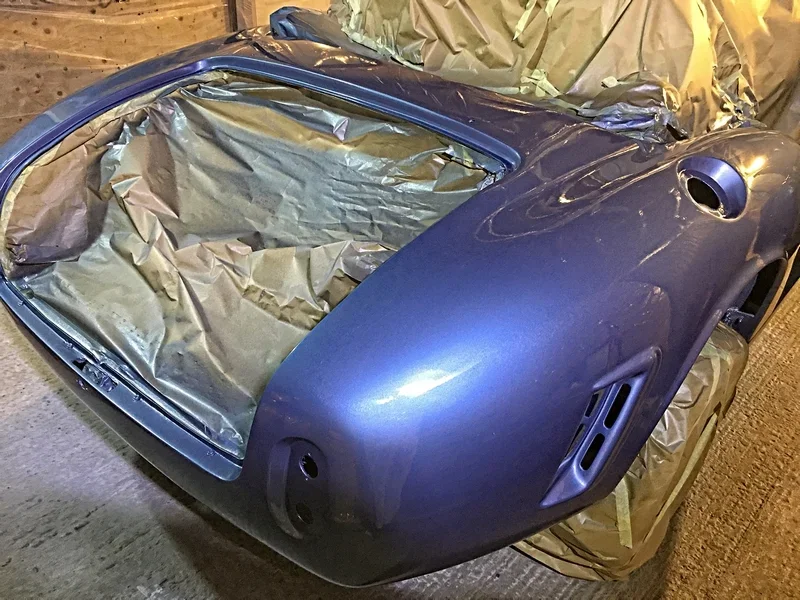
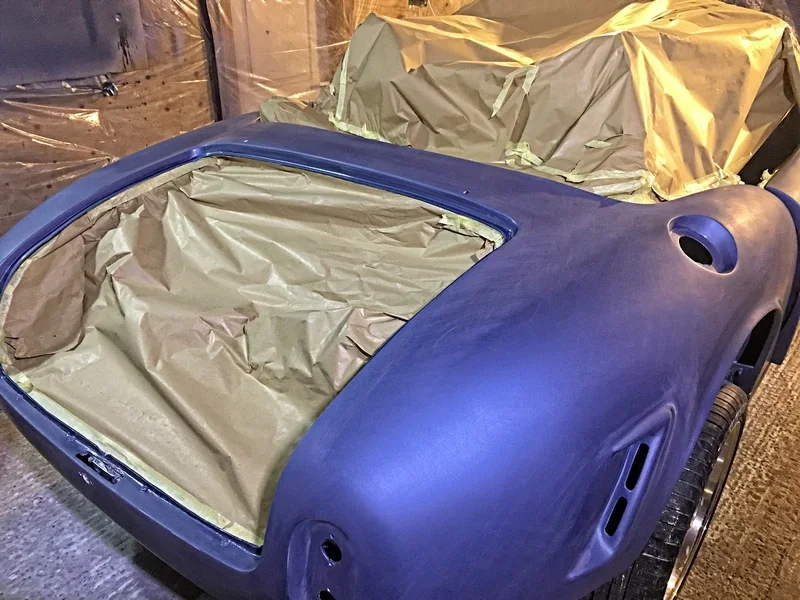
Now the stylish Italian looks like a welders apprentice from Govan Shipyards it is time for a visit to the Designer Outlet... it is basecoat time... Ferrari original 1961 colour Azzurro Metallitzatto 106-A (that's metallic blue to you and I). My research tells me that Blue was the main Ferrari colour back then, with the Ferrari-Rosso only really coming into play in the late 70's to early 80's. Made no difference in the price of the paint (2.5l = £116) so may as well have an original colour.

So suited and masked up again (makes COVID PPE look comletely inadequate, can't find a pic at the moment, probably on SWMBO's phone) I fire up the fan and compressor, fill up the gun (remebering at the last minute to change the jets to the 1.3mm) with basecoat and thinners (no hardener in basecoat) and get spraying.

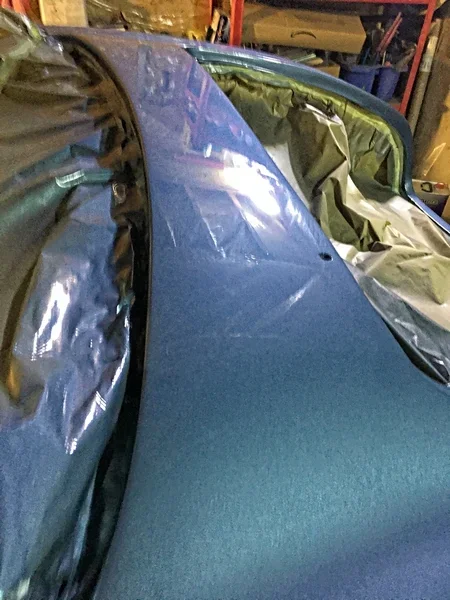
Once again I am astonished with how fast these guns lay down paint. 6" away from the panel, wide fan pattern and nice droplet size (important to avoid the dreaded orange peel), 75% overlap on each pass and going fairly quickly so as not to put too much paint on in one pass (runs). Hey presto 18 minutes later there is a coat of blue on the car.

It looked amazing when it was going on the car shiny and wet (basecoat dries to a dull satin finish).

It's coffee time again as the flash time is around 15-20 minutes on the basecoat.

Back in the booth the whole car is a fabulous colour but dull as ditchwater. I know it is supposed to dry like this but I still cannpot shake off a slight disappointment. So on goes another lovely shiny coat, a bit heavier this time as this is apparently the correct way to do it according to these guys at Paint Society:

View: https://www.youtube.com/watch?v=WP6aUCkKK5w


20 minutes this time so I must have laid down more paint?

20 minutes flash time and more coffee later, back in the booth. Slightly different process this time. The paint is applied 10" away from the panel with the gun pressure turned up slightly, all passes are fast and in the same direction to lay down the metallic particles in the paint the same way (prevents tiger-striping in light metallic paints). This is what Paint Society tell me and who am I to argue....

As this coat was going on it did change the appearance of the metallic surface so something is going on.

The results pre-clear coat, you decide.
 

Attachments

  • Exterior Build Painting 1st Basecoat 43.webp
    Exterior Build Painting 1st Basecoat 43.webp
    106.1 KB · Views: 673
  • Exterior Build Painting 2nd Basecoat 44.webp
    Exterior Build Painting 2nd Basecoat 44.webp
    114.2 KB · Views: 701
  • Exterior Build Painting 3rd Basecoat 45.webp
    Exterior Build Painting 3rd Basecoat 45.webp
    104.7 KB · Views: 690
The next day the basecoat looked like a "Gangsta" matt wrapped car only not in black. It is a really nice finish but not durable as basecoat has no hardener in it, purely there for colour.

So it is hard clearcoat time, this needed to be done within 24-hours of the base coat or the chemical cross-bonding would not take place and the clearcoat would just sit on the top of the basecoat (the reason that clearcoat peels apparently). Finished a 6pm ish the previous night so 10 am next day i'm in the booth loaded up with 4:1 clearcoat and hardener with a splash of thinners and ready to spray.

This part is considerably harder to keep under control, the first coat is easy because you can see the new shine appear over the dull basecoat like a mirror. 75% overlap, quickly on. So first coat 18 minutes and we are there.

The usual flash time coffee break and back in the booth for a second and heavier coat. Much more difficult as you have to really concentrate and be extremely methodical to know where you have laid down paint and where you have not. This coat is also heavier than the first and so runs more easily (ask me how I know).

More coffee and 20 minutes later back in the booth for a 3rd heavy coat, same problem as coat two. Really hard to judge how much paint has hit the car due to the curvy bodywork. With a 9" wide fan pattern on the gun only about 1/3rd of the panel in the middle is dead ahead the top and bottom have curved away, the result, uneven coverage and a big temptation of go over it again during this session, which I resisted.

I did decide to run one last coat as I like a deep gloss, so 4 coats of clear.

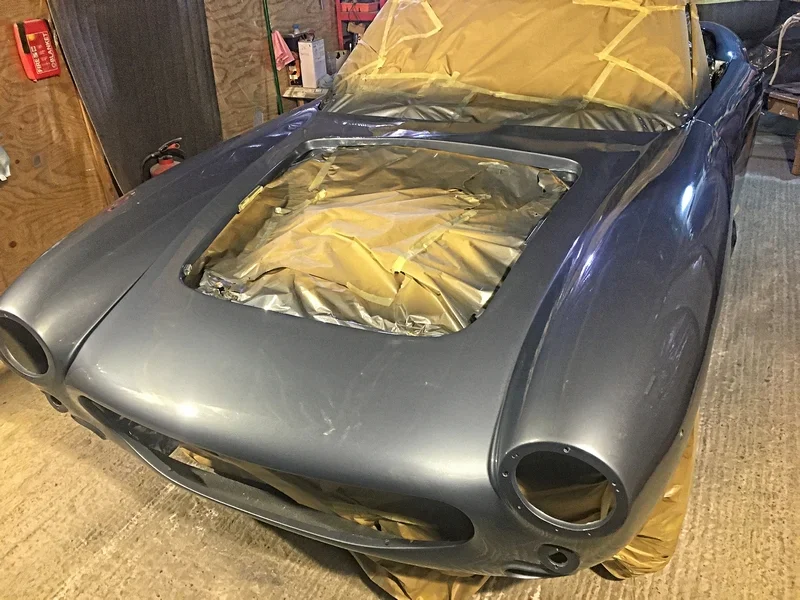
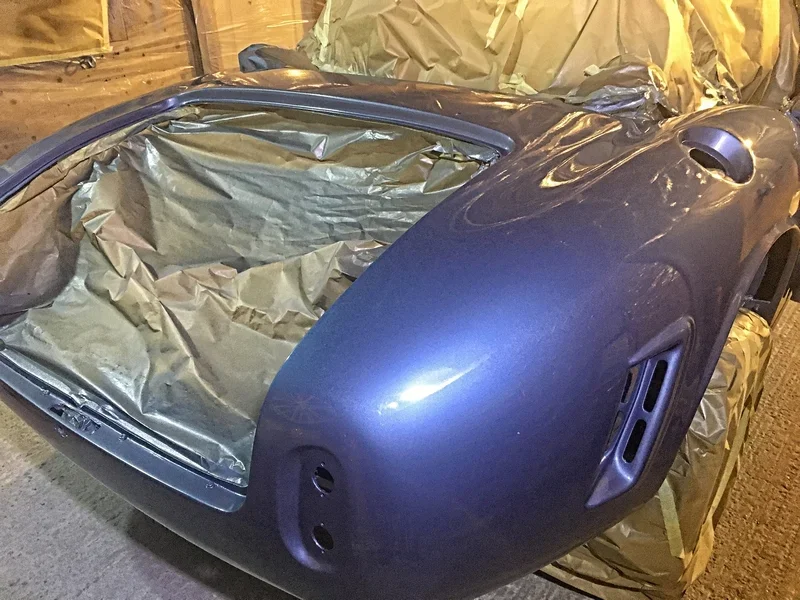
Looks like pool of water on a blue mirror, absolutely amazing. it is now 5pm and I am starving so i lock the beast up for the night an put the heaters on in the work shop... can't have this beauty getting cold it is after all used to the Italian and Californian climate!.... except it isn't is it Sandy it is bloody German, with a body made in Dorset.....

P.S. I was asked at the time: "The car looks like the back is blue and the front is grey, why is that MisterP?" The LED floodlights in the workshop are daylight versions at the back of the car and warm white at the front. Not very helpful when you are spraying a car!!!
 

Attachments

  • Exterior Build Painting 4th Clearcoat 46.webp
    Exterior Build Painting 4th Clearcoat 46.webp
    114.1 KB · Views: 724
  • Exterior Build Painting 4th Clearcoat 47.webp
    Exterior Build Painting 4th Clearcoat 47.webp
    111.3 KB · Views: 789
  • Exterior Build Painting 4th Clearcoat 48.webp
    Exterior Build Painting 4th Clearcoat 48.webp
    88.2 KB · Views: 713
Last edited:
Top Tip: Quit whilst you are ahead and do not watch any more paint spraying videos. Go on ask me why, I dare you.

The answer:

I watched a video or two about de-nibbing runs and bugs from the fresh clearcoat and another about flatting the clearcoat and doing a flowcoat. When I went down to the workshop to look at the clearcoat next day it looked spectacular but did of couse have the customary flies and bits of dust embedded in it (it is my barn the workshop is in after all, even if it is lined with polythene and taped up).

So armed with my new found knowledge of de-nibbing and flowcoats (I am a bit of perfectionist with this stuff), I set too with a very sharp knife blade taking out the bugs, grit and runs as instructed. This took forever and by the time I had flatted the clearcoat back and applied another coat of clearcoat (the flowcoat) it did look even shinier but not worth the extra effort.

Top Tip: Do not bother with a flowcoat, all the bugs will come out with a cut and polish a few weeks later when the paint is good and hard.
 

Attachments

  • Exterior Build Painting 3 flowcoats 54.webp
    Exterior Build Painting 3 flowcoats 54.webp
    114.3 KB · Views: 573
  • Exterior Build Painting 3 Flowcoats 55.webp
    Exterior Build Painting 3 Flowcoats 55.webp
    107.2 KB · Views: 579
  • Exterior Build Painting 3 Flowcoats 56.webp
    Exterior Build Painting 3 Flowcoats 56.webp
    114.9 KB · Views: 603
  • Exterior Build Painting 3 flowcoats 57.webp
    Exterior Build Painting 3 flowcoats 57.webp
    55.3 KB · Views: 583
  • Exterior Build Painting 3 Flowcoats 58.webp
    Exterior Build Painting 3 Flowcoats 58.webp
    57.6 KB · Views: 579
  • Exterior Build Painting 3 Flowcoats 60.webp
    Exterior Build Painting 3 Flowcoats 60.webp
    98.1 KB · Views: 595
  • Exterior Build Painting 3 Flowcoats 61.webp
    Exterior Build Painting 3 Flowcoats 61.webp
    108.2 KB · Views: 623
  • Exterior Build Painting 3 Flowcoats 62.webp
    Exterior Build Painting 3 Flowcoats 62.webp
    95.9 KB · Views: 621
  • Exterior Build Painting 3 flowcoats 63.webp
    Exterior Build Painting 3 flowcoats 63.webp
    53.7 KB · Views: 585
  • Exterior Build Painting 3 Flowcoats 64.webp
    Exterior Build Painting 3 Flowcoats 64.webp
    48.5 KB · Views: 558
  • Exterior Build Painting 3 Flowcoats 65.webp
    Exterior Build Painting 3 Flowcoats 65.webp
    47.3 KB · Views: 551
  • Exterior Build Painting 3 Flowcoats 66.webp
    Exterior Build Painting 3 Flowcoats 66.webp
    81 KB · Views: 597
  • Exterior Build Painting Clearcoat Flatted Back ready for Flowcoat 52.webp
    Exterior Build Painting Clearcoat Flatted Back ready for Flowcoat 52.webp
    94.3 KB · Views: 593
  • Exterior Build Painting Clearcoat Flatted Back ready for Flowcoat 53.webp
    Exterior Build Painting Clearcoat Flatted Back ready for Flowcoat 53.webp
    108 KB · Views: 573
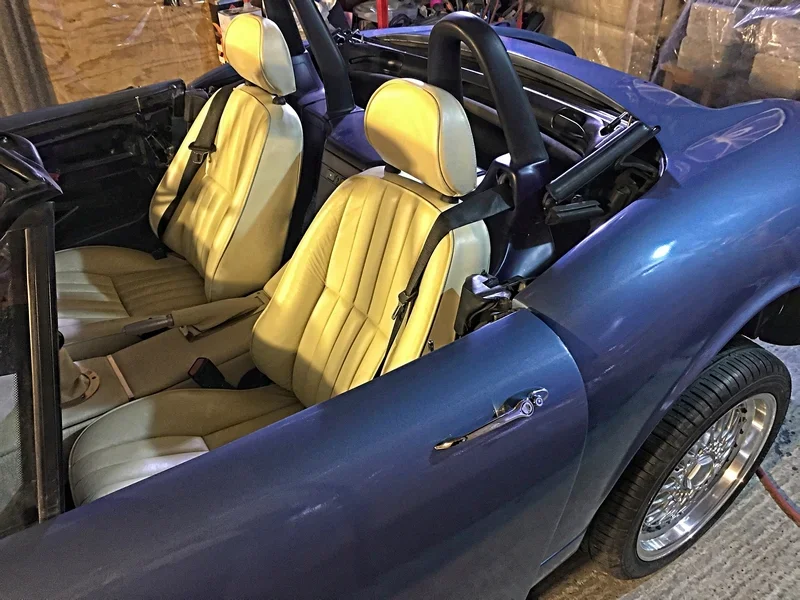
So, did I learn my lesson and leave the paint alone? Well, sort off.... id did leave it to harden for a few weeks whilst I fitted all the bling then gave it a cut and polish, followed last week (mid-may) now the paint is fully cured, with a couple of coats of Diamond H Ceramic Coating. Looks great now, not perfect but it is supposed to be a 1961 Replica Ferrari, it now looks like a really well restored example.

More to follow on:

Adding the Bling.

Odds and sods of rubber trim / waterproofing.

Boot seals.

Fixing jammed bonnet catches.

Remote Control Horn.... yep you heard it right...

Bonnet & Boot stays.

Exhaust and getting rid of the drone.

Engine bay clean up and paint.

Tuning - Viscous Fan Delete, SAP delete, CCV delete & Oil Catch Can, New Vacuum Lines, Cone Filter, M54B30 inlet manifold, purple injectors, filter heat shield, and a remapped ECU to cope with all of this.

It's Friday, it's 6 O'clock and it's time for Crackerjack (a curry most likely alternative)
 
Last edited:
Brilliant thread! Especially the self painting. I'm building a kobra right now but i'm not really building it myself haha, just making decisions!
 
Filler and GRP shrink differently, I used as little filler as possible but wanted to avoid any shrinkage. After the body had been prepared I gave it 2 coats of Re-face which is a 2 pack primer recommended for GRP. I sprayed it on but it can be put on with a small gloss paint roller.
This gives a very strong and stable surface for the primer and top coat to go on. It is a very high build paint and can be flatted down by hand or electric sander.
So many GRP kit cars suffer shrinkage and it is the first thing you see, must be very disappointing after all the effort the builder has put in.
 
Brilliant thread! Especially the self painting. I'm building a kobra right now but i'm not really building it myself haha, just making decisions!

Hi Zag

Thanks for the comments. You really need to get your hands dirty with some of your build though, not as hard as it seems.
 
Filler and GRP shrink differently, I used as little filler as possible but wanted to avoid any shrinkage. After the body had been prepared I gave it 2 coats of Re-face which is a 2 pack primer recommended for GRP. I sprayed it on but it can be put on with a small gloss paint roller.
This gives a very strong and stable surface for the primer and top coat to go on. It is a very high build paint and can be flatted down by hand or electric sander.
So many GRP kit cars suffer shrinkage and it is the first thing you see, must be very disappointing after all the effort the builder has put in.

Hi Steve, @jaguartvr

I know exactly what you mean. Before I took on the bodywork and paint I had a long chat with an old mate / client of mine in Mallorca who is a boat repairman, when I say boat I mean this kind:

MY Titan.webp


Motor Yacht Titan.

I work as a Financial Adviser & Mortgage Broker for a lot of the Crew & Associated Trades on these Superyachts and Motor Yachts.

He made sure I knew to get as close to a finished surface with Fibreglass as possible and to use the absolute minimum of filler for the reason Steve mentions, differential-shrinkage!

The skim-coat you see over my car is Dolphin Glaze which is on the car purely to feather edges and to pick up pinholes in the Gelcoat. Once this was sanded back there was almost none visible on the car prior to very high build primer (2-coats) and flatting back. This filler/glaze was given close to a month in a heated (ish) workshop before paint.

Hopefully (everything crossed) minimal differential-shrinkage! All good so far but the paint has only been on since December and we have not had a really hot spell yet.
 
Engine Bay:

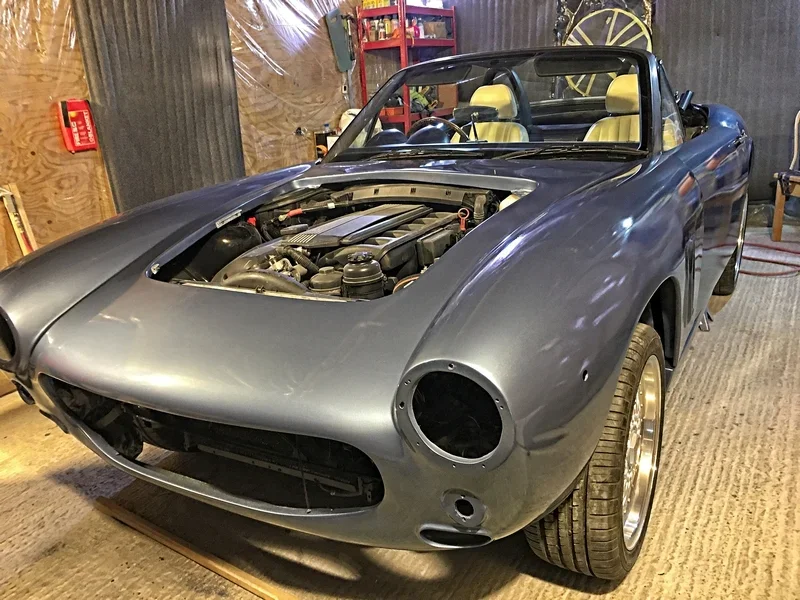
Not wishing to dent or scratch the brand new, soft paint before it cured properly I elected not to start adding the bling, but instead, paid a bit of attention to the engine bay.

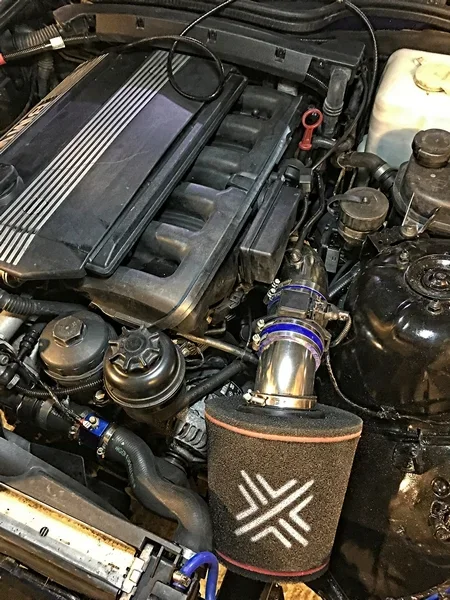
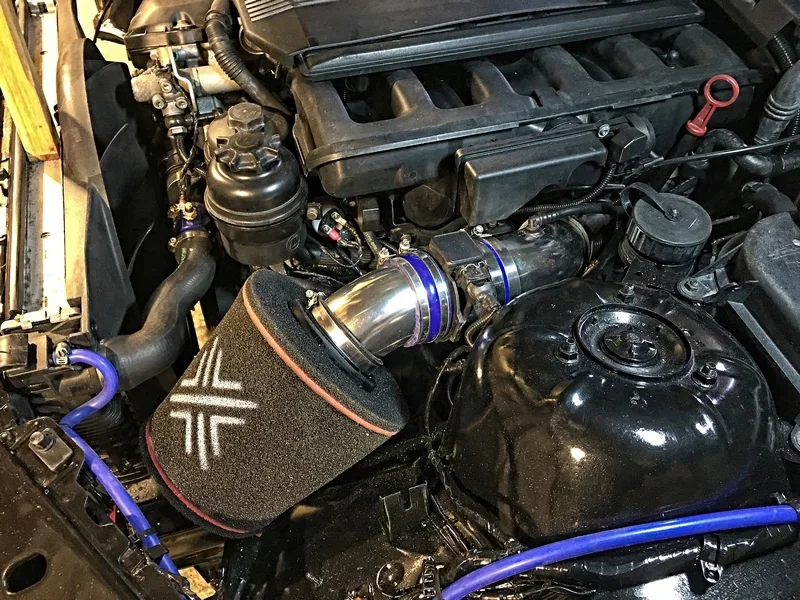
On went, a Pipercross Cone Filter (Vauxhall VXR was the biggest I could find, non-oil type) married to some aluminium intake tubing from evilBay (surprisingly good quality for £10). I needed to move the run for the radiator to the expansion tank to a new route as it ran where the cone filter was going. I had a bit of blue silicone hose lying about which did the job (it is annoying though as everything else is black so will be changed later).

Engine & engine bay got a thorough clean. Whilst I was in there the Secondary Air Pump was deleted and a manifold blanking plate made up and fitted with high-temp gasket sealer. The vacuum pipe which runs from the SAP back to the rear underside of the manifold via the vacuum solenoid was deleted and the port capped off (to be used later for something else).

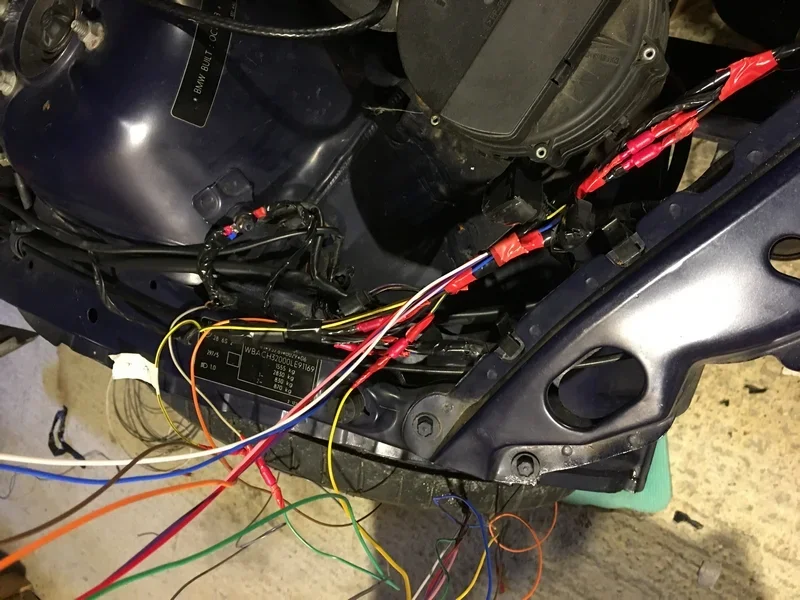
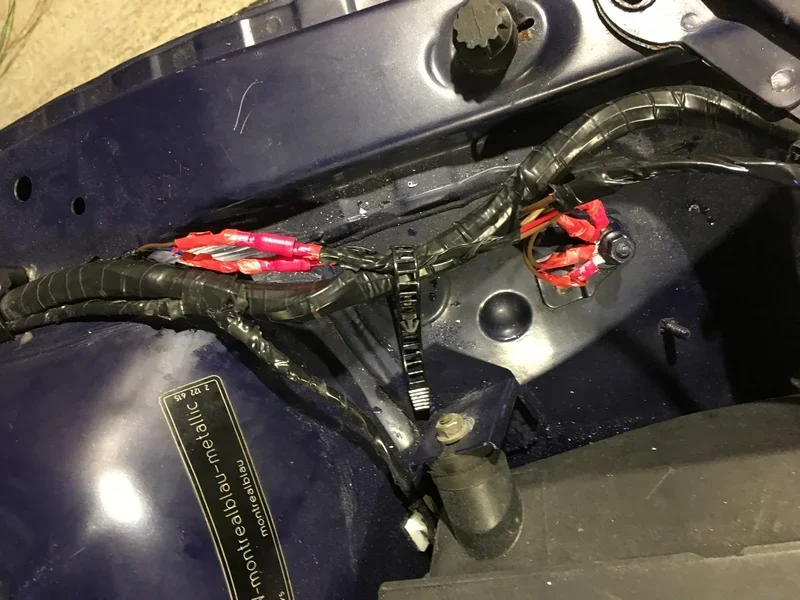
All the wiring runs for gauge sensors, lights and so on were checked and spiral taped with black tape to avoid 13 different colours of wires laying about like a broken rainbow under the bonnet. These were then cable tied to the existing loom. I sorted all of the boot and under rear end wiring at the same time.

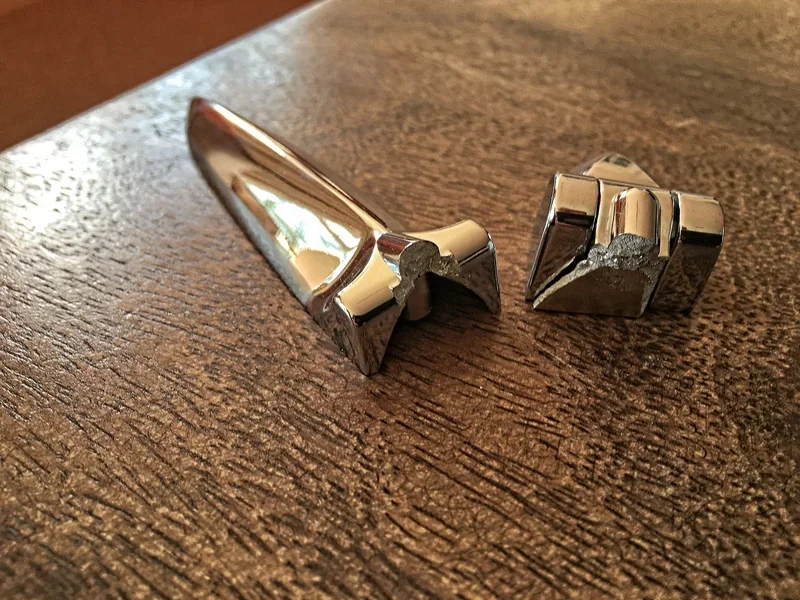
New bonnet catches and cables were fitted after an unsuccessful attempt to repair the originals. So much better.

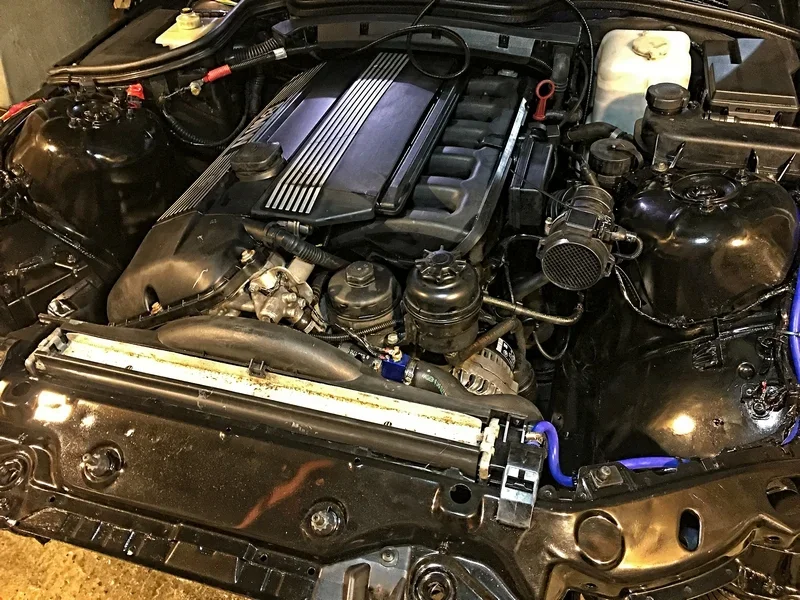
Engine bay was then masked up as much as possible and, having a few tins of Mercedes Obsidian Black lying around (My ML & SWMBO's CLK are both this colour), what I could get to was scuffed back with 600 grit, rust spots treated with Bilt Hamber rust converter and sprayed. I also sprayed the slam panel and what would be inside the wing on the Z3 but is visible on the 250SWB Spyder.

The engine bay looks a look cleaner for it.

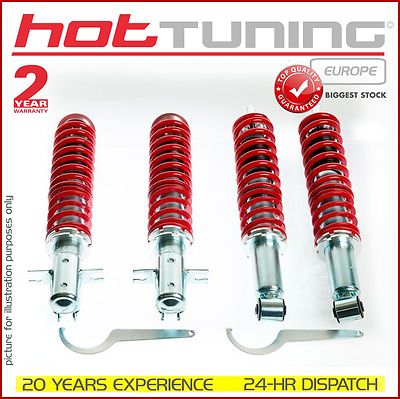
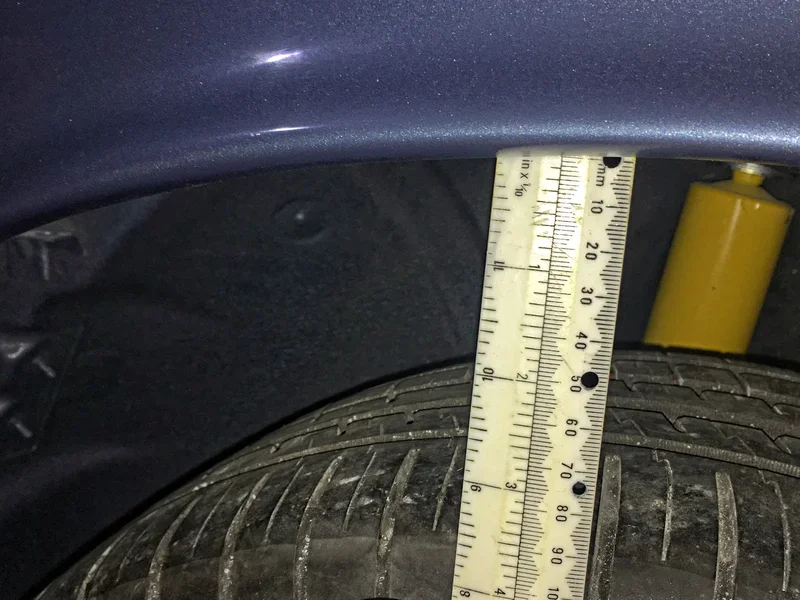
Whilst in the update/upgrade frame of mind on went some adjustable coilovers (evilBay cheapies £200). I have been very surprised with how well the car handles and how supple the suspension has remained with these fitted. For this price I was expecting a jarring ride:


I would not normally have bothered as I lie the standard suspension. The problem was due to the 250SWB Spyder being around 200kg lighter the wheel arch gap was huge and the car needed to lowered to look right.

These went on and adjusted easily and the car sits at a sensible height now. Not "slammed" as the kids would call it but at a 1960's clearance.

Driven about 1000 miles now and the suspension feels great (how long it lasts who knows!)

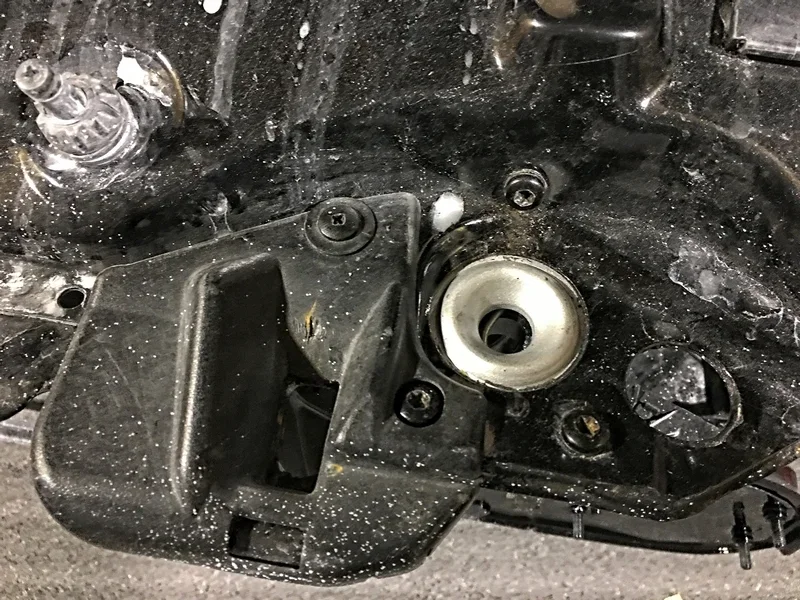
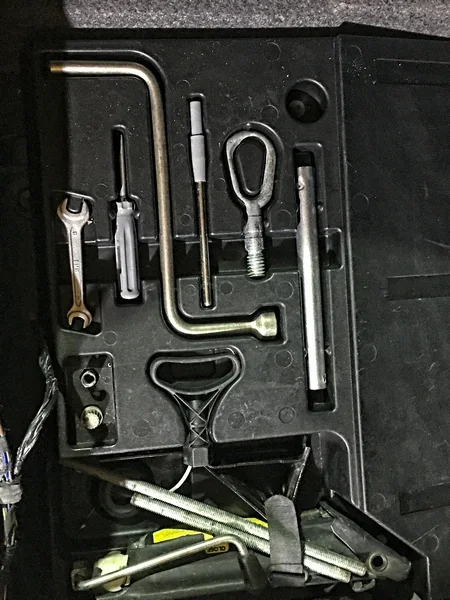
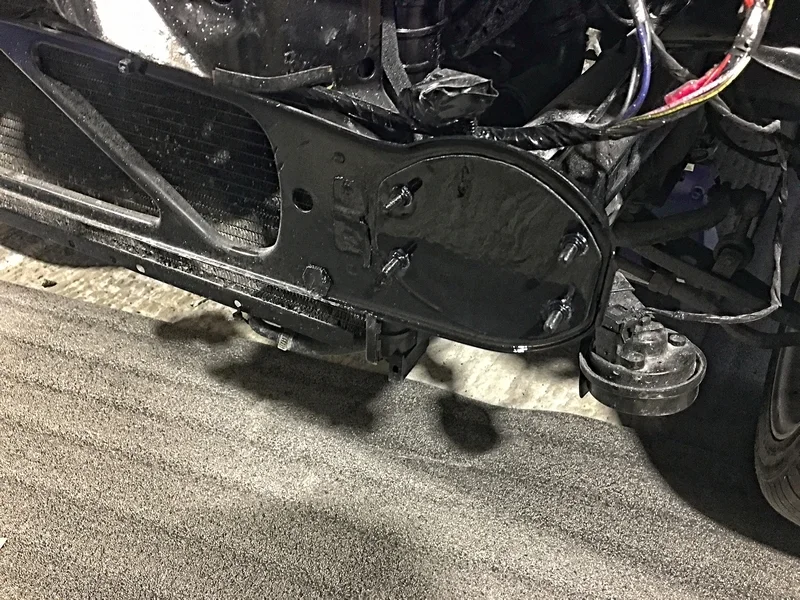
Cleaned up the tool kit and made blanking plates for the open ends of the chassis rails where the bumper shocks normally live. (must make up a towing point here at some stage).

Gagging to get at the bling at this point but resist the temptation as the paint needs to harden up a bit. Grrr........................ SWMBO is putting pressure on me to get the bling on (she loves bling) but I still resist.
 

Attachments

  • Mechanical Engine Bay 3 Pipercross Filter 3.webp
    Mechanical Engine Bay 3 Pipercross Filter 3.webp
    81.8 KB · Views: 686
  • Mechanical Engine Bay Pipercross Filter 4.webp
    Mechanical Engine Bay Pipercross Filter 4.webp
    143.9 KB · Views: 718
  • Mechanical Engine Bay 2.webp
    Mechanical Engine Bay 2.webp
    135.5 KB · Views: 747
  • Exterior Build Wiring Front Lights 5.webp
    Exterior Build Wiring Front Lights 5.webp
    80.9 KB · Views: 703
  • Exterior Build Wiring Front Lights 6.webp
    Exterior Build Wiring Front Lights 6.webp
    72.9 KB · Views: 700
  • Exterior Build Arch Clearance 107.webp
    Exterior Build Arch Clearance 107.webp
    80.9 KB · Views: 710
  • Exterior Build Arch Clearance 108.webp
    Exterior Build Arch Clearance 108.webp
    136.6 KB · Views: 725
  • Exterior Build Bonnet Catches 92.webp
    Exterior Build Bonnet Catches 92.webp
    139.3 KB · Views: 705
  • Exterior Build Bonnet Catches 93.webp
    Exterior Build Bonnet Catches 93.webp
    116.3 KB · Views: 692
  • Exterior Build Wheel Arch Liners 103.webp
    Exterior Build Wheel Arch Liners 103.webp
    86.4 KB · Views: 668
  • Exterior Build Bling Tool Kit 111.webp
    Exterior Build Bling Tool Kit 111.webp
    60.8 KB · Views: 683
  • Exterior Build Chassis End Cap 91.webp
    Exterior Build Chassis End Cap 91.webp
    154 KB · Views: 720
OK, SWMBO is getting to be a PITA on wanting to see the bling go on the car, under girly-pressure I cave in and go for it.

No need for words, the pictures speak for themselves.
 

Attachments

  • Exterior Build Bling 94.webp
    Exterior Build Bling 94.webp
    50 KB · Views: 782
  • Exterior Build Bling 96.webp
    Exterior Build Bling 96.webp
    62.9 KB · Views: 806
  • Exterior Build Bling Boot Hinges 86.webp
    Exterior Build Bling Boot Hinges 86.webp
    91.2 KB · Views: 766
  • Exterior Build Bling Boot Hinges 87.webp
    Exterior Build Bling Boot Hinges 87.webp
    112.6 KB · Views: 804
  • Exterior Build Bling Broken Hinge 120.webp
    Exterior Build Bling Broken Hinge 120.webp
    124.7 KB · Views: 793
  • Exterior Build Bling Ferrari Wheel Stickers 104.webp
    Exterior Build Bling Ferrari Wheel Stickers 104.webp
    144.7 KB · Views: 871
  • Exterior Build Bling Front 105.webp
    Exterior Build Bling Front 105.webp
    111.8 KB · Views: 823
  • Exterior Build Bling Fuel Cap 80.webp
    Exterior Build Bling Fuel Cap 80.webp
    62.7 KB · Views: 773
  • Exterior Build Bling Grille & Fog Lights 98.webp
    Exterior Build Bling Grille & Fog Lights 98.webp
    108.1 KB · Views: 781
  • Exterior Build Bling Lights Front 128.webp
    Exterior Build Bling Lights Front 128.webp
    109.9 KB · Views: 784
  • Exterior Build Bling Lights Number Plate Light Hood 130.webp
    Exterior Build Bling Lights Number Plate Light Hood 130.webp
    84.6 KB · Views: 802
  • Exterior Build Bling Lights Rear 127.webp
    Exterior Build Bling Lights Rear 127.webp
    123.3 KB · Views: 808
  • Exterior Build Bling Rear Lights 88.webp
    Exterior Build Bling Rear Lights 88.webp
    98.9 KB · Views: 793
  • Exterior Build Bling Rear Number Plate Lights 97.webp
    Exterior Build Bling Rear Number Plate Lights 97.webp
    73.1 KB · Views: 812
  • Exterior Build Bling Washer Jets 114.webp
    Exterior Build Bling Washer Jets 114.webp
    49.8 KB · Views: 765
  • Exterior Build Bling Wing Mirrors 121.webp
    Exterior Build Bling Wing Mirrors 121.webp
    77.7 KB · Views: 735
  • Exterior Build Bling Wing Mirrors 122.webp
    Exterior Build Bling Wing Mirrors 122.webp
    102.6 KB · Views: 798
  • Exterior Build Bling Wing Mirrors 126.webp
    Exterior Build Bling Wing Mirrors 126.webp
    91.5 KB · Views: 777
  • Exterior Build Bling Wing Mirrors Rubber Strip 123.webp
    Exterior Build Bling Wing Mirrors Rubber Strip 123.webp
    59.4 KB · Views: 756
  • Exterior Build Bling Wing Mirrors Rubber Strip 124.webp
    Exterior Build Bling Wing Mirrors Rubber Strip 124.webp
    69 KB · Views: 774
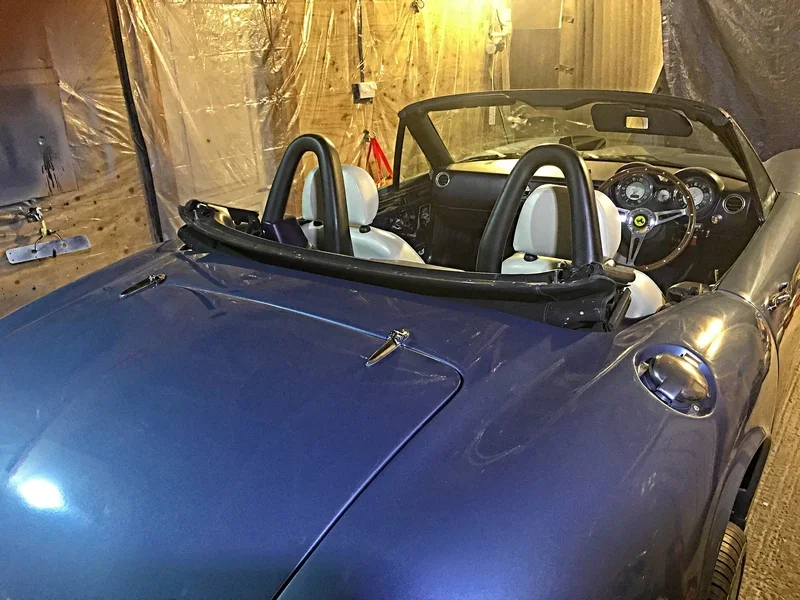
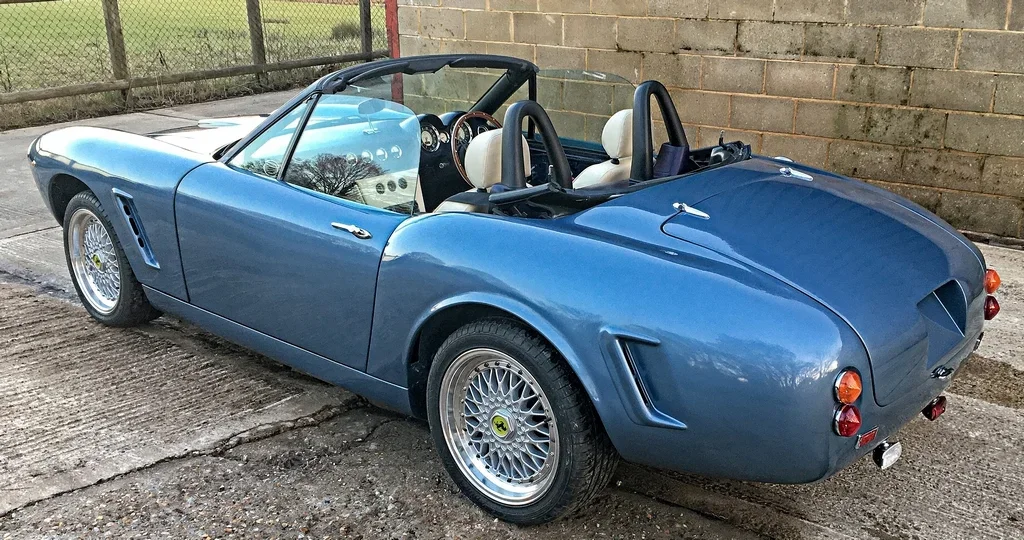
Bling done the car looks like this.

A Blue Peter Badge for anyone who can spot the massive, missing item of bling, noise and performance?

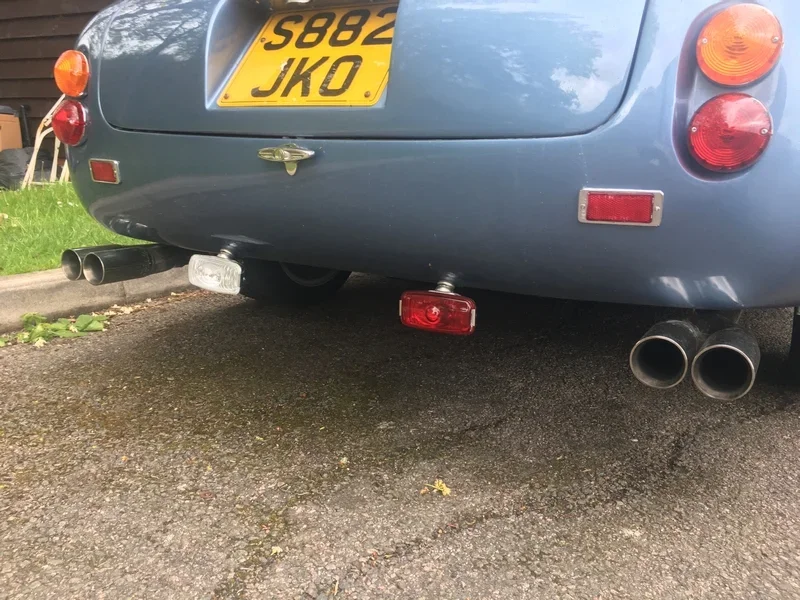
Smart-arses, yep it is the exhaust. So a trip to Redhill Classics is booked and an MOT booked the same day back in Tunbridge Wells (I am nothing if not confident!).


£280 lighter in the wallet and I have a single pipe from resonator back to just beyond the half-shaft, splits to double pipe to branch across to both sides at the rear, ending in twin tips. I opted for no back boxes, the original Z3 cat and resonator box have been retained. Thought I would try it without the boxes first and if I cannot live with the racket add them later of a Helmhotz Resonator Pipe if the problem is a specific frequency.

1000 miles later and it sounds amazing and the uplift in performance from the straight pipes is dramatic. Is it too loud? Probably for a lot of people but I love it. What is an irritation is the following:

2250 - 3250 RPM there is a resonance/drone which is intrusive as it is right in the torque band for day-to-day driving. If you are getting a wiggle on it does not matter as it vanishes by 3300 RPM to be replaced by a glorious howl right up to the re-line (now 7200RPM).

Being a Hi-Fi nut and understanding quite a lot about frequency responses, resonant frequencies, etc. The answer (not done yet) is a 1/4 wave resonator pipe to get rid of the specific frequency. In cars, these are variously called J-Pipes, Helmholtz Pipes, Resonator Pipes, etc.

Correctly speaking they are Helmholz Resonators. The theory goes as follows:

Find the frequency of the resonance/drone that is the PITA (in my case 99hz between 2250 and 3250 RPM measured with a neat phone app) and build a dead-end tube calculated at 1/4 of the wavelength of the troublesome frequency (which T's or J-fits (hence J-pipe) into the exhaust). The result is some of the sound pressure enters the pipe and travels 1/4 wavelength up the pipe and 1/4 back arriving back at the main exhaust 180degrees out of phase with the original resonance/drone thereby cancelling it out.

There is of course more to it than the above, the speed of sound comes into the equation and, to complicate matters the speed of sound changes with temperature, so you need to stick a thermometer where the sun does not shine (up the exhaust pipe) after a long hard drive. I have a digital point and shoot type thermometer which doe the job.

Does it work? Of course it works Jim it's physics "ye cannae change the laws of physics, laws of physics, captain". I have yet to add to my car as I am enjoying it too much to take it off the road. I also have to suss out where a 37" ish tube will fit under the car and have a chat with Redhill Classics about the cost.
 

Attachments

  • Exterior Build Painting Finished Rear 116.webp
    Exterior Build Painting Finished Rear 116.webp
    176.8 KB · Views: 908
  • IMG_2401.webp
    IMG_2401.webp
    108.4 KB · Views: 850
Before we get onto performance upgrades I have the following question:

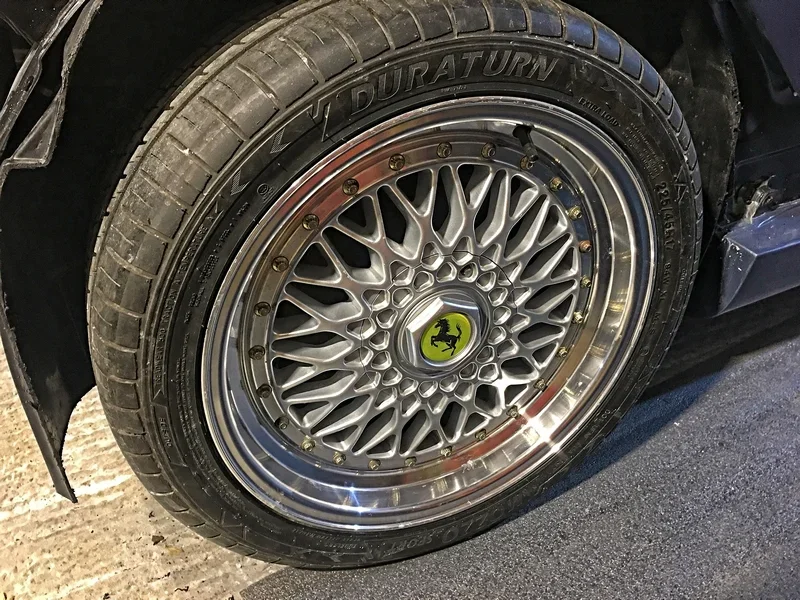
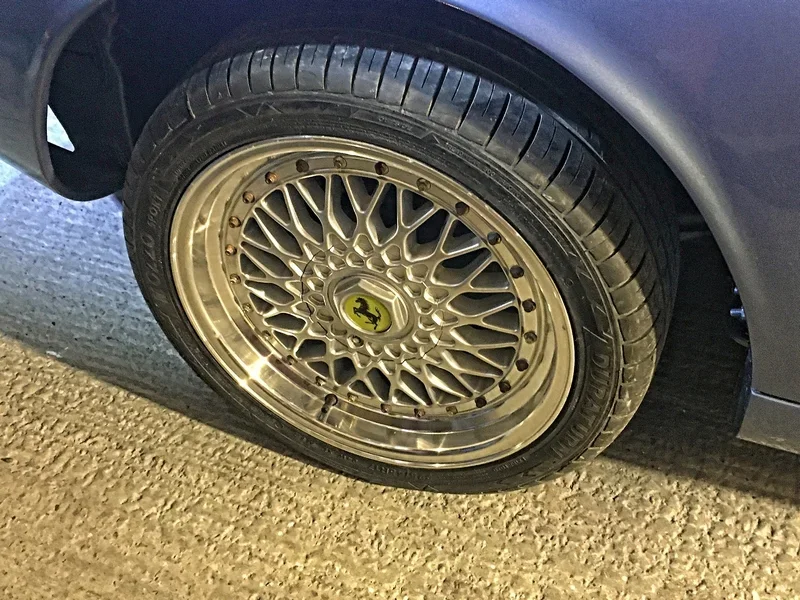
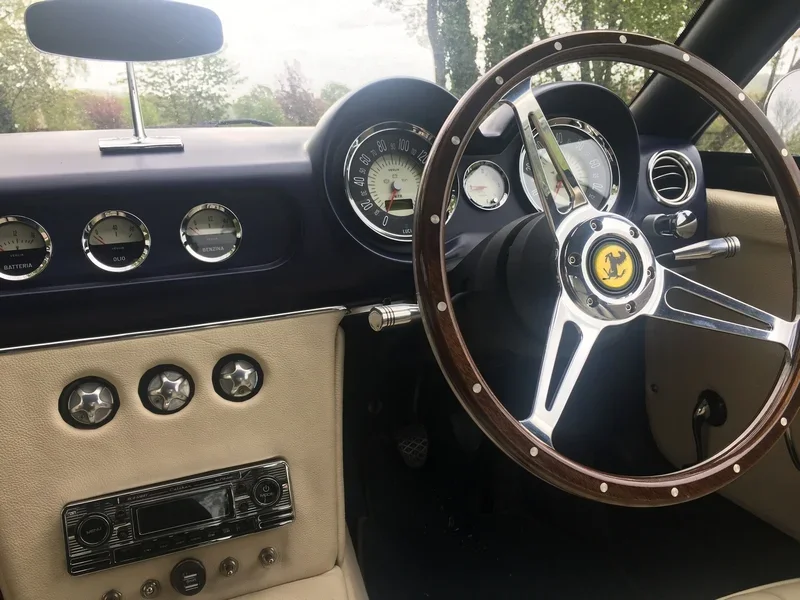
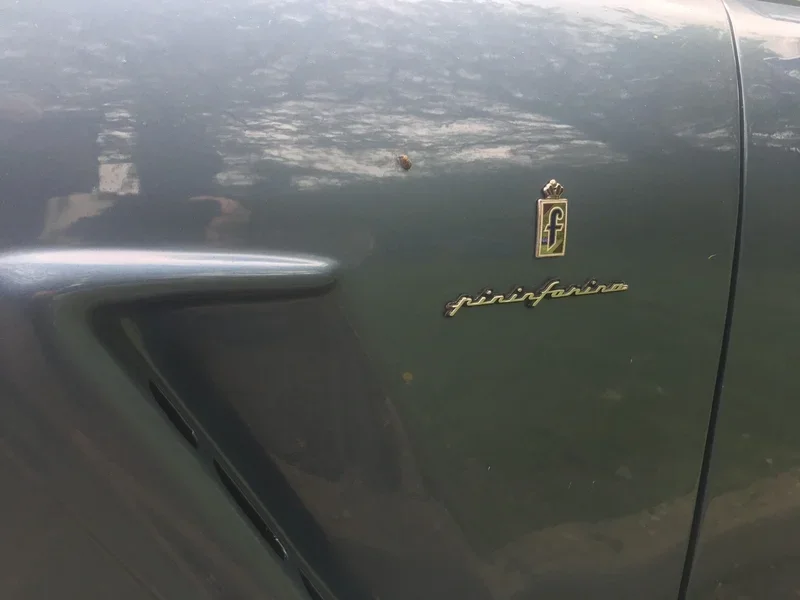
If I add Ferrari badges am I:

A: Just trying to make the car look as good a replica as possible. or
B: Being a Dick!

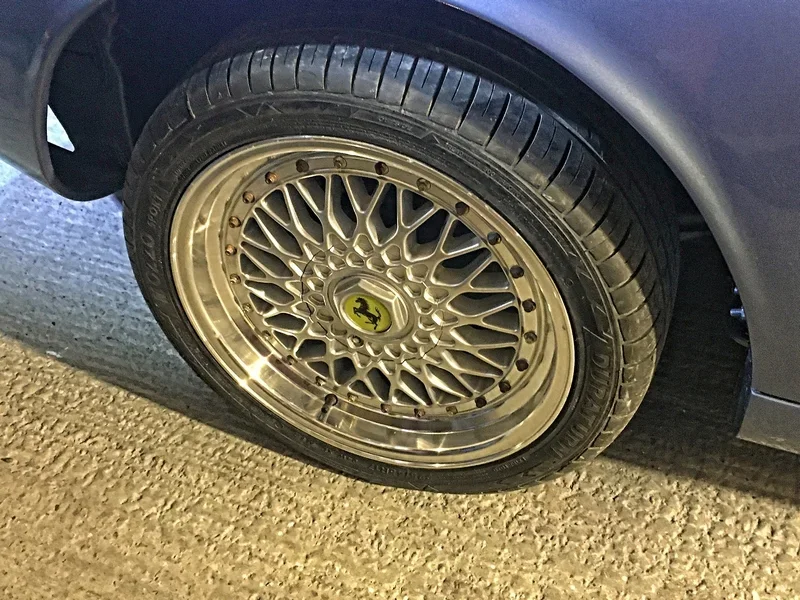
I do not care what the answer is because I have fitted them already and the car looks so much more complete with them in place. I would never try and pass it off as an original in any case (Ferrari never made the 250SWB in a convertible anyway).

It would be nice to know what fellow ZORG's think.
 

Attachments

  • Exterior Build Arch Clearance 108.webp
    Exterior Build Arch Clearance 108.webp
    136.6 KB · Views: 701
  • IMG_2389.webp
    IMG_2389.webp
    73.5 KB · Views: 678
  • IMG_2397.webp
    IMG_2397.webp
    22.4 KB · Views: 671
  • IMG_2398.webp
    IMG_2398.webp
    63.6 KB · Views: 676
  • IMG_2399.webp
    IMG_2399.webp
    37.1 KB · Views: 658
Performance - everything else is just fancy Italian Clothes!

Finally finished the performance upgrades yesterday. They are:

Secondary Air Pump Delete - performance change - none at all but a small (3kg ish) weight reduction.

Viscous Fan Delete - performance change - very noticeable increase in the pick-up in engine speed (viscous was probably stuck). The horrible fan whine has disappeared and the electric fan is far more efficient. Small weight reduction (1kg).

Pipercross Foam cone filter - performance change - very noticeable under hard acceleration, the engine picks up far more quickly and the induction noise is cool. 0.5kg weight reduction.

Stainless exhaust no silencers - performance change - another big step up over standard, the way the engine picks up revs has changed hugely and the car has increased flexibility at low revs. About 10kg lighter because it has no back-boxes.

M54B30 manifold swap.
CCV Delete & Oil catch can install,
All vacuum lines renewed.
ECU remap with M54B30, rev limiter increase to 7200, SAP delete, ABS limp home delete, exhaust mapping for the free-flow exhaust, fuelling uplift for the manifold.

All of these were done at the same time so I cannot comment on which item contributed most. What I can tell you is:

The CCV was jammed full of mustard coloured "Sh1te" and was probably about to fail so replacing with an oil catch can came not a moment too soon. PHEW!!! Emissions control gone mad, the engine is running much cleaner without it.

The Idle Control Valve was similarly full of carbon deposits and oily gunk and was well being truly stuck. As the one which came with the M54 manifold is the same part number and was operational, I cleaned it up and fitted it.

M52TUB28 manifold was also full of oily-gunk being pulled into the engine and burnt. New manifold is clean as a whistle inside so no oily-rubbish being pulled into the engine and burnt. Inlet valves were clean anyway as the injectors were petrol washing them.

The manifold is not difficult to swap out but it is time-consuming, the intake rails are about 30-35% larger than the M52TUB28 manifold, the DISA is massive by comparison to the M52TUB28 DISA. I bought a Throttle Body Adaptor from evilBay which fitted perfectly and the original TB went straight back on. Original injectors were fitted. (I have a set of purples that may go on later).

The result of all of the above is:

Bloody Hell.... this thing is quick!

Engine revs pick up quickly and die-back quickly too (which they did not before, the viscous fan partly caused this), idle is very steady. The sound has changed due to the much larger airflow through the M54B30 manifold and custom exhaust.

As for the performance, the car is so much quicker than the stock 2.8 setup that it is hard to believe. Torque is a little bit better low down than standard (Big DISA and remap I think for this one). When you hit 3250-3500 the car feels like it is going to go into orbit right up to 7000 RPM (it was reasonable before between 3500 and 6000 ish). This a whole new ball game above 3250-3500 revs. I'm not sure how often I will use the last 1000 revs above 6000 from an engine wear point of view but my god it's fast.

The best word I have to describe the performance from idle to re-line is: Relentless!

Add this to a car that weighs about 1200kg and corners like it is on rails: WOW!

Must get it on a rolling road soon to see what it is pushing out.

Top Tip: Get your CCV out of there NOW!!! If you want to stay stock buy a new one, if not get a catch can/oil separator & change your vacuum lines.

Signing off for a bit now until I think of something else to do to the car other than drive it like I stole it!
 
B :whistle:

The dancing donkey men do not take kindly to replicas wearing their badges, they can get very nasty and best avoided if possible. I fitted "California" badges that I had CNC cut out of stainless steel.
How about a nice set of chrome wire wheels?
Greenbanks does a very nice stainless steel grill surround and stainless threshold plates for the door apertures.
 
Back
Top