
You are using an out of date browser. It may not display this or other websites correctly.
You should upgrade or use an alternative browser.
You should upgrade or use an alternative browser.
g8jka - 2.0 Progress Journal - Time to say Goodbye
- Thread starter g8jka
- Start date


Just a point on the roof opening, i have noticed when i start putting the roof down, the plastic window doesnt always fold perfectly and now on all occasions half way through the process i get out and fold it flat by hand, as i noticed it kinked one day and had i left it like that it would have more than likely split or left a bad mark.
B
badman gee
Guest
that looks brill.. as does the car....hows it done.....?
It's magic Wayne

B
badman gee
Guest
Just a point on the roof opening, i have noticed when i start putting the roof down, the plastic window doesnt always fold perfectly and now on all occasions half way through the process i get out and fold it flat by hand, as i noticed it kinked one day and had i left it like that it would have more than likely split or left a bad mark.
I have a way of stopping the crease! But I cannot let my secret out!

that looks brill.. as does the car....hows it done.....?
The alarm has an aux feature that can be programmed to give an output to something for so long. I don't really know how, gookah wired it up for me he has all the wiring diagrams. It can be done with a simple button remote also.
I have a way of stopping the crease! But I cannot let my secret out!
Come on badman let the secret out we all need a way of stoping the rear window creasing

B
badman gee
Guest
It involves a length of pipe insulation.
The thick stuff, and your blanket!
The thick stuff, and your blanket!
We need more info and pics
B
badman gee
Guest
We need more info and pics
Will post some sat, not going out to the garage in my long johns!
Wow its been quite a while since I updated my thread 
The updates are getting less and less now as I have done so much to the car there isn't really a lot else I can do, although there has been several changes over the past 6 months which I need to add to my journal.
First up, I refurbished my style 78's a while ago and after 1 winter the paint started to crack for some reason (maybe because it was freezing cold when I did them or could have been cheap paint). Anyway as this was always meant as a temporary measure to get rid of the gold they had when I got them, I finally took them to be refurbed a couple of weeks ago. As I needed 2 new rear tyres I though I would buy them and get them swapped at the same time as the refurb as they didn't charge to do it and it was going to cost at least £20 elsewhere.
Here is what they looked like


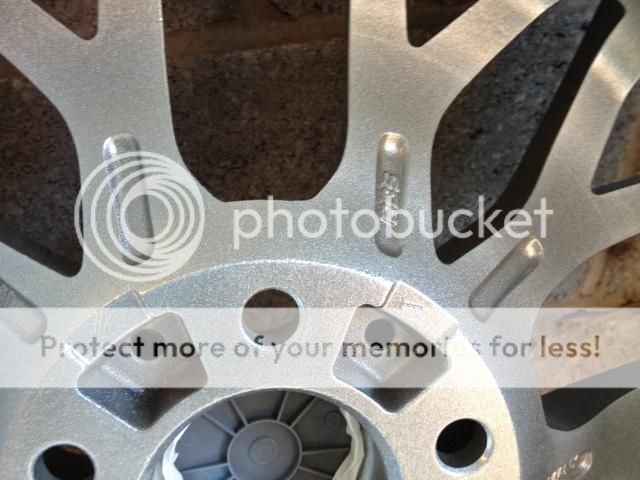
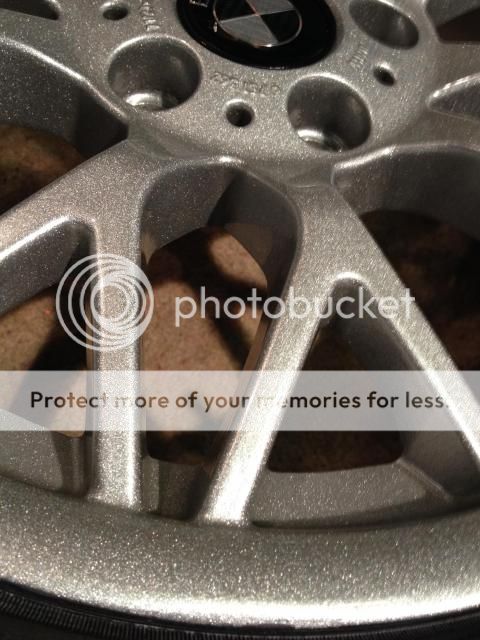
So I took them to be powder coated at City Powder Coating in Birmingham. Unsure of what colour from a choice between silver or anthracite/gunmetal, I had a look at examples whilst I was there and went for one called silver sparkle. This is a colour which is silver but when the sunlight or any other light hits it they give of a sparkle from the flakes in the paint. Almost like a metallic but with more sparkle.
They came out looking like this (normal daylight)
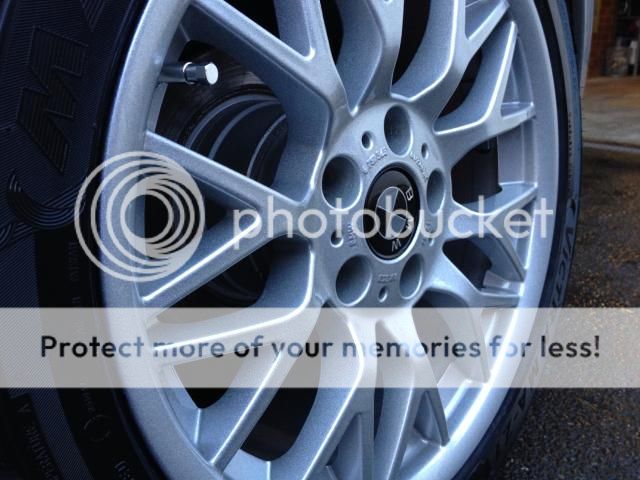
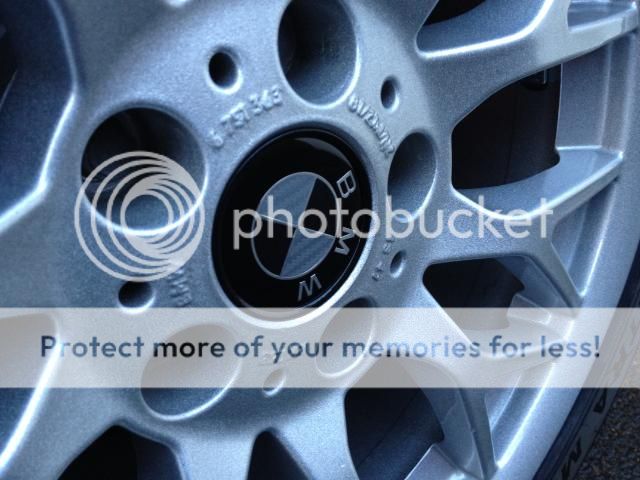
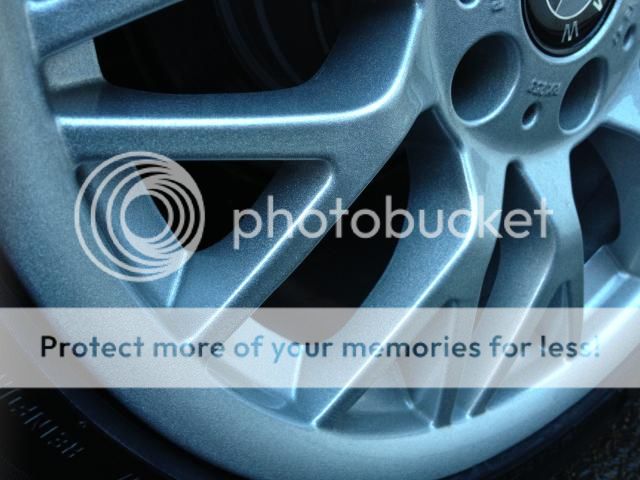
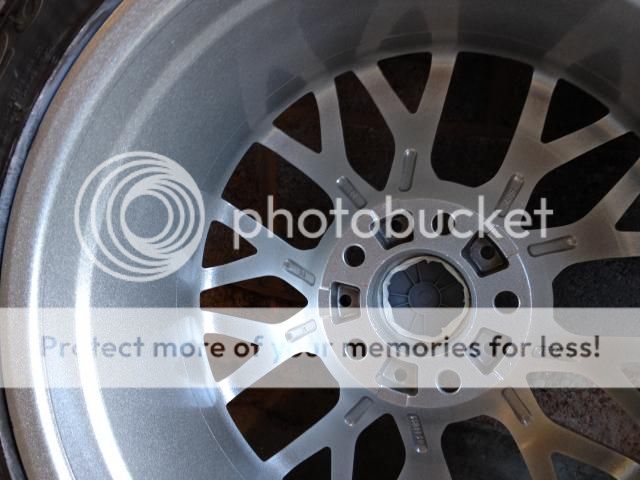
And under the lights in the garage, showing the sparkle
Overall I am extremely impressed with the quality of the work and they have done a fantastic job on all 4 wheels. I added some new badges and tyre valves and put them back on the car
And all this for just £30 per wheel (with tyres on and off and then rebalanced). Without tyres is only £20 a wheel!
The updates are getting less and less now as I have done so much to the car there isn't really a lot else I can do, although there has been several changes over the past 6 months which I need to add to my journal.
First up, I refurbished my style 78's a while ago and after 1 winter the paint started to crack for some reason (maybe because it was freezing cold when I did them or could have been cheap paint). Anyway as this was always meant as a temporary measure to get rid of the gold they had when I got them, I finally took them to be refurbed a couple of weeks ago. As I needed 2 new rear tyres I though I would buy them and get them swapped at the same time as the refurb as they didn't charge to do it and it was going to cost at least £20 elsewhere.
Here is what they looked like


So I took them to be powder coated at City Powder Coating in Birmingham. Unsure of what colour from a choice between silver or anthracite/gunmetal, I had a look at examples whilst I was there and went for one called silver sparkle. This is a colour which is silver but when the sunlight or any other light hits it they give of a sparkle from the flakes in the paint. Almost like a metallic but with more sparkle.
They came out looking like this (normal daylight)


And under the lights in the garage, showing the sparkle

Overall I am extremely impressed with the quality of the work and they have done a fantastic job on all 4 wheels. I added some new badges and tyre valves and put them back on the car
And all this for just £30 per wheel (with tyres on and off and then rebalanced). Without tyres is only £20 a wheel!

That's a good price, did they do any prep to them or did you take them in crazy paved?
My Breytons came with sparkle silver when I bought them. They looked great in bright sun (before I started scuffing them).
My Breytons came with sparkle silver when I bought them. They looked great in bright sun (before I started scuffing them).

£30 a wheel! Bargin! They look great 
That's a good price, did they do any prep to them or did you take them in crazy paved?
My Breytons came with sparkle silver when I bought them. They looked great in bright sun (before I started scuffing them).
Yeah I took them as they were. They remove the tyres, take them to be chemically stripped, fully shot blast them, then do any sanding/prep/refurb work (mine didn't need any), then powder coat them and finally lacquer them for added protection.
I couldn't find anywhere else that would do them for £50 per wheel so these really are a great price. They do loads of different colours and finishes as well even though some are priced a little higher.
MORE UPDATES
So most of these mods were done over the past few months and some at the end of summer last year. The first one is actually one of my dad's ideas and he did the mod first (don't really want to admit that but he does have some uses).
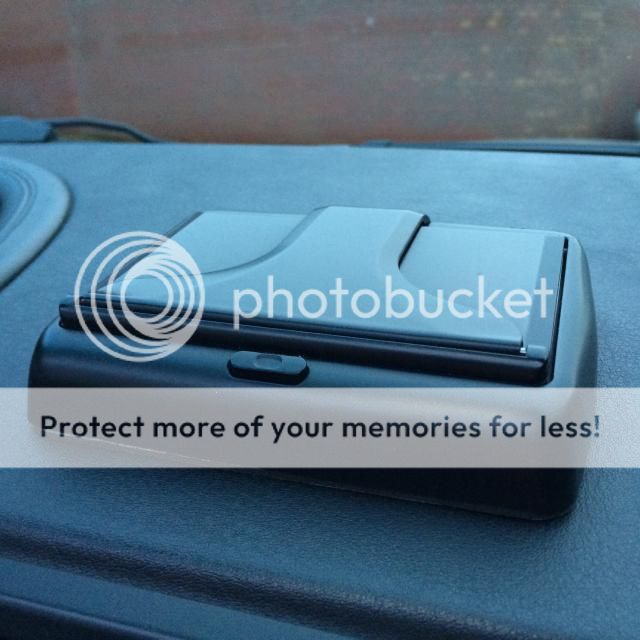
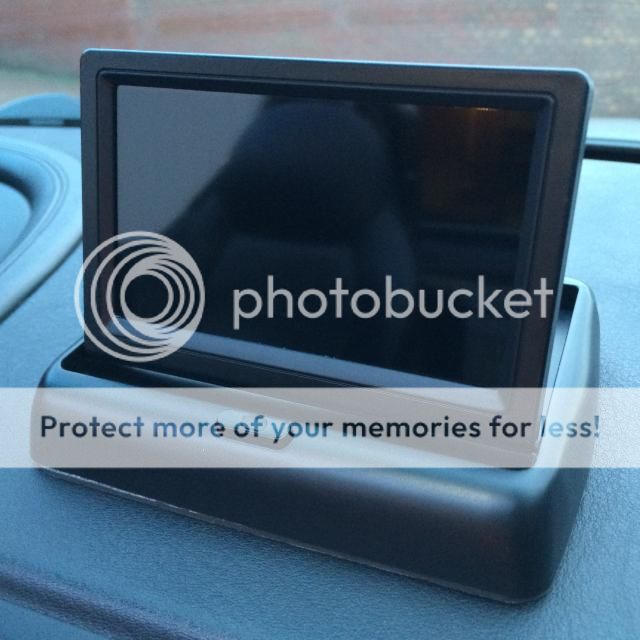
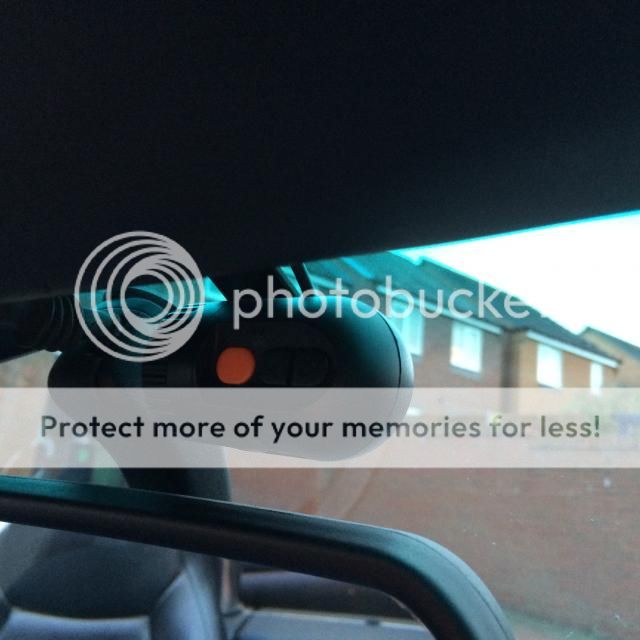
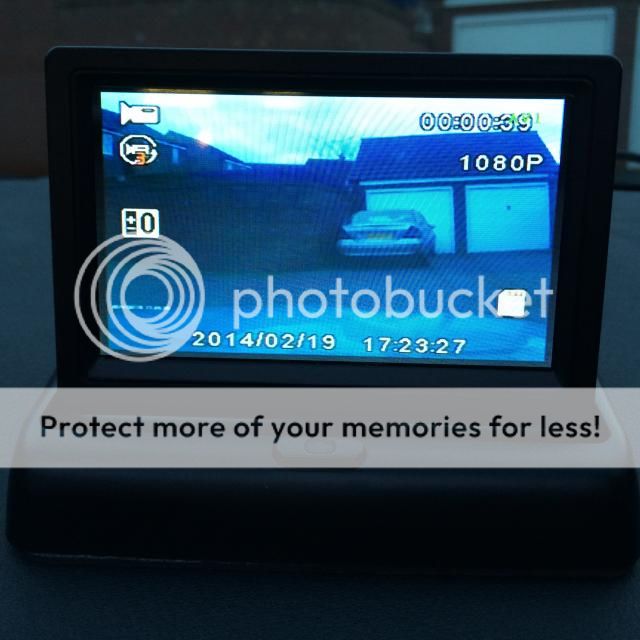
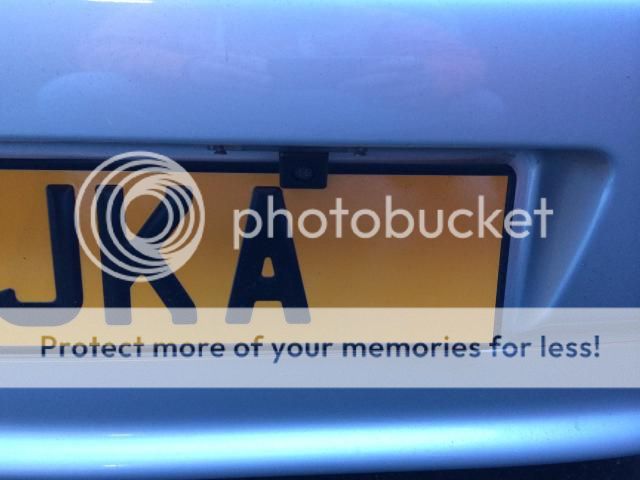
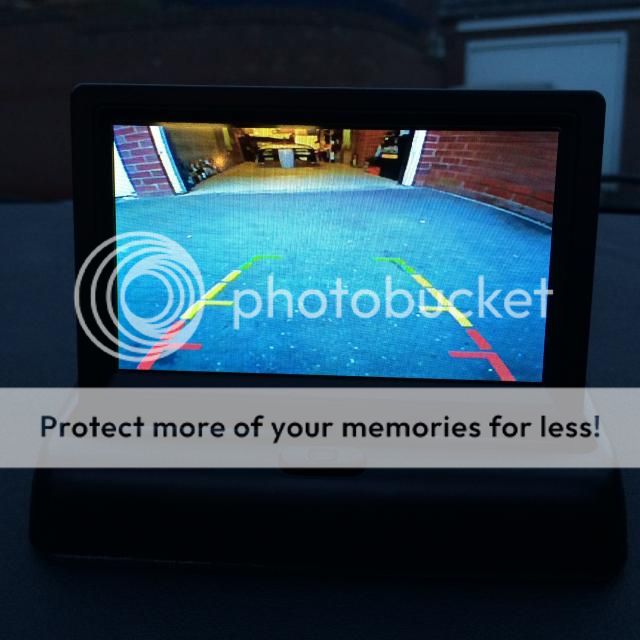
A small, pop up screen is fitted to the dash which allows 2 cameras to be connected into it and it turns on and off automatically when wired into the ignition. My dad fitted a front camera in the bumper, but I wanted one that can record footage of when driving along and one that saves the footage to a micro sd. This is a tiny camera fitted above the rear view mirror which will record automatically and loops every 3 minutes and connected into the flip up screen you can also watch the footage back or even view it in real time. As the screen had 2 video inputs I started to wonder what I could use the other one for and thought about fitting a rear parking camera. I got one that fits into the number plate lamp in the rear bumper and also has an LED to replace the one being removed. It gives a nice wide angle and has lines on so distances can be judged easily. Also I have it wired up so that when I select reverse it automatically switches from the front camera to the reverse camera
The camera folded down, looks nice and neat and the wires go through the dash.
Push the button on the front and it pops up automatically (ignition off so nothing on screen).
Front camera above mirror.
Front facing camera view (picture is better but looks blurred when trying to photograph).
Rear camera in place of number plate light.
Rear facing camera view.
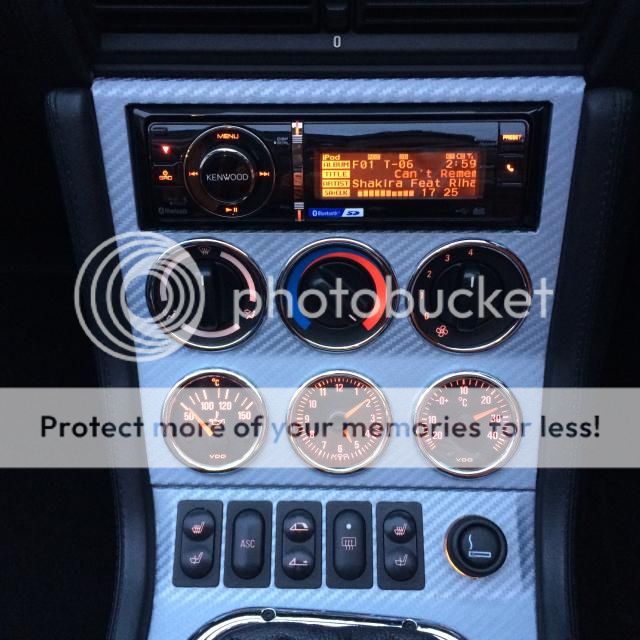
After the old headunit decided to give up I purchased and new Kenwood one that works with an iPhone / iPod via USB, has a Parrot bluetooth unit fitted which can also stream music, SD card slot, oh and one of them CD things.
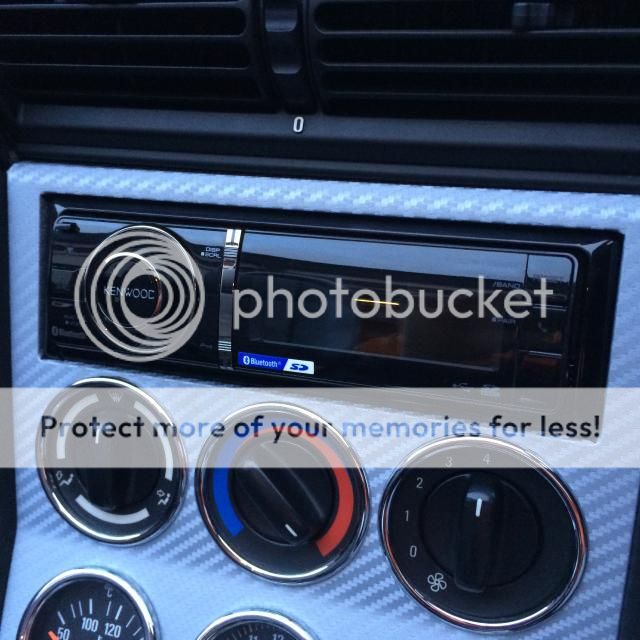
The key colours can also be matched up exactly to the colour of the original dash lights.
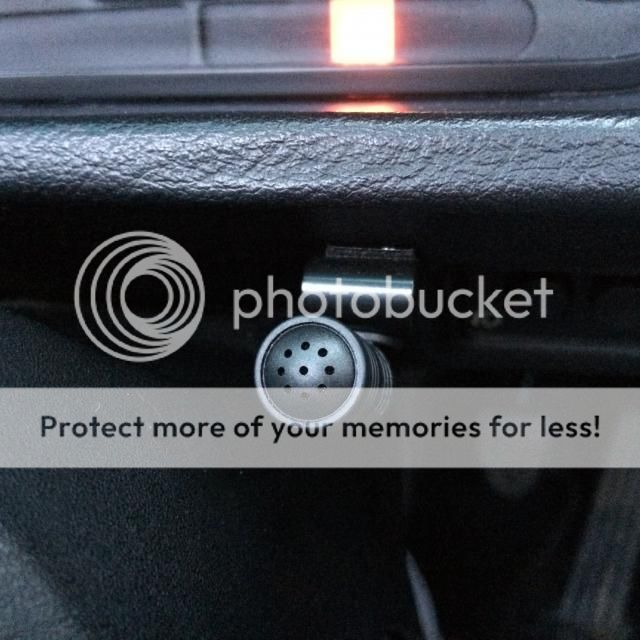
And the microphone was fitted under the speedo unit just behind the steering wheel.
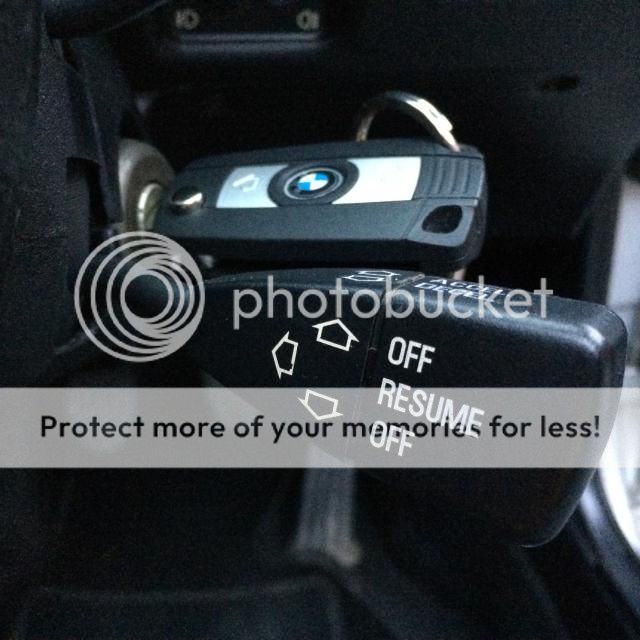
Next up I fitted cruise control, which I had for christmas. Just the stalk and interface was needed and it took about 5 mins to fit.
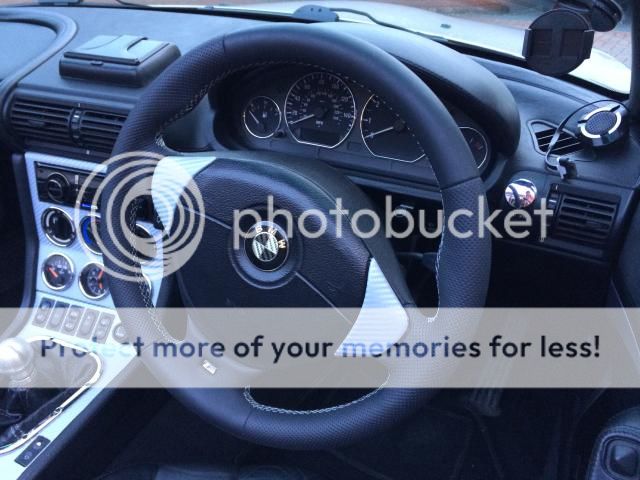
Recently I also got my steering wheel re-trimmed at royal steering wheels. Had it double padded, with perforated leather at the sides and smooth nappa top and bottom finished off with silver stitching to match the colour of the car and my carbon dash. Finally a new monochrome ///M badge was fitted. This is probably one of the best mods I have done and it really improves the driving experience and feels much more like a modern BMW wheel.
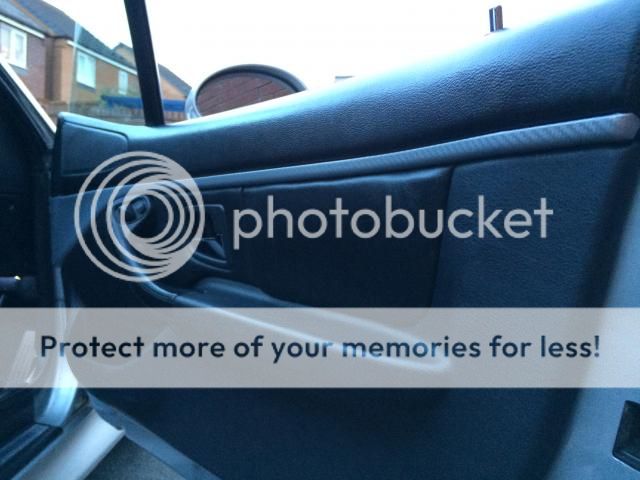
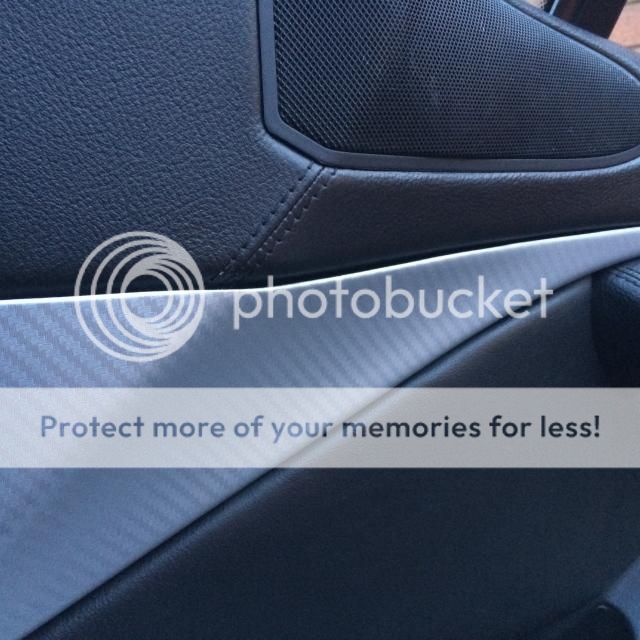
And lastly a mod I had been contemplating for a while. I have seen some doorcards that have an aluminium / silver trim above the leather padding and though they looked OK on silver cars as they match the outside. As I have done my dash and steering wheel tabs in silver carbon fibre vinyl I wondered what these trims would look like covered the same. Here is the answer, I very much like them and it all matches up now.

That's all for now and sorry for the long post, its been a while since a major update
So most of these mods were done over the past few months and some at the end of summer last year. The first one is actually one of my dad's ideas and he did the mod first (don't really want to admit that but he does have some uses).
A small, pop up screen is fitted to the dash which allows 2 cameras to be connected into it and it turns on and off automatically when wired into the ignition. My dad fitted a front camera in the bumper, but I wanted one that can record footage of when driving along and one that saves the footage to a micro sd. This is a tiny camera fitted above the rear view mirror which will record automatically and loops every 3 minutes and connected into the flip up screen you can also watch the footage back or even view it in real time. As the screen had 2 video inputs I started to wonder what I could use the other one for and thought about fitting a rear parking camera. I got one that fits into the number plate lamp in the rear bumper and also has an LED to replace the one being removed. It gives a nice wide angle and has lines on so distances can be judged easily. Also I have it wired up so that when I select reverse it automatically switches from the front camera to the reverse camera
The camera folded down, looks nice and neat and the wires go through the dash.

Push the button on the front and it pops up automatically (ignition off so nothing on screen).

Front camera above mirror.

Front facing camera view (picture is better but looks blurred when trying to photograph).

Rear camera in place of number plate light.

Rear facing camera view.

After the old headunit decided to give up I purchased and new Kenwood one that works with an iPhone / iPod via USB, has a Parrot bluetooth unit fitted which can also stream music, SD card slot, oh and one of them CD things.

The key colours can also be matched up exactly to the colour of the original dash lights.

And the microphone was fitted under the speedo unit just behind the steering wheel.

Next up I fitted cruise control, which I had for christmas. Just the stalk and interface was needed and it took about 5 mins to fit.

Recently I also got my steering wheel re-trimmed at royal steering wheels. Had it double padded, with perforated leather at the sides and smooth nappa top and bottom finished off with silver stitching to match the colour of the car and my carbon dash. Finally a new monochrome ///M badge was fitted. This is probably one of the best mods I have done and it really improves the driving experience and feels much more like a modern BMW wheel.

And lastly a mod I had been contemplating for a while. I have seen some doorcards that have an aluminium / silver trim above the leather padding and though they looked OK on silver cars as they match the outside. As I have done my dash and steering wheel tabs in silver carbon fibre vinyl I wondered what these trims would look like covered the same. Here is the answer, I very much like them and it all matches up now.


That's all for now and sorry for the long post, its been a while since a major update
When can I book you in to do my M?! Some smart mods there!
When can I book you in to do my M?! Some smart mods there!
How about you just take my already modded car and I have yours in exchange ;-)

Some great mods there. I'm most intrested in those halo's
Lee
Lee
Thanks Lee
Unfortunately one side gave up a few weeks ago, but they have been in almost 3 years. I have a new set coming from China in the exact same dimensions so hopefully they will be just as good as the ones I've had before. All the others I have looked at have to go behind the inner lens which is a little more work so I found a set that will go in front like the previous ones I had. If these are no good it will be a new set that fit behind the inner lens on order.
Unfortunately one side gave up a few weeks ago, but they have been in almost 3 years. I have a new set coming from China in the exact same dimensions so hopefully they will be just as good as the ones I've had before. All the others I have looked at have to go behind the inner lens which is a little more work so I found a set that will go in front like the previous ones I had. If these are no good it will be a new set that fit behind the inner lens on order.
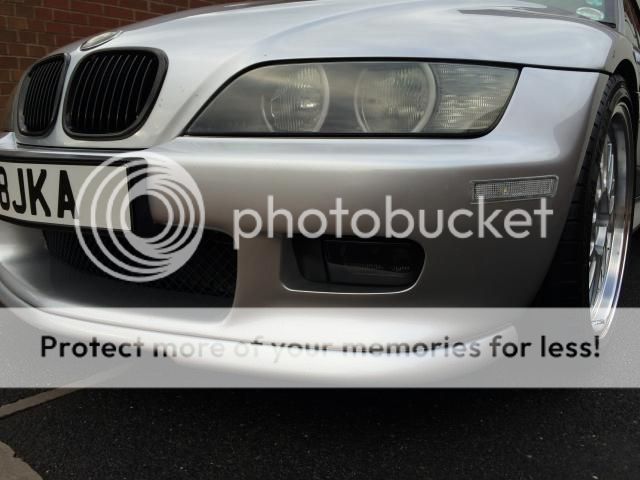
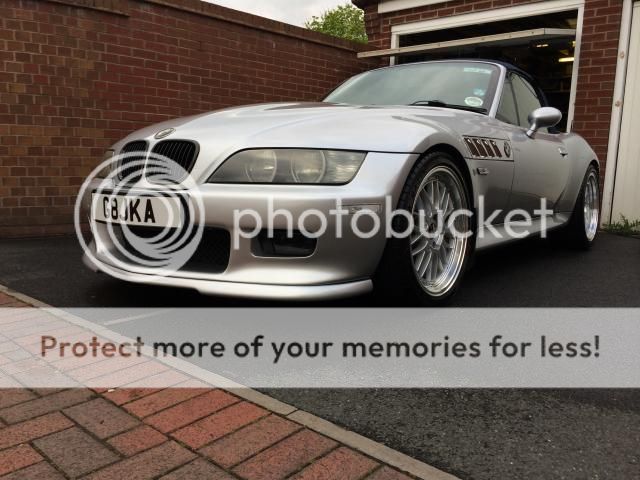
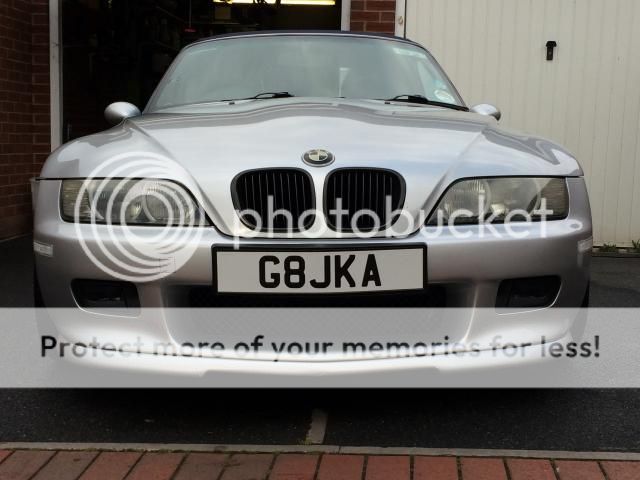
So got a bit bored and still looking for things to do on the zed, I decided to tint the fog lights a few weeks back. Wasn't sure at first but they have grown on me. Goes quite well against the black blanking plates next to them. Also fitted some of the flat style after market side lights as one of the old ones broke.
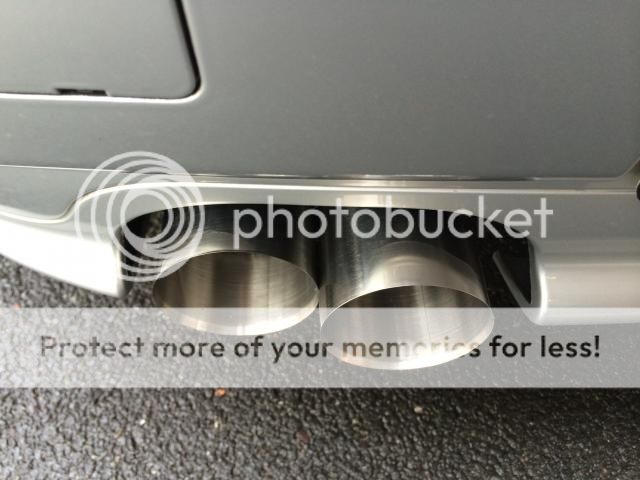
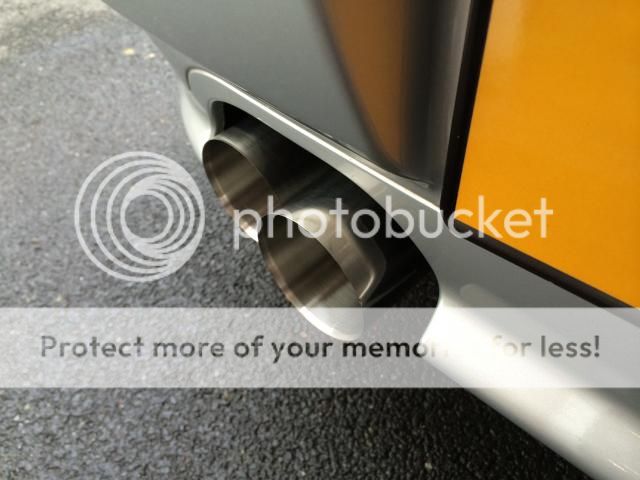
And this weekend I had delivery of a couple of tailpipes made by the guy on the z4-forum who made the handbrake and gearknob I have. Great quality workmanship made in stainless steel, with 76mm tips (I think the same as eisenmann exhausts?). Took a bit of modifying as he didn't quite make the retaining bracket big enough so they wouldn't go over the original pipes and they had to be trimmed back slightly. They are staggered so they follow the lines of the bumper just like the originals.

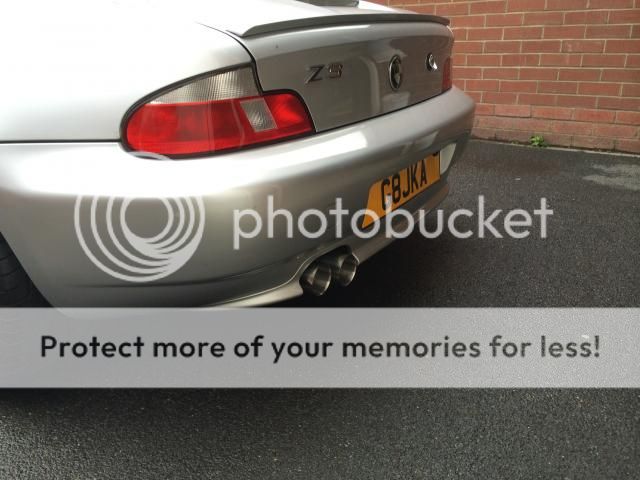
Should have my old angel eyes back up and running again soon as I have had an idea. Plus the new ones I got to replace them are the bigger type and I decided to break 2 of them on a trial fit


And this weekend I had delivery of a couple of tailpipes made by the guy on the z4-forum who made the handbrake and gearknob I have. Great quality workmanship made in stainless steel, with 76mm tips (I think the same as eisenmann exhausts?). Took a bit of modifying as he didn't quite make the retaining bracket big enough so they wouldn't go over the original pipes and they had to be trimmed back slightly. They are staggered so they follow the lines of the bumper just like the originals.


Should have my old angel eyes back up and running again soon as I have had an idea. Plus the new ones I got to replace them are the bigger type and I decided to break 2 of them on a trial fit

Should have my old angel eyes back up and running again soon as I have had an idea. Plus the new ones I got to replace them are the bigger type and I decided to break 2 of them on a trial fit
Look forward to that update