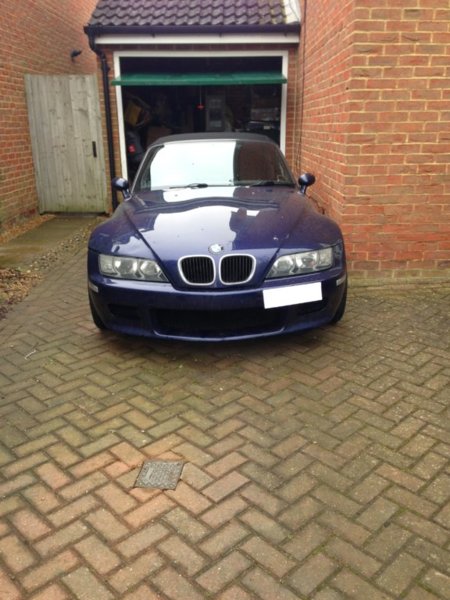
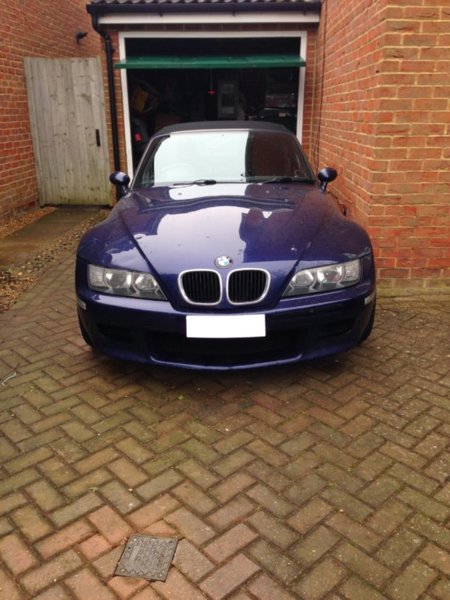
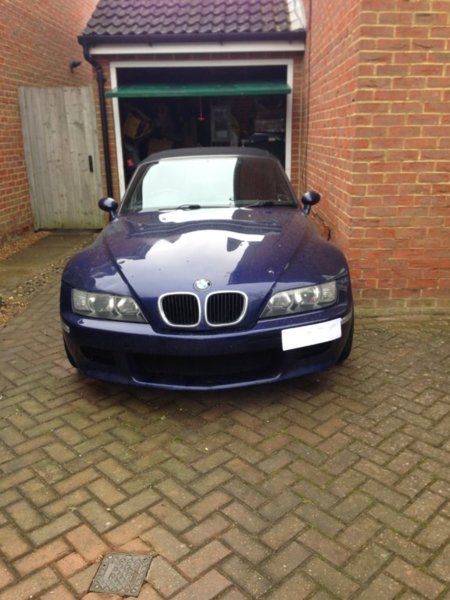
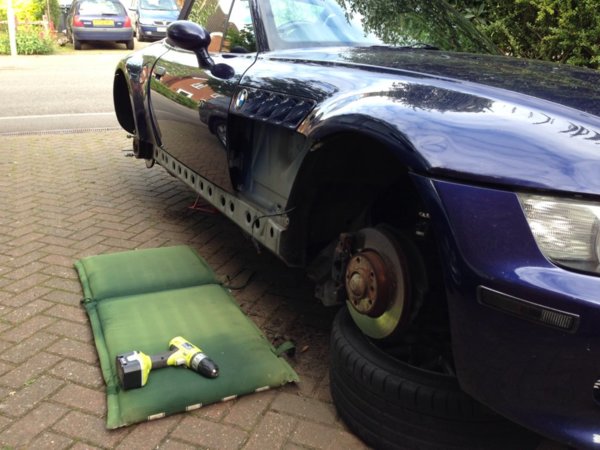
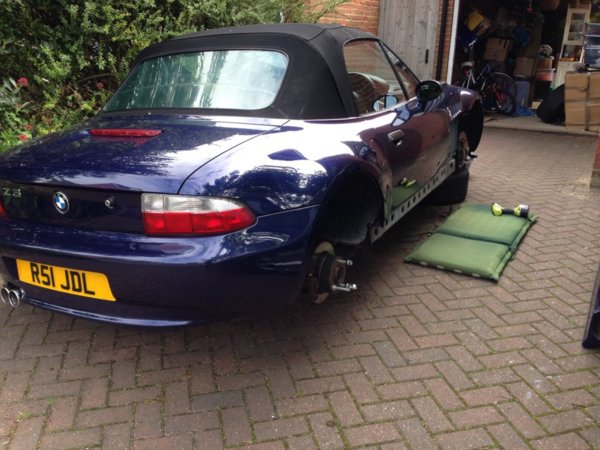
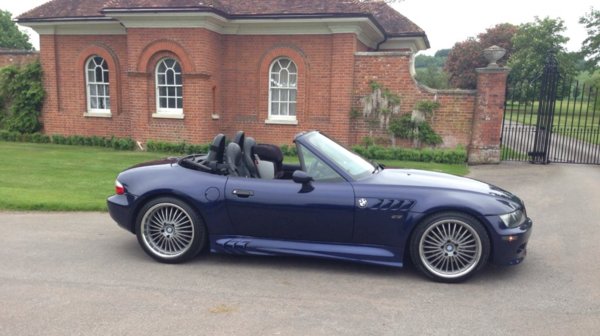
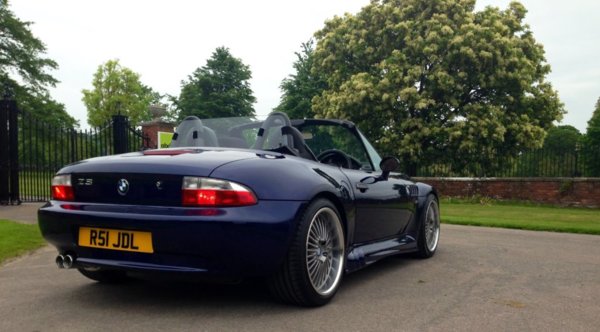
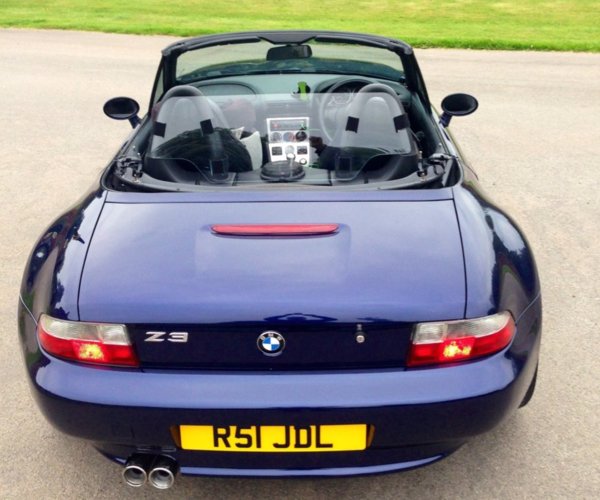
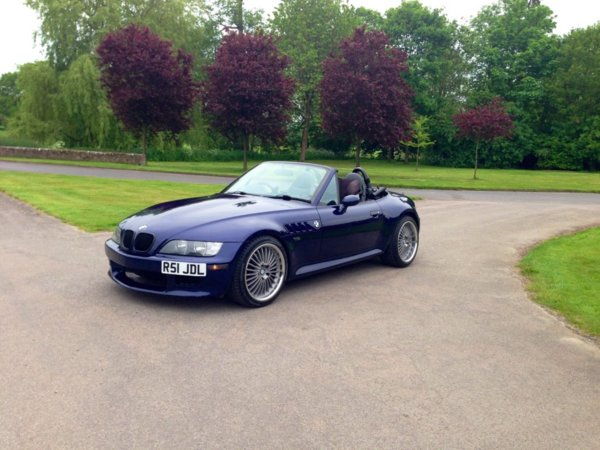
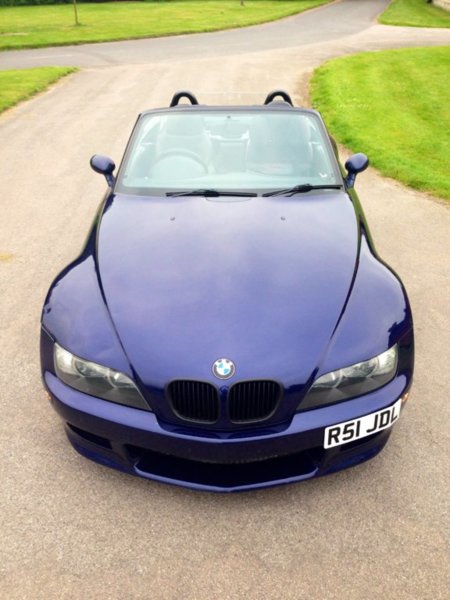
Dino D's Z3 2.8 Custom build. '98 Montreal Blue

Dino D

Zorg Guru (V)
British Zeds
Joined
Mar 28, 2014
Points
176
Location
Kent
Model of Z
2.8 Manual
So had the Z 6yrs now and done more than I imagined to it in that time, made some good friends and helped and been helped by a great Z community.

I'm going to start with most recent updates and work backwards hence reserving posts below to try and get everything into order. Looking back I've done so much it's going to take a while to fill out this build thread so lots of details to come...

Spec list as it stands:

Improvements:
SUSPENSION AND DRIVETRAIN:
BC Racing height and damper adjustable suspension with BC front camber adjustable top mounts,
6kg front springs and 8kg rear springs
BMW OEM M3 front strut reinforcement plates
Meyle Heavy Duty rear top mounts
Meyle Heavy Duty control arms
BMW OEM shock reinforcement plates rear
E-Tech front strut bar
Powerflex purple polybush kit for suspension bushes ,diff mount bush and rear beam bushes.

BRAKES:
EBC Yellow Stuff brake pads (front and rear) coupled with Brembo High Carbon brake discs all round with Goodridge braided stainless steel brake lines

WHEELS:
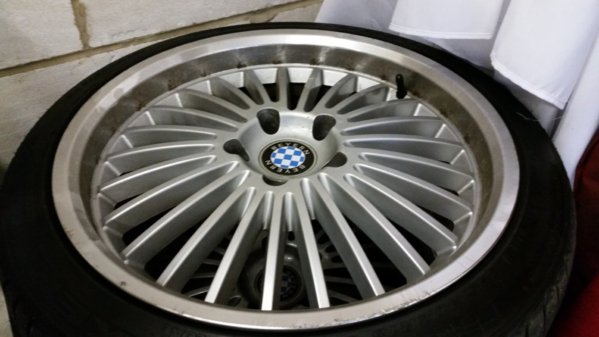
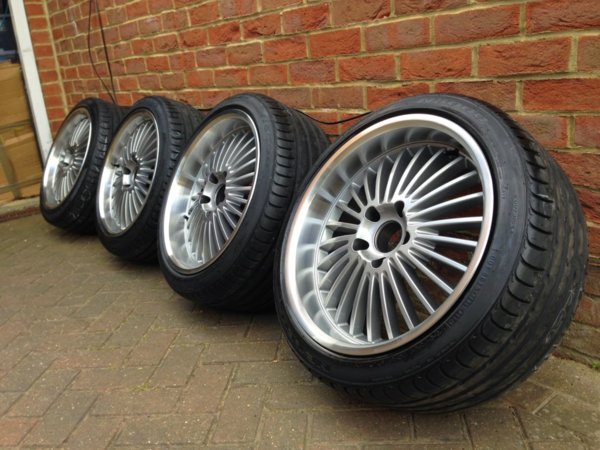
1. Summer:18" Staggered Beyern Multi (18x8.5, 18x9.5) with Nexen N8000 XL all round (225/40/18 and 255/35/18) SOLD
2. Winter: 17” BBS BMW Style 78 (17x 7.5, 17x 8.5 et41) 225/45, 245/40 ZR17
3. Winter: 17” Z3M Style alloys made in Italy, square set up (17x7.5j et35) 235/40 ZR17 all around.

PERFORMANCE:
SuperSprint stainless steel back box
Earl's performance stainless steel braided clutch hose
Simota intake
Viscous fan delete (after 2 failures)
New auxiliary fan, radiator temp switch 80/88c, thermostat and housing and water pumps (x2).

ICE:
Alpine mechless headunit,
4x Hertz Dieci DSK 130.3,
1 x JL Audio 6.h” 6w3v3 sub in a sealed enclosure between roll hoops
Alpine KTP 445 Inline Amplifier for drivers and Alpine Mono amp for the sub

ALARM: Clifford G5 650 MKII CAT 1 alarm and immobiliser with dual proximity sensor, smartwindows, blackjax etc

EXTERIOR:
Custom headlights with indicator lens delete and smoked lenses
Clear/red tail light units with chrome bulbs.
Fog light delete and black mesh (Kamei style pattern) in airdam and foglight openings.
Black flush fit bumper marker lights.
Full respray with custom smoothed bodywork (bonnet, front wings, rear wing, front bumper) colour coded door handles
Hamman rear valence
Rhino Lip custom rubber front lip
Z3 M wing mirrors

INTERIOR:
Black M Sport seats (heated) and door cards, facelift centre console with brushed aluminium finish. SOLD
Black Sparco R100 relcining Buckert seats with Planted Technology seat bases. Heating pads retor fitted to seat bases and back - heated Sparcos are treat!
R52 Mini Convertible rear view mirror
Storm Motorwerks V1 stainless short and weighted gear knob and handbrake cover
Storm Motorwerks cigar lighter blank
Doug Whalen black anodised hood release handle
Thayer Seat Recline Kit
Extended Clutch Stop
BMW OEM mesh deflector for roll hoops and pespex deflector (I like both..)
Raid 340mm Alcantara airbag steering wheel(to be fitted)

CAR DETAILS (from factory)
Type code CJ32
Type Z3 (EUR)
E series E36 (7)
Series 3
Type ROADSTER
Steering RIGHT
Doors 2
Engine M52
Displacement 2.80
Power 142 KW / 193 BHP
Drive HECK
Transmission MANUAL
Colour MONTREALBLAU METALLIC (297)
Upholstery LEDER OREGON/BEIGE E36 SANDBEIGE E3 (Q2SN)
Prod.date 1998-01-15

FACTORY FITTED OPTIONS:
HEATED WINDSCREEN WASHER NOZZLES Door mirror/ driver's lock, heated
SOFTTOP BLACK Softtop, black
SOFTTOP OPERATION, ELECTRO-HYDRAULIC Softtop, electromech. semiautom.
FLOOR MATS, VELOUR Floor mats, velours
WARNING TRIANGLE Warning triangle and first aid kit
SMOKERS PACKAGE Smoker package
AIR CONDITIONING Air conditioning
ON-BOARD COMPUTER On-board computer
RADIO BMW BUSINESS CD RDS Radio BMW Business CD RD
HIFI LOUDSPEAKER SYSTEM HARMAN KARDON Hi-Fi System Harman Kardon
M LEATHER STEERING WHEEL M sports steering wheel
ENGLAND VERSION NATIONAL VERSION GREAT BRITAIN
MAIN BATTERY SWITCH Battery master switch
EUROPE/DEALER DIRECTORY Retailer Directory Europe
ENGLISH/OWNERS HANDBOOK/SERVICE BOOKLET Operating instructions, English
SHIPPING PROTECTION PACKAGE Transport protection package Standard equipment
LIMITED SLIP DIFFERENTIAL (25%) Differential lock 25%
AUTOMATIC STABILITY CONTROL+TRACTION Automatic stability control (ASC+T)
LT/ALY WHL/ Z STAR BMW LA wheel Z Star
CHROME LINE INTERIOR Chrome Line Interior
HARDTOP PREPARATION Hardtop-preparation
WINDOW LIFTS, ELECTRIC AT FRONT Window lifts, electric, front
HEADLIGHT BEAM-THROW CONTR. F LOW BEAM Headlight aim control
FOGLIGHTS
LANGUAGE VERSION ENGLISH Language version English
BMW OEM FACTORY WIND DEFLECTOR (non-roll hoop version)

Some general pics:
How it looked from the factory:
IMG_3495.JPG


How it looked the day I collected from the previous owner @pangsterZ3 in Edinburgh OCT 2011:
IMG_0020.jpg

IMG_0021.jpg


2016 summer:
IMG_3894.JPG

1B75326F-28D0-4D2A-B8BF-DD5E4FEEE392.JPG


Winter wheels look with style 78's
IMG_8817.JPG

IMG_8479.JPG


Current look April 17 with full respray, custom panel smoothing, shadow chrome M style wheels
IMG_2418.JPG

IMG_2406.JPG

IMG_2412.JPG

IMG_2415.JPG

IMG_2393.JPG

IMG_2396.jpg

IMG_2407.jpg

IMG_2504.jpg

IMG_3210.JPG

IMG_3211.JPG

IMG_2847.JPG
 
Last edited:

Dino D

Zorg Guru (V)
British Zeds
Joined
Mar 28, 2014
Points
176
Location
Kent
Model of Z
2.8 Manual
September 2011 - where my story with this car begins:

I was looking for a 90's BMW and was thinking of a e30 325. It needed to be dual role car of fun and do the commute. e30 where already too much money in 2011 and rust is an issue on them. An e36 wasn't quite right (I'd had an e46 previously too). I ended up going a bit more on the fun side by looking at Z3's, whic I first drive back in 98 and always remembered and loved.

I knew that after owning a standard e46 330i that a stock car would not do it for me anymore. What BMW call 'sport suspension' managed to be brittle, firm yet allow to much wallow at the same time. I also needed to hear more of the straight 6 so was looking at cars that had some work in this area already.

I'd seen this particular Z3 in the reader rides section of Pistonheads and when it came up for sale it was at the same time I was looking...it was older than I was looking for and not my first colour choice but I loved the list of recent mods. It was not the cheapest one out there but by far the one of the best loved ones. I was also considering a nice 3.0l but I always like the original rear treatment. Whist the extra torque and power of the 3.0l was alluring it has a very linear delivery unlike the single vanos 2.8 which has a distinct vanos switch moment which I like. I briefly considered a S50 M but the M tax on running costs were a concern and honestly that much power in this chassis worried me..

In my book a well used and cared for car with improvements was better value than a static museum car. The seller was a genuine guys and after detailed email and phone exchanges a deposit was paid and an easyjet flight was booked to Edinburgh. It was over a month before I could go pic it up though, oh the anticipation...

Pics from the for sale ad:
A47AAA6C-A6DD-4C5E-80E8-738398DABCF8.JPG
2F7392AC-DA84-42B2-A034-1F6C8C1EF4B1.JPG
0CB1345F-D761-43D1-A4A6-670D1019CDE6.JPG
2960D88A-1850-49D0-8081-6BA58099C2B9.JPG

Gills comparison - shark gills vs M gills (now has custom smoothed shark gills)

4D8B5DE7-D332-407B-A0E9-83C53A74D87A.JPG


Royal steering wheel and storm Gearknob


Lockwood dials which have since been replaced by standard after the black interior was fitted.


So collection day one grey October day in Scotland:
This was the only car I've never driven myself before parting with the full amount but I didn't need to. The seller picked me up at Edinburgh airport and I'll never forget clapping eyes on it for the first time and hearing rumble into the multi story car park. It just looked like nothing I'd seen before and the colour under the fluorescent lights made me forget all about the sliver or black I was originally looking for.

I was sure I'd sell the 18 inch Beyern alloys as in the pics they looked to big and blingy for me but when seeing it person it was just lovely (although I did want to customise the finish of the lips which I eventually did in 2016). The stance from the rear was just pure 911, very glad I went with the original bodystyle, some things just cannot be facelifted..

He drove me back to his house to do the deal and I knew the car was just right from the passenger seat already. And the sound, my what a lovely sound when 6cyl breathes through a Supersprint exhaust.
Money handed over, boxes of extra bits loaded I took the keys to drive it over to another location outside the city to fit the hardtop where it was stored.

I hadn't been behind the wheel of a BMW for sometime but boy it felt good and within a few miles I was rowing the through the gears letting it run to the redline and slowing down again just to repeat. The weighted and shortened Storm gearknob along with Clutch Delay Valve delete and braided hose makes such an improvement over the standard, my e46 could only have hoped to have shifted this nice. The lack of drive by wire throttle also helps as there is none of delay can they have between pressing the throttle and it actually responding.

After we fitted the hardtop I said good bye to seller (not before giving it proper blast so he could hear the tasty exhaust form the outside). I decided to take in some Scottish A-roads before the motorway slog down to Kent. I cut cross country on the A702 down to Moffat before the seemingly endless motorway slog:
Got some pics in Scotland - the epic A702 which was an ideal road to get familiar with my new to me car:
IMG_0023.jpg

IMG_0024.jpg

I thought I was progressing well but actually had to get out of the way of the some of the locals, boy do the Scots know how to drive and on an A road. They even overtake without people flashing their headlights or blocking them. Not sure why the road manners disappear south of the border..

Back to the Z - I knew that the suspension would be an improvement over stock but I was gobsmacked at how it turned and responded, didn't think a Z3 could feel this good. Together with the sound and crisp shifts I was simply over the moon.

IMG_0022.jpg

Stopped off in a picturesque town called Biggar to buy some black insulation tape the close the gap between the hardtop and windscreen seal (it needed adjusting to seat properly but I wasn't going to faff around roadside with that!).
The local did look at me funny standing in the high street photographing the car but I couldn't help it, just looked so good and I was still pinching myself!

Many hours later I was back on Kent and the hardtop was off within minutes so I could go for a drive with the hood down (as if driving the whole day wasn't enough..)

The hardtop never really made it back on and was sold a couple years later. I'm a hood down whenever possible driver. Love the look of the Cosmos black hardtop against the Montreal blue but just never used it much and took up room in the garage...miss a bit though..
 
Last edited:

Dino D

Zorg Guru (V)
British Zeds
Joined
Mar 28, 2014
Points
176
Location
Kent
Model of Z
2.8 Manual
Between buying in 2011 and the next major update in Feb 2015 I'll list the things I did.

The car was pressed in to dual service - my daily commute which was around 40 miles each way for some great A roads, bit of Motorway and some dual carriage way. It was a pleasure for this sort of drive and the top was always down on those summer and winter evenings, a great way to clear the head from a days work at the office.

First mod:
CG Lock seat belt stabilizer:

download.jpg

With the firm suspension and grippy rubber you would come out of the seat before the car ran out of grip! Especially with the standard seats.
So this went in and is still in 6yrs later - brilliant device and doesn't to seem to be available for sale any more in 2018?

Soon followed by a seat lifter/incline kit which lifts up the seat front and hold you better in the seat, reducing the submarine effect under braking where you slide out the seat pretty much:
seat_height_mod.jpg

(Internet image, I never took pics!).

I now use one of @Southernboy s kits on my Sparcos as I need less lift, but am so used to the slight tilt it feels odd not having it:
https://zroadster.org/pages/Southernboys-BMW-Z3-Modifications/


The car was actually used weekdays and on most weekends it stood still. Was a real treat to use it daily on decent roads.

It had lots of maintenance in that time - regular oil, filters etc. Always used branded oils and genuine filters
Tyres - rears at twice the rate of fronts - the way it should be :)

Top tip re doubling tyre life:
I found that that swapping the tyres on the rime so the outside is then the inside doubled tyre life - with the rear camber I run from lowering and a lot of wear happening on acceleration as it squats and messes with camber/toe the insides would go very quickly. Worth keeping in mind when choosing tyres- I used to run Falken 452 back then. Now not many tyres let you do this, but the Hankook Ventus V12 I have now do. They do not have an 'outside' marker just direction so you can swap them over on the rims form side to side.

Cooling system - I was somewhat unlucky in that I've had 2 viscous fans break apart and 2 clutch fan units fail in the open position - that rubbish design is now banished from my car forever and now only runs a brand new aircon fan (which is standard on aircon equipped cars).
Here is thread from when I replaced my seized the air con fan using a e36 unit (identical bar some excess plastic trim and half the price - was around £100 compare with £200+ for the 'Z3' item:
https://zroadster.org/threads/electric-fan.7828/


Important info for MK1 2.8 Owners re the electric aircon fan wiring here:
Just to add that in doing this I discovered that many cars had the incorrect wiring for the aux fan from the factory! Yes from the factory!!

The fan was wired to switch on at high speed only hence I never heard it operate apart from when aircon was used...
It's well documented and there is a detailed (very) thread here with pics and diagrams, it's pretty simple once you have the info(!!)
http://www.bimmerforums.com/forum/showthread.php?2207733-Z3-2-8-electric-fan-failure/page2&highlight=Aux fan wiring

After swapping the wires I now have an aux fan that kicks in on low speed as needed. This is handy as my viscous seems to have died (again). Possibly because I stored it upside down for two weeks, I'll try to refill it and keep it stored correctly in case I ever need it again!
 
Last edited:

Dino D

Zorg Guru (V)
British Zeds
Joined
Mar 28, 2014
Points
176
Location
Kent
Model of Z
2.8 Manual
Interior overhaul.

So I wanted heated sports seat and like the facelift interiors...so somewhere in 2012 I bought a Cat C 2.2 to swap over bits:
It was sport model so the interior (black) came over along with the chrome ring headlights and the Style 78'S (I miss those!)

In between work and family it must have taken a year to finish swap! For months the interior was in a state of half beige/black, different seats, no seats etc etc.
It's not easy tinkering with no garage and needing the car daily and having a hectic work family life but it gone done! The 2.2 sadly had to be moved on, would liked 2 zeds on the drive, they make nice ornaments!
My z with teh 78's (you can see here how the rear had sunk as the bushes wilted and the suspension tired:
IMG_7889.JPG


The 2.2 sporting my old interior and my 16inch wheels
Presentation1.jpg
Presentation11.jpg


As I bought it:
IMG_0239.jpg

IMG_0708.jpg

Black sports seats, door cards and facelift console in:
IMG_4382.jpg
IMG_4383.JPG
IMG_4976.jpg

Now with Sparcos (heated) and Raid steering wheel - 2017
 
Last edited:

Dino D

Zorg Guru (V)
British Zeds
Joined
Mar 28, 2014
Points
176
Location
Kent
Model of Z
2.8 Manual
MAJOR REAR END/SUSPENSION OVERHAUL FEB 2015

So the car had been in regular service it was taking its tool on bushes and suspension - we all know now that the bushes are so important and around 100k miles they will be shot. Just how much of an impact they have i was about to find out.

The car had taken a back seat what with family and work priorities taking over and the move from employment to setting up a business and the uncertainty that brings. The car actually was SORN for months in 2014 I think as there was just no time or money to do the things it needed.

The car needed a cam sensor, the suspension was clonking , it handled poorly, needed 4 tyres, the rimes need refurbishing and some cosmetics needed doing. All small things on their own but when you are pressed for time and cash it looks bleak and I seriously toyed with breaking it and moving on as to my jaded eye it was worth more in parts than as whole, how I know different now!

I got MOT'd and back on the road in late 2014 and know it wasn't right, it rattled was not sure-footed and felt tired. The engine was fine and always smooth and punchy but the drive was poor- as it deteriorated over time I just forgot how good it can be on a fresh chassis and put it down to the fact the Z3's are like TVR's and want to kill you all the time. It nearly did a few times in the wet so I used to be rolling roadblock rainy days!

I ended seeing @Lee post about a fuel tank rattle that saw him drop the rear subframe on his M and fix it. i was convinced that my car had that issue, I did not know about the rear bushes and how bad they get and the effects they have.

Some pics of it is sad state, rear sunken, rims looking worse for wear:
IMG_1414.jpg
IMG_6639.jpg
IMG_7889.JPG


So after chatting to @Lee he kindly opened the Zedshed doors to my car and what follows is a lot of work that turned this car's fate around, it was make a break really thinking back.
Much work by @Lee , @GazHyde , @pgunter , @Shortie_gal @Oldguysrule rule went into the car and for that I am cannot say thank you enough, it really lead to the best few years I've had with the car and it becoming a keeper in our family:

Feb 2015 - some posts from the overhaul, full thread in all its gory details here (it made me cringe seeing the car in this state!) https://zroadster.org/threads/project-dino-d.6735/

It was a freezing Feb afternoon when I made the trip from Kent to Basingstoke, the car was covered in salt and grit, horrible state never to be repeated!
IMG_5533.jpg


The latest car to arrive at Dr. Lees garage belongs to @Dino D. It has a variety of issues needing looking at, including setting the suspension up correctly. It has coilovers on the front and lowering springs on the back.

Before anything gets tweaked its up on the axle stands & wheels off for the obligatory inspection.

Wheels off, and mahoosive wheels they are too...


Don't fancy being the one to clean them, even though they are rather nice :joyful:


Rear suspension setup. Not much spring in those springs. Not sure how much lower these actually are than standard, but pretty low by the look of them!


Everything looks pretty much the same as every other Z3 we've had in the garage - a bit tired looking! Yellow stuff pads all round as well.


Front suspension with coilovers (slight issue with this one visible to the eye!)


The differential bush can't seem to wait to come out, and looks to be making a bid for freedom already...


Drop links are starting to crack...


After our look over it became pretty clear it needs the rear sub frame dropping and a full refresh on the rubber components therein. Once the rear wheel arch liners were removed it was clear to see that the rear beam bushes had failed already. The video below shows the state of the beam bushes and the differential bush in better detail.


View: http://youtu.be/q_KWZk4TLJw


You've seen the process we are about to show you several times before in the other progress threads, but mainly for Dino's benefit here they are again!

First off the car is the spare wheel and spare wheel carrier. Spare wheel has seen better days...


Off with the tasty sounding Supersprint exhaust. The great thing about the 2.8 exhausts is they are joined midway down the underside of the car, so we don't have to remove the whole thing. It may need a quick go over with some metal polish :bag:


I'll skip over the things we disconnected and unplugged, but after about 3 hours we got to this stage (it would have taken less but we had to pop out for a bacon buttie!).


After a rather awkward lift it was on the work bench. Not sure why this one seemed to weigh heavier than the other subframes, but it almost broke both of us (particularly those who got their hand trapped in the process!).


With it on the bench we removed the anti roll bar and separated the swing arms from the ream beam. Having made such good progress we took a little drive out to drop the rear beam and PowerFlex beam bushes at the local garage for removal and fitting.

Next stage will most likely be Saturday when we will have collected the reworked beam and collected pile of parts from GSF. We now have a white board up in the garage so we can list things out, I forgot to take a picture of exactly what is going to be ordered. It's pretty much everything except springs and shocks. I'll update this thread later with a list when I get chance.

Much progress tonight, but not so many pictures. Nice early finish tonight with just 3.5 hours on the clock :)

The swing arm bushes have been pressed out and replaced, the handbrake cables changed, the differential powerflex bush fitted and the subframe dropped to the floor and loose fitted back on the car.

Parts galore!


Diff bush fully removed


Half a powerflex bush fitted


Other half fitted


Pressing in the new swing arm bushes


A lot left to connect up again, but it's back in place and held in by the diff mount and the beam bolts.


Weight saving!
 
Last edited:

Dino D

Zorg Guru (V)
British Zeds
Joined
Mar 28, 2014
Points
176
Location
Kent
Model of Z
2.8 Manual
Overhaul cont:
A little update...
@Lee got round to the front of the car and got the coil overs out and they look like this:


*Badly corroded.
*One damper not returning to length when spring removed.
*One top mount totally seized and causing one side adjust the height by itself (!).

These are FK Coilovers fitted in 2010 and done circa 25k miles in all weathers including winter. Half my commute used to be on a Kentish A roads so plenty of muck..

I'm not sure if this is good or bad as far as longevity goes.
The top mounts were items from an eBay seller.

So I've looked at replacements and settled on a set of BC's like these:
http://www.corbymotorsport.com/z3-c-1_205_14_86_325_342/bmw-z3-9602-bc-coilover-kit-br-p-952.html

Adjustable height and damping (quite easy apparently with little extenders for the rear damper adjustment. Comes complete with pillow ball camber adjustable front top mounts.

They get excellent reviews from BMW forums in the US.

They sound very well engineered, lots of info here:
http://www.bc-racing.co.uk/br-series-coilovers

Should arrive mid March and looking very forward to transformed ride!!

I can only apologise in advance for the following pictures as they are bordering on pornography. Yes, it's coil over fitting time :highfive:

The full kit laid out on the bench... *drools* Seriously though these are unbelievably good quality, and possibly the finest finish on any component I've seen fitted to a car.


Rear view. BC coil overs, Brembo discs, EBC Yellow Stuff pads, braided brake lines. Total respect to Dino for choosing quality :thumbsup:


Rear shock top mounts and adjustment for the coil overs (30 different settings of firmess).


New and old front coil overs next for comparison.


Top ends of the coil overs side by side. Oh to even understand what is going on here!


Front coil over fitted and tucked under the strut brace...


Dino D said:
The little extenders to adjust the rear shocks are nice touch and will look great poking out through the carpet in roof stowage well.
Yes, with a mesh deflector you should be able to make quick damping changes at the traffic lights! Interestingly the front adjusters have flexible extenders you can fit - Lee said this is so you can adjust damping without lifting the bonnet. Think of everything these people!

The amount of adjustment you can make to both the height of the front units and also the spring is impressive. Not sure if my diagram will make sense or not, but as I see it (I'm sure @Lee can correct me if I'm wrong)

The bottom locking ring allows you to extend/contract the overall length of the coil over. The locking rings above that allow you to control the length of the spring.

On the FK unit you only have one locking ring set which controls the height of the entire unit.


Dino D said:
Is that a rubber sleeve over the top and bottom coils on each spring I see in the pics?
I'm happy to send you all the hi-res photos I've taken once we've finished the project if you want them. Currently have about half a GB of pictures taken (65 in total). Just remind me when you pick her up ;)

Here is a better close up image of the rear springs for you. It has a rubber boot/sleeve on the top and bottom, and also the center coil has a rubber sleeve as well. They are well protected for sure.
 
Last edited:

Dino D

Zorg Guru (V)
British Zeds
Joined
Mar 28, 2014
Points
176
Location
Kent
Model of Z
2.8 Manual
So it eventually was all put back together after having:
New discs and pads all round
New shocks and dampers
ALL rear bushes
Handbrake cables
Lots of man hours!
and probably loads of other things I've forgotten!

IMG_6076.jpg

Collection day.

waiting next to THAT M. When I dropped off the Z at Lee he ran me back to the station in it. It was freezing and damp yet it was putting down power and sure footed, I just couldn't understand how it was doing that - I was soon to find out what fresh, good suspension and bushes can for a Z.
What a great car that white M was, felt like a new car!

IMG_6080.jpg


Having a bit of a play after collecting it from Lee. I was totally awe struck how it was driving and couldn't get my head around the fact it wasn't trying to kill me any more - it would go where I pointed it and nicely!


My initial review after getting the car back:
So a review is order of the improvements added by Dr Lee at the Zorg Z3 hospital(!).

To sum up key improvements added where new coilovers, Powerflex Rear Beam Bushes (purple) Powerflex Diff bush (purple) new brakes and lots of other little bits...

The car had FK Coilovers which were dead after 5yrs and around 25k miles.
All the other bushes were already Powerflex purple.

I won't compare the ride to what it was before on the dead Coilovers as obviously it's an improvement but rather to what I remember it being like when the original FK's were fresh.
Whilst it cornered flat, rode very well over smooth roads it always had a bit if 'steer from the rear' which robbed confidence.
It was just about acceptable on the bumpy roads round where I live. It was ok on the motorway but needed plenty correction and would do some strange vertical movements over certain undulations.
Until I experienced something else in really thought it was very good. In any case it was better than standard, even a Z3 on fresh standard suspension is not my idea of a sports car at all.
Would I say buy FK Silverlines now though- definitely not.

So now on the new BC Coilovers. Currently the firmness is set to at 20 on the rear and 15 on the front (30 being the hardest damper setting).
Ride height a bit lower than standard, say 20-30mm.

It's now firm yet supple at low speeds, the wheels feel pushed down into the roads.

Higher speeds is a total transformation - confident is never a word I used to describe a Z3. It is now. The only other car I've driven over the same road that felt so planted was Cooper S (supercharged convertible model).

Traction has improved greatly, simply no more slip!

No more steer from the rear (that is no doubt helped by the Powerflex rear beam bushes).

Motorway cruising is more like cruising, before it would be constantly hunting and following ruts and bumps.

It's still very much alive but now the feedback is more pleasant and useful rather than just tiring hunting around.

Cornering is still as flat as ever even with the increased ride height over previous set up. So flat that on the road I think any ARB upgrade will be redundant, perhaps on track when really being pushed it may be useful but for the roads it's flat as flat can be! I'd like to try a car with the ARB upgrade at some point just to see.

To say I am pleased with these coilovers is a major understatement!

Now let me talk about the bushes:
It's not really fair to compare dead OEM bushes with new Powerflex but I think I'm correct in saying that even compared to new OEM rear beam bushes the powerflex are a huge improvement (I recall the first Z I ever drove back in the 90's having a strange sensation when turning on fast sweeps, even though it was running 17 inch staggered ACS wheels supplied from BMW and was a new 2.8).
There is simply non of that now, what a pleasure!

The trade off be some increased road roar into the cabin but not a massive amount more (given mine is already elevated due to low profile and 18inch wheels).

Now the diff mount. Again it's now a Powerflex item and the OEM one was completely worn. I had a difficult gear change always having to select 3rd before taking first and generally a bit of slop. Now it changes smoothly and I can take 1st again without issue from a stop.
It's still a BMW shift though so not amazing (for those who have driven Hondas or Mazdas you will know what I mean!).

With the new bushes and suspension it somehow puts the power down much better and a result it feels like there is more of it.

The diff bush has a trade off though and that is diff whine. It increases noticeably. In a focused weekend car like mine I love it, adds to the 'muscle car' feel and sound. If it's your daily or you do lots of motorway miles then the OEM might be a better compromise for you.

For me I feel like I now have the perfect riding Z.
And it still needs to be corner weighted (although as Lee set it up with tape measure it probably not far out, especially the way it feels). Also needs proper alignment again.
I really need to get track day booked and explore it more.
However even on the road just cruising along it's feels great, a real pleasure to steer.

Many thanks to Lee and Gary for all the help on this!


As I got to use the car and played with settings more and with lots of discussion with @Brian H (the only other Z3 owner back then with BC's I changed out the rear springs to 8kg (from the 6kg supplied) as the 6kg were too soft and bottoming out.
So it has 8kg rears and 6 kg fronts now.

CORNER WEIGHTS AND ALIGNMENT


So I finally got the corner weights and alignment done
The short update is this:
I've already gushed about how great the car feels before the alignment and corner weights. After this it's even better. Really can't believe a Z3 can be this planted, confident and fun to drive!
Love it!


The longer update.
@Lee had managed to get the cross weights pretty close, there was just 2% difference which without professional garage equipment is impressive!!

Chris at Kent MX-5 who did my car said on the road I would probably not notice that small of a difference and I didn't really, the car felt so good when I got it back from Lee I was wondering wether I should spend the extra doing the corner weighting. However it did need alignment anyway and I just wouldn't be 'sure' until it was done that it was all 100%.

The big changes I could instantly feel are:
-1 degree camber on the front. What a revelation to steering precision, feel and bite.
Much less hunting over bumps and the front just hooks up, understeer pretty much eliminated.
Front feels welded to the road.

A point to note for others doing this set up- Chris originally wanted to dial in -1,5 degree camber but with the adjustable top mounts he could only get -1,5 on one side and not the other hence settling for -1 on both sides.

Given my tyres are wide (225 but fitted over a wide rim) this is still plenty make a difference. For those who want to track it and run more camber than you'll probably needed some other changes to allow more camber than what just the top mounts can offer.

I also had the front lowered slightly and can notice that from the drivers seat I feel that I am more on top of the front end and in control. I'll admit to wanting a slight nose down stance for looks too.

Alignment - no pulling to the right and just feels sweet. It used to pull a bit to the right.

These are weights now:
Weight if driver: 75kg
1/4 tank fuel.
LF 335kg RF371kg
LR 338kg RR364kg
Cross weight 50,3%
Total weight 1406kg

Ride height
LF 5"9/16 RF 5"8/16 (from front ARB)
LR 7"7/16 RR 7"3/8 (from rear beam)

Camber -1 degree both sides (front)
Front toe: 0,5mm toe in

I looked around for places for corner weights and all I found have Motorsport backgrounds but the thing is most are too busy with track season upon us. Chris at MX5 services is also busy with track work but is geared to people with road cars too. So although it took a few weeks to make a date that worked for us both he was helpful to accommodate. Great service from a knowledgable guy who has raced RWD big engined car for years.


I'll paste in some bits from his site here to explain the corner weighting and importantly the equipment he uses (ensures that the car is truly level):
MODS: hope this ok?

http://www.kentmx5.co.uk/mx5-suspension-set-up/

Here at Kent MX5 Services, we are specialists in full suspension set up, 4 wheel laser alignment plus much more.

We have all the latest digitail and laser alignment equipment:
Full corner weighting and cross weighting facilties by Long Acre as used in USA by NASCAR
Full Lite Align 4 wheel laser alignment
Fully adjustable flat floor with laser level for accurate suspension readings.
All castor, camber, bump steer , Akerman and ride height / rake adjustment equipment.
Fast Road / race spec. suspension and brake upgrade packages supplied and fitted.

Again, due to our vast experience in suspension tuning, not just with the MX5, but with various motorsport disciplines over many years, we have various set up options that we will offer your MX5.

There are various theories on suspension tuning, and what alterations do x, y and z, but there is a lot of truth in the phrase " there is more than one way to skin a cat". Our knowledge has been gained by extensive and exhaustive testing over many years, and we feel we have the best set up options available for your MX5 in all disciplines, from fast road use to full race specifications.
Corner weighting (and cross weighting) a car is the most important chassis tuning process you can do for any car. It is nothing short of Critical.

Corner weighting.....what is it?

Corner weighting a car allows precise vehicle weight distribution which is critical for that ultimate car balance on the track. It is highly regarded as the most important chassis tuning tool available, and is the only true way to obtain that perfect balance of a car. Of course castor, camber, ackerman angles etc all matter, BUT, a degree or minute here and there does not have the same effect to a car that corner weighting / cross weighting does. Cross weights ideally should be 50%, but depending on what discipline you are doing, can easily be adjusted with a turn here and a turn there on spring platforms. For example, we run 51% cross weight at Brands Hatch as the circuit has more right handers than left.

The classic symptom of a car that has not been corner weighted is the difference in balance of a car through right hand corners compared to left. On an exagerrated basis, if you have oversteer in corners going one direction, and understeer in the other, your corner weights, or more to the point cross weight, are wrong. In fact it has to be said, when setting up a car that does NOT have a central driving position, it is in fact the cross weight you go buy, and not as what most people think, the corner weights. It is all about making sure the percentages between the LF and LR are the same as the RF and RR, regardless of their actual corner weight. And yes....the driver is needed for corner weighting a car. For at least the first set up seesion anyway, and providing accurate measurements have been recorded during the set up process, without a driver is possible. But rule of thumb....WITH DRIVER IN THE CAR.

How long does this take, and how much?

Well it depends on what you want done of course.....and what is needed. A road car will not need as much as a full race car set up. We have extremely accurate and complex systems that we use, which need to be set up each time for each car. We know from experience, our equipment measures more accurately than the 4 wheel alignment systems used in most garages that are on fixed ramps. When permanent ramps / alignment stations have been in garages for a while, there is what only can be an assumption that the ramp the car is on is still level. We have had a few customers witness this. When the car was on the ramp, they could visibly see that the ramp was not sitting level compared to the floor and the wall. Therefore whilst the laser was level, the car wasn't. We then had to redo the cars castor and camber angles using our adjustabe laser flat floor.

Throughout the whole set up process, our adjustable laser flat floor is always used. It is the only way to be accurate. We charge £100 which allows all the equipment to be set up, and all your cars angles etc to be measured. This allows us 2 hours, and of course included in this are any alterations done in that period. We then charge £12.50 every 15 minutes there after. WE DO NOT KNOW THE WORDS RUSH OR HURRY. Accuracey takes time. If your MX5 has coil over suspension, and is used for track disciplines, then corner weighting etc is done. However, for a full race spec set up, with full set up sheets available afterwards, the price is £320, and we will need you car for a day.

Please note, that any broken compents / snapped bolts are not included in these costs. New parts / bolts will be charged in addition, and labour at 15 minute intervals on top (£12.50). Kent MX5 Services do not except any responsability for any broken parts / bolts.
 
Last edited:

Dino D

Zorg Guru (V)
British Zeds
Joined
Mar 28, 2014
Points
176
Location
Kent
Model of Z
2.8 Manual
The love was well and truly back for the Z and as it now became a life log keeper it got some cosmetic TLC:

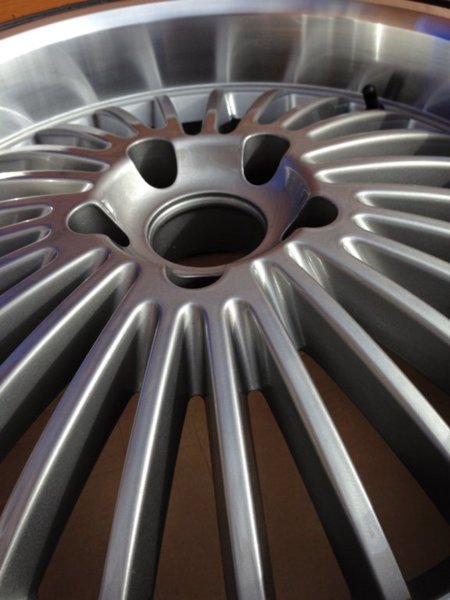
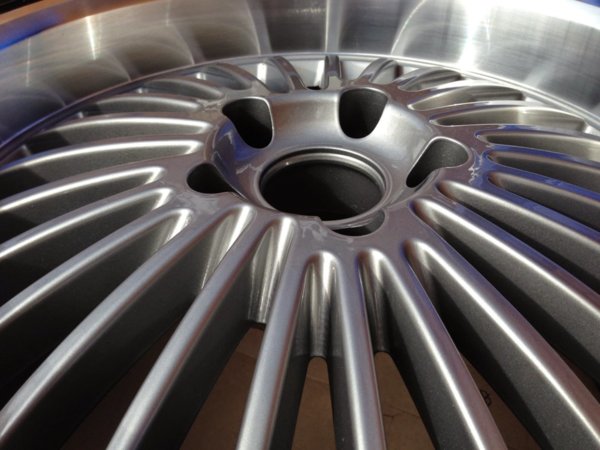
The Beyern Multis got refurbished in my own custom finish with diamond polished bare aluminium dishes and slightly darkened powder coated and painted spokes.
IMG_6962.jpg IMG_6967.jpg IMG_6970.jpg


12mm spacer on rear, no front spacers.

Grew a lip spoiler:


Aftermarket side skirt and smoked lenses fitted:
IMG_7401.jpg
IMG_7402.jpg
IMG_7514.jpg
IMG_7518.jpg
IMG_7522.jpg
IMG_7524.jpg
IMG_7525.jpg
IMG_7529.jpg
IMG_6962.jpg
IMG_6967.jpg
IMG_6970.jpg


Faffing about with numberplate placement, still not finished with that!!
IMG_6332.jpg IMG_6333.jpg IMG_6336.jpg IMG_7401.jpg IMG_7402.jpg IMG_7514.jpg IMG_7518.jpg IMG_7522.jpg IMG_7524.jpg IMG_7525.jpg IMG_7529.jpg

Lots of runs out on Zorg events and plenty pampering happened, I will add a collection of pics from runs on later pages as run out of room here!
 
Last edited:

Dino D

Zorg Guru (V)
British Zeds
Joined
Mar 28, 2014
Points
176
Location
Kent
Model of Z
2.8 Manual
March 2017
So in Valentine's Day 2017 the Z decided it liked the rear of the Vectra in front too much and 'kissed' it. The Vectra had a scratched bumper and the Z came off with a very bad nose job...

Most frustrating as only a few months earlier I put a stone chip free bonnet and boot lid on that I collected in the Midlands from @Sir Percival argh!!

Luckily it was only cosmetic damaged and even luckier that I'd taken out a proper insurance policy (agreed value through the excellent broker @BMBabe aka Stacey at Mannings ) which meant the Z could get repaired. A good insurance policy is measured in a situation like this and they were great.

I got in touch with @Tim beard as he owns a body shop and I've long admired his work on his Z3 Cobra since he posted up about it a year ago. After seeing the amazing paint job and detail he put into his car in the flesh it was a no brainer to ask Tim to do the work which he kindly agreed. Can't ask for more than a car nut and Z lover who knows the black art of paint who and who also is great guy to trust a car with.

So off it went to Tim's shop in Bexleyheath (sporting M style wheels from @spurs fan in a coupe fan. This car had a lot of bits from Andy and others from this community which I'll mention as I do the test of the updates)
IMG_1721.JPG


A bit of time and then this happened, bit scary seeing that:
IMG_2128.JPG


But a nice smooth nose in primer..
IMG_1979.JPG


and some lovely Montreal Blue going on the rear bumper:
IMG_2135.JPG


and some treated sills (that used to live on @Sir Percival now California)
IMG_1981.JPG


and those M mirrors finally seeing proper coat of paint(!), no more 'patina':
IMG_2143.JPG


with one or two subtle custom touches coming along...
IMG_1986.JPG


Make it all feel better.

Patience is a virtue and good work takes time so I'm patiently waiting but man, am I excited!
 
Last edited:

t-tony

Zorg Expert (II)
Supporter
British Zeds
#ZedShed
Joined
Dec 31, 2013
Points
226
Location
Torksey Lock,Lincoln, England
Model of Z
E89 Z4 23i Auto
Gonna be great Dino.:thumbsup:

Tony.
 

Shelly

Zorg Expert (I)
Supporter
British Zeds
East Anglian Crew
Joined
Jul 9, 2013
Points
201
Location
Norfolk
Model of Z
Z4 2.0 20i M Sport sDrive
This is going to be a interesting thread to keep track off :p
Well done for all your work :)
 

BMBabe

Zorg Expert (I)
Staff member
Supporter
British Zeds
Community Admin
Joined
Sep 4, 2014
Points
206
Location
Aylesbury
Model of Z
Z3
Having a bit of a moan on your behalf to the insurer for ya clearly worked soooo pleased :D can't wait to see your zed all finished :thumbsup:
 

Ianmc

Zorg Guru (IV)
British Zeds
The M44 Massive
Joined
Oct 12, 2014
Points
165
Location
New Forest
Model of Z
Z3 (M44)
A rear M roadster bumper and boot lid (with raised number plate) and 4 exhaust would look good on the prefacelift 2.8 me thinks.
Do we know if it is a plug and play install?
 

Grumps

Always happy, apart from when I'm not 🤬
Supporter
British Zeds
Joined
Apr 27, 2014
Points
226
Location
Forest Town, Mansfield
Model of Z
Z4 e85 2.5i
Looking good Dino. Those wheels really are something.
 

oldcarman

Zorg Guru (V)
Supporter
Canadian Zeds
The M44 Massive
Joined
Feb 11, 2014
Points
188
Location
Pine Falls Manitoba can.
Model of Z
1.9 M44
I have to go the exact same route because some idiot backed into my z3 a week after I got it here. Survived about 6K mi of transport from U.K. To my driveway only to be damaged by the idiot who took off without leaving any info and only 4 mi from home. Wish I could have Tim perform the repairs as it will look great once yours is done. JIM
 

DavidM

Zorg Expert (I)
Supporter
British Zeds
Joined
Apr 25, 2013
Points
208
Location
Ireland
Model of Z
2.8 Roadster
Refurb looking great so far - looking forward to seeing the finished paint job!
 

Lee

Zorg Guru (V)
British Zeds
M Power
#ZedShed
Joined
Mar 26, 2014
Points
193
Location
Basingstoke
Model of Z
Z4 Coupe 3.0si
Glad to see she's on the mend mate. She will be tip top for summer!
 
Top