When I was doing up the Z engine I was quite pee'd off how poor the rocker cover looked. I didn't want powder, or gloss, I'd had ok results before with wrinkle paint and had a new can left.
So, a good clean with engine cleaner, I have a small tank, a squirt with brake cleaner. Then a good going over with a coarse 50mm scotchbrite pad on an air grinder, that got rid of all the oxide and left a clean surface. Another good going over with brake/parts cleaner, don't use anything like that inside.
Now, wrinkle paint, there's a whole technique to it, it MUST be done above 20C, so, heat gun it, then two light coats. Keep the heat gun going quickly over it between coats. Then one thicker coat according to the instructions. I've never found that works, I usually give it two thicker coats. I did three on the bimmer, just because, with heat gunning in between. The wrinkle effect should develop over the next three hours. Some people on YouTube stick the part on an oven on low for 30 mins. Depends on whether you like your house smelling like a hot oily/painty engine for a week or so.
Mine came out like this:
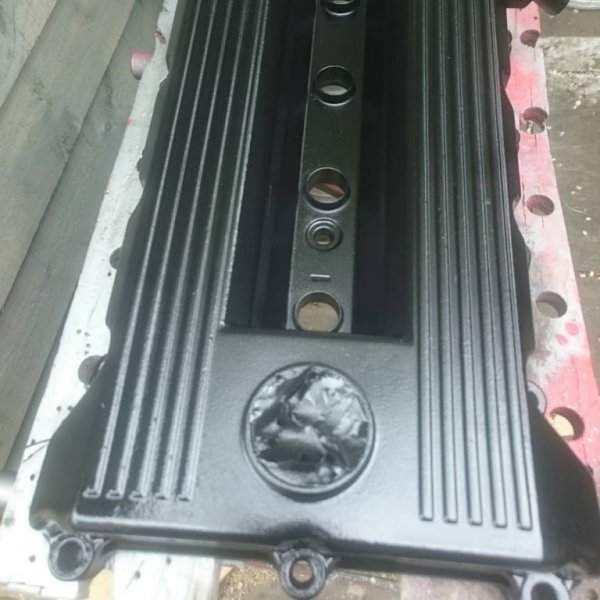
Not that great looking, but wait, there's more.
I filed off the raised lines, then went over them with 400/600 wet/dry on a sanding block. Top tip, level it First, before you paint, I marked it slightly trying to get it level, you wouldn't notice, but I do.
Came up like this: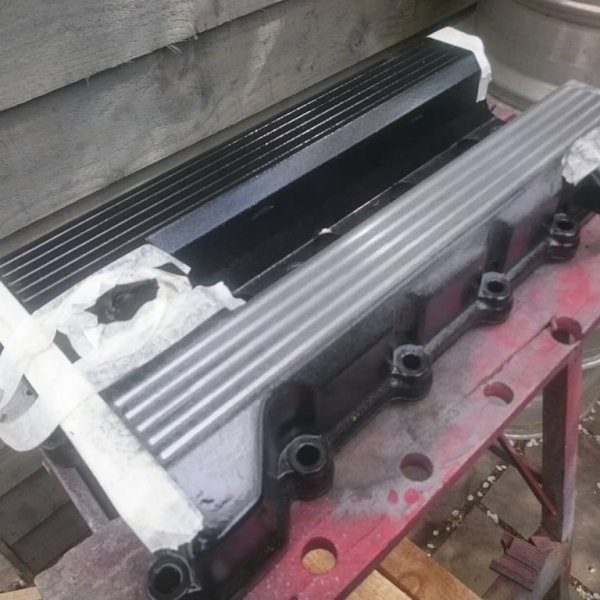
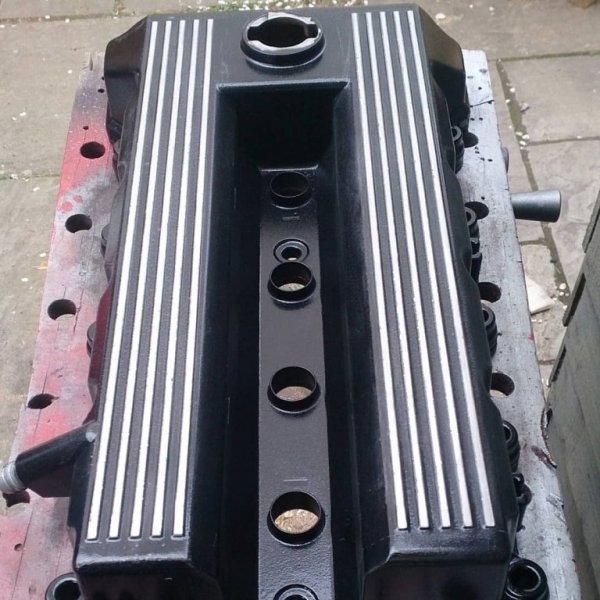
Still doesn't look very wrinkly though, does it? Install it and run the engine up to temp, because curing it properly, at operating temp brings it up like this:
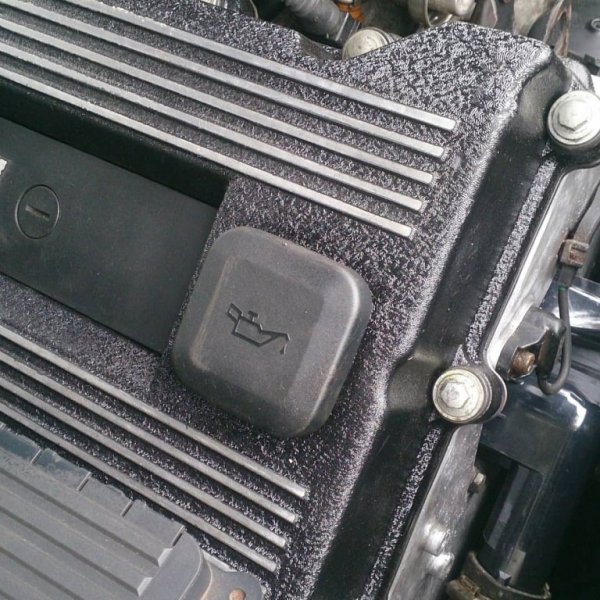
Which is exactly what I wanted. In fact it looked so good it made the inlet manifold look decidedly manky.
I pulled that off, cleaned it thoroughly and ground off the casting flash, scotchbrite, parts cleaner, then painted it. Not turned out quite as well, I only had enough paint for the two coats and one thick coat. If you do something like this, I really do think you need the 2/3 thick coats, not the single one the instructions suggest.
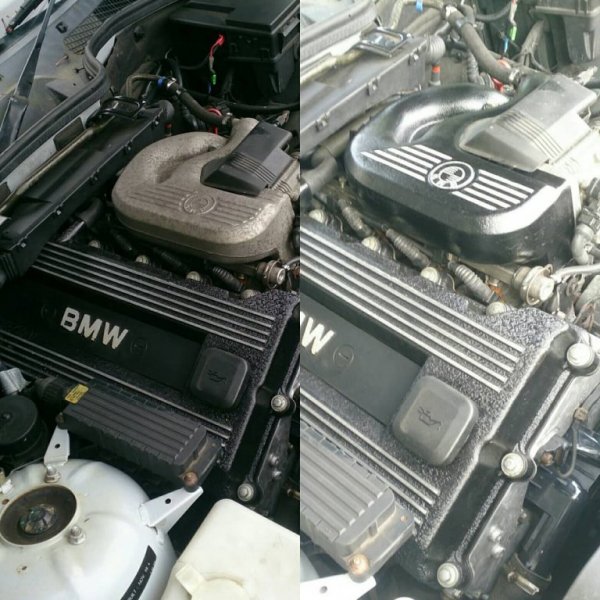
Still a massive improvement over what was there. I flatted the BMW logo and raised lines before I painted it. Definitely the best way to do it, much easier to get them back without damaging the finish.
I topped that of by replacing the nuts with M7 stainless flange nuts from Trev's Vintage Machine Shop on eBay.
(poor pic, but you get the idea)
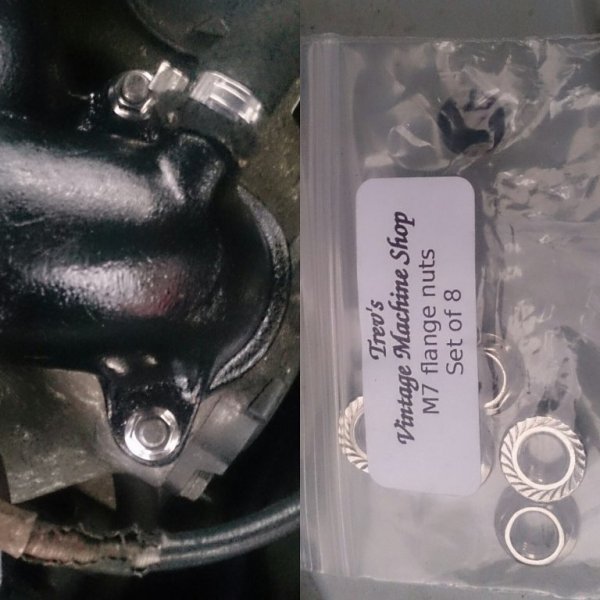
Makes the throttle cable look shabby now!
Anyway, wrinkle paint
Clean
Heat gun the part
Two thin coats
Heat gun between coats
At least two thicker coats
Heat gun
Cure it on the car.
Job done.
So, a good clean with engine cleaner, I have a small tank, a squirt with brake cleaner. Then a good going over with a coarse 50mm scotchbrite pad on an air grinder, that got rid of all the oxide and left a clean surface. Another good going over with brake/parts cleaner, don't use anything like that inside.
Now, wrinkle paint, there's a whole technique to it, it MUST be done above 20C, so, heat gun it, then two light coats. Keep the heat gun going quickly over it between coats. Then one thicker coat according to the instructions. I've never found that works, I usually give it two thicker coats. I did three on the bimmer, just because, with heat gunning in between. The wrinkle effect should develop over the next three hours. Some people on YouTube stick the part on an oven on low for 30 mins. Depends on whether you like your house smelling like a hot oily/painty engine for a week or so.
Mine came out like this:

Not that great looking, but wait, there's more.
I filed off the raised lines, then went over them with 400/600 wet/dry on a sanding block. Top tip, level it First, before you paint, I marked it slightly trying to get it level, you wouldn't notice, but I do.
Came up like this:


Still doesn't look very wrinkly though, does it? Install it and run the engine up to temp, because curing it properly, at operating temp brings it up like this:

Which is exactly what I wanted. In fact it looked so good it made the inlet manifold look decidedly manky.
I pulled that off, cleaned it thoroughly and ground off the casting flash, scotchbrite, parts cleaner, then painted it. Not turned out quite as well, I only had enough paint for the two coats and one thick coat. If you do something like this, I really do think you need the 2/3 thick coats, not the single one the instructions suggest.

Still a massive improvement over what was there. I flatted the BMW logo and raised lines before I painted it. Definitely the best way to do it, much easier to get them back without damaging the finish.
I topped that of by replacing the nuts with M7 stainless flange nuts from Trev's Vintage Machine Shop on eBay.
(poor pic, but you get the idea)

Makes the throttle cable look shabby now!
Anyway, wrinkle paint
Clean
Heat gun the part
Two thin coats
Heat gun between coats
At least two thicker coats
Heat gun
Cure it on the car.
Job done.

 well done mate.

