- Joined
- Nov 25, 2012
- Points
- 178
- Location
- Newport, South Wales,UK
- Model of Z
- Z3 M43 1.8 (1999) and Z4 E85 2.0i (2007)
After seeing how hard some Meyle lollypop bushes were to install the other weekend I decided to make some tools to remove and install the bush to make it easier.
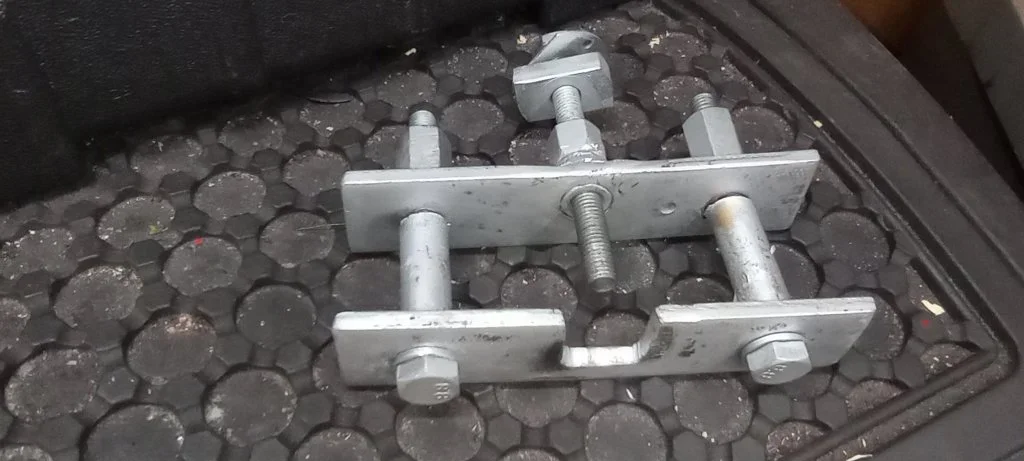
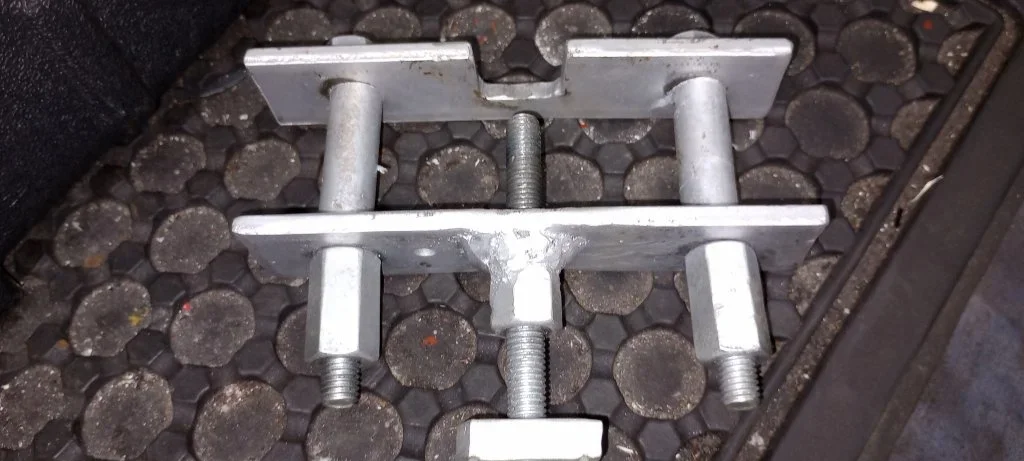
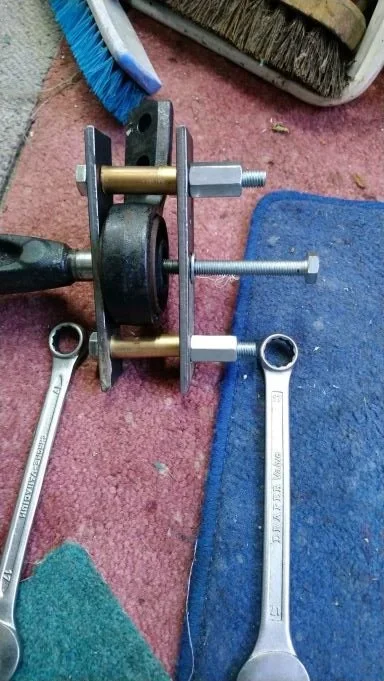
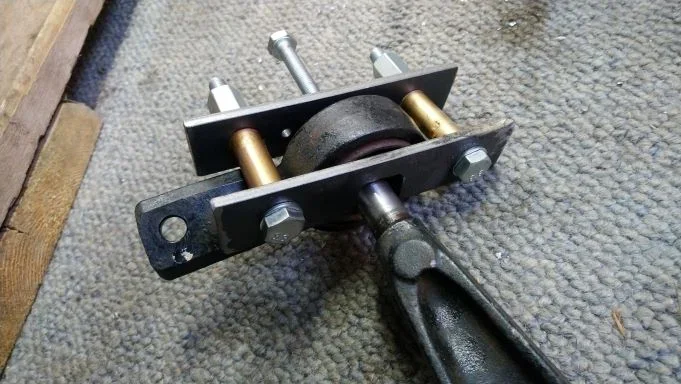
The removal tool was made from two 105mm x 35mm x 1.5mm lengths of steel bar, one was cut out to straddle the wishbone pin behind the lollypop, drilled each at both ends to fit M10 threaded bolts with spacer pipes fitted between the bars over the threaded bolts. The front bar was drilled and tapped in the centre to take a M12 bolt to provide the pulling power against the centre wishbone pin when the tool is mounted on the lollypop. A squirt of WD40 on the bush and pin and the threaded parts of the tool had the lollypop off with ease. The tool could be used with the wishbone still on the car with just the lollypop unbolted from the car allowing it to drop down to make room to attach the tool if just replacing that bush.
The other tool made for putting the new lollypop on the wishbone pin was made using thicker plate from a 150mm x 150mm x 10mm square. This was slotted to fit over the wishbone pin to provide the pushing force on the centre of the bush and the outer edge of the lollypop. Dilled at each end to take M12 threaded rod and two M12 threaded Bownuts were added to one end of the treaded rod, Normal M12 nuts and washers were used at the plate end of the threaded rods to exert the pushing power when tightened. The Bownuts were connected to the wishbone by using a socket set extension bar through the first small hole in the wishbone arm. By doing the nuts up evenly the new lollypop is pressed onto the pin with the application of rubber grease to aid it along the pin.
Parts obtained from local branch of Wickes and ebay for the Bownuts and 10mm plate steel.
Removal tool
Installation Tool
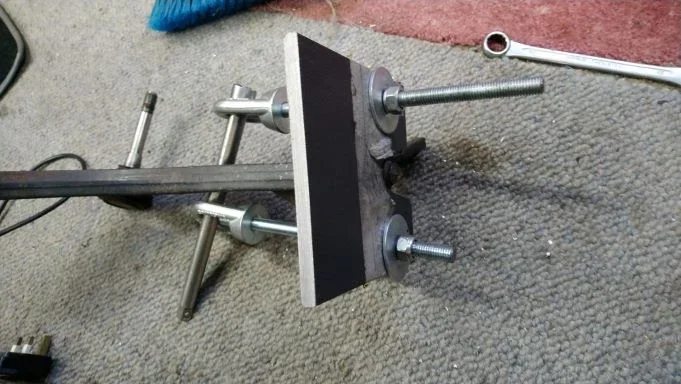
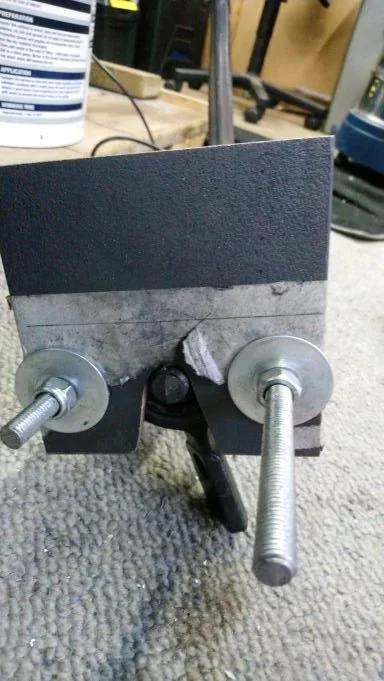
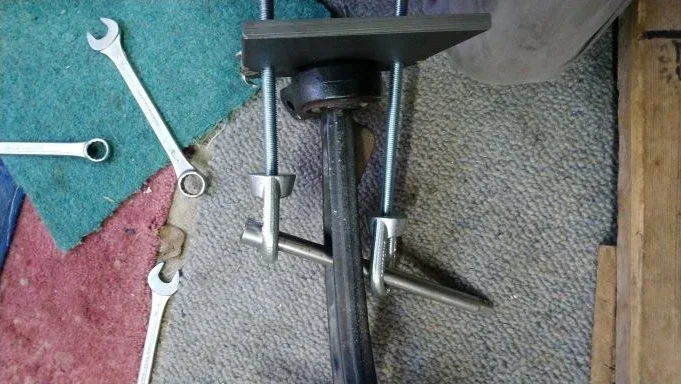
Updated pictures of the removal tool, threaded centre nut now welded to the bar for extra strength


The removal tool was made from two 105mm x 35mm x 1.5mm lengths of steel bar, one was cut out to straddle the wishbone pin behind the lollypop, drilled each at both ends to fit M10 threaded bolts with spacer pipes fitted between the bars over the threaded bolts. The front bar was drilled and tapped in the centre to take a M12 bolt to provide the pulling power against the centre wishbone pin when the tool is mounted on the lollypop. A squirt of WD40 on the bush and pin and the threaded parts of the tool had the lollypop off with ease. The tool could be used with the wishbone still on the car with just the lollypop unbolted from the car allowing it to drop down to make room to attach the tool if just replacing that bush.
The other tool made for putting the new lollypop on the wishbone pin was made using thicker plate from a 150mm x 150mm x 10mm square. This was slotted to fit over the wishbone pin to provide the pushing force on the centre of the bush and the outer edge of the lollypop. Dilled at each end to take M12 threaded rod and two M12 threaded Bownuts were added to one end of the treaded rod, Normal M12 nuts and washers were used at the plate end of the threaded rods to exert the pushing power when tightened. The Bownuts were connected to the wishbone by using a socket set extension bar through the first small hole in the wishbone arm. By doing the nuts up evenly the new lollypop is pressed onto the pin with the application of rubber grease to aid it along the pin.
Parts obtained from local branch of Wickes and ebay for the Bownuts and 10mm plate steel.
Removal tool
Installation Tool
Updated pictures of the removal tool, threaded centre nut now welded to the bar for extra strength
Last edited: