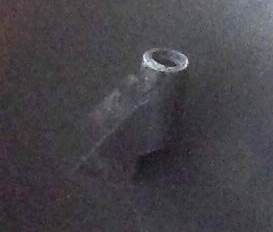
How does the Z3 door mirror casing fit together?

David Carter

Zorg Addict
Supporter
Joined
Mar 8, 2015
Points
49
Apologies if this one has been asked before, but I can't find it. I recently embarked upon replacing my Z3's corroded mirror pedestals with plastic ones. Plenty of videos, posts etc showing how to do it, except I came across a problem with the mirror casing. All the guides say to undo the four self tapping screws under the mirror glass that hold the two halves of the casing onto the innards, at which point it will split apart. Seemingly the screws should pass through the rear half of the casing and the mechanism, screwing into the front casing and holding it all together. All very logical. However, when I came to dismantle mine, I found the casing had been fixed together by a load of silicon sealer. Having finally prized it all apart, I found why; there is seemingly nothing on the front part of the casing to fix it to the other half. There are no fittings for the screws to fix into, only two small locating tabs on the base of the rear casing and one larger one on the top of the front half, but no mechanism for these to actually clip the two halves together. It doesn't look as if anything has broken off, there's just nothing there! The four self tappers just screw into spire nuts behind the mechanism. Whether these are original or not, I don't know (one is obviously a replacement, but the other three match).

Any idea how the front part of the casing should be secured? Any help much appreciated.

mirror.JPG
 

Sean d

Zorg Expert (I)
Supporter
British Zeds
Joined
Sep 29, 2015
Points
201
Location
Lincolnshire
Model of Z
Z3 2.8
There are 4 very small tork screws that go in behind the glass, the parts they go into are missing on your cover
 

David Carter

Zorg Addict
Supporter
Joined
Mar 8, 2015
Points
49
Thanks for the reply. Are the screws you refer to the ones that have the spire nuts on in the photo? These are the screws that are supposed to fix the two halves together in all the videos etc., but as you say, the parts they go into seem to be missing on my cover. Are they separate parts or moulded into the cover? There is no sign of anything having broken off and I have another front cover from a previous Z3, which is exactly the same; no fixings visible or any sign of them ever having been there. This vehicle also had the mirror covers glued together (before being written off by a Transit that couldn't stop in time!).
 

Sean d

Zorg Expert (I)
Supporter
British Zeds
Joined
Sep 29, 2015
Points
201
Location
Lincolnshire
Model of Z
Z3 2.8
They are part of the cover and I can see in your pic where they where attached, they are indeed the ones with spire clips that shouldn't be there,
the backs are quite common as the stem snaps on the mirrors so it shouldn't be to hard to get one, we have a number of breakers that may well help, I have tagged a couple
@mrscalex
@spurs fan in a coupe
 

handsomejackuk

Zorg Guru (III)
Australian Zeds
The M44 Massive
Joined
Aug 8, 2016
Points
145
Location
t
so can the allen bolts be accessed once the mirror covers are removed ? mine is seized and needs mirror base painting have squirted plus gas down ther but to no avail yet... if not i have to paint mine with it attached....
 

David Carter

Zorg Addict
Supporter
Joined
Mar 8, 2015
Points
49
I twisted my mirror up to get at them (which resulted in the corroded pedestals breaking), but you should have no problem accessing the allen bolts once the covers are off. In future I'll take the covers off first before removing the mirrors.
 

Sean d

Zorg Expert (I)
Supporter
British Zeds
Joined
Sep 29, 2015
Points
201
Location
Lincolnshire
Model of Z
Z3 2.8
so can the allen bolts be accessed once the mirror covers are removed ? mine is seized and needs mirror base painting have squirted plus gas down ther but to no avail yet... if not i have to paint mine with it attached....
Once the mirror covers are removed you get full access to the mechanism, however if its to far gone it will never release without breaking
 

spurs fan in a coupe

Zorg Guru (V)
Supporter
3rd Party Trader
Joined
Dec 5, 2011
Points
175
so can the allen bolts be accessed once the mirror covers are removed ? mine is seized and needs mirror base painting have squirted plus gas down ther but to no avail yet... if not i have to paint mine with it attached....
Yes you can, you ping the mirror glass off, then the motor controlling the glass (4 Phillips screws from memory) then the 4 torx screws that hold the two halves of the mirror body coloured sections together (which Sean mentions on this thread) and the fragile metal intervals are then exposed as are the heads of the Allen bolts.
 

handsomejackuk

Zorg Guru (III)
Australian Zeds
The M44 Massive
Joined
Aug 8, 2016
Points
145
Location
t
thanks Andy done it now... cracked the mirror in the process but i get one at some stage no rush.. its all off and the wires taped up on the caer and a piece of tap over the remaining holed in the car..,

I was hoping i could free the mirror foldng mechanism have give it a good clean with wire brush in shed blown out all the crap... has anyone ever managed to free it up without breaking the mirror... iwas thinking of putting a long stud through where the wire goes where the sprink is to take tension off the spring and see if ti would free itself....

but not looking hopeful...
 

Sean d

Zorg Expert (I)
Supporter
British Zeds
Joined
Sep 29, 2015
Points
201
Location
Lincolnshire
Model of Z
Z3 2.8
thanks Andy done it now... cracked the mirror in the process but i get one at some stage no rush.. its all off and the wires taped up on the caer and a piece of tap over the remaining holed in the car..,

I was hoping i could free the mirror foldng mechanism have give it a good clean with wire brush in shed blown out all the crap... has anyone ever managed to free it up without breaking the mirror... iwas thinking of putting a long stud through where the wire goes where the sprink is to take tension off the spring and see if ti would free itself....

but not looking hopeful...
There is a fix on here somewhere, you can remove the spring and sleeve and put a stud through
 

handsomejackuk

Zorg Guru (III)
Australian Zeds
The M44 Massive
Joined
Aug 8, 2016
Points
145
Location
t
There is a fix on here somewhere, you can remove the spring and sleeve and put a stud through

seen that one but you cant run the wires through then for the adjustment. i wondered if the tension was taken off the spring whether it would be free to get moving again i give it atry tomorrow not keen on breaking the mirror though, and may just paint it as it is...
 

Sean d

Zorg Expert (I)
Supporter
British Zeds
Joined
Sep 29, 2015
Points
201
Location
Lincolnshire
Model of Z
Z3 2.8
seen that one but you cant run the wires through then for the adjustment. i wondered if the tension was taken off the spring whether it would be free to get moving again i give it atry tomorrow not keen on breaking the mirror though, and may just paint it as it is...
I tried it a few months back and it was siezed inside, only gave it a gentle knock and it snapped, I have repaired one in the past and drilled a hole next to the stem for the wires to go through
 

handsomejackuk

Zorg Guru (III)
Australian Zeds
The M44 Massive
Joined
Aug 8, 2016
Points
145
Location
t
that could be an option too drilling another hole for wires.. i not going to force it... did give it a tap with a hammer earlier... if that serrated washer thing underneath can be cut off and a new one pressed on if it frees up its worth a shot..
 

David Carter

Zorg Addict
Supporter
Joined
Mar 8, 2015
Points
49
I was loathe to remove my driver's side mirror without having the passenger side back in place, in case I ended up with no door mirrors at all, but figured I needed to see if I needed to replace both mirror casings. I therefore threw caution to the winds and stormed in. Fortunately this side went without a hitch and here's what I learned for anyone tackling mirror pedestal replacement for the first time:

If you haven't already got any, invest in a set of plastic trim removing tools. This will save much profanity and damage by trying to do the job with a screwdriver or similar.

Remove the door trim panel first. Some videos make it look as if you can remove the mirror and pull the electrical cable through from the outside far enough to expose the connector block. If everything is as it should be this is not possible, as the cable is attached to the door panel by a plastic clip that can only be accessed by removing the trim panel.

Prize out the mirror glass (both mine came out without damage using the plastic tools), then undo the four torx screws that hold the mirror casing in place and remove the casing. My driver's side casing was intact(ish) and I could then see why I couldn't find any means of attachment on the passenger side. As you can just about see from the photo below, the plastic tubes that the torx screws go into are not directly attached to the casing, but are held onto it by three thin plastic fins, which can break off and leave virtually no trace.

Once the casing is removed you can easily access the allen screws that hold the mirror in place. I would not attempt to access them by twisting the mirror up, as shown in some videos, as any corrosion or stiffness in the joint (i.e. if it is more than about a month old!) will result in something breaking. Probably not a problem if you're replacing the pedestals, but not great if you want to re-use the original parts. After that it's a simple matter of swapping the old parts for new and reversing the process to put it all back together. The connectors for the wires in the back of the motor assembly simply pull out, and no need to label which is which, as those nice people at BMW have moulded into the backplate which colour wire goes where and which is the top (and in English too!).

mirror2.jpg
 

Attachments

alec.m

Dedicated Member
Joined
May 3, 2012
Points
40
Location
Lymington Hampshire
Model of Z
3.0 Auto
Top