Help!!! taking out rear end and have the for pesky bolt issues.
- Thread starter MartinJ
- Start date
and finally... with a different trailing arm and hub you cannot paint dots on hub and drive shaft, so how do you know where the drive shafts go in the 'new' hub?
Not important for the driveshafts as far as I'm concerned. I'm just reassembling mine and they are going back on different sides and different trailing arms. Relevant for the propshaft to diff. It will have markings but add your own if it makes it clearer.
Hi guys - Dunno if I'm reading the above correctly.
I've reassembled my driveshafts but I didn't realize there were markings to follow. Doh! Looks like I'll have to take them apart again then. Is there some sort of synchronization required due to these markings.
Need to distinguish between driveshafts and propshafts. That tends to be the British terminology but if you are reading stuff from other countries the terms can be switched.Hi guys - Dunno if I'm reading the above correctly.
I've reassembled my driveshafts but I didn't realize there were markings to follow. Doh! Looks like I'll have to take them apart again then. Is there some sort of synchronization required due to these markings.
Driveshafts (x2). Diff to hub. No markings. No issues
Propshaft (x1). Gearbox to diff. Markings. Align on reassembly. I couldn't tell you exactly what the degree of consequence is of not doing so as I don't know. But clearly balanced components come into it and the risk of some vibration. Perhaps it doesn't matter in practice! But I've been careful to realign the factory marks on the propshaft to diff. There are 4 sets of marks on mine. One on each 'ear'. And the mark goes across the propshaft onto the diff input flange. The marks are made in slightly different positions on each ear. So if you put it back wrong the marks don't align.
The prop can go on any way you like - it's when you split the two prop halves and don't line up the white paint dots that you can get a vibration.
Those four plate to sill bolts can be a sod but if an allen rounds out, I just hammer a suitable Torx or spline drive socket in there.
Those four plate to sill bolts can be a sod but if an allen rounds out, I just hammer a suitable Torx or spline drive socket in there.
Not surprised you say that. But would bring me out in a rash if I didn't put it back how it left the factory aligning to the diff.The prop can go on any way you like - it's when you split the two prop halves and don't line up the white paint dots that you can get a vibration.
Those four plate to sill bolts can be a sod but if an allen rounds out, I just hammer a suitable Torx or spline drive socket in there.
- Joined
- Dec 8, 2011
- Points
- 145
Regarding propshafts. It's well worth understanding the principles explained in this short video - especially the often ignored parallel flange angles -
A constant velocity joint negates the necessity to have parallel flanges (hence the name "constant velocity").
A constant velocity joint negates the necessity to have parallel flanges (hence the name "constant velocity").
Thanks. Interesting and understood. So what is the relevance of aligning the marks between the rear end of the prop and the diff? If any at all? The flanges would stay parallel regardless of where on the diff they join to.Regarding propshafts. It's well worth understanding the principles explained in this short video - especially the often ignored parallel flange angles -
A constant velocity joint negates the necessity to have parallel flanges (hence the name "constant velocity").
- Joined
- Dec 8, 2011
- Points
- 145
Absolutely none. It probably relates to people not understanding things and it's been passed down the generations from the days when you would split the shaft rather than the flange.Thanks. Interesting and understood. So what is the relevance of aligning the marks between the rear end of the prop and the diff? If any at all? The flanges would stay parallel regardless of where on the diff they join to.
I wouldn't take it as read that the flanges are parallel, especially since the engine/gearbox is floating, as is the rear beam. It's very unlikely to be out of tolerance, but if you are chasing perfection, you could probably use shims. I wouldn't bother.
You only need to be concerned if you stripped the propshaft and pulled the front section out of the sleeve.
Oh well. At least it's back as it left the factory. But I did rack my brains at the time and really couldn't see the significance.Absolutely none. It probably relates to people not understanding things and it's been passed down the generations from the days when you would split the shaft rather than the flange.
I wouldn't take it as read that the flanges are parallel, especially since the engine/gearbox is floating, as is the rear beam. It's very unlikely to be out of tolerance, but if you are chasing perfection, you could probably use shims. I wouldn't bother.
You only need to be concerned if you stripped the propshaft and pulled the front section out of the sleeve.
just to say ; this community is terrific. i think i understand from all the comments how the prop shaft works with regards to disassemble of teh rear prop sahft to diff flange. so let me see if i have this right .t he only think to 'worry' about is if you are splitting the prop shaft in the middle when you have to mark the splines to get the right joint alignment and to avoid vibration. With the diff to prop shaft just have to mark the shaft to shaft. so that it bolts back together how it came off the flange. NI marking of prop shaft to diff apart from that. i now question my self is this right?
- Joined
- Dec 8, 2011
- Points
- 145
Bang onjust to say ; this community is terrific. i think i understand from all the comments how the prop shaft works with regards to disassemble of teh rear prop sahft to diff flange. so let me see if i have this right .t he only think to 'worry' about is if you are splitting the prop shaft in the middle when you have to mark the splines to get the right joint alignment and to avoid vibration.

Yes, but it shouldn't actually matter. It is good practice, as this will align any witness marks on the flanges.With the diff to prop shaft just have to mark the shaft to shaft. so that it bolts back together how it came off the flange.
I don't know what you mean by "NI"NI marking of prop shaft to diff apart from that. i now question my self is this right?
You are right.No marking of prop shaft to diff apart from that. i now question my self is this right?
Last edited:
Bang on
Yes, but it shouldn't actually matter. It is good practice, as this will align any witness marks on the flanges.
I don't know what you mean by "NI"
soooo. uts now 20/08/2021. still not gotbthe rear end of but close. Last thing to do befour undoing bolts that hold beam and rear dampers is to take out the outer break cables. here are pics of that glorious event.

These are the cables going into body. i assume we take those out as well?
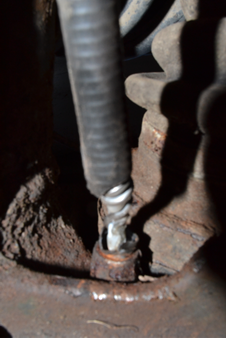
the following pic shows where i am after attempt to remove from trailing arm hub.


So I guess i just keep pulling and twisting until it comes out?
These are the cables going into body. i assume we take those out as well?
the following pic shows where i am after attempt to remove from trailing arm hub.

So I guess i just keep pulling and twisting until it comes out?
They ca
They can be a fight to remove where they enter the rear bulkhead. If you were replacing these with everything in situ then you undo at the handbrake, then grapple with your tool of choice and pull them through to outside. As you are removing the rear beam and they are knackered I would cut them, get the beam down and then have easier access. They can also be a problem to remove at the hub end but in my experience not as awkward as the rear bulkhead.soooo. uts now 20/08/2021. still not gotbthe rear end of but close. Last thing to do befour undoing bolts that hold beam and rear dampers is to take out the outer break cables. here are pics of that glorious event. View attachment 195081
These are the cables going into body. i assume we take those out as well?
the following pic shows where i am after attempt to remove from trailing arm hub. View attachment 195083View attachment 195083
So I guess i just keep pulling and twisting until it comes out?
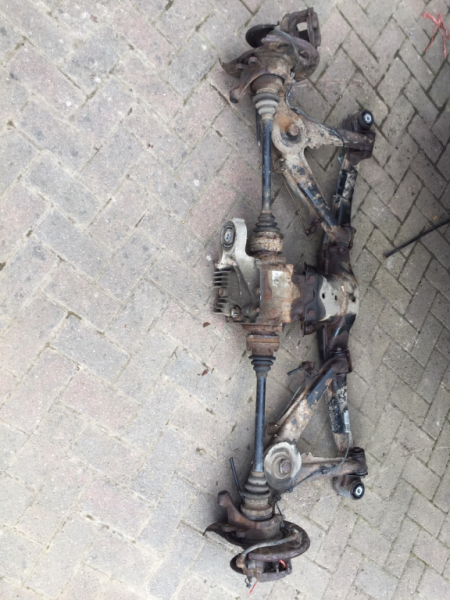
This is my Z3 rear end. 


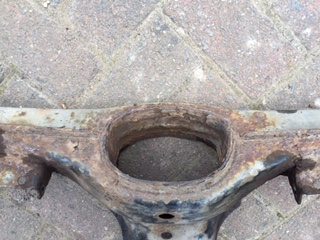
finally got the rear end off after realising that the diff bush was stuck. used a lever and it dropped quite sweetly. Beam axle will be off to be blasted. Not sure to paint or coat. I have seen a posit regards the diff and it sounds like it take a lot of cleaning , but up for it. Have ordered epoxy pant and Lanoguard so after cleaning the underside and taking off the rust I can clean and paint. The Lanoguard is going into the inner sill which has already been cleaned using angle grinder with wire head. I have replacement hubs which have already been coated. Apart from the rear end items: brake discs , pads,et al and amazing amount of new nuts and bolts required, will look at replacement tank strapsas well.


finally got the rear end off after realising that the diff bush was stuck. used a lever and it dropped quite sweetly. Beam axle will be off to be blasted. Not sure to paint or coat. I have seen a posit regards the diff and it sounds like it take a lot of cleaning , but up for it. Have ordered epoxy pant and Lanoguard so after cleaning the underside and taking off the rust I can clean and paint. The Lanoguard is going into the inner sill which has already been cleaned using angle grinder with wire head. I have replacement hubs which have already been coated. Apart from the rear end items: brake discs , pads,et al and amazing amount of new nuts and bolts required, will look at replacement tank strapsas well.
It goes back together a lot easier once it’s all cleaned ( including all the nuts and bolts)
