FxSlin - 97 Z3M & 97 1.9 Z3

fxslin

Zorg Guru (I)
Norwegian Zeds
Joined
Apr 17, 2017
Points
95
Location
Oslo, Norway
Model of Z
///M & 2.8
After the warm welcome from you forums members in the “Introduce Yourself” and seeing all the good work performed on the Zeds. I figured I would share my work on my 97 2.8 as well and get feedback/help/tip from the community.

[note this section is copy&pasted from my intro post]
Last summer I spontaneously decided that I needed Z3 roadster. ( had just finished my daily driver E53 project car, sold now) I was really lucky and just around that time a 97 2.8L manual roadster in right color combo appeared on the market. Together with a friend I went checking the car out and we decided it did need some TLC, but mechanically it was good. So I managed to get it for a very good price (for the norwegian market). I realize I've been extremely lucky afterwards, there has not been any manual 2.8 pre-facelift (or facelifted as well) on the market afterwards here in Norway as I know about. Just a few M's and Coupè's.
[end copy&paste]

Is I mentioned in my intro post, I’ve had this car for a year now and has already done a bit of work it. I have project thread on a Norwegian BMW forum,where I have documented most of my work and will post them in this thread so this thread will be in sync with the Norwegian version (it seems/feels that I’m only Z3 person in the norwegian BMW clubs ). I probably throw in a few posts of the trips and other Z3 related stuff, so it won't be pure technical progress thread.


My story starts with the purchase :)

Since I didn’t know to much about Z3’s at the time when I purchased the car, so I had a friend who also had Z3 at time coming along with my to inspect the car. As said before the car appeared to be in general good condition and the previous owner had done a few things. Ie added supersport suspension on it and it seemed that he didn’t want sell. But he had house project that he needed to finish (He actually shed a tear on the hand over day, I felt really sorry for him).


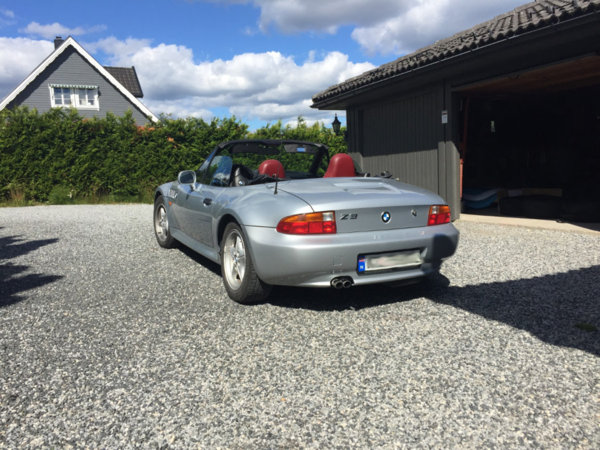
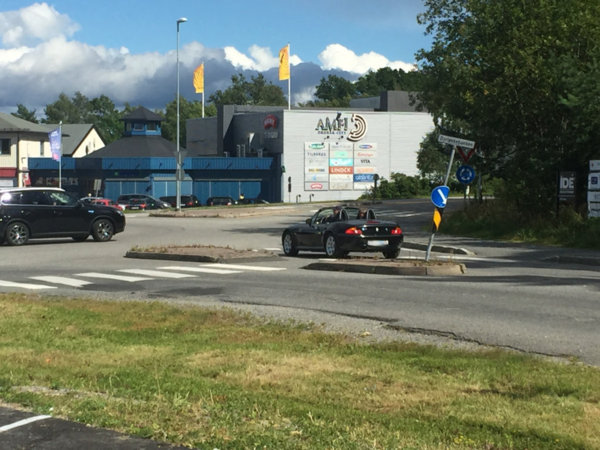
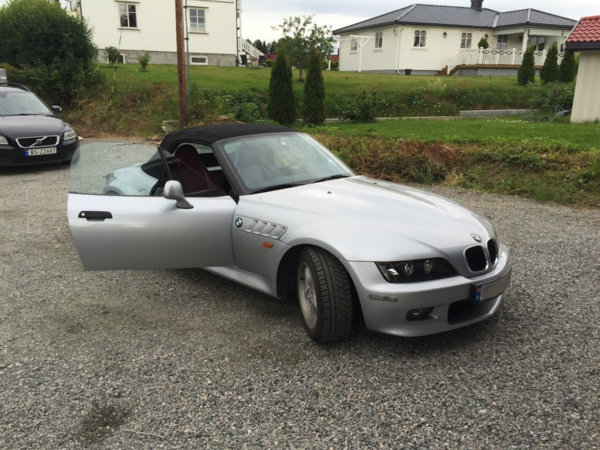
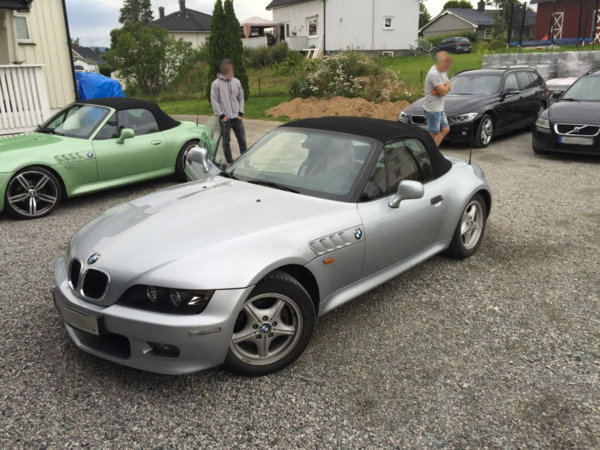
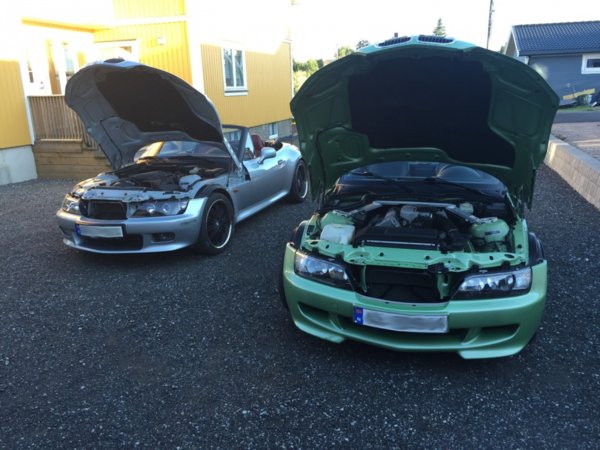
Some pics from the “inspection” day and which ended up in agreement (under condition that all paper work checked out, which it did obviously).
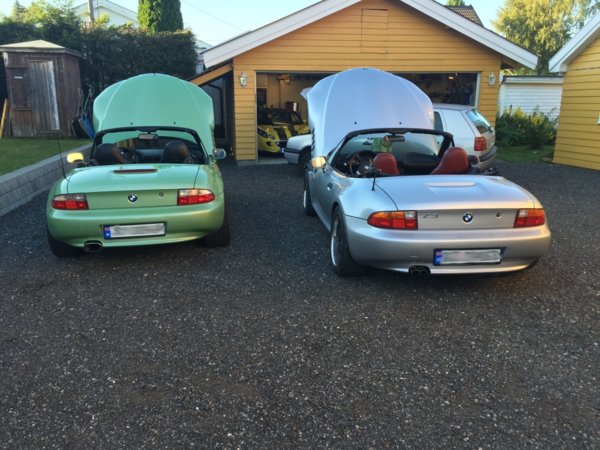
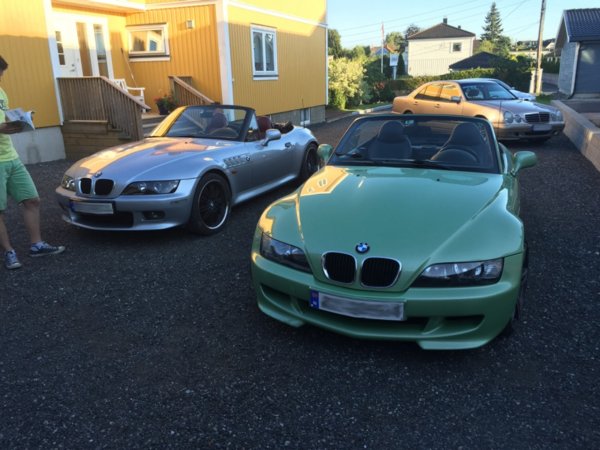
Note the green Z3, that was my friends Z3 (1.9) at the time.
pic1.JPG

pic2.JPG

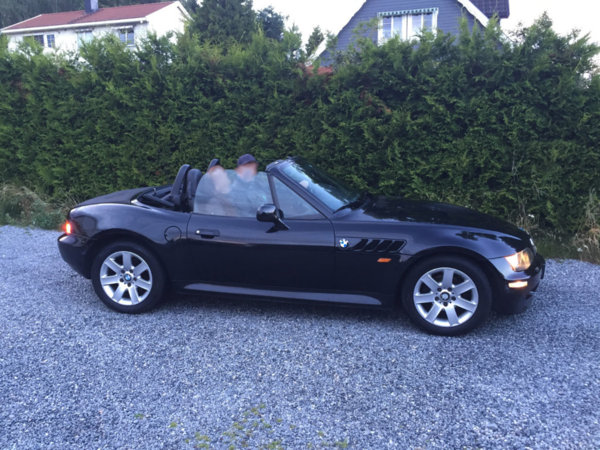
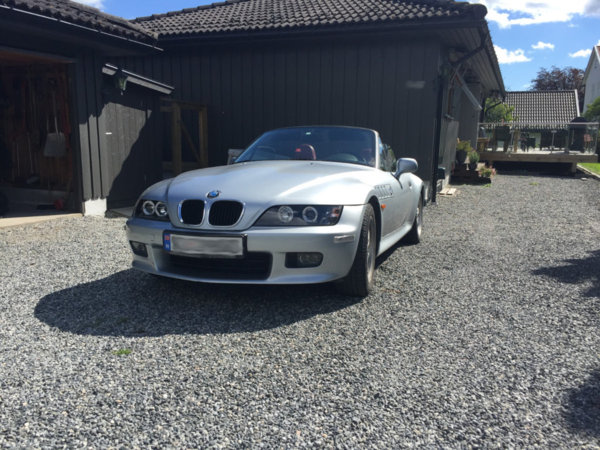
Some pics from the handover day and car is finally home. It was delivered on winter tires (aka storage tires).
pic3.JPG
pic4.JPG
pic5.JPG

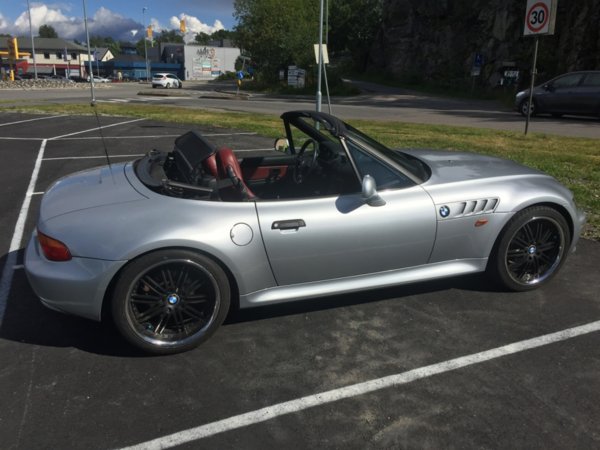
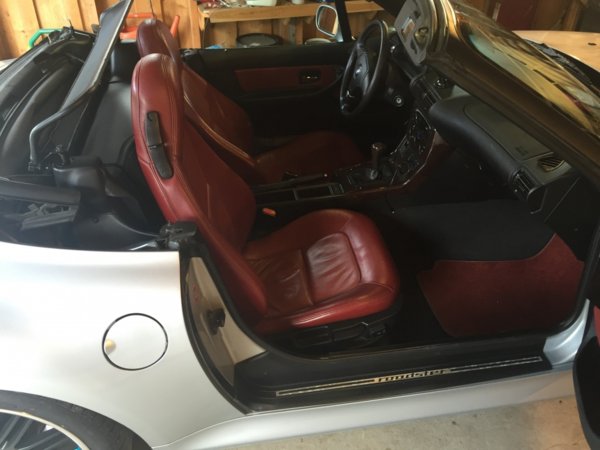
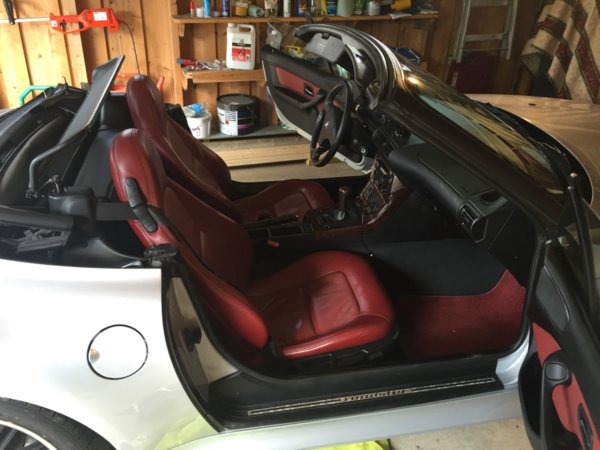
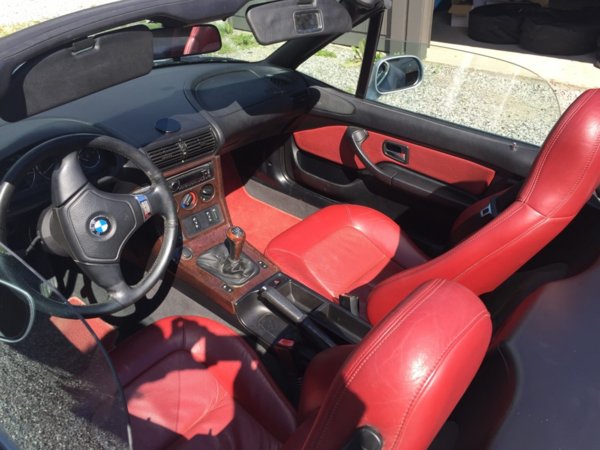
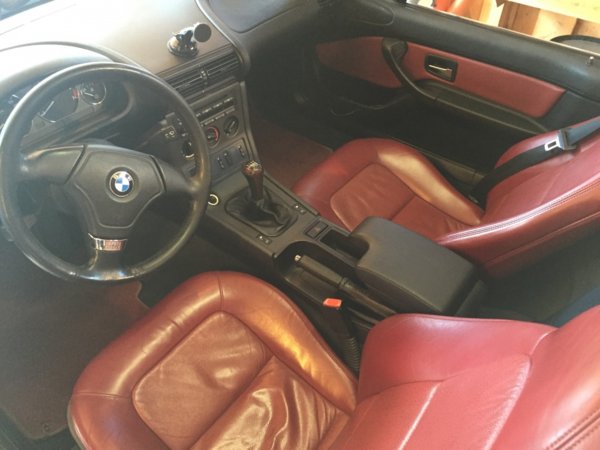
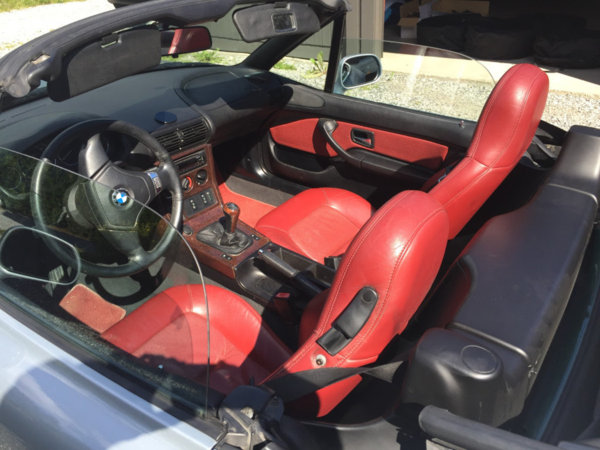
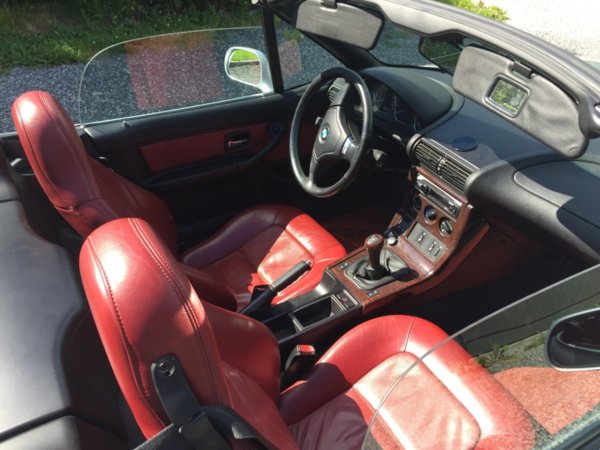
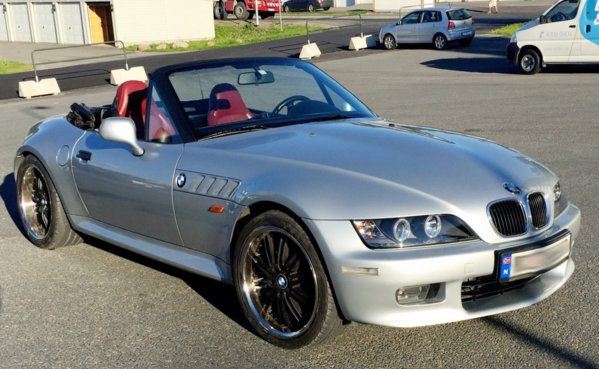
The color combo of Arktissilber metallic and Leder Oregon/Taninrot was the winning point for me. Did not really like the wood trim, but I had a plan for that.
pic6.JPG
z3_5.thumb.jpg.7e23ed1b5f68e6a7d9a347e8ce374d0d.jpg

Same afternoon I went over to my mates house (after throwing on the summer tires ) and go trough the car more thorough.
z3_8.thumb.jpg.f87c9076afb0b8a563f7f7a62c131fa2.jpg
z3_6.thumb.jpg.7551d7a56c15aa3a319fa3e6952e54c5.jpg
z3_7.thumb.jpg.8799a101166ed06efd099ed5abd57742.jpg

Of course we ended up discussing which one had the best rear:)

Anyway we compiled a list of things that needed to be done:
- Rocking seats
- New top, its beyond repair
- BMW badges worn out
- Seat belt guide on drivers side
- Minor rust spots (We didn't take of the panels, so at that time I was worried it would be even more hidden)
- Hole in the exhaust
- Tires very worn and dry
- Check the suspension (car is lowered) and get it registered in the papers for car. (is PIA to be stopped in control and not have these kinds for mods approved).
- Service the car (replace fluids etc..)

My plan was to just enjoy the rest of the summer with it and start tackling with the rust issues first when the season was over. However that plan didn't hold.

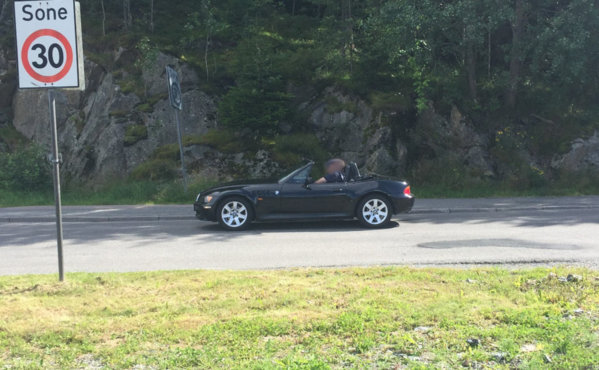
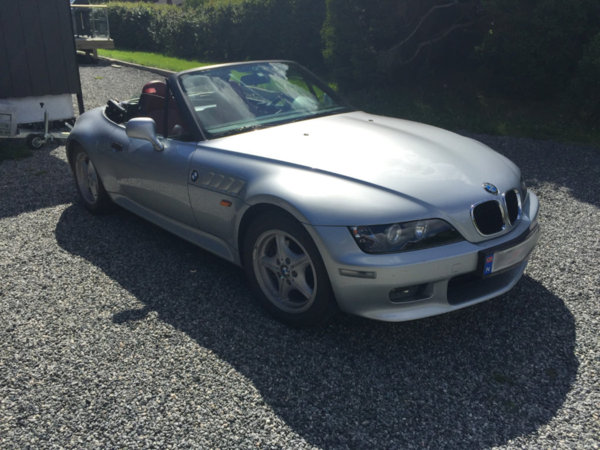
This is how the car looked like in the 2016 summer.
pic7.JPG
To be continued....

Thread index:
- Seat belt guide: https://zroadster.org/threads/fxslin-97-2-8-progress-log.17478/#post-293159
- Wind deflector - https://zroadster.org/threads/fxslin-97-2-8-progress-log.17478/#post-293176
- Hazard button - https://zroadster.org/threads/fxslin-97-2-8-progress-log.17478/#post-293183
- Passenger seat bushes - https://zroadster.org/threads/fxslin-97-2-8-progress-log.17478/#post-293200
- BMW CD43 radio - https://zroadster.org/threads/fxslin-97-2-8-progress-log.17478/#post-293219
- Helping neighbour to by a Z3 :) - https://zroadster.org/threads/fxslin-97-2-8-progress-log.17478/#post-293234
- First C&C with Z3 - https://zroadster.org/threads/fxslin-97-2-8-progress-log.17478/#post-293241
- E46 Armrest install - https://zroadster.org/threads/fxslin-97-2-8-progress-log.17478/#post-293372
- ZHP gear knob - https://zroadster.org/threads/fxslin-97-2-8-progress-log.17478/#post-293374
- K&N cone air filter - https://zroadster.org/threads/fxslin-97-2-8-progress-log.17478/page-2#post-293381
- The Z3 attends it first NSK (Norwegian Sportcar club) meetup - https://zroadster.org/threads/fxslin-97-2-8-progress-log.17478/page-2#post-293386
- Winter hibernation, the Z3 enters workshop - https://zroadster.org/threads/fxslin-97-2-8-progress-log.17478/page-2#post-293892
- Z3 comes home again - https://zroadster.org/threads/fxslin-97-2-8-progress-log.17478/page-2#post-293910
- New rims purchased - https://zroadster.org/threads/fxslin-97-2-8-progress-log.17478/page-2#post-293915
- Broken passenger side mirror base - https://zroadster.org/threads/fxslin-97-2-8-progress-log.17478/page-2#post-293926
- New Hood insulation pad - https://zroadster.org/threads/fxslin-97-2-8-progress-log.17478/page-2#post-293939
- Replace drivers side mirror base, Radio caps, window lift issues and state of spare wheel - https://zroadster.org/threads/fxslin-97-2-8-progress-log.17478/page-2#post-294299
- New rims and tires - https://zroadster.org/threads/fxslin-97-2-8-progress-log.17478/page-2#post-294316
- Classic Car Show 2017 ( Oslo, Norway ) https://zroadster.org/threads/fxslin-97-2-8-progress-log.17478/page-3#post-295958
- Well wrapped package arrives https://zroadster.org/threads/fxslin-97-2-8-progress-log.17478/page-3#post-297359
- BMW CCN Spring meet https://zroadster.org/threads/fxslin-97-2-8-progress-log.17478/page-3#post-299076
- Installed roll hoops https://zroadster.org/threads/fxslin-97-2-8-progress-log.17478/page-3#post-299436
- Mini Zed meet https://zroadster.org/threads/fxslin-97-2-8-progress-log.17478/page-3#post-302120
- DIY Wind deflector https://zroadster.org/threads/fxslin-97-2-8-progress-log.17478/page-4#post-302397
- C&C Meet - https://zroadster.org/threads/fxslin-97-2-8-progress-log.17478/page-4#post-304391
- Roadtrip with club - https://zroadster.org/threads/fxslin-97-2-8-progress-log.17478/page-4#post-310838
- Front break overhaul - https://zroadster.org/threads/fxslin-97-2-8-progress-log.17478/page-5#post-312803
- A new car enter the scene - https://zroadster.org/threads/fxslin-97-2-8-progress-log.17478/page-5#post-318125
- A massive job undertaken - https://zroadster.org/threads/fxslin-97-2-8-progress-log.17478/page-5#post-328064
 
Last edited:

fxslin

Zorg Guru (I)
Norwegian Zeds
Joined
Apr 17, 2017
Points
95
Location
Oslo, Norway
Model of Z
///M & 2.8
After a few days of enjoying the car, I started to order parts and breaking my own promise of doing the rust work first. However at the same time I had decided that this car I actually would end up keeping for some good time. So I would let a proper workshop tackle the rust and get it professionally done (I’ve done rust work on my previous cars, but this one is a keeper).

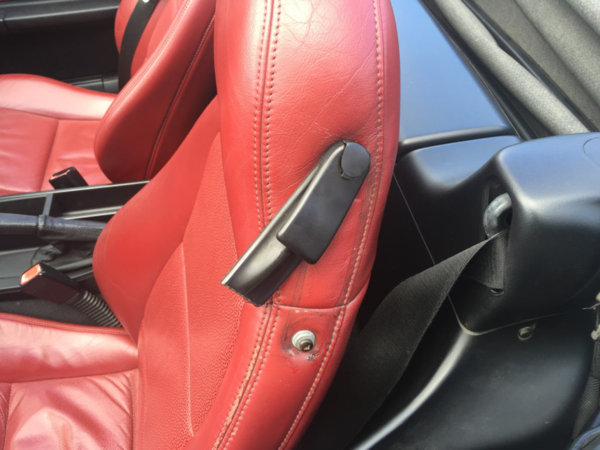
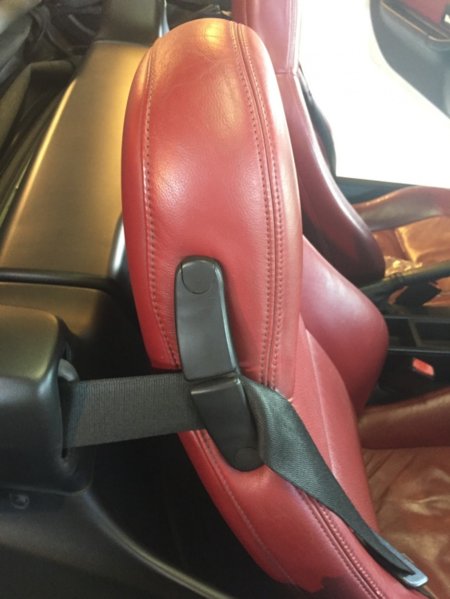
So first part to arrive was the seat belt guide for my drivers seat. After reading about all work that was required to change these, I planned a whole day for this task. But I knew that my car seemed to have slightly different solution than newer cars (changed 98?), so I hoped for a easier approach. But I didn't manage to source a "old" version of the guides, so I had some modding ahead of me.

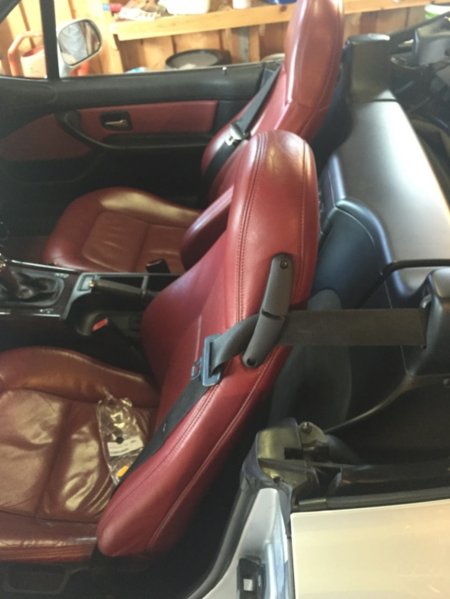
This is how my starting point was:
post1.jpg.bd0da6b324376bc04f0f93167f34a14f.jpg

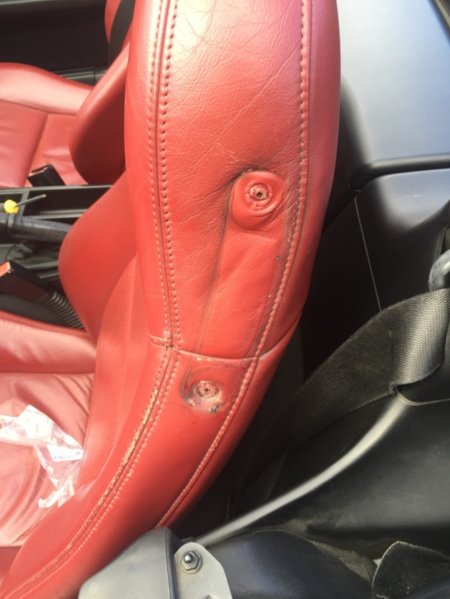
The leather was nicely deformed after the previous guide:
post2.thumb.jpg.656ef0ab7bdbe595f99c950a96fb300b.jpg

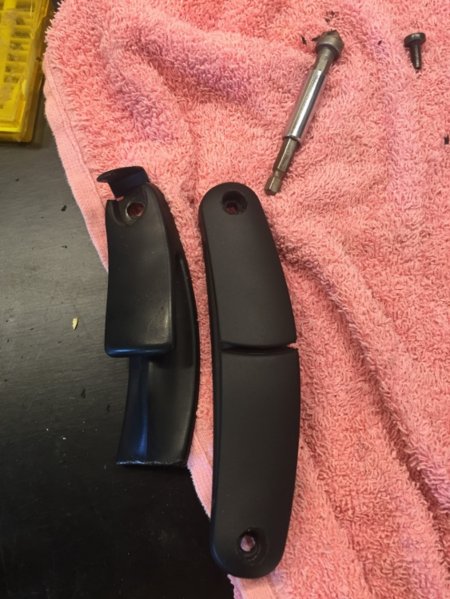
Old versus New part. The old version then you can unscrew the guide directly from the seat. Compared to new version where you have to access from inside of the seat. I find the older solution a bit easier :)
post3.thumb.jpg.a0b117c02c3873979bc91488c6456822.jpg

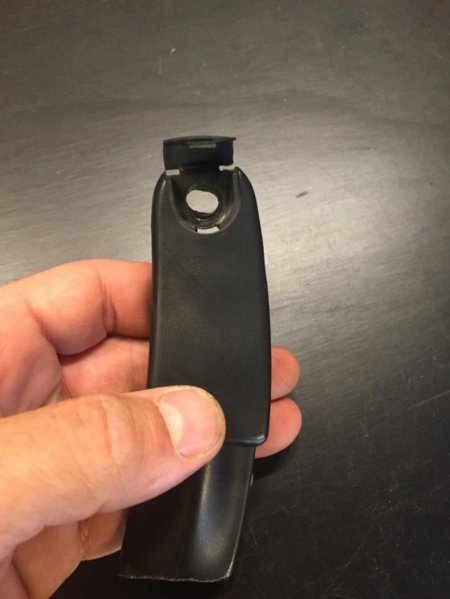
A previous owner had tried to glue the old part, didn't work obviously.
post4.thumb.jpg.e622b541842c19cf933da27969ac7faf.jpg

Since I have the 97 solution I had to start mod the newer version, so the extended part for the screws needed to:

post5.thumb.jpg.e0f66cbe1834aeb236cb631389cfb813.jpg

After playing a bit with this, it looked like this:
post6.thumb.jpg.f692e79fd4bd872f11a03ee233be898a.jpg

Then I need create new holes and create "widen hole" (not sure what to call this) to fit the screw head. I worked on the finish after this picture. Important that you line up the new holes perfectly at this stage, other is becomes PIA to get it on again.
post7.thumb.jpg.c61abd16818c421d8a87a5e523c10157.jpg

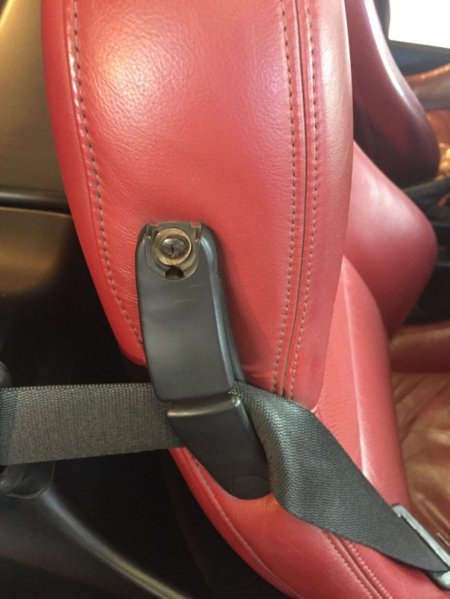
Since I was of by a a few mm, there was lot swearing and sweating to get the guide on again and align it nicely. But I got in, looking like this.

post8.thumb.jpg.116bf772abd3aef8912759c5d388ec04.jpg

However the passenger side was missing the cap for the top screw:
post9.thumb.jpg.23464bde2b30283d929c3c7994f3567e.jpg

So I stole the part from the old broken part:
post10.thumb.jpg.e377da96cb69f5776a29d4cff80bc161.jpg

After some modding I managed to get this one work on the passenger side. It's not perfect but will hold until I get correct date guides.

post11.thumb.jpg.dd1787588483a4e3e5d4d15439bf90bd.jpg

So now I had working seat belt guides...
 
Last edited:
fxslin

Zorg Guru (I)
Norwegian Zeds
Joined
Apr 17, 2017
Points
95
Location
Oslo, Norway
Model of Z
///M & 2.8
One thing you learn fast with driving a Z3, is that a wind deflector is essential. So I had search on finn.no (a norwegian ebay / craiglist site) for one of those and I got lucky again. A nicely used wind deflector popped up in my neighborhood, so I quickly picked this up.

So I decided to quickly installed this one (However I was really wrong in my assumption of needed time), read a few quides online and started of with good energy.

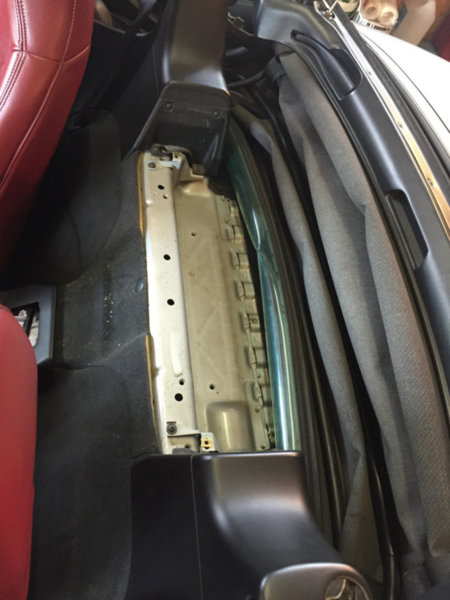
First out was to get the rear storage box out, this went easy. And I was positively surprised that everything was neat, dry and no rust underneath.
post2.jpg.e63a6fb1a8c9ad9b6a0da3714e56d7dc.jpg

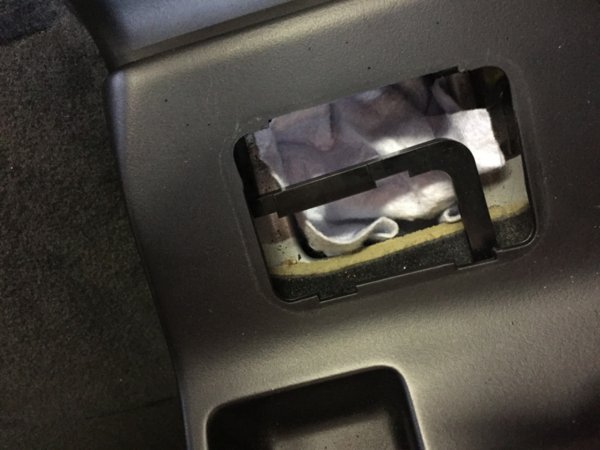
A few places where there is "screw traps", so I tucked clothes in these ones:
post5.thumb.jpg.729c21c13421a9f0b56d721ceb9dd96b.jpg

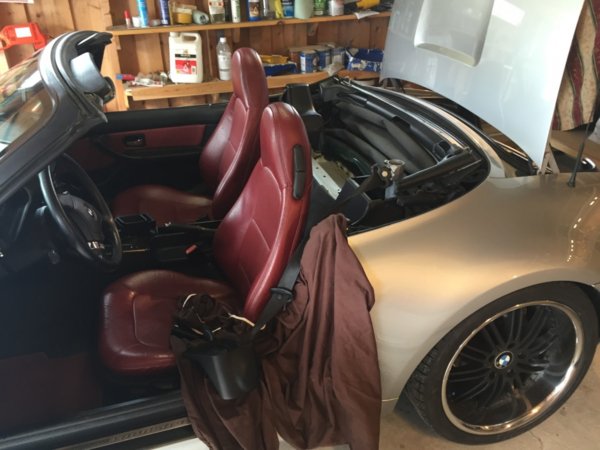
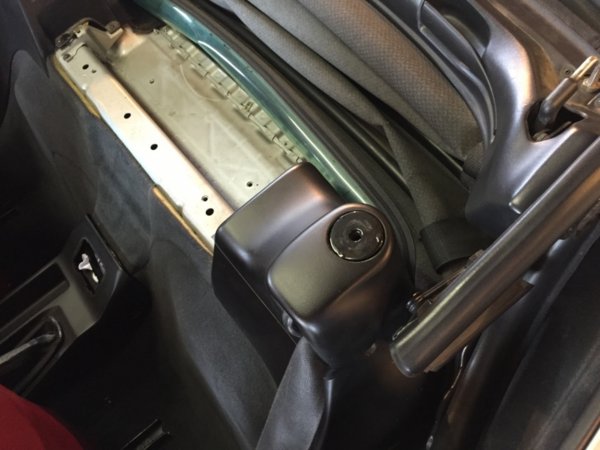
Then the top cover for the drivers turrent was off:
post3.thumb.jpg.290206d15951cf81de4d7576e95e84eb.jpg

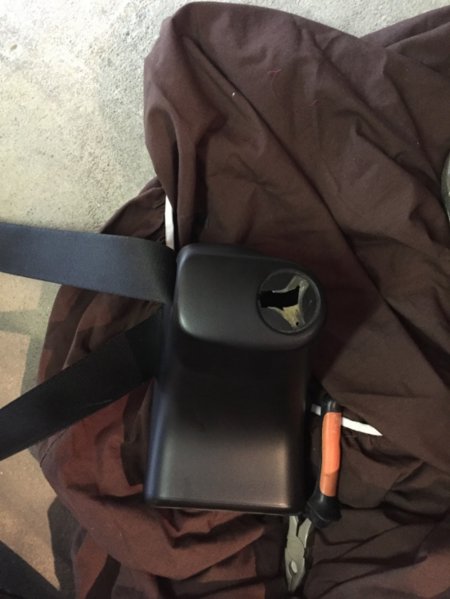
So far everything went good, until I got starting "opening" the whole in the top cover. Underneath the cap I discovered that the whole top was filled with styrofoam and this was sitting like a B.........
post4.thumb.jpg.b8a7acf0be369eb7b702ac25f3b9212d.jpg
However after some time with heatgun, machines, swearing, talking to neighbour and trip to shop to buy some missing screws to attach the wind deflector base it looked like this.
post8.thumb.jpg.d7ebf9ee69d6c6186e9e465ac83ba1f3.jpg

One passenger side it when a lot faster since I now had the "method" sorted out + that the styrofoam part came out easy in one piece.

post9.thumb.jpg.7a83bd27e4e1fec642e0c9d51a940a98.jpg

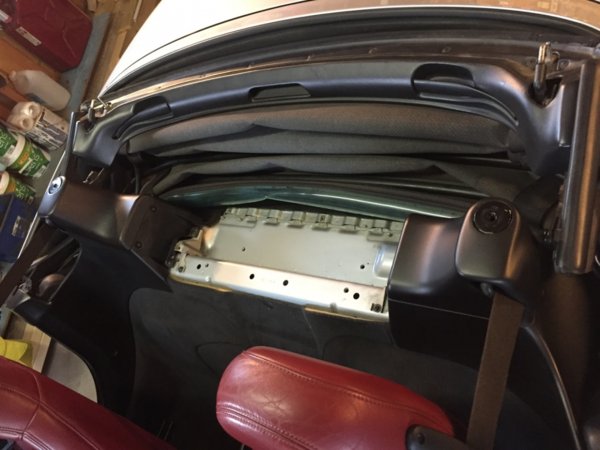
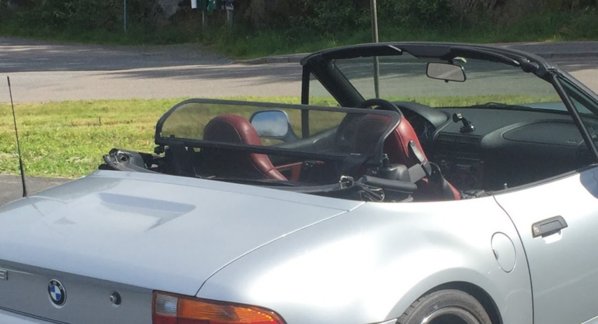
The rest of install went fine and the end result was good!

post7.thumb.jpg.31cc2f511ea7097e68b6cd7907e7f8e6.jpg
post6.thumb.jpg.cf5d174caa0a50532f20340752453754.jpg

I was amazed how good this worked and how much wind and wind noise it actually deflects.
 
Last edited:
fxslin

Zorg Guru (I)
Norwegian Zeds
Joined
Apr 17, 2017
Points
95
Location
Oslo, Norway
Model of Z
///M & 2.8
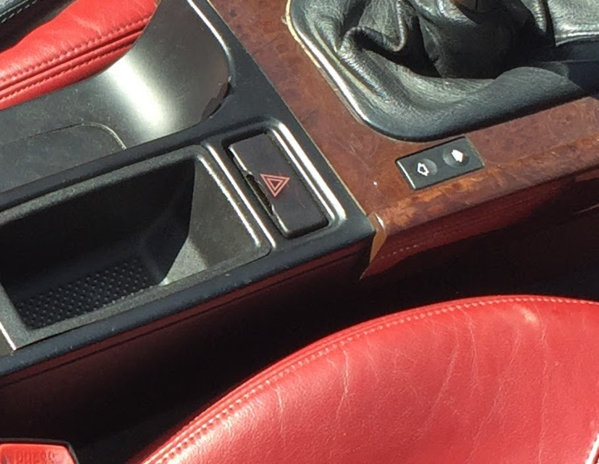
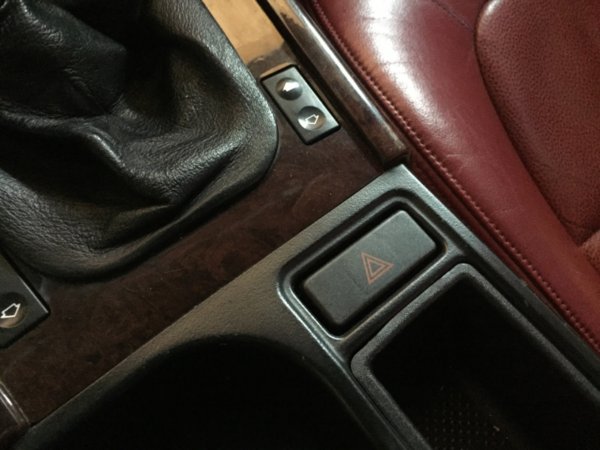
Some days later a few more parts arrived, this time a Hazard button replacement arrived.

This was nice and easy fix, broken and ugly button:
post1.jpg.e64627c7cd38d364b751c061a0d6f991.jpg

Voilâ, a nice and shiny button:
post2.thumb.jpg.0d247e61c3086c5a6cf61167fc924f55.jpg

A small thing, but things like this does bother my alot :)
 

fxslin

Zorg Guru (I)
Norwegian Zeds
Joined
Apr 17, 2017
Points
95
Location
Oslo, Norway
Model of Z
///M & 2.8
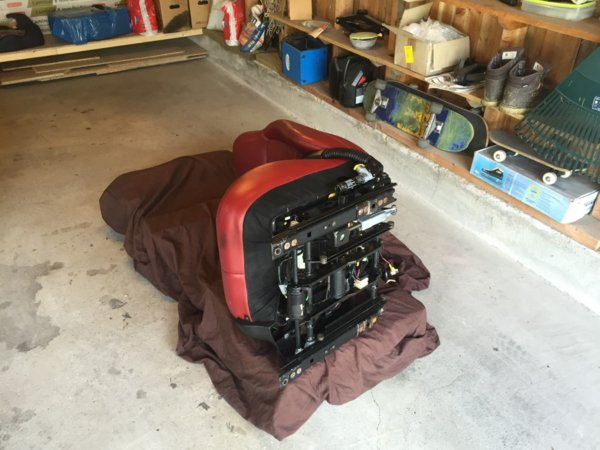
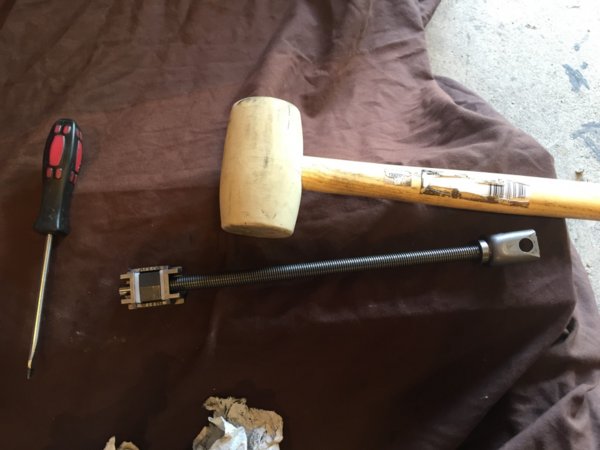
One the parts that also arrived around this time was the seat bushes to fix rocking passenger seat and tackling the none working height regulator on this seat (electrical). Again I read my self up on this task on online guides.

My starting point, these needed
post3.thumb.jpg.9fbb120949208bb79447714dc9691ac2.jpg
go into this seat:
IMG_8031.thumb.jpg.fc737f656c9d2fb0c3cc3de3642a93e6.jpg

So after a some time understading how to release the seat connectors, I got the seat out.
I didn't find to much underneath, the car was nice and clean. Only found a gold coin, which turned out to plastic. So it ended up in my daughters pile of toys:)

IMG_8034.thumb.jpg.76b489415863b9f4d2bdbade956bb9fe.jpg

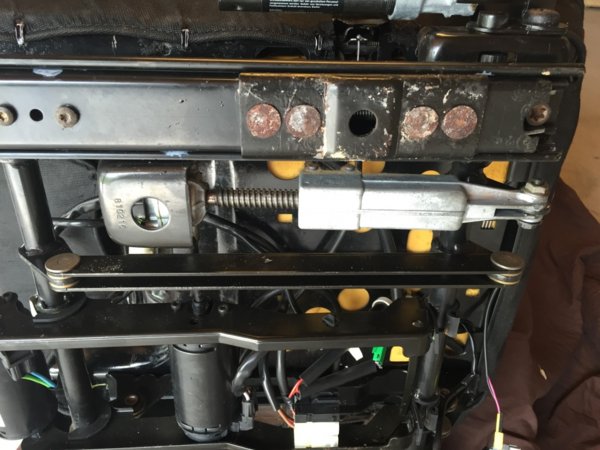
With the seat out, it was time to get the "slides" out of the seat frame.
IMG_8037.thumb.jpg.9af863eb7e4159789f887dac252e571d.jpg

Thx to the good DIY's online, this task went really easy.
IMG_8038.thumb.jpg.0e51059a94020aa046f815753b725142.jpg

And there it was, the cause of the rocking seat. I was prepared for this, thx to online pictures. But I was actually surprised that bushes had completely deteriorated, was nothing left.
IMG_8039.thumb.jpg.9fff8cd1d4c3fe8d0a5ea9b48028c51b.jpg
After a good round of cleaning it looked like this:
IMG_8045.thumb.jpg.7f96c6bdf5f2304679ca5eb3814c77fc.jpg
Left over of the bushes:
IMG_8046.thumb.jpg.bbc753621835bfecbd7a4eca7642f8cf.jpg

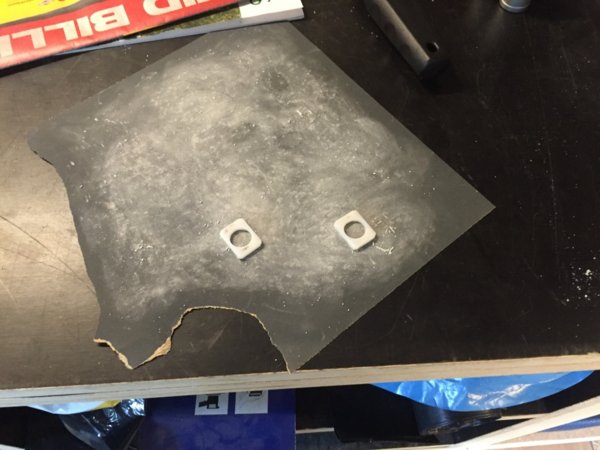
Now new bushes needed to go in. This requires some sanding and exact fitment to get a really snug fit!
IMG_8047.thumb.jpg.bc2f7082d1a7d70da79419e56ff0c048.jpg

After a bit more sanding and some Jeremey Clarkson inspired tools, they where in and had nice and tight fitment.
IMG_8048.thumb.jpg.be09523968c562ae19e604fc304ec57a (1).jpg

Then same thing was done on other side and a round of cleaning and greasing, before I assembled the whole lot back to the seat.

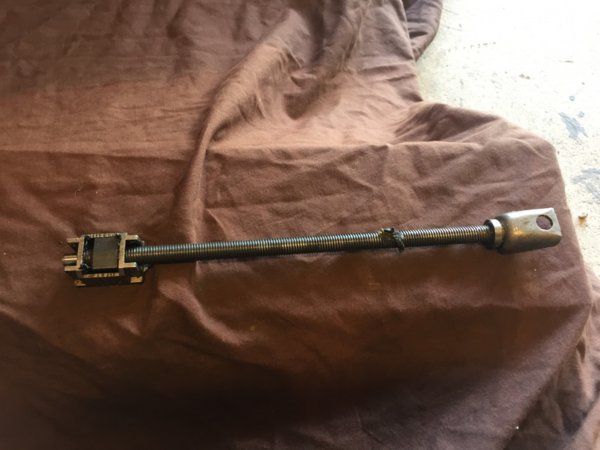
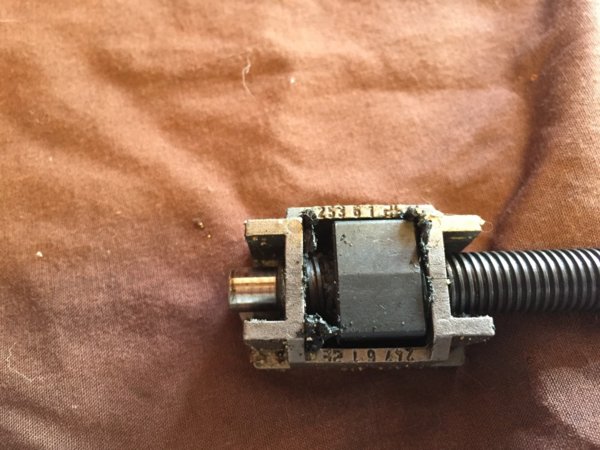
However I also needed tackle the faulty height mechanism, which basically was just to unscrew the mount and screw back in again (all the way). The problem is that when you take the seat all way up the mount can "unscrew" it self of the hinges from the "rasing/loweing" part.

IMG_8053.thumb.JPG.c1061e8a16062745898a8b7dd57708db.JPG

Then it was time get everything back into the car. Was a little excited to see if everything was working as it should and that I did not get the airbag lamp light ( I had disconnected the battery, so I felt safe on this issue).
IMG_8055.thumb.jpg.ee78b2747eac95e208342efc7dc58d3e.jpg

Everything worked fine, no more rocking and working seat lifter! So all in all, it was good day in my garage.

To top my day that, this one arrived as well. So there I had new task waiting for me:)
IMG_8032.thumb.jpg.23602044c76fa834527b64f73e4e12a4.jpg
 
Last edited:
Antm72

Zorg Expert (II)
Supporter
British Zeds
Joined
May 4, 2015
Points
246
Location
South Yorkshire
Model of Z
2.8
Nice work on the seatbelt guides @littlefeller offers a solution to stop these snapping again which works really well.
It looks a great car and understand why its a keeper.:scorecard:
 

ZTec

Zorg Guru (IV)
Supporter
British Zeds
The M44 Massive
Joined
Oct 18, 2014
Points
171
Location
Llantwit Major
Model of Z
Z3
Looking good. Plenty to be done on these cars.
 

fxslin

Zorg Guru (I)
Norwegian Zeds
Joined
Apr 17, 2017
Points
95
Location
Oslo, Norway
Model of Z
///M & 2.8
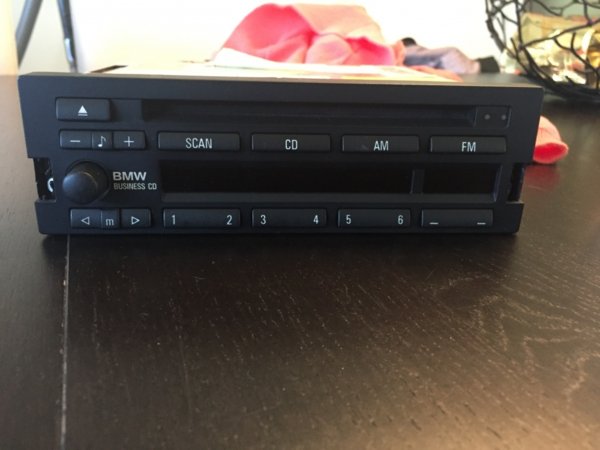
Since I got the CD43 radio the day before, I could not resist installing it.

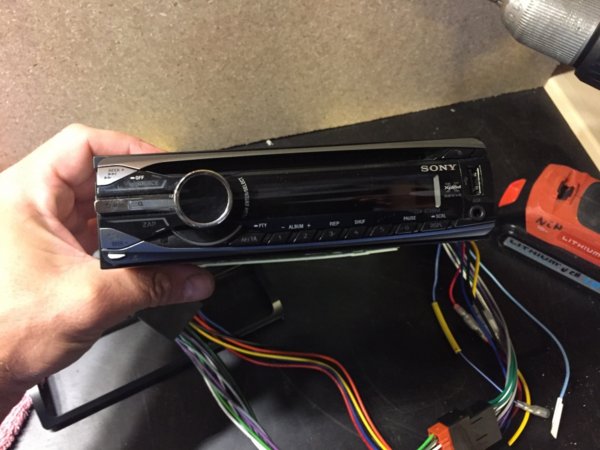
I was a bit excited to see what mods has been done behind the dash to install the current Sony xploded radio unit. I was bit afraid that a previous owner had done some "hacking" on the original BMW radio plug.

But after getting the old one out:
IMG_8067.thumb.jpg.d72c56fd00917ab4baa6ca389d61d45d.jpg

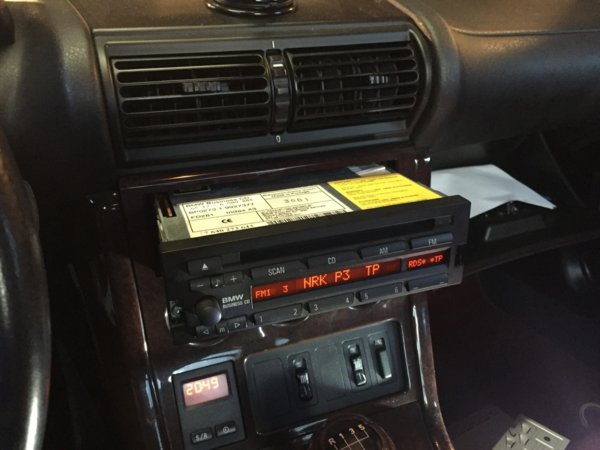
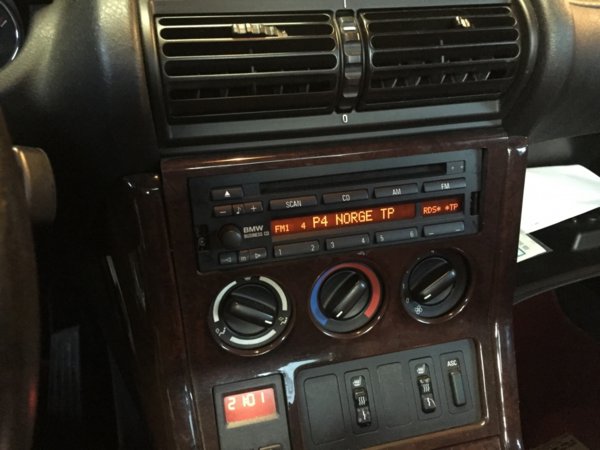
I could conclude that they had used proper cables and done everything neatly. So it was just matter of unplugging and re-install the CD43 radio. I was also curious if the "new" radio and given code was working at it should (I bought it of forum member of the norwegian BMW forum).

But everything worked fine and the radio reception was better than the Sony one for reason (does the Z3 have an ampered antenna like ie. E53 and E39's?).
IMG_8063.thumb.jpg.99e976aad8590b63e1e6bf2dc0a1afa2.jpg
IMG_8065.thumb.jpg.30ff81764511bc116823b3c427735f39.jpg

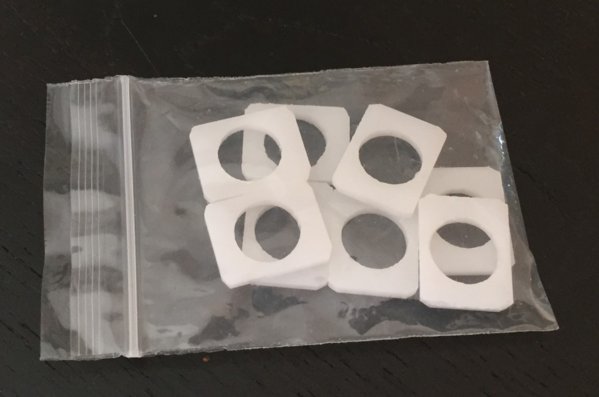
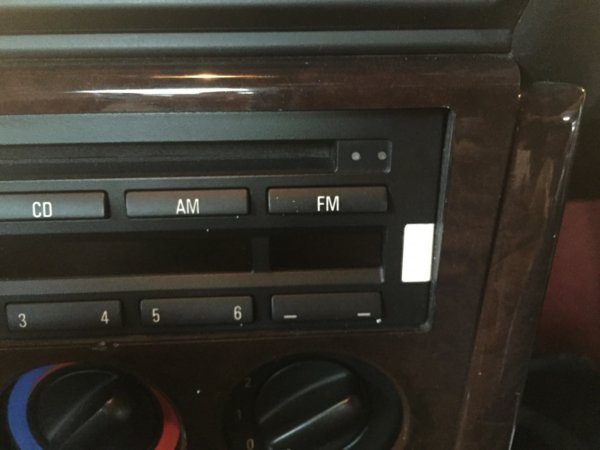
As you can see on the above picture, I was missing the radio caps to cover screws. And the only ones I found on ebay was at NOK 400 ( approx 45 euro at that time).
So I decided to make my own ones, so after searching in my "magicbox" with all little things that I think might come handy one day. I found a piece plastic from Ikea furniture that had the same rought surface of the radio.

After a little work on this piece I ended up with a cap like this:
IMG_8073.thumb.jpg.87d02d5e9f5d40bb134ad99373b3e703.jpg

(the center trim was lose a this point, this was fixed in a later task)
IMG_8076.thumb.jpg.1728f174883a69ce0648408ef459fa0a.jpg

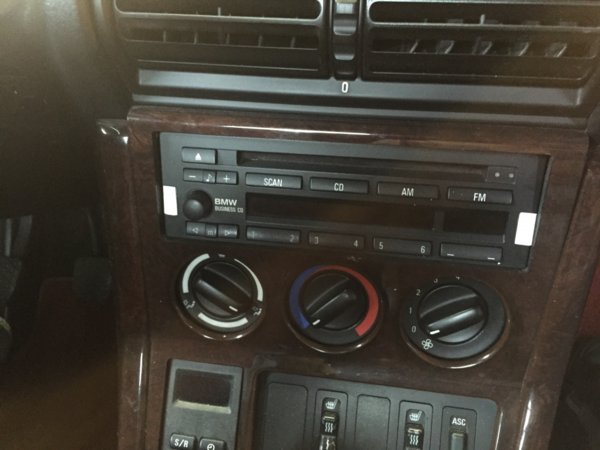
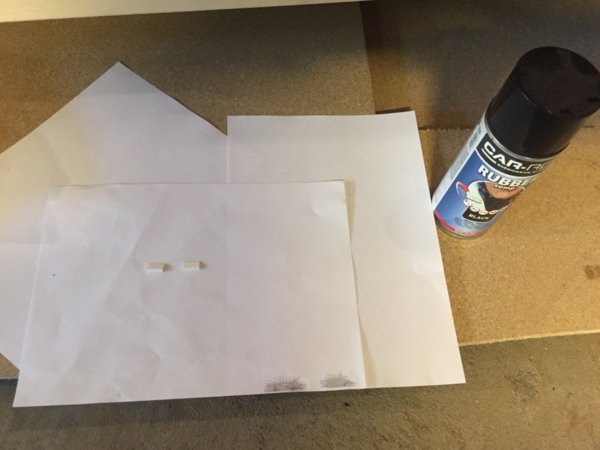
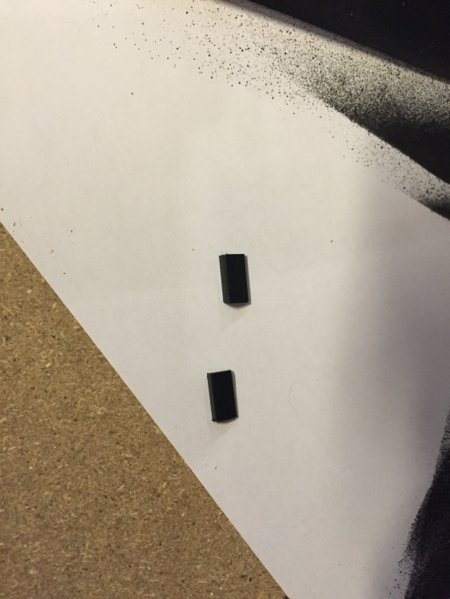
However they where still in wrong color, so I checked my "paint" shelf and found that a "plastidip" clone I had almost matched the radio color. So the radio caps was painted in my "professional" paint shop :)
IMG_8077.thumb.jpg.e6c44bb9fb864698fd01906be236ce62.jpg
IMG_8080.thumb.jpg.13ee82fde13c3baa5320848d51ae5d03.jpg

Not perfect in the color match, but good enough I find some reasonable priced radio caps (which I did find at a later stage).

IMG_8083.thumb.jpg.3ce4f0b254b41861be53747c7e7bc81e.jpg

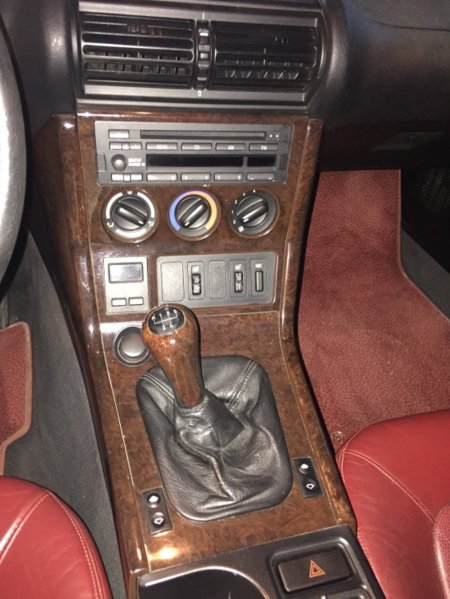
But getting the OEM look on the radio, was something that really lifted interior (at least in my opinion). Still had issues with the wood trim though at this stage :)
 

fxslin

Zorg Guru (I)
Norwegian Zeds
Joined
Apr 17, 2017
Points
95
Location
Oslo, Norway
Model of Z
///M & 2.8
I've spent many hours talking to my neighbor about cars and different models. Since I finally to the step to buy "useless" but awesome car. He started to follow the market as well.

So one day he called me and asked if I could tag along to check out a car. He had found one owner 2002 black 1.8 Z3 that appeared to be in good condition and completely stock. I let him drive my car over there and so he would get a feeling with it.
The car was indeed not in bad condition, maybe 7/10. But he managed to talk price down a lot and got the car. (I have not seen a car on the Norwegian market to that price in same condition and low milage).

Test driving:
pic1.jpg
pic2.jpg

From our front yard ( we share part of the road into our houses ).

pic3.jpg

So that meant suddenly two Z3 to work on and maintain. Double the fun right:)
 

fxslin

Zorg Guru (I)
Norwegian Zeds
Joined
Apr 17, 2017
Points
95
Location
Oslo, Norway
Model of Z
///M & 2.8
Nice work on the seatbelt guides @littlefeller offers a solution to stop these snapping again which works really well.
It looks a great car and understand why its a keeper.:scorecard:
Thx. Yes, I read about his solution. I might get in touch with him, when I find "correct" guides for my 97 model.
 

fxslin

Zorg Guru (I)
Norwegian Zeds
Joined
Apr 17, 2017
Points
95
Location
Oslo, Norway
Model of Z
///M & 2.8
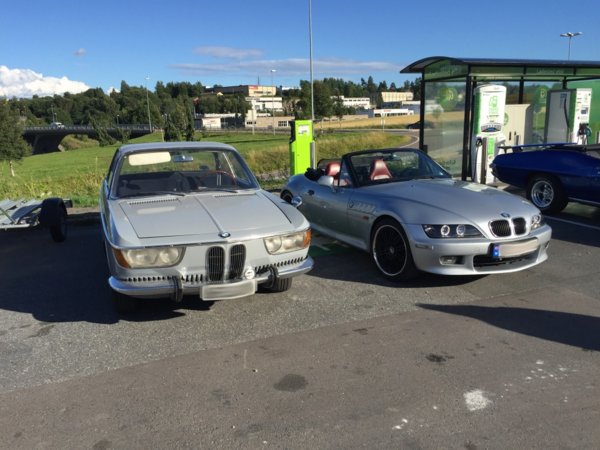
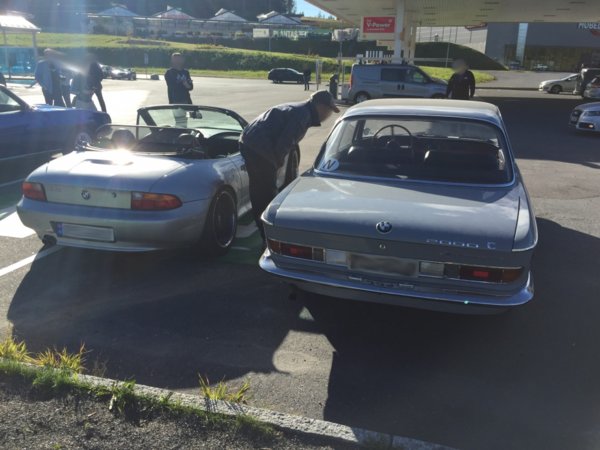
At this time it was still summer and I was just doing minor fixes on the Z3. However at this stage I felt that I could bring the car to its first Cars & Coffee meetup.

Got there and ended up parking next to this nice 1967 BMW 2000 C Automatic, after chatting with the nice couple owning. It was revealed that they had 13 more BMW's stored at home on their farm. One of the cars they has was Red Z3 1.9 (I don't recall which red color or year), but it was clearly one of their jewels. Since they were planning to restore the car completely and keep it.

Some pics:
IMG_8135.thumb.jpg.5f80a3feb982b4fae66d58b4a31e1ad8.jpg
IMG_8137.thumb.jpg.bd8afcd98d5e9d5379c2bca3256767eb.jpg IMG_8144.thumb.jpg.ca7729575e0d43ea3d18b140b8b65543.jpg IMG_8145.thumb.JPG.6cecb289406b39518c8c91a2cc167557.JPG IMG_8149.thumb.jpg.d6ec3f1551d8d699288b203fe9741c09.jpg IMG_8146.thumb.jpg.0589a2a99a0eff4c9bf99f195e992b60.jpg IMG_8139.thumb.jpg.f3cf50bd3145a6bb08e4006133ac7265.jpg IMG_8142.thumb.jpg.7063c739520a41ee542aa8180158068d.jpg IMG_8140.thumb.jpg.b9a2ba32a1fb4b2fcc26296c568c626b.jpg

Love these events! Nice to go around and hear all stories behind the cars!
 
Last edited:
BMBabe

Zorg Expert (I)
Staff member
Supporter
British Zeds
Community Admin
Joined
Sep 4, 2014
Points
206
Location
Aylesbury
Model of Z
Z3
Lovely write up AWESOME JOB :thumbsup:
 

DavidM

Zorg Expert (I)
Supporter
British Zeds
Joined
Apr 25, 2013
Points
208
Location
Ireland
Model of Z
2.8 Roadster
That was a great read with some fine work done - and some fine looking cars on show!! Thank you for sharing.:)
 

PHILIP BAXTER

Zorg Guru (V)
Supporter
British Zeds
Joined
May 3, 2015
Points
180
Location
Cardiff
Model of Z
Z3 3.0i Roadster
Keep up the good work. You can't beat a good progress thread.
 

fxslin

Zorg Guru (I)
Norwegian Zeds
Joined
Apr 17, 2017
Points
95
Location
Oslo, Norway
Model of Z
///M & 2.8
That was a great read with some fine work done - and some fine looking cars on show!! Thank you for sharing.:)
Keep up the good work. You can't beat a good progress thread.
Thx!
Btw: I've read trough my own posts and I apologize for the poor English. I tend write English with Norwegian style, please forgive me :)
 

fxslin

Zorg Guru (I)
Norwegian Zeds
Joined
Apr 17, 2017
Points
95
Location
Oslo, Norway
Model of Z
///M & 2.8
This post contains some redundant info from my introduction post. But I let it pass to keep the chronology intact on the mods performed on my car in this thread.
As many of you Z3 drivers has noticed , a decent armrest something that these cars really lack. Especially when one is in cruising mode:)

However I really like to have some arm space, when I go in "active mode" (or sport mode as the wife calls it, coming from when I push the sport button in our DD. Of course also a BMW).
So I wanted a solution where I could flip back the armrest and free up the space when needed. I did find a few really good options online, however some of them introduced a cupholder in front of the armrest or others where to low etc. Was not just perfect in my opinion. Until found a DIY (can't remember where, maybe this forum) with a guy who had adapted a E46 armrest. His solution was a perfect hybrid solution and it still looked somewhat OEM. So I setup search online and thought it would take time to get one in correct color, decent shape and reasonable priced. Again I was lucky and one turned up within a few days and close by. I managed to purchase it to 1/2 price after some rounds in the "ring":)

I was planning to use DIY I found online and again assumed that it would go fast.
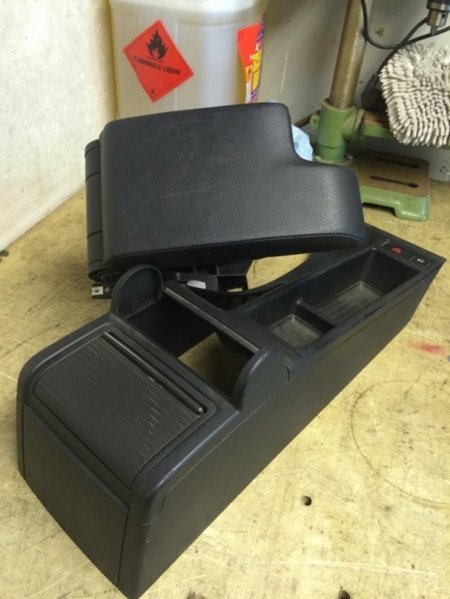
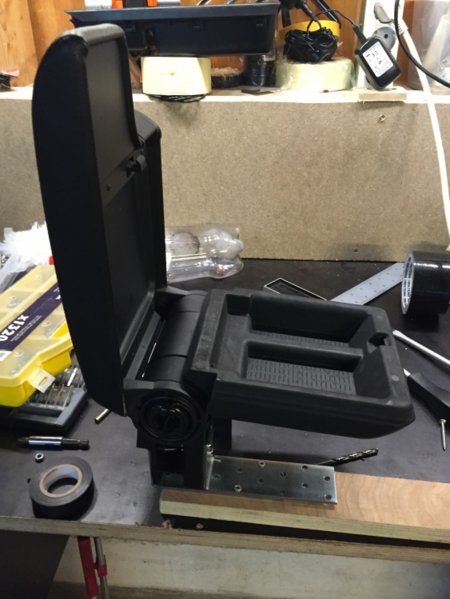
This was the starting point, I only used the armrest + the hinge part. The rest I gave to a friend working on a E46.

57b0c78b24a60_44_547941531(1).thumb.jpg.3fcbecd11f83486b4b6c14692601e72e.jpg

But as I started to work with this solution I realized that the DIY solution would not be sturdy enough to my liking. I wanted it feel solid in any direction and withstand the weight from 2 people. So I realized this would take more time and require a bit more thinking for my be happy with the final solution. (A solid OEM feeling)

First I spent some time finding the correct height and modified the armrest bit by bit. (taking to much would render it to low)
I ended up with aligning armrest with the armrest in the doors.
IMG_8122.thumb.jpg.44340c0791fa23f959b90eb6284a73e0.jpg

Then I was playing with different mounts ideas and testing their sturdiness. I wanted something really solid but not massive and keep the uplift function of the armrest and lid function to the hidden storage.

53618-cf074fdaa45fc69dfb47589bdb9810b4.jpg

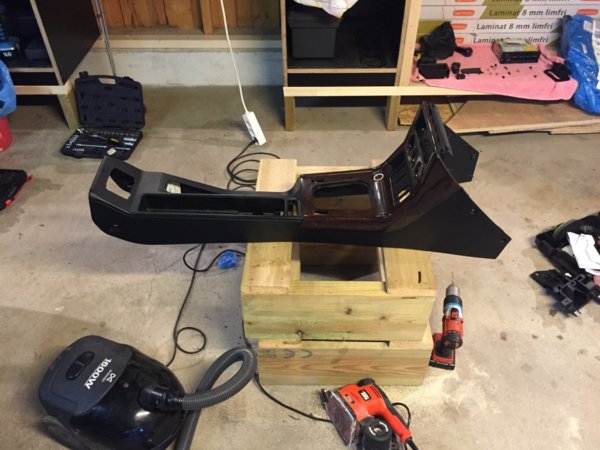
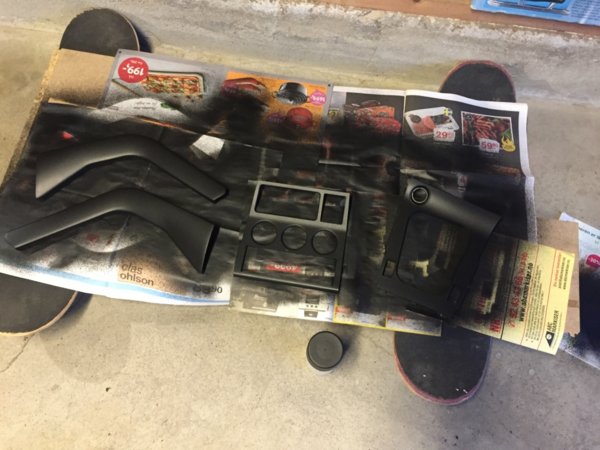
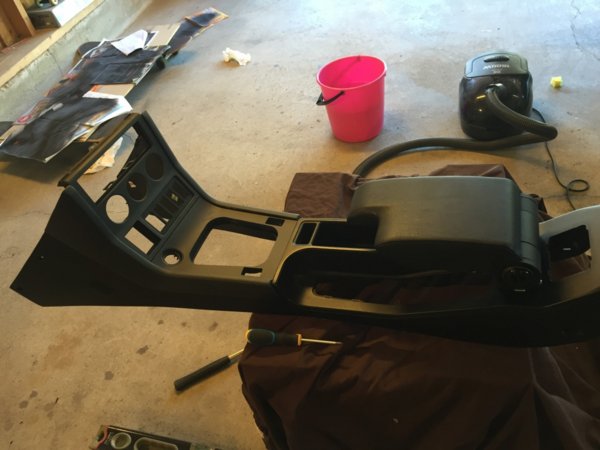
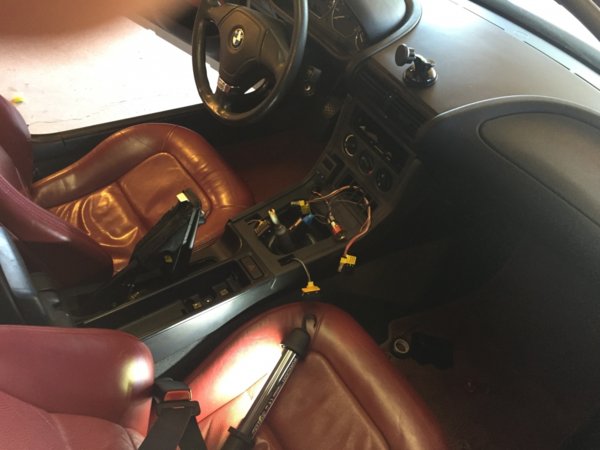
The I started the task with taking out the center console and dismantling it. Taking the console also meant that I the opportunity to fix my dislike with the wood interior and glue some loose parts.
IMG_8169.thumb.jpg.b409b903a42fdeb7189a225dbb8f1442.jpg

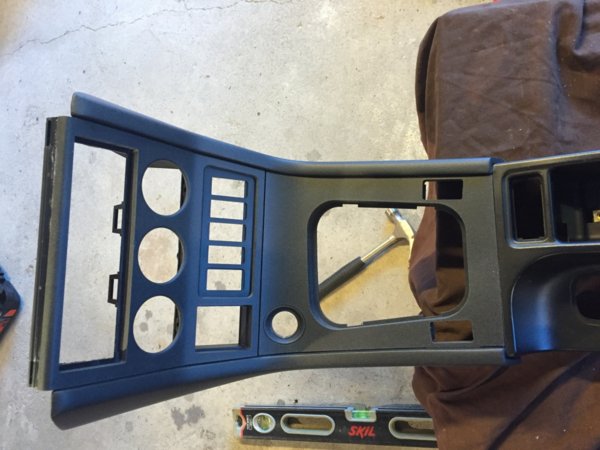
Plastidip'ed my trim panels in my home paint studio, note the skateboard allowing me to move it around when needed (I felt really clever at this point :) ).

IMG_8209.thumb.jpg.c93b4e3b6c61671ff81992295c0710d1.jpg

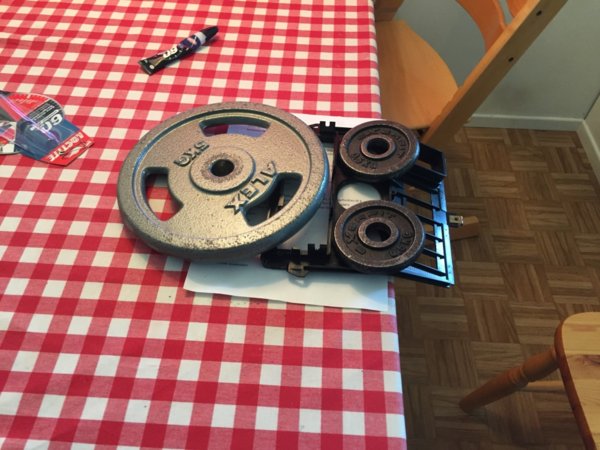
And glued the loose trims, finally my home gym equipment got used!
IMG_8228.thumb.jpg.3bc65b316ca799be5165149f9ead88a4.jpg

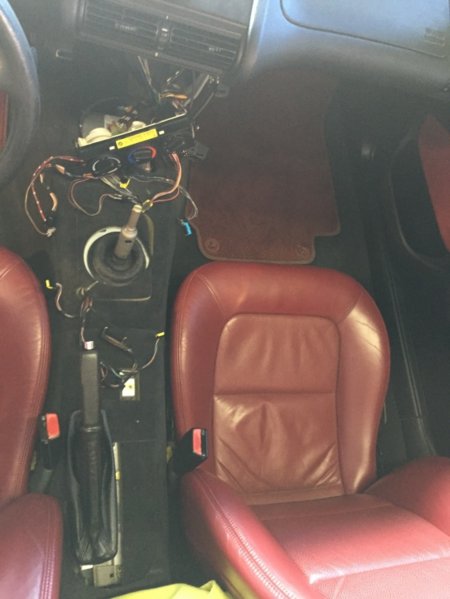
And checked all wires and cleaning out, while the console was out.
IMG_8227.thumb.jpg.e2a62e531dc69aad84f36e7605042625.jpg

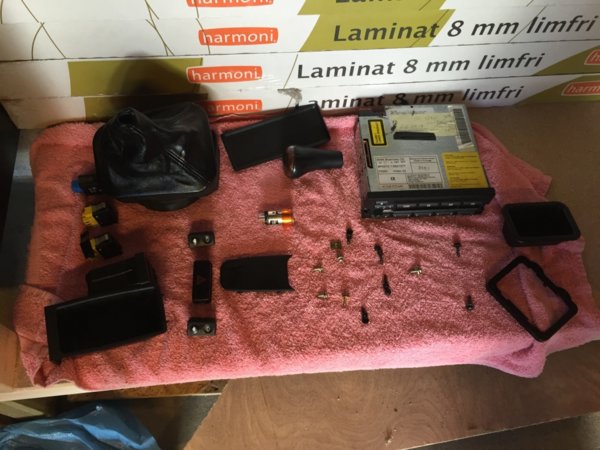
Was quite a few screws and other little things involved in the console dismantling, so I laid out in a reassembly pattern.
IMG_8224.thumb.jpg.016f728fcc11b060bac453cb795b2a00.jpg

After all this was done, I could finally focus on the main task. I spent some time playing and tinkering with different solutions.
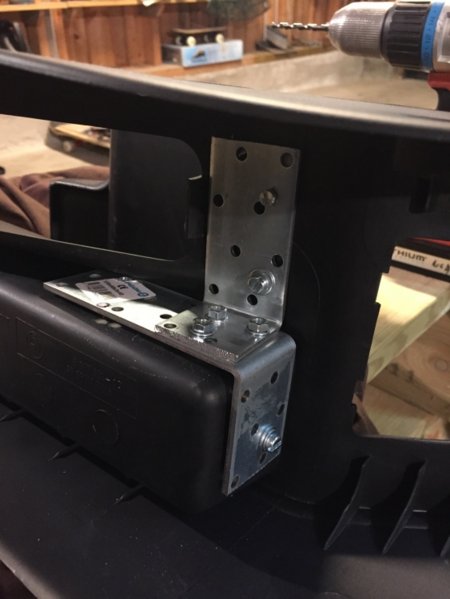
This bracket is what I ended up with. The idea was get a solid mounting platform for the armrest and the same time get as much "spread out" of the down-force from the weight of the driver/passenger arm. I also wanted sturdiness any direction, so I wanted many angles to fit the bracket on.

IMG_8191.thumb.jpg.1ea7b77659619c10a23659b306b3c691.jpg

Assembling it all together.
IMG_8233.thumb.jpg.19c84298c8967506d7edb2eb8935fc2d.jpg

The paint job turned out pretty good (I topped it with 3 layers of plastidip clear coat to create a robust surface).
IMG_8234.thumb.jpg.ec0ed485c9c7259b81133ad60bb48ad0.jpg

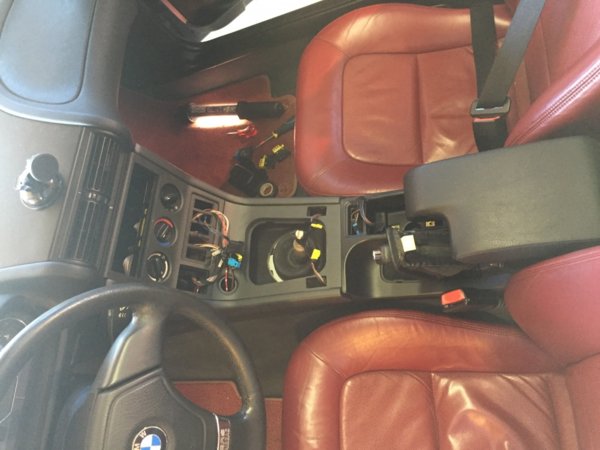
It was a PIA to get it back in! I ended up get it 1/2 way in and then sorted out all the wires correctly and tape them together on outside of center console. To avoid them go back in again, whilst I was fighting with console to get it in place.
IMG_8237.thumb.jpg.bf5395e877e66518a960e95a96d2348a.jpg

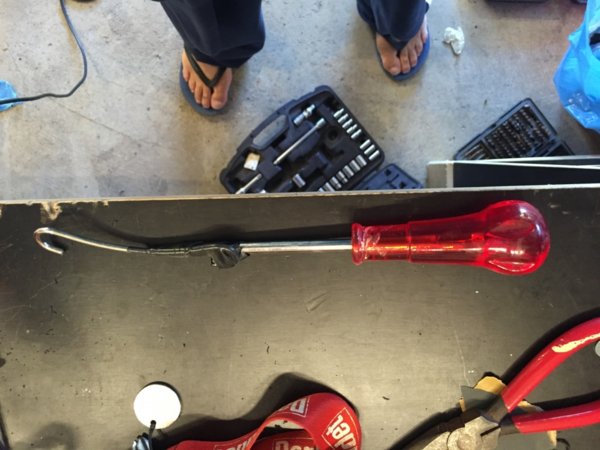
My magical wire picker tool!
IMG_8246.thumb.jpg.fa0fb9ada44d6c8f79d9d0ad25c44997.jpg

Last check that everything was working before screwing all screws back in.
IMG_8239.thumb.jpg.ee4621c425a9ba2704d774e288d8e6c8 (1).jpg

Finally finish after 2 days of work (well two afternoons to be accurate).

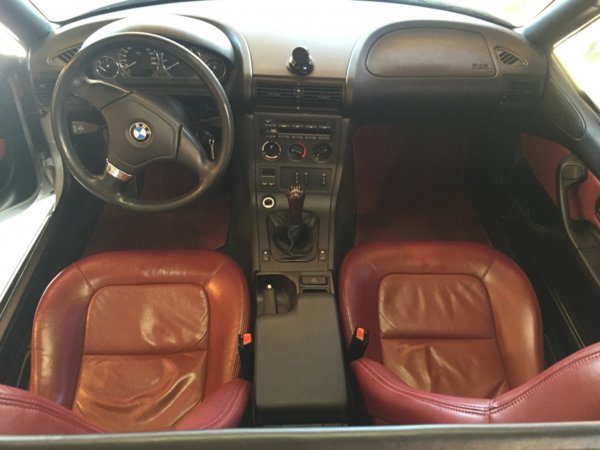
The mandatory before picture:
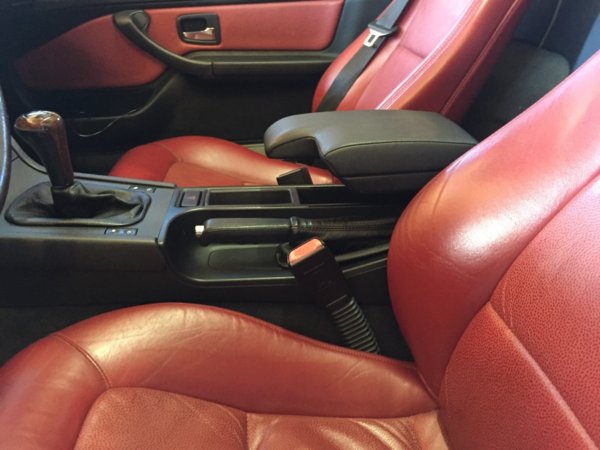
IMG_7743.thumb.jpg.813203261d4457ebe123433c5ace59f1.jpg

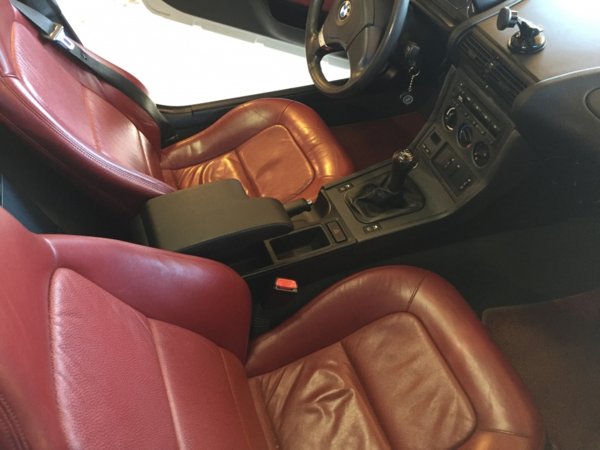
And of course some after pictures:
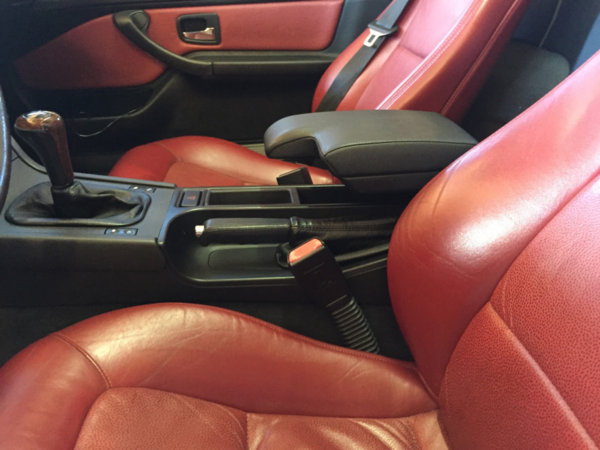
IMG_8248.thumb.jpg.5488489e151cf4513d578b97cef43d68.jpg IMG_8249.thumb.jpg.10251fbb6bf83fea1dd2300f03743cc6.jpg IMG_8251.thumb.jpg.615faa7b803dabc76d8a45a85fbb432c.jpg IMG_8253.thumb.jpg.9804f24da7ffc6e8ca69890a836c5e2c.jpg

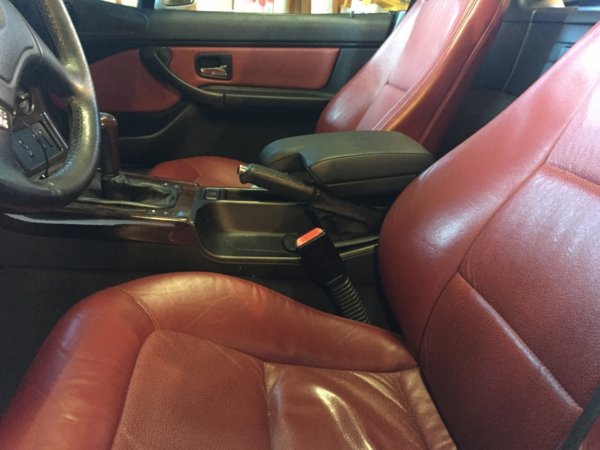
I was really pleased with the end result and my driving comfort increased a lot, when I go in "active driving" mode I just flip the whole armrest up/back and regain space for active shifting :)
I also thinks it looks kinda OEM and the height was perfect for me. (Later on I also got a matching gear knob, will be in future post).
 

fxslin

Zorg Guru (I)
Norwegian Zeds
Joined
Apr 17, 2017
Points
95
Location
Oslo, Norway
Model of Z
///M & 2.8
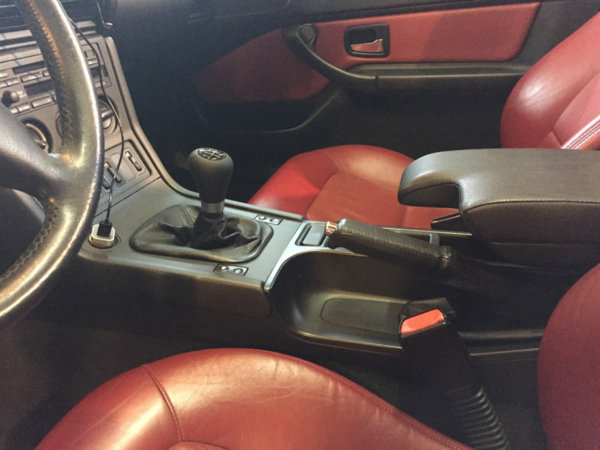
After the armrest mod and painting the trims, I just could not resist investing in a proper gear knob. So I ended up ordering a ZHP knob, it was actually more expensive to get a one for 5 gearbox and no M logo.

This job was a easy fix and this time I assumed my time needs correctly.

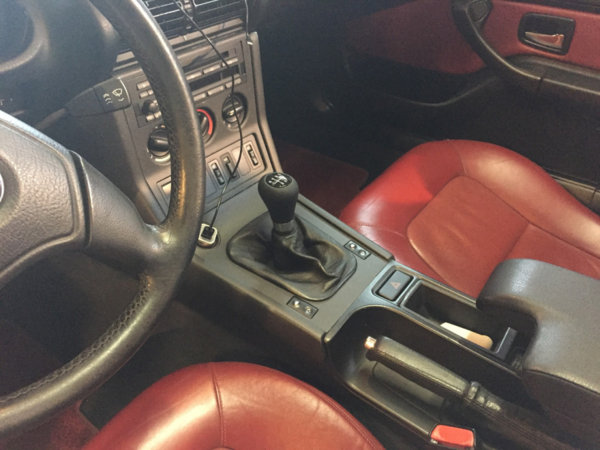
So the car went from this:
pic3.thumb.JPG.5f14f797700496e6b486b91cd92c5ec1.JPG

To this:
pic2.thumb.JPG.ef7a0850da9c5002034fb14e465e5c2c.JPG pic1.thumb.JPG.f00a6a31b5599ea6e9dd4d5f33aba860.JPG

The ZHP Short Shift Knob really does transform the shifting feeling, the weight balance and length really out performs the OEM knob.
This is mod I really recommend, it really changed my "feeling" with the car.
 
Top