
Overview
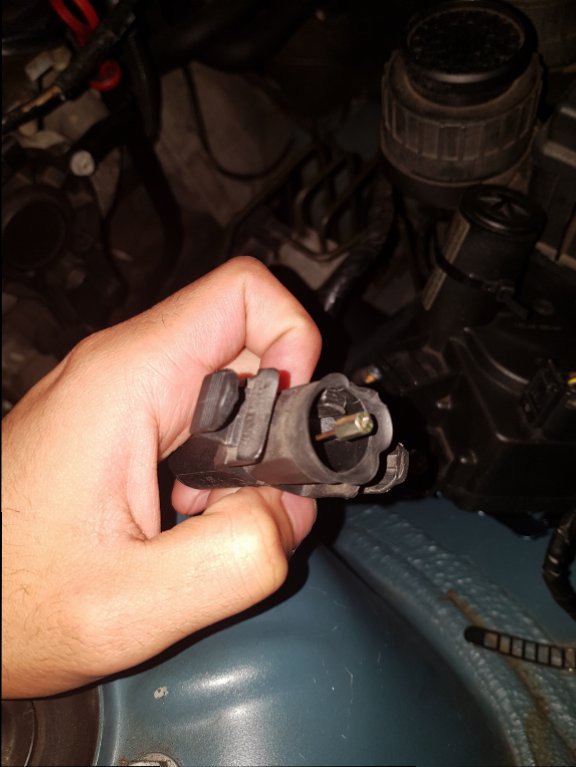
After successfully fitting cruise control to my Z3, here is a guide that people with the M44 engine should be able to follow to add cruise control to their Z3's - this guide will be useful if you have a throttle cable - like this:

If your zed uses fly by wire then installing cruise control is really easy - just follow the steps in this written guide by @Brian H here.
As my zed uses an actual throttle cable the installation is a little bit more involved and the entire process from start to finish should take a couple of hours. Obviously, as I had some issues the process took a lot longer.
Required Parts
Parts that you will need:
Cruise Control ECU

Cruise Control Actuator

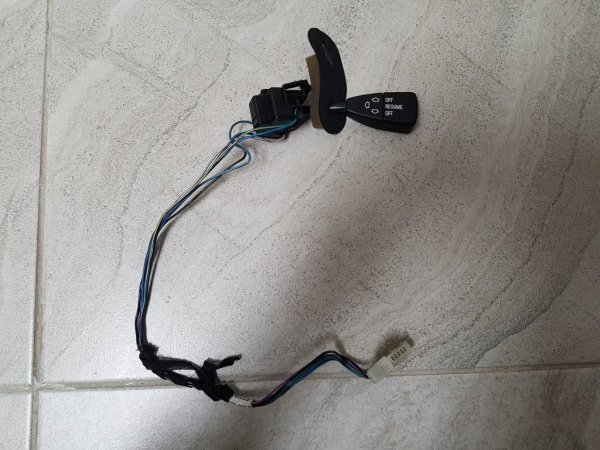
Cruise Control Stalk

Clutch Switch
(I purchased mine from eBay for £9 - made by a company called 'FACET' - never heard of them but we'll see how long the switch lasts!)

Here is the RealOEM link that you can use to find part numbers
Installation
Cruise Control Stalk
In order to install the stalk, I chose to remove the steering wheel, whilst this may not be completely necessary, I chose to do it for the extra working space that the absence of a steering wheel would give me. My steering wheel has also recently been re-trimmed so the very last thing I wanted to do was damage it!
Removing the steering wheel is easy - just make sure that you disconnect the battery and wait about 10 minutes before removing it (so you don't experiencing an airbag punching you in the face!)
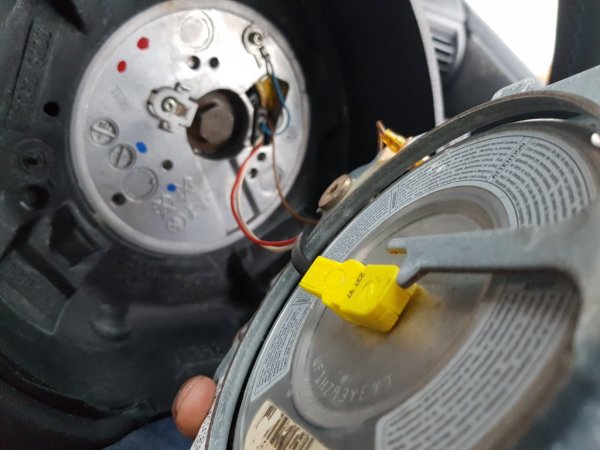
There are two T27 torx bolts that hold the airbag in place - once these are removed you should be able to remove the airbag - be careful though there are a couple of wires attached to the airbag which you will need to disconnect.

Once these have been disconnected you will need a 16mm socket to remove the bolt that holds the steering wheel in place. Before removing the wheel make a mark with some form of permanent marker on the wheel and the splines that the wheel slides onto as this will make refitting the steering wheel easier.
You can then slide the steering wheel off - just be sure to remove the wires for the slipring.
Once the wheel has been removed you will need to remove the bottom of the steering column cover. In my case this was held on by a Phillips screw though I'm not sure if it was a factory screw as I have seen torx screws used to hold the covers on in the past.
Once you've removed the two screws a firm and steady pull should separate the cover into two pieces.
Next, it's time to remove the plastic panel that sits above your knee or under the steering column, I believe, from memory, there are a total of six screws that will need removing and, if yours has them you will also need to remove the plastic caps that sit on the screws. Having learnt from past mistakes I find it easiest to gouge straight into the plastic caps with a phillips screw driver - as mentioned in this article here - this helps prevent any damage to the surrounding trim pieces. You will then have to replace the caps but that is far easier and cheaper (just over a pound each) than replacing entire trim panels.
You should also remove the trim that surrounds the pedals to aid the removal, there are two 'twist lock fasteners' - (sorry, I don't know the technical term for this). Once you've removed this as well as the six screws that hold the plastic panel under the steering column you should be able to pull the panel straight out.

Above: One of the two 'twist-lock fasteners' that you will need to remove
You now have really good access to install the cruise control stalk.
You will need to make a cut in the cowling cover - my dremel stopped working half way in the process so I had to resort to using a file so this isn't the tidiest of jobs. However, Andy kindly sent me a spare so that I could have another go.

The area that you need to cut is premarked from the factory so it is simply a case of following the lines and you should have a nice cut which will allow your stalk to fit.
The stalk will then clip into place, like so:

Once the stalk is fitted find the matching connector under the steering column and plug the stalk into this connector:

Ignore the junction boxes above... That is to sort on another day.
Installing Clutch Switch
A clutch switch is something that you will need if your car has a manual transmission.
The switch will allow the cruise control to disengage when you push the clutch down. If you have an automatic I believe you will need something called a bridging cable.
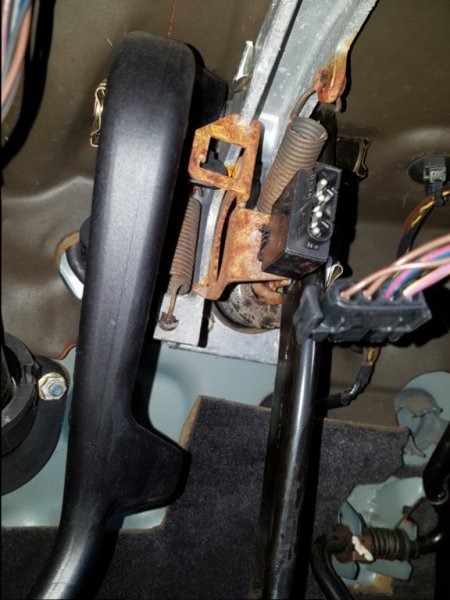
There is a two pin connector taped up under the steering column which is for the clutch switch.


The switch simply pushes into places alongside the brake switch - however - do be careful of the orientation so as not to damage the switch as it does only slot in one way.
Installing the ECU
The ECU can be plugged in behind the glove box. In order to remove the glove box there are again a number of screws that you will need to remove. The removal process for this is very similar to the removal of the drivers side panel - except for the extra two screws in the glove box that will also need to be removed.
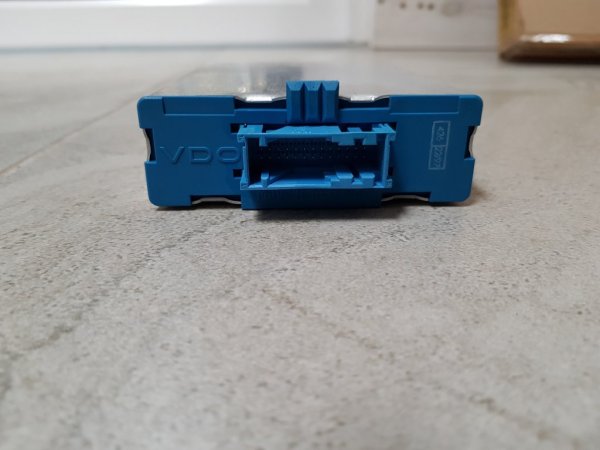
Once the glove box has been removed, you should see, lurking in the pile of wires a blue connector. The blue connector is the one that you will need to plug into your ECU.

The ECU can then be mounted like so:

Excuse the messy cabling, that is also one of the jobs that need tackling at some point.
Installing the Actuator
By far the most fiddly part of the entire process is to install the actuator.
To begin with you will need a bracket of some sort to mount the actuator onto, I came across a genuine BMW bracket on RealOEM. The bracket had to be ordered from Germany and cost £5.00 from my local dealer. Once it had arrived, I chose to paint it body colour so that it fits in well in the engine bay.

My only complaint is that I couldn't find any mounting points onto which the bracket could be seated and I've found that others have had the same issue. This meant that I had to use zip ties to secure the bracket which I am not at all happy with. I believe in a car where cruise control was selected as a factory option this bracket would have been welded onto the chassis. My plan for the future is to perhaps fabricate a bit of sheet metal for the cruise control motor that I can bolt on to existing mounting points in the engine bay.
You then need to install the bowden cable. This is relatively straight forward, the bowden cable has two ends to it, one of the ends will be secured alongside the throttle cable, the other end needs to be attached to the actuator - this is the bit that I got wrong as I forgot to connect the cable into the actuator - like so:

The end that needs to be secured alongside the throttle cable is relatively easy to fit it simply clips in to the metal bracket that is already present on the throttle body, you may find that you need to open the throttle up by hand to clip the extra cable in. The process is difficult to explain, but if you use the existing bowden cable as reference point you should be okay. Ensure that once this is fitted there isn't excess slack in the cable yet it shouldn't be so tight so as to increase the idle of the car.

Troubleshooting
After following the above steps you should have a fully working cruise control system. If not, having done plenty of research some common issues seem to be:
- Not enough tension in the bowden cable
- Faulty ECU
- Faulty Clutch Switch
- Faulty Brake Light Switch
- Faulty Brake Lights
Hope that this guide helps someone. If you have any questions, feel free to ask.
After successfully fitting cruise control to my Z3, here is a guide that people with the M44 engine should be able to follow to add cruise control to their Z3's - this guide will be useful if you have a throttle cable - like this:
If your zed uses fly by wire then installing cruise control is really easy - just follow the steps in this written guide by @Brian H here.
As my zed uses an actual throttle cable the installation is a little bit more involved and the entire process from start to finish should take a couple of hours. Obviously, as I had some issues the process took a lot longer.
Required Parts
Parts that you will need:
Cruise Control ECU
Cruise Control Actuator
Cruise Control Stalk
Clutch Switch
(I purchased mine from eBay for £9 - made by a company called 'FACET' - never heard of them but we'll see how long the switch lasts!)
Here is the RealOEM link that you can use to find part numbers
Installation
Cruise Control Stalk
In order to install the stalk, I chose to remove the steering wheel, whilst this may not be completely necessary, I chose to do it for the extra working space that the absence of a steering wheel would give me. My steering wheel has also recently been re-trimmed so the very last thing I wanted to do was damage it!
Removing the steering wheel is easy - just make sure that you disconnect the battery and wait about 10 minutes before removing it (so you don't experiencing an airbag punching you in the face!)
There are two T27 torx bolts that hold the airbag in place - once these are removed you should be able to remove the airbag - be careful though there are a couple of wires attached to the airbag which you will need to disconnect.
Once these have been disconnected you will need a 16mm socket to remove the bolt that holds the steering wheel in place. Before removing the wheel make a mark with some form of permanent marker on the wheel and the splines that the wheel slides onto as this will make refitting the steering wheel easier.
You can then slide the steering wheel off - just be sure to remove the wires for the slipring.
Once the wheel has been removed you will need to remove the bottom of the steering column cover. In my case this was held on by a Phillips screw though I'm not sure if it was a factory screw as I have seen torx screws used to hold the covers on in the past.
Once you've removed the two screws a firm and steady pull should separate the cover into two pieces.
Next, it's time to remove the plastic panel that sits above your knee or under the steering column, I believe, from memory, there are a total of six screws that will need removing and, if yours has them you will also need to remove the plastic caps that sit on the screws. Having learnt from past mistakes I find it easiest to gouge straight into the plastic caps with a phillips screw driver - as mentioned in this article here - this helps prevent any damage to the surrounding trim pieces. You will then have to replace the caps but that is far easier and cheaper (just over a pound each) than replacing entire trim panels.
You should also remove the trim that surrounds the pedals to aid the removal, there are two 'twist lock fasteners' - (sorry, I don't know the technical term for this). Once you've removed this as well as the six screws that hold the plastic panel under the steering column you should be able to pull the panel straight out.
Above: One of the two 'twist-lock fasteners' that you will need to remove
You now have really good access to install the cruise control stalk.
You will need to make a cut in the cowling cover - my dremel stopped working half way in the process so I had to resort to using a file so this isn't the tidiest of jobs. However, Andy kindly sent me a spare so that I could have another go.
The area that you need to cut is premarked from the factory so it is simply a case of following the lines and you should have a nice cut which will allow your stalk to fit.
The stalk will then clip into place, like so:
Once the stalk is fitted find the matching connector under the steering column and plug the stalk into this connector:
Ignore the junction boxes above... That is to sort on another day.
Installing Clutch Switch
A clutch switch is something that you will need if your car has a manual transmission.
The switch will allow the cruise control to disengage when you push the clutch down. If you have an automatic I believe you will need something called a bridging cable.
There is a two pin connector taped up under the steering column which is for the clutch switch.
The switch simply pushes into places alongside the brake switch - however - do be careful of the orientation so as not to damage the switch as it does only slot in one way.
Installing the ECU
The ECU can be plugged in behind the glove box. In order to remove the glove box there are again a number of screws that you will need to remove. The removal process for this is very similar to the removal of the drivers side panel - except for the extra two screws in the glove box that will also need to be removed.
Once the glove box has been removed, you should see, lurking in the pile of wires a blue connector. The blue connector is the one that you will need to plug into your ECU.
The ECU can then be mounted like so:
Excuse the messy cabling, that is also one of the jobs that need tackling at some point.
Installing the Actuator
By far the most fiddly part of the entire process is to install the actuator.
To begin with you will need a bracket of some sort to mount the actuator onto, I came across a genuine BMW bracket on RealOEM. The bracket had to be ordered from Germany and cost £5.00 from my local dealer. Once it had arrived, I chose to paint it body colour so that it fits in well in the engine bay.
My only complaint is that I couldn't find any mounting points onto which the bracket could be seated and I've found that others have had the same issue. This meant that I had to use zip ties to secure the bracket which I am not at all happy with. I believe in a car where cruise control was selected as a factory option this bracket would have been welded onto the chassis. My plan for the future is to perhaps fabricate a bit of sheet metal for the cruise control motor that I can bolt on to existing mounting points in the engine bay.
You then need to install the bowden cable. This is relatively straight forward, the bowden cable has two ends to it, one of the ends will be secured alongside the throttle cable, the other end needs to be attached to the actuator - this is the bit that I got wrong as I forgot to connect the cable into the actuator - like so:
The end that needs to be secured alongside the throttle cable is relatively easy to fit it simply clips in to the metal bracket that is already present on the throttle body, you may find that you need to open the throttle up by hand to clip the extra cable in. The process is difficult to explain, but if you use the existing bowden cable as reference point you should be okay. Ensure that once this is fitted there isn't excess slack in the cable yet it shouldn't be so tight so as to increase the idle of the car.
Troubleshooting
After following the above steps you should have a fully working cruise control system. If not, having done plenty of research some common issues seem to be:
- Not enough tension in the bowden cable
- Faulty ECU
- Faulty Clutch Switch
- Faulty Brake Light Switch
- Faulty Brake Lights
Hope that this guide helps someone. If you have any questions, feel free to ask.
Attachments
-
 85.4 KB Views: 77
 -
 208.5 KB Views: 77
 -
 183.2 KB Views: 69
 -
 110.5 KB Views: 85
 -
1.5 MB Views: 26
-
 83.7 KB Views: 84
Last edited:
")
