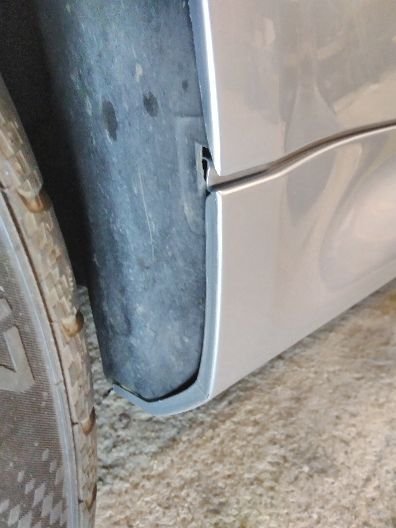
Another Sill refurb

SimonT

Dedicated Member
Joined
Sep 21, 2020
Points
34
Location
East SUSSEX
Model of Z
z3
So, hi everyone.
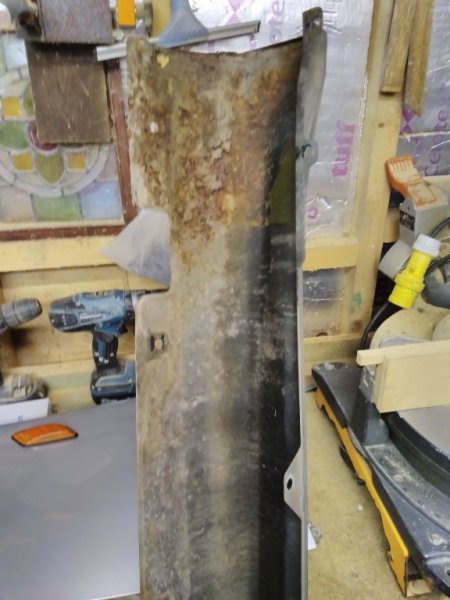
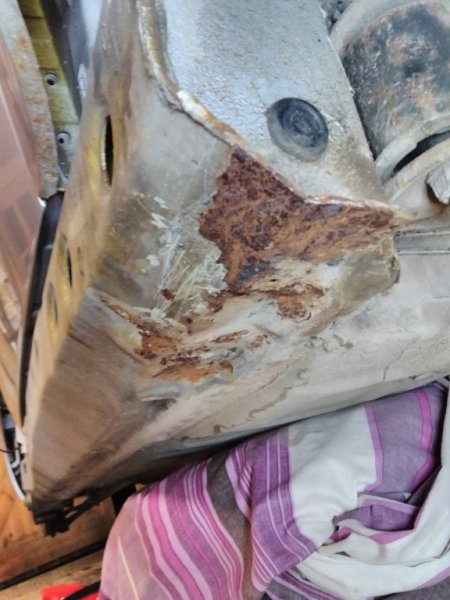
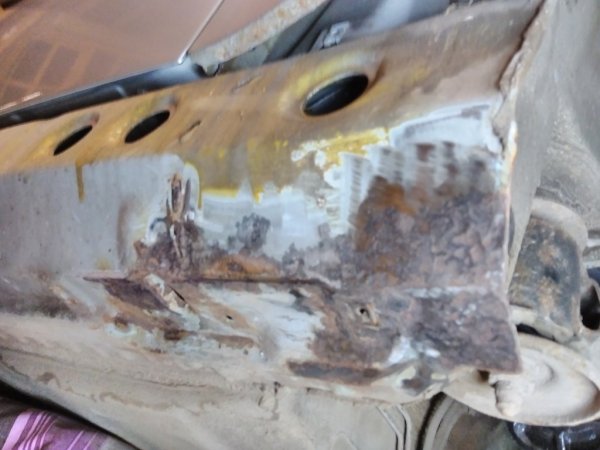
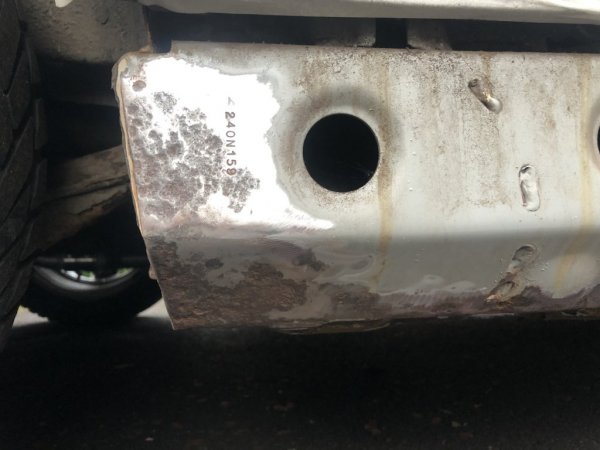
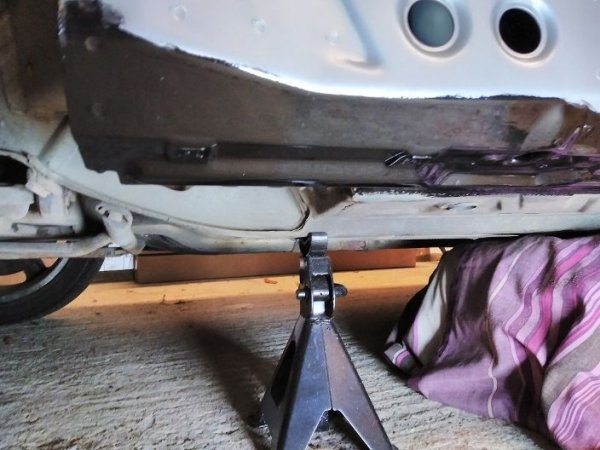
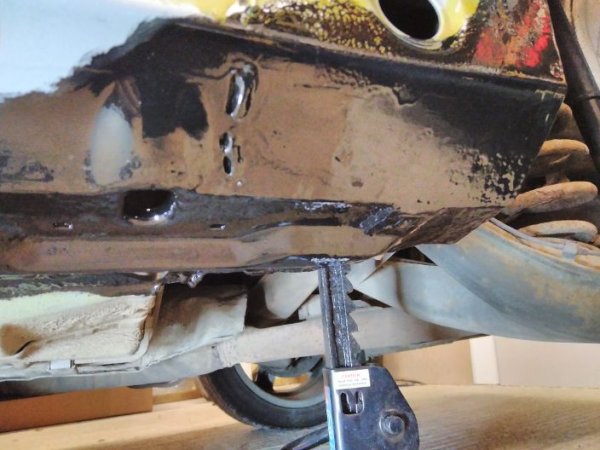
What have I done?. Just bought a lovely, low mileage 2.8 Z, joined this group and got too involved with all of the good works being posted. So with spanner in hand, I decided to have a look at the dreaded inner sills as the outer ones were a bit orange at the ends. Having never really got involved with this sort of project I was surprised with, after reading exactly how everyone else has done it, how straight forward the strip down was. I was even more surprised with the very good condition of the inners however the outers are going to need to be replaced. A couple of questions for all you learned people if you would be so kind.
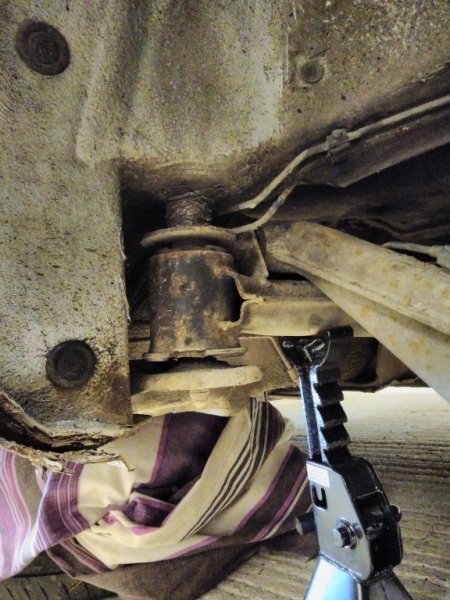
1/ Have I placed the axle stand in the right place.
2/ There seems to be vertical movement in the cylindrical mount at the end of the cross beam when I lowered the car on to the stands, has a bush gone or is this in tolerance.
3/ Has the sill been replaced before or were they painted black with no underseal from the factory.
4/ I only broke a few of the small trim clips that hold the vertical and horizontal plastic trim covers but does anyone have a link to the ones that I need.
5/ So am I right in thinking that I need to first remove as much rust as possible, treat the bare metal with Kurust. paint with red oxide, paint with waxoyl underseal and finally spray with silver hammerite.
Thanks in advance for any help/reassurance and advice. I wouldn't have attempted anything like this without the confidence joining this group has given me.
Cheers
 

Attachments

Last edited:

Ocdste

Dedicated Member
The M44 Massive
Joined
Sep 5, 2020
Points
28
Hi Simon I have literally just done this job on my Z, those sills are not so hard to remove when you take your time. They come painted black from the factory, I have jacked my car where you have your stand and not had any problems, though I don’t really know about the movement in that bush others will know though.
A ebay number for you for those little white clips you broke. It’s inevitable and unavoidable eBay number 171190177356.
I personally removed as much with the ginder as I could then used the krust, coated in zinc primer and then I used jenolite direct to rust satin finish which is a primer undercoat and finish coat and you can really feel how good it is once applied it feels a little rubbery I need to post my pics in project Liz thread but here are a few so you can see the finish I got, for the record my sills were worse than yours and seriously worth doing everyone will have different ideas and processes these are mine.
 

Attachments

Althulas

Zorg Guru (V)
Supporter
British Zeds
Joined
Jun 14, 2014
Points
198
Location
Banburyshire
Model of Z
M Roadster
Hi Simon as ste states clean up as best as possible. I used an angle grinder with wire cups, the used acids to eat up any remaining rust spots, one of the acids contains phosphate to leave a protective coating. Surface were then etched primed, epoxy painted, sealant place over and then sprayed with a near match paint as I could get made. I’ve not finished yet but will apply the same procedure underneath the sill length but won’t used the sealer on the side and plan to use https://www.rust.co.uk/product/dinitrol-rc900-rust-converter-224 in the cavities as a just in case anything there. You can see what products I’ve used in this thread https://zroadster.org/threads/time-i-pulled-my-finger-out.28012/

ive never jacked up my car on the rear beam either, looks like your rear beam bushes are worn but it’s A doable job at home, mines in a lay-by in my village. There’s some good threads on here Dr Wong and Mazza both recent ones to read and loads in the Zedshed section to read. On Dr Wong thread you’ll see a cheaper alternate for epoxy paint instead of from bilt hamber and rust uk. Do post up more pics of your progress.
 

SimonT

Dedicated Member
Joined
Sep 21, 2020
Points
34
Location
East SUSSEX
Model of Z
z3
Thank you for the replies, they are a good morale booster.
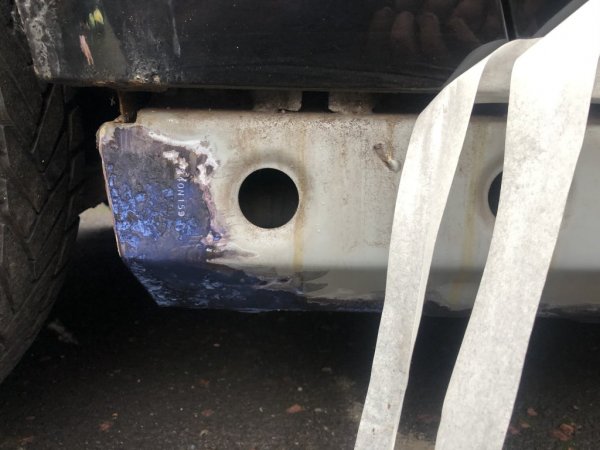
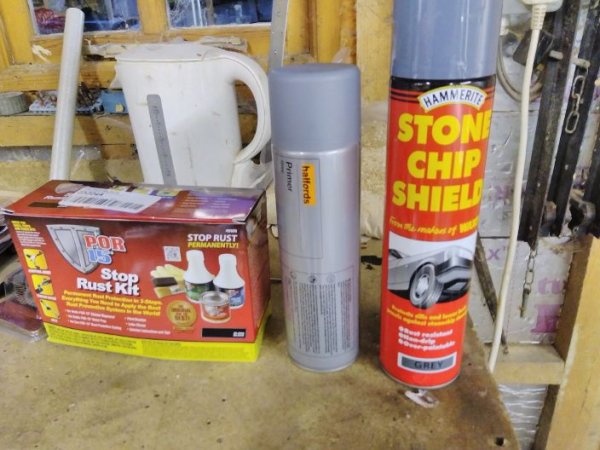
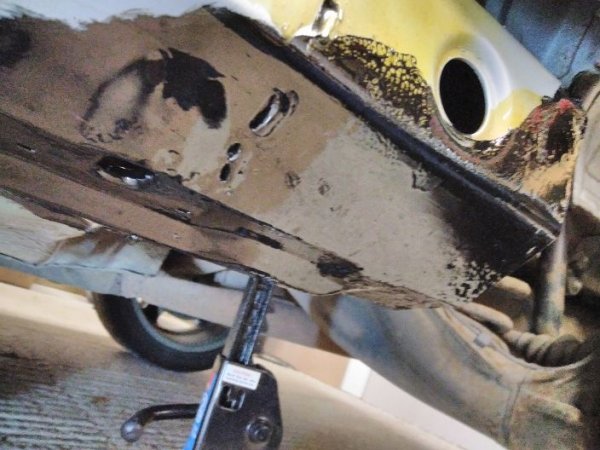
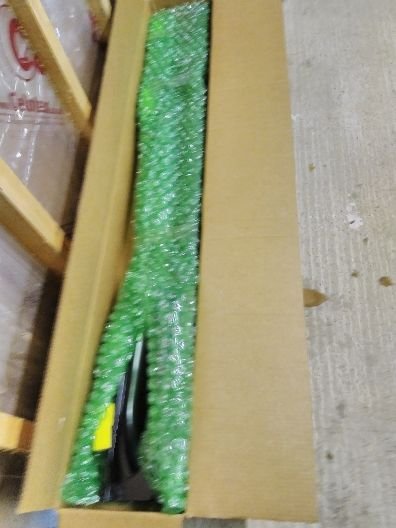
So, continuing on, this is the progress so far. The two new BMW sills have turned up, I got busy with the wire brushes on the grinder and removed most, if not all, of the rust, hit it all with the three stage POR 15 stuff and I must say it does look a lot better. So, going forward, am I right to now prime the POR 15 then stone chip it and finally hit it with some matched aerosol paint and lacquer. Then, finally get the sills painted inside and out by a local body shop. Just remembered, I think I have to spray the inside of the structural sills with waxoyl. Does this all sound about right to you guys.
Many thanks,
Si
 

Attachments

SimonT

Dedicated Member
Joined
Sep 21, 2020
Points
34
Location
East SUSSEX
Model of Z
z3
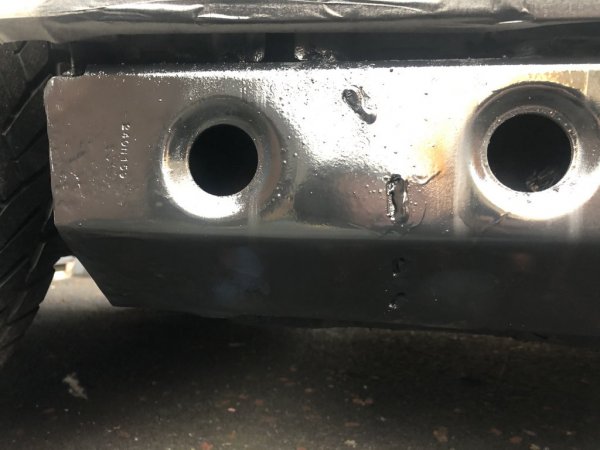
Black POR 15 is now covered with primer ready for the stonechip and arctic silver top coat.
Has anyone had an experience with the pattern part ebay front wings and was it a good one or do they fit like a cheap suit!?. New Bmw ones are really expensive.
Si
 

jonco

Zorg Guru (IV)
Supporter
British Zeds
The M44 Massive
Joined
Dec 6, 2011
Points
159
Location
Chester
Model of Z
'98 1.9 Auto
..........Has anyone had an experience with the pattern part ebay front wings and was it a good one or do they fit like a cheap suit!?. New Bmw ones are really expensive.
Si
I never used eBay but fitted Starline Wing from ECP a few months ago ~£95 after discount code. Quality was good - had to elongate one of the top mount holes very slightly to get alignment right. Had wing panel professionally sprayed but did my new OEM sills myself.
 

SimonT

Dedicated Member
Joined
Sep 21, 2020
Points
34
Location
East SUSSEX
Model of Z
z3
Thanks for the advice jonco, I am picking up the ECP wing this morning and have booked the body shop for painting this week. Fingers crossed it all goes according to plan.
 

SimonT

Dedicated Member
Joined
Sep 21, 2020
Points
34
Location
East SUSSEX
Model of Z
z3
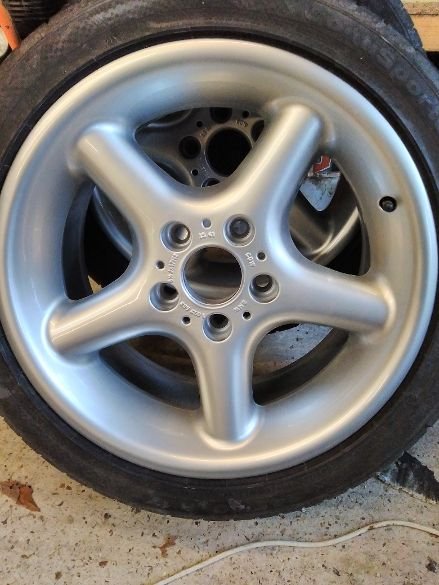
So it's all coming along rather nicely, the near side sill refurb with all the prep work and coatings is now finished. While this side is up on stands I decided to get the two wheels refurbished . My local wheel guys, Smart Wheels of Netherfield sent them away to be chemically dipped, filled and repaired where needed, powder coated and baked. They then put the tyres back on and balanced the wheels. Total cost, £ 80.00 a wheel, considering they were a right scabby mess I think that's a bit of a bargain. Just waiting for the new sill and front wing to come back from the painters and I can bolt it all back together. As an asides, the painters have said that my Arctic silver code 309/7 has three different shades to it either yellow grey or silver and that as its a 1998 motor they are having a realy tough time trying to narrow it down. Sounds strange to me. Anyone else come across this and is there an easy way to find out?.
Cheers all.
 

Attachments

ktnez99

Zorg Guru (IV)
British Zeds
Joined
May 18, 2018
Points
164
Location
West Midlands
Model of Z
Z3 2.8L
Isn’t the paint colour/code attached to the VIN? @t-tony might know...?
 

SimonT

Dedicated Member
Joined
Sep 21, 2020
Points
34
Location
East SUSSEX
Model of Z
z3
Paint code is also shown on label on suspension turret under bonnet.:thumbsup:
Thanks Jonco,
I took the code to the painters and he reckoned that this code has three shades to it based on where the car was made/painted, anyhow, I picked them up the other day and to my old eyes, they look fine. Looking forward to bolting the nearside back together and putting the refurbed wheels back on before hitting the offside, think a quick blast round the B-roads is in order first, just to charge the battery of course!.
I will post a couple of pics when its back on the floor.
Cheers all.
 

SimonT

Dedicated Member
Joined
Sep 21, 2020
Points
34
Location
East SUSSEX
Model of Z
z3
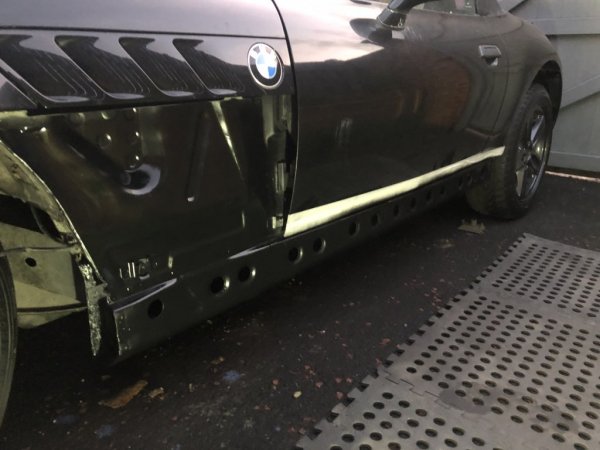
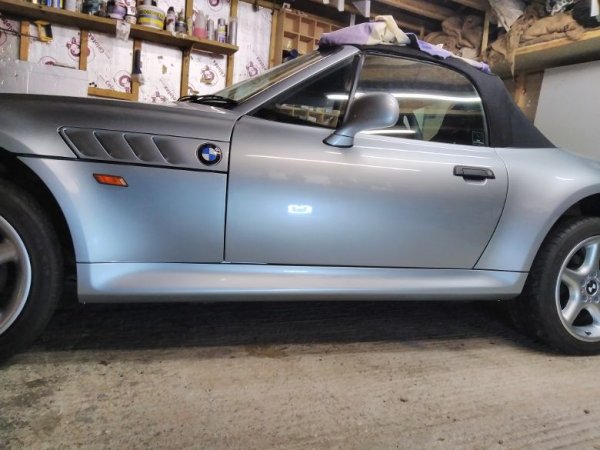
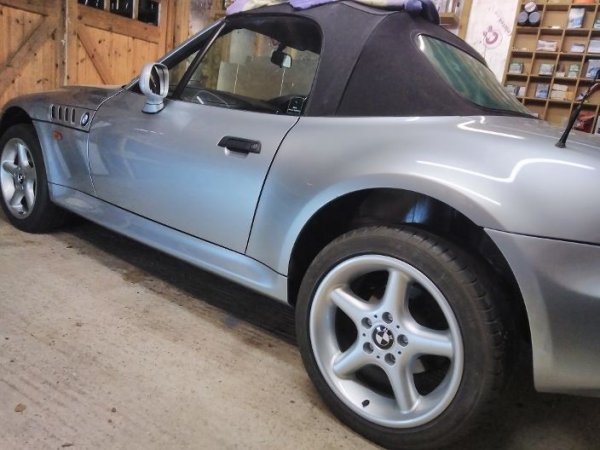
Well, it's landed, I finally have one side done, all shiny and new looking. The paint has matched in lovely and the wheels look great, not sure about the new black centres but time will tell. The new ECP front wing is better than expected but not quite perfect on the panel gaps {good enough for me) and it all bolted back together nicely.
A few observations for people undertaking the same project that have probably been mentioned but I obviously missed are,
Don't tighten up the new panels until they are all on, much easier to align and "nudge about" to get a good fit.
Do replace all of the plastic push in captive "thingy's" that the hex head screws screw into in the wheel arches and the jacking points, if not they lose their grip and the new screws keep turning.
I can definitely second the recommendation to replace all of the hex head screws with new stainless screws and washers and the grinding flat of the socket to get on the rusted wheel arch liner screws [worked a treat].
All in all I
finished sill 4.jpg
am quite chuffed with how its all gone and am actually looking forward to starting the off-side. This forum really is a great place to gather information and confidence.
Cheers all,
Si.
 

Attachments

ktnez99

Zorg Guru (IV)
British Zeds
Joined
May 18, 2018
Points
164
Location
West Midlands
Model of Z
Z3 2.8L
Is ECP Euro Car Parts? Are they selling front wings?
 

Bampz

Zorg Guru (I)
British Zeds
Joined
Aug 2, 2016
Points
94
Location
Pembrokeshire
Model of Z
2.8
That looks really good nice and clean , looking at the sill ends I think it was @Nodzed that came up with a good idea to protect them with some seed tray plastic and silicon sealant
 

SimonT

Dedicated Member
Joined
Sep 21, 2020
Points
34
Location
East SUSSEX
Model of Z
z3
Is ECP Euro Car Parts? Are they selling front wings?
Yes, near and off side,, with the discount £ 93.00 quid each. They fitted ok but just needed a tiny bit of fettling with the grinder on the top corner near the door shut. Literally just a 1 second touch with the metal disc to remove a high spot on the fold over. Hope that helps.
S
 

SimonT

Dedicated Member
Joined
Sep 21, 2020
Points
34
Location
East SUSSEX
Model of Z
z3
That looks really good nice and clean , looking at the sill ends I think it was @Nodzed that came up with a good idea to protect them with some seed tray plastic and silicon sealant
Am dithering on the silicone as not sure if it would trap moisture in and prevent free draining, will definitely look at the sill end caps though.
Was in Pembrokeshire a couple of years ago, lovely place similar to East Sussex but with a lot less traffic. Must try and get back up there as some of those coastal drives were great.
S
 

ktnez99

Zorg Guru (IV)
British Zeds
Joined
May 18, 2018
Points
164
Location
West Midlands
Model of Z
Z3 2.8L
That looks really good nice and clean , looking at the sill ends I think it was @Nodzed that came up with a good idea to protect them with some seed tray plastic and silicon sealant
That sounds inventive. Any pics @Nodzed ? Please share and show us.
 

ktnez99

Zorg Guru (IV)
British Zeds
Joined
May 18, 2018
Points
164
Location
West Midlands
Model of Z
Z3 2.8L
Yes, near and off side,, with the discount £ 93.00 quid each. They fitted ok but just needed a tiny bit of fettling with the grinder on the top corner near the door shut. Literally just a 1 second touch with the metal disc to remove a high spot on the fold over. Hope that helps.
S
I’m amazed!!! ECP?!?
E14540BB-715B-476A-883C-8D4E864498BC.jpeg
 

Nodzed

Zorg Expert (II)
Supporter
British Zeds
M Power
Joined
Feb 18, 2016
Points
231
Location
Forest of Dean, Gloucestershire, England
Model of Z
Z3M Imola and Z4 (e89)
Here you go


t-tony

Zorg Expert (II)
Supporter
British Zeds
#ZedShed
Joined
Dec 31, 2013
Points
226
Location
Torksey Lock,Lincoln, England
Model of Z
E89 Z4 23i Auto
Top