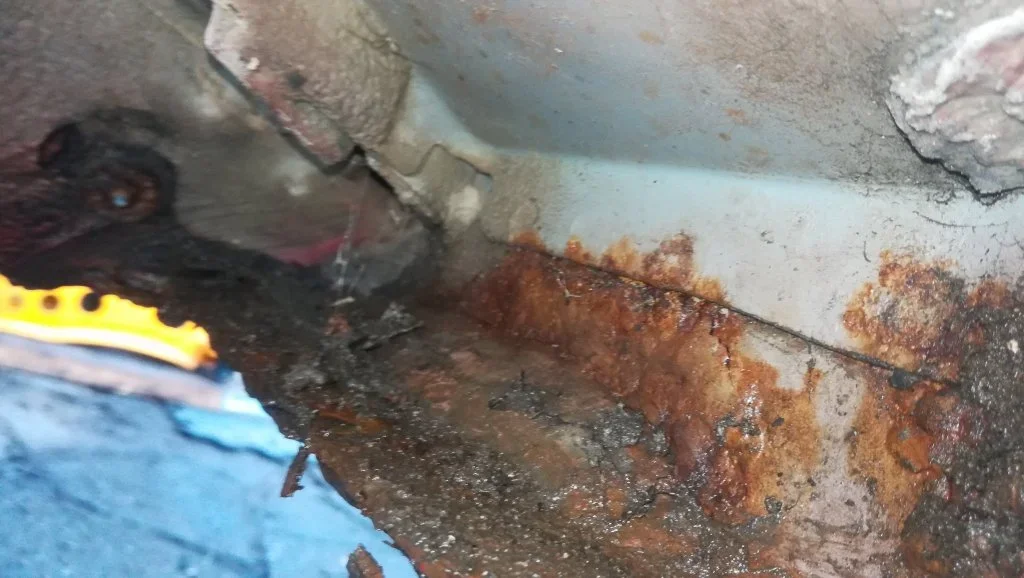
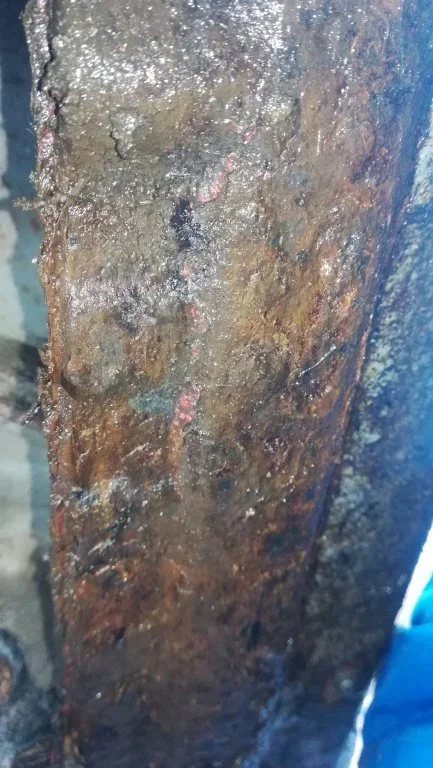
Rust prevention

Tom Holland

Zorg Addict
Joined
Jun 28, 2017
Points
49
Hello folks, my new car for me(2002) was owned by someone who lived in the country. So I thought it best to take a look behind the arch liners. Glad I did. Has anyone used por - 15. Also is mottez shock absorbing mat made to prevent condensation on things like inside the boot lid/bonnet a good idea?
 
I prepped problem areas and extended beyond by grinding back to metal, clean the metal with a acid phosphate witch pits a protective coating, sprayed over with etch primer, then painted over with a two pack epoxy paint, seam sealed and painted over with a matching paint. How it all holds up in the long term I can not say yet. I got my products from https://www.rust.co.uk/ and https://www.bilthamber.com/ you can see my work so far https://zroadster.org/threads/time-i-pulled-my-finger-out.28012/ it has been some time since I’ve done any work on it just waiting for some better weather but still nice and clean underneath.

@DrWong used Lechlar two pack epoxy paint on his and had no problems. Prep is the key to whatever you use I think
 
Thank you all for your prompt response. Yes I can see that thorough preparation would be more important than product. Chemical rust converters, etch primer I will look into the bilthamber products. What about the dynamat idea to reduce condensation? Either way luckily I caught the rest before it became a serious problem. Only one sill is rusted out. Going to look for prices soon. Any suggestions on these would be appreciated. Thanks for your help all
 
Have a look at a product called VacTan 😊
 
If you have condensation in the boot, there is a problem, but it can be easily fixed rather than using something to absorb it.
Common water entry is the 3rd brake light seal, the aerial grommet and the rear lights.
Better to fix the problem first.
Also check that the lower 'pockets' at each side of the boot are not filling with water, there are some electrical components in there that can be water damaged and can cause you bigger problems. Alarm sensors etc etc
 
If you have condensation in the boot, there is a problem, but it can be easily fixed rather than using something to absorb it.
Common water entry is the 3rd brake light seal, the aerial grommet and the rear lights.
Better to fix the problem first.
Also check that the lower 'pockets' at each side of the boot are not filling with water, there are some electrical components in there that can be water damaged and can cause you bigger problems. Alarm sensors etc etc
 
OK yes I will look into ASAP, the softop was down when I got it. The hard top was not locked off on the drivers side and the leak has caused the yaw sencor to fail I think. I now have got the hardtop bolted tight and TBH used a bike inertube as a seal. I think the whole lot needs positioning better. Apparently the softop was re - covered 5 years ago. Suspect its mis alignment. I think its waterproof now, plus I got a cover over it as no garage.
 
I prepped problem areas and extended beyond by grinding back to metal, clean the metal with a acid phosphate witch pits a protective coating, sprayed over with etch primer, then painted over with a two pack epoxy paint, seam sealed and painted over with a matching paint. How it all holds up in the long term I can not say yet. I got my products from https://www.rust.co.uk/ and https://www.bilthamber.com/ you can see my work so far https://zroadster.org/threads/time-i-pulled-my-finger-out.28012/ it has been some time since I’ve done any work on it just waiting for some better weather but still nice and clean underneath.

@DrWong used Lechlar two pack epoxy paint on his and had no problems. Prep is the key to whatever you use I think
I took back to clean metal, primed with Lechlar epoxy, seam-sealed where needed, another coat of epoxy primer, then top coat and lacquer. Epoxy primer is cheap and pretty much the best protection available if you’re DIY’ing, IMO. I researched POR, but for every story singing it’s praises there were two bemoaning it. I’ve yet to read a bad word about epoxy primer.

All Bilt Hamber stuff is amazing if slightly pricey. If you have the time and patience, BH Deox Gel can dissolve every last bit of rust and give a perfectly prepared surface for paint. The cleaned sill below took weeks to achieve, but looks as good now as when I did it two years ago.
9BDE811A-B997-43C2-A39F-3FFE07C416EE.webp
885D5FB5-949C-4B1D-975C-623BFB64A7D5.webp
60514C2C-86BD-4388-AB5C-658E86E54CED.webp
 
Now that's impressive! I will definitely look into that. I can see the main problem being not having a dry environment / or garage for doing this kind of work. Will have to find one temporarily. Thanks again.
 
It's not looking so good though 🤔
 

Attachments

  • IMG_20210109_130608.webp
    IMG_20210109_130608.webp
    79.4 KB · Views: 88
  • IMG_20210109_130544.webp
    IMG_20210109_130544.webp
    74.9 KB · Views: 94
I wouldn't get too disheartened just yet. It's really thick metal round there and cleans up surprisingly well. Best thing would be to attack the loose surface with an angle grinder/drill to see what's left. I found a cheap finger sander from Amazon was really useful for those awkward areas behind the wheel arch.
 
Thanks I did clean it of but the rain etc. It's not as bad as it look I think. Then I slapped some grease over it all. When weather improves will be prepared with chemical treatment and what ever I go with. She'll by rite 😉Thank for your reply
 
During the first lock down, SWMBO and I decided to attack the underneath of the broomstick, there was no rush and the sun was shining, so we set to. First day, we took the sills off, the front wings, and the wheels and arch liners off. we then raised her up on axle stands.
We then had a fun afternoon with the pressure washer underneath, getting every last bit of crud off, we ended up soaked to the skin.
Next morning I was volunteered to get under with the angry grinder fitted with a wire cup, the flat wheels are a bit too savage, I think, Finishing off with a hand operated wire brush, followed up with another dose of pressure washer in the evening, so she would still be damp in the morning.
Next morning, 2 litres of Vactan was sprayed all over everything underneath and through the chassis holes, and me! with a small garden type pump sprayer.
Next morning, a light hosing down and a light soft brushing underneath, to remove all the grains of ferrous oxide brought to the surface.
Next morning, when all was dry, 10 aerosol tins of Simonize tough paint was applied to everything underneath, and through the chassis holes, and me! with many coats.
Next morning, we fixed the panels back on and made a mental note to fit a new set of tank straps, and sort out some sill covers, sooner rather than later. Tank straps are done, Thanks Mazza, sills are still pending.
I must add, All this work was carried out outside.

 
Last edited:
I have to say that getting these emails and reading how people get on with it is very inspiring. It's when the fluffle valve or the giggling pin is busted I will be crying in my beer!
 
Next morning I was volunteered to get under with the angry grinder fitted with a wire cup, the flat wheels are a bit too savage,

Gotta love an angry grinder.

Mine now, will forever be known as that
 
Unless you lived in Purley, then it would be Mr. Angry Grinder ..............................=))

Tony.
 
Back
Top