raymond
Zorg Guru (I)
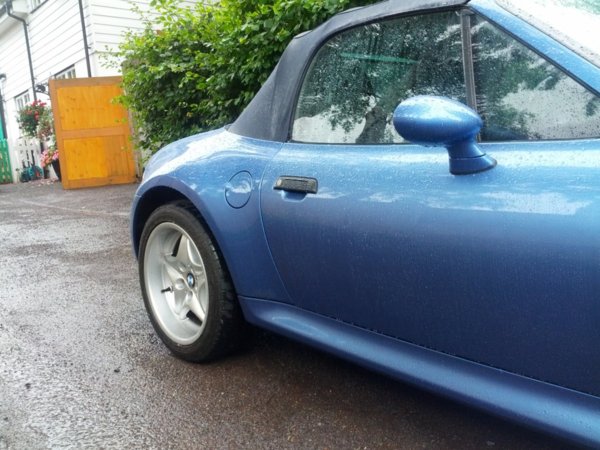
The rear wings on my Z3M are looking a bit crusty around the edges.Mainly around the arch and the join beween the sill and the wing. If you are keeping the wing then in order to treat the rust the rear wing needs to be removed. New wings are around £300 each but I managed to source one from Ebay. Note the pre and post facelift wide body wings are different. First thing is to jack the car up and remove the rear wheel and safely support the car. Remove the road wheel. Remove the arch liner which is held in by four 8mm screw bolts, two in the upper part and one each on the lower ends.
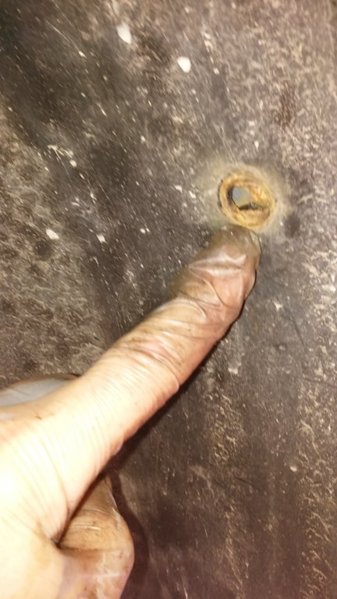


the inner arch panel should now pull down along with a lot of road muck so perhaps you will want to cover the brake disc. Also gives you a chance to clean things up.
From inside the door remove the lower sill covering strip by first removing the small push clip.

Then lift up the panel breaking some of the white clips. Same for the vertical panel but start removing it from the top where a part fits through the seal. Count how many white clips you have broken and get them from Ebay, Amazon or BMW . You have to remove these trim pieces to get to the lower bolt.
Rear bumper is now next. On my car was a large plastic mount which I removed quite easily. On some non M cars there is a large vertical plastic rivet. The manual mentions removing the mounting clips to push the bumper towards the front of the car to unlock the keyhole plastic rivets. After a bid of head scratching I just got a bread knife and carefully cut through them from outside. Saved a lot of time !
You can see where the clips go through here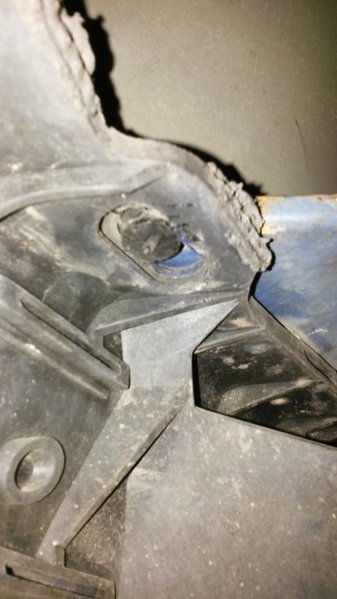
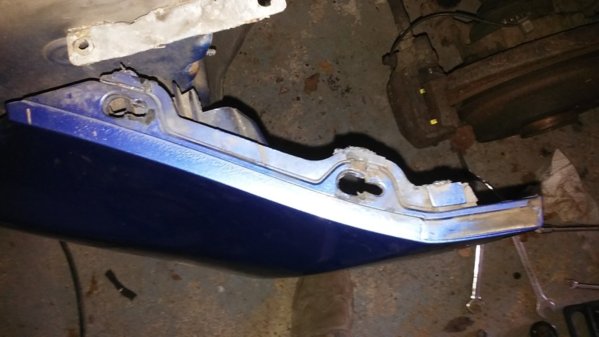
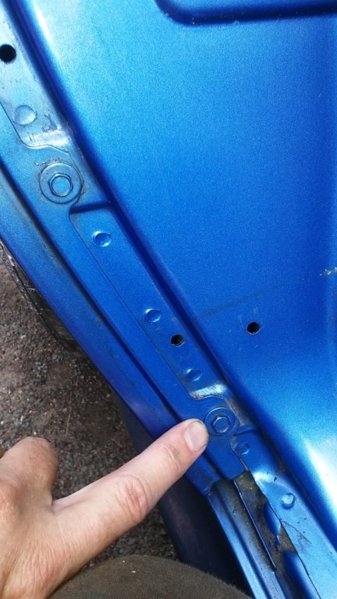
Then using a hex socket so you do not damage the paint on the bolts remove all the bolts. Get someone to perhaps support the boot lid as you have to remove the boot lid bolts on one side. I managed myself easily enough. The early M has a sensor on the drivers wing on a bracket that you need to remove before removing the wing. Once all bolts are removed the wing should just lift away.
You will now see where the rust has got to on the inner flanges.
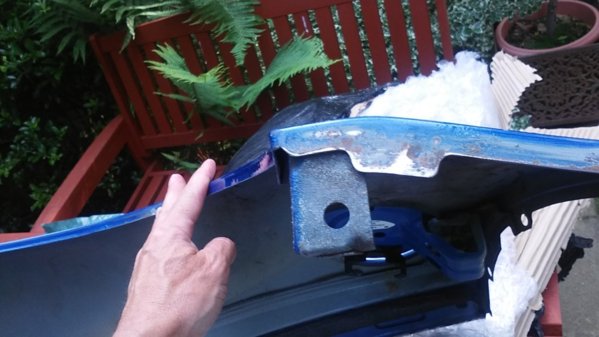
On my own car there was overspray on the top part of the where the wing meets the rear roof panel which shows the wing had been repainted on the car.

I also rubbed down the suspension with a wire brush and painted Aquasteel rust converter so the suspension is now a nice black cover. The wing is now at the bodyshop and fitting looks a reversal of the above but I shall update the thread once it arrives. White trim clips are 51471840960 while the two bumper clips are 51128399166.
Unfortunately BMW did not have the clips so off to ebay yet again. £10 for those two small clips. It is possible with a pair of thin nosed pliers to release the two wings on these clips from iside the wing if you don't want to cut through them. Once it was all prepared I placed copper ease in all the bolt holes and ordered some 8mm srew bolts to replace the rusty ones.I had a second hand wing repainted at a cost of £150. When it was ready I started to refit it.
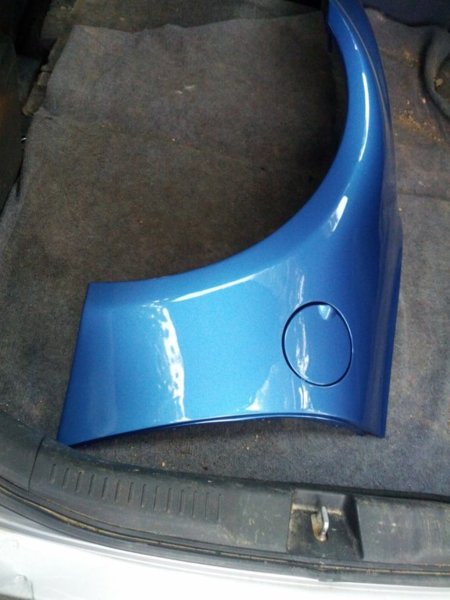
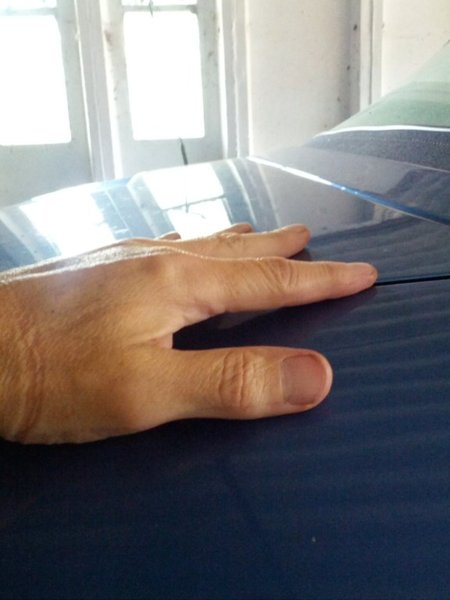
Give yourself plenty of room and place a small tea towel over the rear part of the wing where the boot lid hinge will rest. You will need a little help here while you guide it under the rear light cluster and lift the boot hinge away so you can slot the wing in carefully. At this stage I placed some of the top wing bolts in place then bolted the hinge brackets to the vertical face of the wing after removing the towel. I then placed a few of the door entrance bolts in place. Now you can start adjusting the wing. Start at the top to get the correct width in relation to the boot lid, not height at this stage then do the relation to the door and the sill with the door shut. use your finger and your eyesight to check it is in perfect alignment. It is quite easy to adjust the wing to fit. then adjust the boot hinge to get the boot lid at the correct height. take you time doing this as it must look right. Once I was satisfied I tightened all the bolts not forgetting the lower one near the sill. i then offfered the bumper up to the wing with the new clips and just pushed it into place
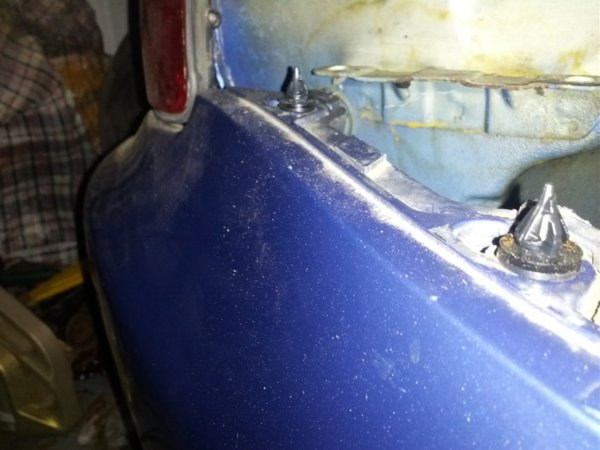
The front clip went in easily enough but the rear one would not engage so I just used a pair of pliers from inside the wing to pop it into place
Again I went round the shut angles just to check alignment
Once I was happy everything lined up I sprayed cavity wax, in my case Comma, just about everywhere before refitting the wing liner with new screw bolts.
So I have replaced one badly rusted wing with a rust free freshly painted panel. My next part to do will be the sill on that side. I am working to a budget otherwise I would have done the sill and door at the same time but that will come next. If you are considering painting the rear wing then I think removal is the best way to do it so you can fix any rust on the return flanges

the inner arch panel should now pull down along with a lot of road muck so perhaps you will want to cover the brake disc. Also gives you a chance to clean things up.
From inside the door remove the lower sill covering strip by first removing the small push clip.
Then lift up the panel breaking some of the white clips. Same for the vertical panel but start removing it from the top where a part fits through the seal. Count how many white clips you have broken and get them from Ebay, Amazon or BMW . You have to remove these trim pieces to get to the lower bolt.

Rear bumper is now next. On my car was a large plastic mount which I removed quite easily. On some non M cars there is a large vertical plastic rivet. The manual mentions removing the mounting clips to push the bumper towards the front of the car to unlock the keyhole plastic rivets. After a bid of head scratching I just got a bread knife and carefully cut through them from outside. Saved a lot of time !
You can see where the clips go through here


Then using a hex socket so you do not damage the paint on the bolts remove all the bolts. Get someone to perhaps support the boot lid as you have to remove the boot lid bolts on one side. I managed myself easily enough. The early M has a sensor on the drivers wing on a bracket that you need to remove before removing the wing. Once all bolts are removed the wing should just lift away.
You will now see where the rust has got to on the inner flanges.

On my own car there was overspray on the top part of the where the wing meets the rear roof panel which shows the wing had been repainted on the car.

I also rubbed down the suspension with a wire brush and painted Aquasteel rust converter so the suspension is now a nice black cover. The wing is now at the bodyshop and fitting looks a reversal of the above but I shall update the thread once it arrives. White trim clips are 51471840960 while the two bumper clips are 51128399166.
Unfortunately BMW did not have the clips so off to ebay yet again. £10 for those two small clips. It is possible with a pair of thin nosed pliers to release the two wings on these clips from iside the wing if you don't want to cut through them. Once it was all prepared I placed copper ease in all the bolt holes and ordered some 8mm srew bolts to replace the rusty ones.I had a second hand wing repainted at a cost of £150. When it was ready I started to refit it.

Give yourself plenty of room and place a small tea towel over the rear part of the wing where the boot lid hinge will rest. You will need a little help here while you guide it under the rear light cluster and lift the boot hinge away so you can slot the wing in carefully. At this stage I placed some of the top wing bolts in place then bolted the hinge brackets to the vertical face of the wing after removing the towel. I then placed a few of the door entrance bolts in place. Now you can start adjusting the wing. Start at the top to get the correct width in relation to the boot lid, not height at this stage then do the relation to the door and the sill with the door shut. use your finger and your eyesight to check it is in perfect alignment. It is quite easy to adjust the wing to fit. then adjust the boot hinge to get the boot lid at the correct height. take you time doing this as it must look right. Once I was satisfied I tightened all the bolts not forgetting the lower one near the sill. i then offfered the bumper up to the wing with the new clips and just pushed it into place

The front clip went in easily enough but the rear one would not engage so I just used a pair of pliers from inside the wing to pop it into place
Again I went round the shut angles just to check alignment

Once I was happy everything lined up I sprayed cavity wax, in my case Comma, just about everywhere before refitting the wing liner with new screw bolts.
So I have replaced one badly rusted wing with a rust free freshly painted panel. My next part to do will be the sill on that side. I am working to a budget otherwise I would have done the sill and door at the same time but that will come next. If you are considering painting the rear wing then I think removal is the best way to do it so you can fix any rust on the return flanges
Last edited:

