Project 'Desmond' (2.2)

NabsNabsNabs

Dedicated Member
Supporter
British Zeds
Joined
Mar 22, 2021
Points
44
Location
Epsom
Model of Z
2.2L Sport
Hey All,

Thought I would create a thread to document my progress on my new project for the Summer and beyond!

I'm slightly lame and name all my cars, and my Z will be called Desmond because its a 2.2 and as my gf is a Saffa ( as is Desmond Tutu ) so she has a connection too and isn't left out.

Desmond has 69.5K on the clock, Manual transmission, 2.2L 'Sport' finished in Topaz Blue body / Black manual roof with type 78s.

1617566855052.png


I've got a long list of stuff, many of which I will attempt to do my self so will be a great learning experience. I also live above a small car workshop in West London, so if I really screw things up there is a bit of a safety net, although they will be quite pricey so will be on the look out for a local-ish specialist if people have any recommendations. Generally trying to keep it as OE /OEM as I can, although may make some exceptions i.e. the stereo system.

I don't really have any car tools, so one of the first things I will need are a good set of tools (torque wrench? ) and a proper jack me thinks, along with a manual ( I hear Haynes manuals for 3 series 92-98 ) are a start. I do have a multi-meter and an OBD II diagnostic tool which I got from Euro car parts, but it doesn't seem to work on Desmond...It does work on my other Car, Alan ( a Golf Mk 7 ) - are there something particular about a Z which requires specific compatibility??
Otherwise would be good to hear of any must have tools or bits that will help me along my quest to restore Desmond to the glory he deserves.

Anyway, I've compiled a list of the bits and bobs I have found (so far) that will need work on below. If people know of any of the parts available or pointers that would be of much help!

Mechanical :
  • Oil warning lamp sometimes comes on when in neutral.....although turns back off when driving - Seller tells me she previously had an oil pressure issue which was resolved but her garage couldn't turn off the light. Probably the most major issue of the lot as I know this can be a whole host of costly things so am really hoping its just the sensor.....Any ideas what it could be? FIXED July
  • Front Brake pads/Discs need changing - FIXED May
  • Unknown if water pump has been changed...
  • Vacuum Leak error - FIXED May
  • Vanos Error - FIXED May

Exterior
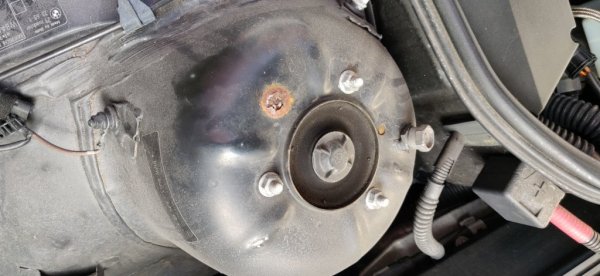
  • Small rust patch appearing on each front suspension strut inside the engine bay, almost as if it has been rubbing against the bonnet lid, looks cosmetic only - Is this a common thing?
  • Clouded front lights - FIXED April
  • Cracked rear left light needing replacement
  • Front right Indicator lens needing replacement ( I have the part with the car ) FIXED May
  • Engine bay insulation missing a couple of clips that attach to the bonnet underside. FIXED April
  • Sills - Very early signs of rust appearing by the edge of front arches. Will look to nip it in the bud before it gets out of control. The seller tells me she had the car undersealed about 5 years ago, MOT history suggests no history of rusting problems underneath, but am yet to see on a ramp myself, although have used an inspection mirror.
  • Alloy refurb - Will refurb at some point
  • Front respray - Will look to get front half done at some point, a few chips and scuffs here and there, otherwise maybe a detail on the rest of the car.
  • Exhaust tips - Might look to see if I can get something chrome over the current stock ones.

Interior:
  • Blank buttons missing for rear section behind handbrake / Stow compartments
  • Gear stick - really tired and doesn't light up so will replace. I am not 100% sure if my car would have come with a chrome one or a black one, but the current one is black with M logo, but the prior owner thought it was aftermarket. Given its such a used and tactile part, I may go brand new OEM or very mint 2nd hand. FIXED June
  • Chrome Headlight switch - Think they seem to have come faulty as standard from factory!
  • Car mats - Need a drivers side matt, maybe will get some OEM look ones with a Z3 or M logo or something...
  • Seats - Driver bolster has a tear and will need attention. I am looking to get the seats tidied up otherwise, but expect one bolster panel will have to be replaced...Is it cheaper to by another set of Sport seats? FIXED June
  • Upgrade interior lights - FIXED April
Infotainment
  • Head Unit - Thinking I may replace this as no bluetooth is really annoying. If I can keep it OEM look as much as possible that would be preferred so maybe will try to find a newer BMW head unit to swap with - Any ideas? Otherwise, is there a way I can keep the original head unit and add an auxillary Bluetooth function? maybe replace the 6 CD changer option to be the bluetooth?
  • 6 CD changer in the boot is stuck and reads error....I may look to fix this if easy ahead of finding a bluetooth solution FIXED April
  • Cassette deck in the head unit is stuck and reads error.... I had tried one of those cassettes to 3mm Jack devices to plug in my phone but managed to jam it..
  • Speaker - Front right footwell speaker blown and rattles FIXED April

Any advice for a newbie would be much appreciated, I am very handy with DIY for a house incl. electrics and plumbing, but never have touched my cars so that needs to change! Otherwise, how would I go about finding the part number refs I see get quoted about??

Cheers,

Billy ( aka Nabs )
 
Last edited:

andyglym

Shiny Dust Caps Make Your Zed Go Faster.
Supporter
British Zeds
Joined
Feb 20, 2015
Points
231
Location
Moresby, West Cumbria, England
Model of Z
2.8 Roadster
Hi mate. The Resource Directory on here has lots of good info as does the Pelican Parts Web page, lots of "How Too" guides.


The above link will give you all the parts you need for your Zed. Youtube is also a great source of info, failing that pop a Q up and one of the Team will have an answer to resolve.

The clouded front lights just need a good polish, plenty of headlight kits and guides about. A decent trolley jack, axel stands, socket sets, plastic pry tools is about it for most routine jobs.
 

andyglym

Shiny Dust Caps Make Your Zed Go Faster.
Supporter
British Zeds
Joined
Feb 20, 2015
Points
231
Location
Moresby, West Cumbria, England
Model of Z
2.8 Roadster
If you do the waterpump, which makes sense, do the belt, pulleys, tensioners and thermostat too. Check the cooling fan for lateral movement, if it moves, think about changing it as they can fail badly when past it.
 

NabsNabsNabs

Dedicated Member
Supporter
British Zeds
Joined
Mar 22, 2021
Points
44
Location
Epsom
Model of Z
2.2L Sport
Exterior
  • Small rust patch appearing on each front suspension strut inside the engine bay, almost as if it has been rubbing against the bonnet lid, looks cosmetic only - Is this a common thing?
So I tried to investigate this further - I jacked Desmond up and took off the front wheels to have a better look.

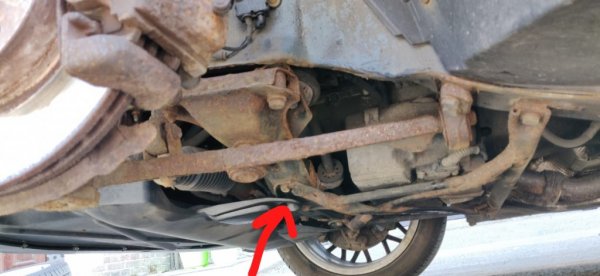
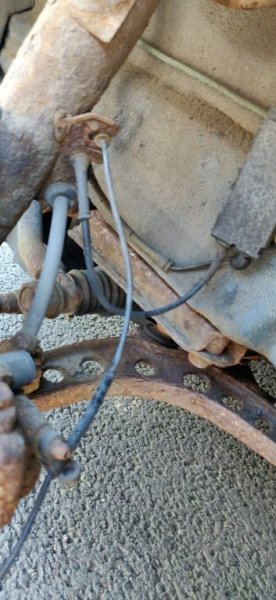
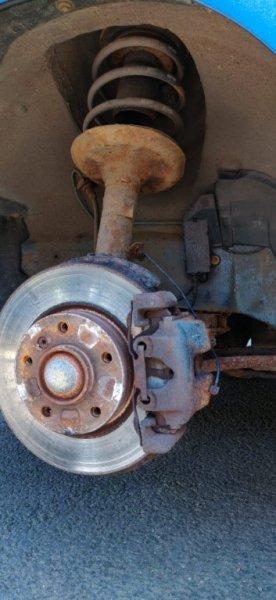
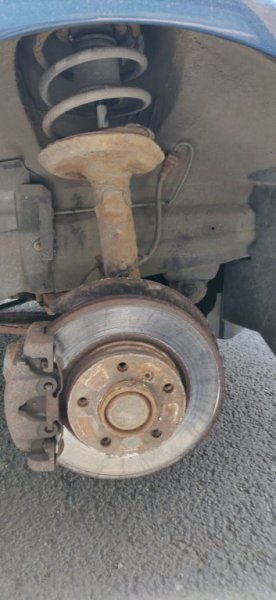
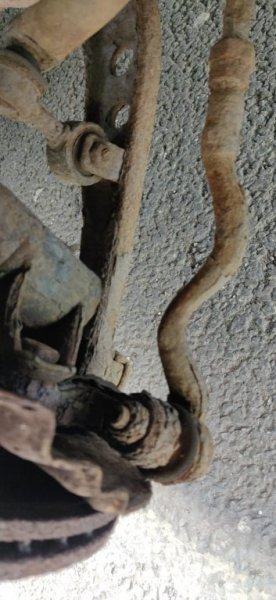
I found quite a lot of rust under the front axle parts. I'm no expert but to me the control arm/wishbones look shot along with the brackets and joints, the front struts also rusting pretty bad too. I think when I change up the brakes I need to also change the protection plates along with.

Otherwise, I was able to get a better sight of the rest of the front under carriage. It was a pretty sorry sight....

Seems to be a bracket that has rusted completely away from its bolt...Is this dangerous to drive with? Car had only passed its MOT 1 month ago with no mention of this....

Would welcome thoughts on what I need to fix, what parts I can do myself and where I'd need to give it to a garage?

WhatsApp Image 2021-04-25 at 20.17.51.jpeg

Left Front:
WhatsApp Image 2021-04-25 at 20.18.47.jpegWhatsApp Image 2021-04-25 at 20.19.10.jpeg

Right front
WhatsApp Image 2021-04-25 at 20.19.44.jpegWhatsApp Image 2021-04-25 at 20.20.12.jpeg

Tower struts - both side similar. The small hole is rusting on both towers

IMG_20210418_170130.jpg
 
Last edited:

Lee

Zorg Guru (V)
British Zeds
M Power
#ZedShed
Joined
Mar 26, 2014
Points
193
Location
Basingstoke
Model of Z
Z4 Coupe 3.0si
We see those rust spots on the turrets quite often.

She looks like a seaside car going by all that corrosion. Nothing on your list looks scary, look forward seeing how you tackle each fault.

P.S boot rack is on the wrong way round.
 

NabsNabsNabs

Dedicated Member
Supporter
British Zeds
Joined
Mar 22, 2021
Points
44
Location
Epsom
Model of Z
2.2L Sport
Looks daunting to me as a car novice! But semi-do able...I imagine lots of seized bolts.

I'll be doing the brakes within the next few weeks or so. But in terms of priority, none of this other stuff was flagged as advisories in recent MOTs - therefore can I wait until suspension, bushes, control arms etc need replacement or should this be a priority to prevent rust taking hold and making things harder to deal?

What's the likely issue/remedy on the tower mounts?

Otherwise, I like the boot rack this way round 😝 helps keep luggage stay on.
 
  • Haha
Reactions: Lee

NabsNabsNabs

Dedicated Member
Supporter
British Zeds
Joined
Mar 22, 2021
Points
44
Location
Epsom
Model of Z
2.2L Sport
Thought I'd post an update as its been a while:

I'd been mostly focusing on fixing some new error codes which had appeared post my original list of work. This included a vacuum leak ( fuel trim bank 1 permissible range exceeded ) and a Gunked up Vanos Solenoid ( Vanos inlet camshaft tight or jammed ) which is documented here:

EML warnings....MAF? VANOS?

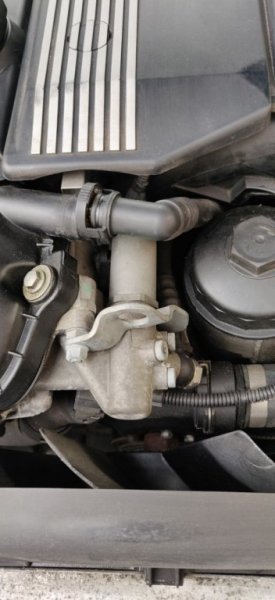
After building my smoke machine , the problems was fixed by replacing a hidden bung around the back of the engine/intake and a spray of cleaning solution into the Solenoid.

Smoke machine.jpg


The first attempt didn't find the leak but 2nd time it worked a treat to locate this pretty perished rubber. 96p later from Sopers the problem is solved:

Old bung.jpgBung.jpg

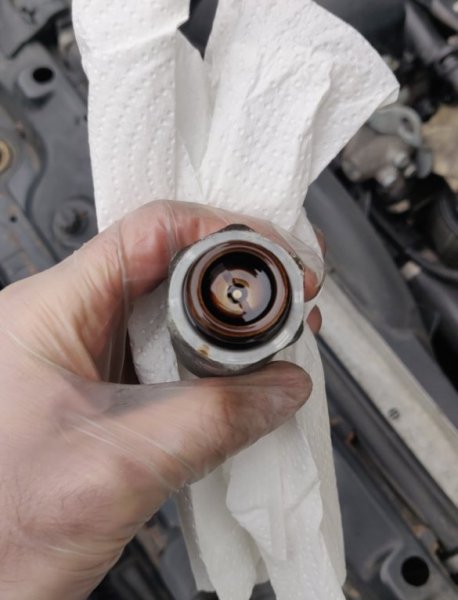
The Solenoid was a bit of a tricky fellow to get loose, but after buying a new adjustable wrench I was able to get it out and a quick clean with Brake cleaner has seemed to resolve the error code:

Solenoid installed.jpgSolenoid before.jpg


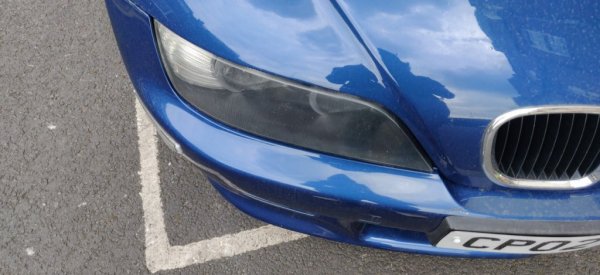
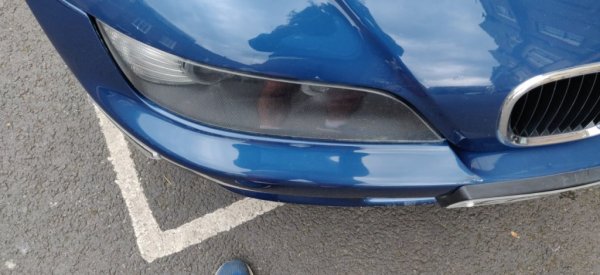
I've also had a go at polishing the front headlamps, I used the Holt Headlight Restorer Kit from ECP ( ~£13 ), which came up quite well. I did each headlight one by one as was a bit uncertain of the results.
If I did it again, I would recommend doing the final polishing stage together on both lights, as the Velcro backing to the polishing pad almost detached from the polishing pad itself when removing it between the final polish on headlight 1, to first sanding on headlight 2. Otherwise be careful as there is only 1 attachment provided in the kit.

To be fair the lights weren't in the worst state, but its definitely worth doing and is noticeable to me. Not hugely obvious in these pics, other than the reflection of my glorious legs way more visible in the after pic

Lights before.jpgLights after.jpg

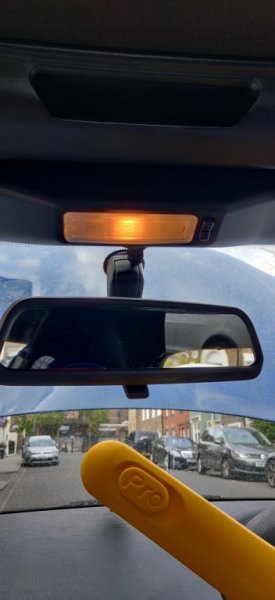
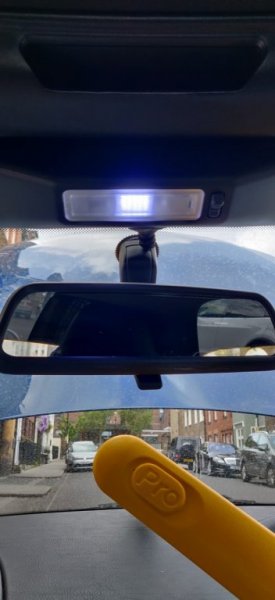
Finally, I replaced the interior light bulb to LED ( £3.65 from ebay - 42mm white bulb ) as I felt the yellow looks so dated these days.


Interior light before.jpgInterior light after.jpg

There will be a few more updates to come over the rest of May & June as I really gather pace with tidying Desmond up!
 

NabsNabsNabs

Dedicated Member
Supporter
British Zeds
Joined
Mar 22, 2021
Points
44
Location
Epsom
Model of Z
2.2L Sport
The last two weeks I've been trying to restore Desmond's interior adding the odd improvement here and there as well.

I went and got:
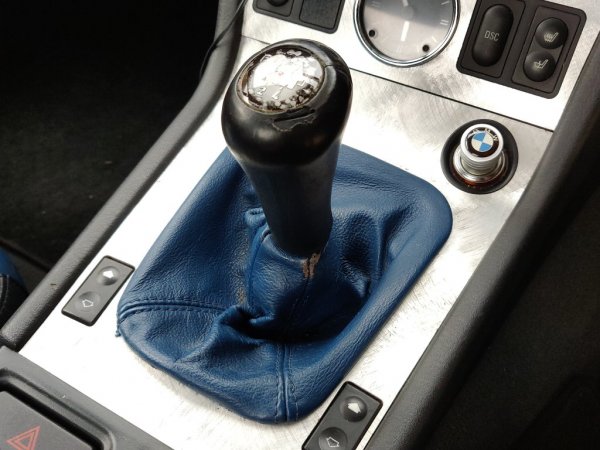
  • A new original BMW Light up gear stick ( ~£114 ) from Sopers Lincoln BMW
  • A used arm rest/cupholder from the forum ( £50 ) - Shoutout to @IainP
  • Topaz Blue Leather colourant kit (£65), Leather repair kit (£20), plus extra black colourant (£12)
  • A couple of used dashboard blanks (£10)
  • Some Speaker material from ebay (£3)
  • Material insulation from hobbycraft (£4.50)
  • Black spray from Halfords ( £8 )
Total: £286.50

Some before and after pics:


BEFORE:
IMG_20210508_175435.jpg

IMG_20210508_175451.jpg
IMG_20210516_125500.jpg

IMG_20210508_175448.jpg

925C417F-842D-4EBE-8AF5-1299A4D4F002.jpeg

DURING:

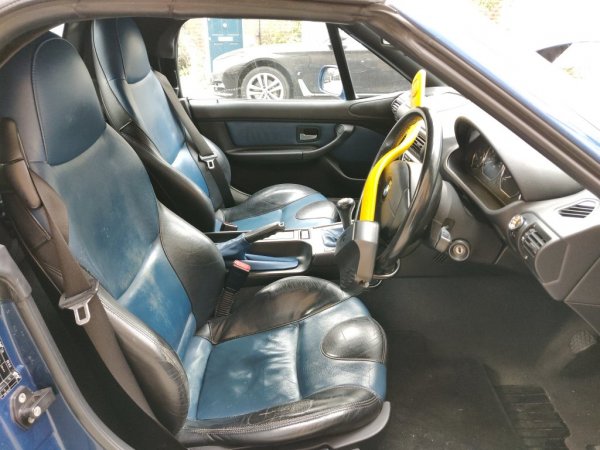
The driver's seat was in a fairly worn state including a tear approx 6cm long hidden under a bit of utility tape. I took out both seats, prepped them up and carefully peeled back the tape to reveal the cut.

Whilst indoors, I unclipped the seat leather so I could repair the foam lower bolsters on both seats, as well as add some additional insulation padding panels where the seat leather felt loose.

One tip which I would recommend is - RAISE THE SEAT BEFORE YOU DISCONNECT. This makes fiddling around with the seat leather clips under the base far easier to access.

IMG_20210530_161850.jpg

IMG_20210527_221126.jpg

In my case, the passenger seat was also stuck in the highest position ( common fault ). The motor was working but I had to fiddle around with the aluminium housing to loosen the jammed mechanism. I added some pics, as whilst there were lots of write-ups on fixing this, but there were limited photos. All you have to do is unscrew the bolt holding the aluminium housing, insert a screwdriver and twist to unjam it.
IMG_20210612_202926.jpg
IMG_20210612_202903.jpg


Painting turned out easier that I expected, I took my time, and did four coats ( 2 by sponge, 2 by spray ) both black then Topaz blue, followed by two finisher coats in Satin/Matt. The tear is fixed and appears as a natural wrinkle if at all.

IMG_20210531_224212.jpg
IMG_20210604_094433.jpg


The speaker grills had been annoying me looking like they were full of dust, turns out that the fabric had perished, so I took these out by prying the metal tabs out, replaced the material and resprayed the grills.

IMG_20210509_124436.jpg


I decided to repaint the arm rest leather in blue to match the seats as well and to give a dash of colour as well.

I also added some insulation material into the door card leather where this looked a bit flat.


AFTER:


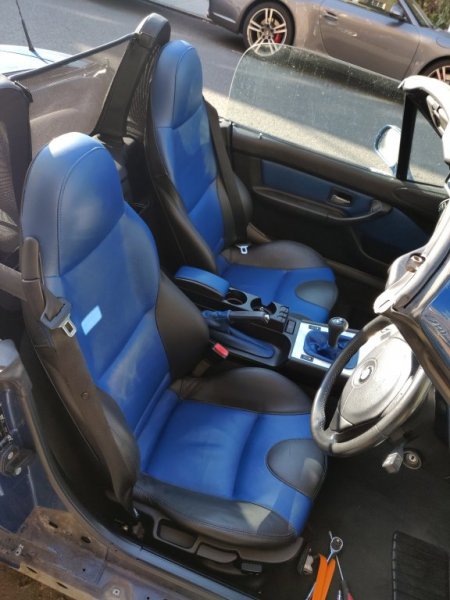
I repainted the door cards, seats and gear stick gator - Cant be happier with the results. The interior looks like new, and the tear is not really noticeable at all unless you knew it was there. The blue is meant to be Topaz blue as per the spec of my car. It looks more vibrant than it used to, not sure if its not a perfect match, or the colour has just dulled over time. Either way I'm very happy. The Handbrake lever is still original and doesnt look obviously different.

IMG_20210613_181628.jpg

IMG_20210613_181604.jpg
IMG_20210613_181614.jpg


Putting the seats back, I also noticed another common fault, that water had been pooling under the passenger seat......One extra thing to add to the list of work. For the time being I drained the water out by wringing the sponge into a little food tub and moping up the excess with a towel. Fortunately the 28 degree heat made this easier to dry out.
IMG_20210612_204608.jpg
 

Attachments

t-tony

Zorg Expert (II)
Supporter
British Zeds
#ZedShed
Joined
Dec 31, 2013
Points
226
Location
Torksey Lock,Lincoln, England
Model of Z
E89 Z4 23i Auto
Cracking job, you should be well pleased.

Tony.
 

NabsNabsNabs

Dedicated Member
Supporter
British Zeds
Joined
Mar 22, 2021
Points
44
Location
Epsom
Model of Z
2.2L Sport
Cracking job, you should be well pleased.

Tony.
So pleased with how it turned out. I spent several days on it and was immensely satisfying. I took a gamble on the arm rest given it was changing from black to blue but it came out really well and glad I did as I like the contrast.
For perfection, there is a bit of stitching missing on the upper bolster....At some point, I will try to open that up and add some thread in. Will have a look at the handbrake leather as well sometime soon.
If I was doing it again, I wouldn't need as much paint. I got the bigger size leather colourant kit ( recommended for two seats ) but given I had split colour seats I could have saved a few quid with the small one.
 

NabsNabsNabs

Dedicated Member
Supporter
British Zeds
Joined
Mar 22, 2021
Points
44
Location
Epsom
Model of Z
2.2L Sport
It's been quite a while since my last post....Lots of things have conspired against me....Moving house, changing job twice, getting a new puppy and getting married.

The house renovations have been taking up most of my time, but the good news is Desmond has a nice new (dry) home, the bad news, is this guy also has found a nice home over the winter :mad: in my bonnet insulation.

A skip infront of the garage has preventing me use the car for the past 5 months, but now its gone, I'm looking for advice on what to check that could be prone to mouse damage.....and sitting there for a while.

1683542549231.png
 
Top