DinaColada's 1998 z3

DinaColada

Dedicated Member
Canadian Zeds
Joined
Jul 11, 2017
Points
35
Location
Toronto
Model of Z
Z3
Hello Zroadster, my name is Dina. It's my first time posting here, so I apologize in advance if the formatting of this post is wrong... But I'm glad to be part of the community!

Around a year ago and a half ago, my Fiancé and I wanted a fun car for summer and he came across an ad for a z3. My Fiancé knew next to nothing about cars and I knew even less! When he bought the z3, we took a major risk... Neither of us knew how to drive a manual car at the time and we didn't even inspect it! My Fiance had good faith in the seller since he worked as an RCMP and struck him as an honest, kind person. Fortunately for us, it ended up being a great car; no mechanical issues and completely rust and dent free. We were very lucky.

Fast forward a year and a half, we've come from a stock z3, to a car that looks, performs and sounds much better now! There's still work to do of course, but we're happy with what we've done so far. We focused a lot on the interior, as we felt the exterior of the z3 has aged really well, while the interior still looks like something from the 90's. While I can appreciate the interior's 90's charm, we wanted something more modern.

As for what's left to do / fix:
  1. Removing the factory analog speedometer and tachometer and mounting a nexus 7 tablet and using the torque app for a digital speedometer and tachometer.
  2. Adding aluminum surround to sunvisor mirrors. - Scrapped
  3. Stitching the door panels white so it matches the rest of the interior (will also remove the wrinkles from the door panels during this time) - DONE
  4. Wrapping the roll hoops in leather with white stitching to match the rest of the interior. We have the AC schnitzer roll hoops and we're trying to decide if the white stitched roll bars or the chrome ones will look better. I'm leaning towards leather, Fiancé likes the chrome!
  5. Wrapping the LeatherZ armrest in leather with white stitching to match the rest of the interior.
  6. Painting the air vents gloss black to match the center console.
  7. Blue LED on the door panel speakers and subwoofer enclosure to match the kick panel lighting.
  8. Converting the LED colors on the instrument cluster and the window buttons from amber to blue to match the rest of the car's lighting.
  9. Install the Eisenmann performance exhaust
  10. Tinting the windows - DONE
  11. Fixing the protruding interior door handle frames - DONE
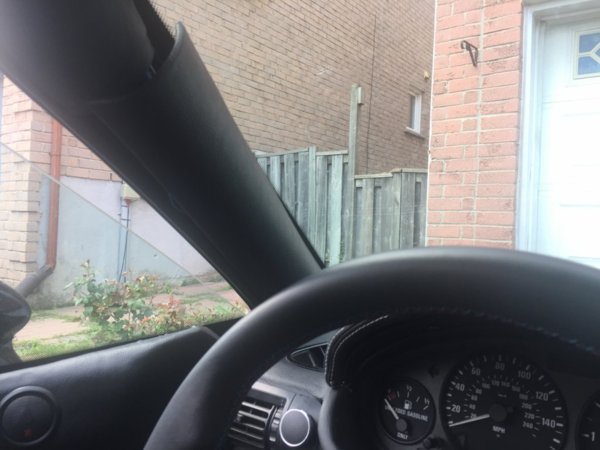
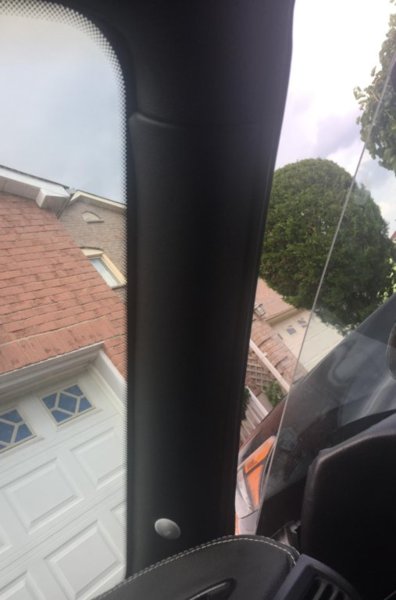
  12. Fixing the protruding driver's side A pillar - DONE
  13. Aligning the center console - DONE
  14. Wrapping the roll hoop plastic surrounds in leather
  15. Replace the current euro steering wheel with the e46 steering wheel with white stitching - DONE
  16. Engrave dead pedal. Everything but the dead pedal has the ///M logo. This was intentional as we want to engrave "BMW Z3" on there!
  17. Install Euro steering panel. - DONE
  18. Paint calipers blue or white.
  19. Repaint entire car with black, with holographic flakes.
  20. Gap in cluster. - DONE
  21. Paint chips and smoothing out centre console
  22. Glovebox alignment. - DONE
  23. Frosted BMW emblem in the trunk's amp display.
  24. Mechanical issues (Dome light flickering, dead LED in switch panel and a few other small issues) - DONE
  25. Install seatbelt guides
  26. Install Southernboy's gear trim
I'm very excited to know what you guys think! Looking forward to sharing the progress of the car with everyone!

Dina
 
Last edited:

DinaColada

Dedicated Member
Canadian Zeds
Joined
Jul 11, 2017
Points
35
Location
Toronto
Model of Z
Z3
IMG_0335.JPG
IMG_0336.JPG
IMG_0339.JPG
IMG_0354.JPG
IMG_0356.JPG
IMG_0358.JPG
IMG_0252.JPG


Here are photos of where we're at overall. The photos I took weren't too great, so I'll definitely update the post tomorrow with better photos of the interior and exterior. I'll also include some progress photos we took!
 
Last edited:

Antm72

Zorg Expert (II)
Supporter
British Zeds
Joined
May 4, 2015
Points
246
Location
South Yorkshire
Model of Z
2.8
Hi Dina and welcome from me in South Yorkshire.
A lot if work has gone in to that interior looking forward to your photo's and progress as you complete your vision.:thumbsup:
 

andyglym

Shiny Dust Caps Make Your Zed Go Faster.
Supporter
British Zeds
Joined
Feb 20, 2015
Points
231
Location
Moresby, West Cumbria, England
Model of Z
2.8 Roadster
:welcome:to the forum from West Cumbria, England. Nice comprehensive intro :thumbsup:
 

Slam

Zorg Guru (IV)
Supporter
British Zeds
Joined
May 24, 2017
Points
168
Location
North Yorkshire
Model of Z
Zedless. Mini GP 1379
Hi Dina and welcome from London, smart looking interior
 

Shelly

Zorg Expert (I)
Supporter
British Zeds
East Anglian Crew
Joined
Jul 9, 2013
Points
201
Location
Norfolk
Model of Z
Z4 2.0 20i M Sport sDrive
:welcome: Hi and welcome from me too :coolsteer)
:highfive: A great thread to read :slaphead:
 

Nodzed

Zorg Expert (II)
Supporter
British Zeds
M Power
Joined
Feb 18, 2016
Points
231
Location
Forest of Dean, Gloucestershire, England
Model of Z
Z3M Imola and Z4 (e89)
Hi & Welcome :welcome: .... that's some serious modding :thumbsup:
 

DavidM

Zorg Expert (I)
Supporter
British Zeds
Joined
Apr 25, 2013
Points
208
Location
Ireland
Model of Z
2.8 Roadster
Welcome from Ireland! Interesting interior modifications so far and those you list for future upgrade - good luck!
 

Zeti

Zorg Guru (IV)
Supporter
Romanian Zeds
The M44 Massive
Joined
Oct 9, 2013
Points
167
Location
Bucuresti/ Romania
Model of Z
Z3 roadster 1.9
Wow, what a space shuttle!
Welcome Dina and congratulations for the work done so far!
Dan
 

t-tony

Zorg Expert (II)
Supporter
British Zeds
#ZedShed
Joined
Dec 31, 2013
Points
226
Location
Torksey Lock,Lincoln, England
Model of Z
E89 Z4 23i Auto
Hi Dina, amazing transformation to the interior, safe to say you two are seriously hooked on the Z.:thumbsup: Please keep us posted on the upgrades.
Welcome to our forum from near Lincoln UK.:)

Tony.
 

bessieblue

Zorg Guru (II)
East Anglian Crew
Joined
Jan 13, 2012
Points
120
Location
chelmsford
Model of Z
2.2
Hi Dina, very nice work, i've had my interior changed to a very light cream about 2 years ago. welcome to the club
 

Mint

Zorg Expert (I)
Supporter
British Zeds
East Anglian Crew
Joined
Sep 23, 2012
Points
222
Location
Stafford
Model of Z
2.2 & 3.0 Sport
Hi @DinaColada,:welcome: to the forum from me too in Staffordshire, UK. Great mods you've done there, keep em coming:thumbsup:
 

DinaColada

Dedicated Member
Canadian Zeds
Joined
Jul 11, 2017
Points
35
Location
Toronto
Model of Z
Z3
Hi everyone, I took a lot more photos of the interior! Starting off with the center console. It was cut out to fit a standard size navigation unit. The HVAC knobs were moved down and the cables were extended. Beneath the HVAC knobs is an LED switch panel which control things like the fog lights, convertible top, kick panel lights, defroster, etc. The console was finished in gloss black and the side panels were covered in black leather and white stitching. It's still a work in progress, as the console is protruding and not aligned properly and I ended up scratching the paint a little bit while putting the console back in. It also definitely needs some cleaning! Fortunately, everything is an easy fix :)

18011782_285603365228956_3242940723569360896_n.jpg
18161351_1175192222591427_2415597191906197504_n.jpg
18160610_1963284240573696_4757479954600427520_n.jpg
IMG_0257.JPG
IMG_0295.JPG
IMG_0305.JPG
IMG_0306.JPG
IMG-0362.JPG


Also installed a backup camera:
IMG_0316.JPG
IMG_0319.JPG
 
Last edited:

DinaColada

Dedicated Member
Canadian Zeds
Joined
Jul 11, 2017
Points
35
Location
Toronto
Model of Z
Z3
My Fiance and I really liked the Aston Martin db9's interior and took inspiration from it! So a lot of the interior has black leather with white stitching.

A pillars: The driver's side has a protruding a pillar which needs to be fixed. On the A pillars, tiny holes were drilled to install the blind spot detection system we purchased.
IMG_0288.JPG IMG_0289.JPG

Dash leather: The entire dash was covered in leather with white stitching. The only thing that remains to cover in leather for the dash, is the glovebox. This is still a work in progress, the bits of leather sticking out and the gap are intentional as I plan on removing the the dash again to wire a digital speedometer. They'll be gone once it's installed!

19436403_1353482721366357_2986492345198837760_n.jpg
IMG_0251.JPG
IMG_0254.JPG
IMG_0256.JPG
IMG_0258.JPG
IMG_0260.JPG


The e-brake handle and shift knob leather also have white stitching:

IMG_0210.JPG
IMG_0209.JPG


The interior windshield trim was also covered in leather:
IMG_0235 - Copy.JPG
IMG_0236 - Copy.JPG
 
Last edited:

DinaColada

Dedicated Member
Canadian Zeds
Joined
Jul 11, 2017
Points
35
Location
Toronto
Model of Z
Z3
The seats have ///M embroidery and of course, black leather with white stitching. The seat belt catches were also very faded, so they were restored to red. I think they really make a huge difference in the overall look of the interior! As you'll see below, the lateral panels were also covered in leather with white stitching!

The seats before, after taking off the leather::
19761719_312155879230692_7036626576678584320_n.jpg


After:
IMG_0252.JPG
IMG_0311.JPG
IMG_0312.JPG
 
Last edited:

DinaColada

Dedicated Member
Canadian Zeds
Joined
Jul 11, 2017
Points
35
Location
Toronto
Model of Z
Z3
The new audio system took a looong time to "finish". The door panels in particular took a lot of time. They're about 80% done! They look very wrinkly, but this is temporary. I'm planning to remove the door panels, and stitch them white to match the rest of the interior. After that, all the loose bits of leather and wrinkles will be gone and it'll look a lot cleaner and shaped.

18380257_303696086729857_1188299863188570112_n.jpg
18723540_1892056427749397_933001118714167296_n.jpg
20394054_306914409719285_4913541340807036928_n.jpg
IMG_0244.JPG
IMG_0248.JPG


The sub enclosure turned out really well in my opinion! Just needs a bit of touch ups with paint, but it's already looking really great!

18094876_1411214468921869_8099443700389642240_n.jpg
IMG_0215.JPG
IMG_0216.JPG
IMG_0217.JPG


The amplifier install also turned out really well! It's displayed on a plexiglass false floor with blue LEDs, where it sits next to an optima yellow top battery.

IMG_0262.JPG
IMG_0264.JPG
IMG_0272.JPG
 
Last edited:
Top