- Joined
- Apr 27, 2012
- Points
- 100
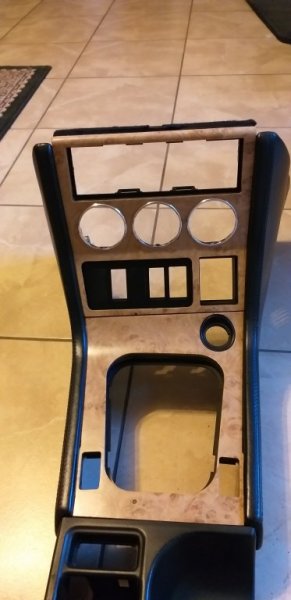
After 20 + years of the hot South African weather, the original coating on the wood veneer has fine cracks and some chips. I have decided to tackle this issue and restore the parts.
Once I decided to do this, I also decided I would prefer a lighter wood veneer than the Walnut brown OEM veneer.
I found a veneer seller on eBay called "Thin wood and old tools" ( https://www.ebay.co.uk/usr/thinwoodandoldtools?_trksid=p2057872.m2749.l2754 )
I bought two 8" x 12" sheets of Oak burl veneer and had them shipped over.
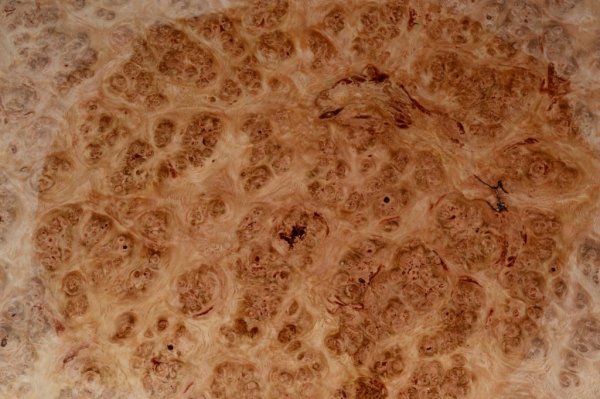
Next was to remove the OEM parts and detach the wood trim from the plastic sub frame. This was really easy, since it is just stapled and contact glued.
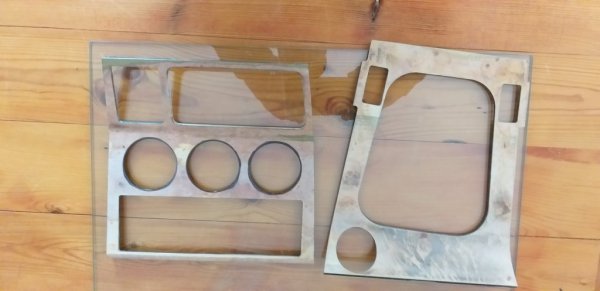
The next step was to remove all the old coating on the original veneer. This was a slow process since I had to ensure I maintained all the curves and angles of the parts. So beginning with 120 grit wet sanding paper, I began removing the urethane coating and finally finished off with 400 grit when I got down to the original walnut veneer.
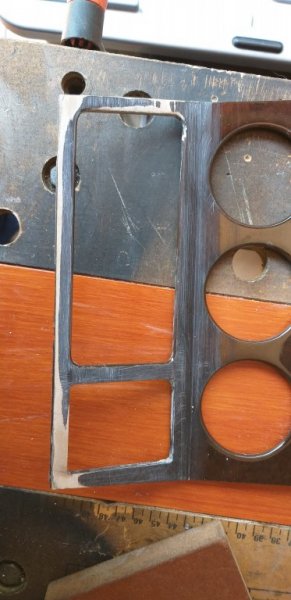
Both sections stripped and sanded with 400grit.......
I then started looking for a professional who could apply the new veneer. After looking through endless online companies, I found one guy in Durban -about 1000 kms away from me who has the expertise and will do the job.
Having found my man, I then looked at what he would face in actually doing the job, and decided to make some moulds he could use to clamp everything after applying the glue...
So using 20 and 30 mm thick MDF I set about making the necessary mould parts..
The top section of the wood trim is fairly easy as it has only 1 angle and a 10mm radius curve where it fits under the top dash air vent. The 10mm radius was easily machined with a router and 10mm cutter.
The lower section of the console trin is more complicated since it has a large radius curve at the end where the ciggy lighter is located.
Bear in mind, moulds have to be made for both sides of each console part...
The upper console part clamping moulds.....
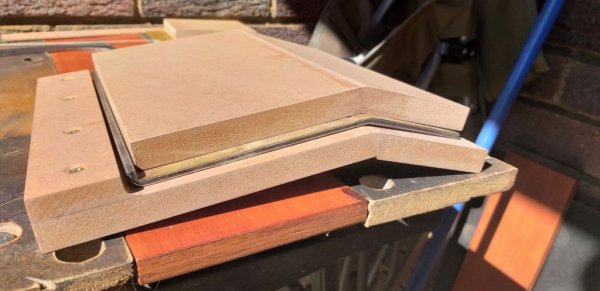
And the lower clamping moulds.....
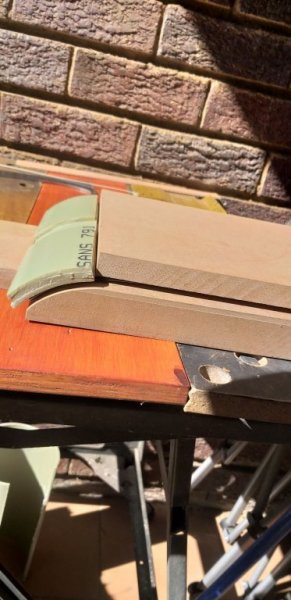
As you see I used some plastic which I cut from a section of drain pipe I had laying around. It was the perfect fit, so I simply added layers to give it sufficient rigidity to sustain clamping.
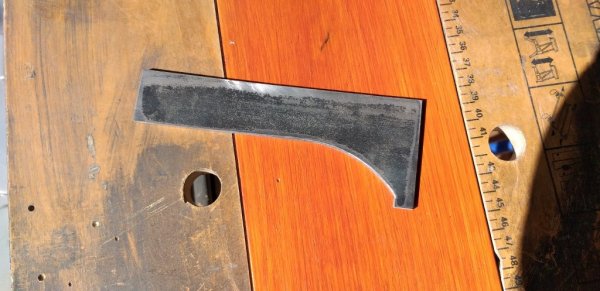
I had a special tool laser cut to ensure I had the perfect inner curve for the lower section mould. I used this to scrape the MDF until it was perfectly shaped to the curve of the tool and hence the console part.
So all ready for the the veneering guy to work his magic...
I'll add to this thread when I get the finished parts back from him early next month... I have a mate travelling to Durban on the 28th Sept. He will take the parts etc with him and deliver to the veneering guy... More to come..
Once I decided to do this, I also decided I would prefer a lighter wood veneer than the Walnut brown OEM veneer.
I found a veneer seller on eBay called "Thin wood and old tools" ( https://www.ebay.co.uk/usr/thinwoodandoldtools?_trksid=p2057872.m2749.l2754 )
I bought two 8" x 12" sheets of Oak burl veneer and had them shipped over.

Next was to remove the OEM parts and detach the wood trim from the plastic sub frame. This was really easy, since it is just stapled and contact glued.
The next step was to remove all the old coating on the original veneer. This was a slow process since I had to ensure I maintained all the curves and angles of the parts. So beginning with 120 grit wet sanding paper, I began removing the urethane coating and finally finished off with 400 grit when I got down to the original walnut veneer.

Both sections stripped and sanded with 400grit.......

I then started looking for a professional who could apply the new veneer. After looking through endless online companies, I found one guy in Durban -about 1000 kms away from me who has the expertise and will do the job.
Having found my man, I then looked at what he would face in actually doing the job, and decided to make some moulds he could use to clamp everything after applying the glue...
So using 20 and 30 mm thick MDF I set about making the necessary mould parts..
The top section of the wood trim is fairly easy as it has only 1 angle and a 10mm radius curve where it fits under the top dash air vent. The 10mm radius was easily machined with a router and 10mm cutter.
The lower section of the console trin is more complicated since it has a large radius curve at the end where the ciggy lighter is located.
Bear in mind, moulds have to be made for both sides of each console part...
The upper console part clamping moulds.....

And the lower clamping moulds.....

As you see I used some plastic which I cut from a section of drain pipe I had laying around. It was the perfect fit, so I simply added layers to give it sufficient rigidity to sustain clamping.
I had a special tool laser cut to ensure I had the perfect inner curve for the lower section mould. I used this to scrape the MDF until it was perfectly shaped to the curve of the tool and hence the console part.

So all ready for the the veneering guy to work his magic...
I'll add to this thread when I get the finished parts back from him early next month... I have a mate travelling to Durban on the 28th Sept. He will take the parts etc with him and deliver to the veneering guy... More to come..
Attachments
-
158.7 KB Views: 19
-
61.7 KB Views: 21
-
64.8 KB Views: 24
-
92.6 KB Views: 18
-
66 KB Views: 23
-
125 KB Views: 17


