A Dutch Z4

Maybe its also interesting to show what things went wrong with my car.... (and how I fixed them...)

I once broke the rear center diff bolt:
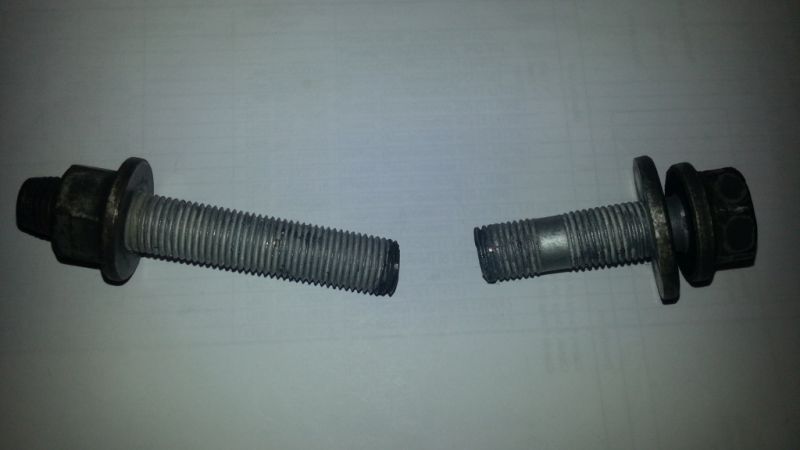
1bout.jpg


That gives some very loud bangs in the rear, as the diff is then banging against the subframe.

This was probably the result of a combination between having a lot of power and a polyurethane bushing with faulty design.
The poly bushing I used in this spot was from a company called PSB, and was available before powerflex or strongflex had a product for this spot. The PSB bushing had a very thin steel inner core and around that a very hard plastic core:
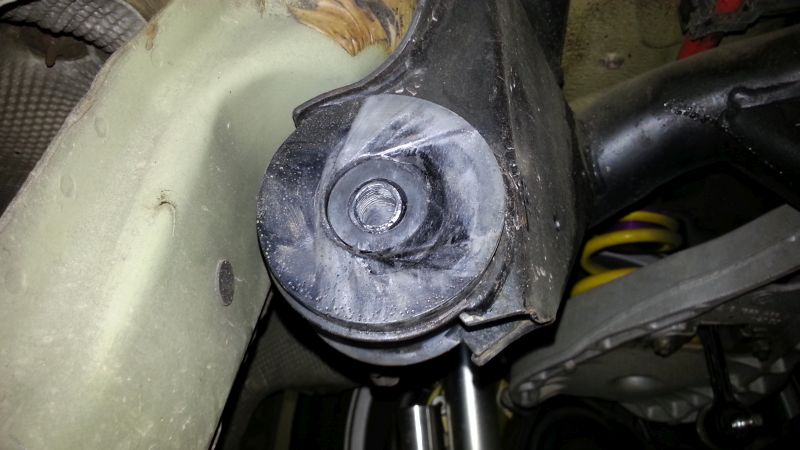
3bout.jpg


That core probably couldnt hold the tightening torque on the bolt resulting in possible flexing, resulting in metal fatigue.

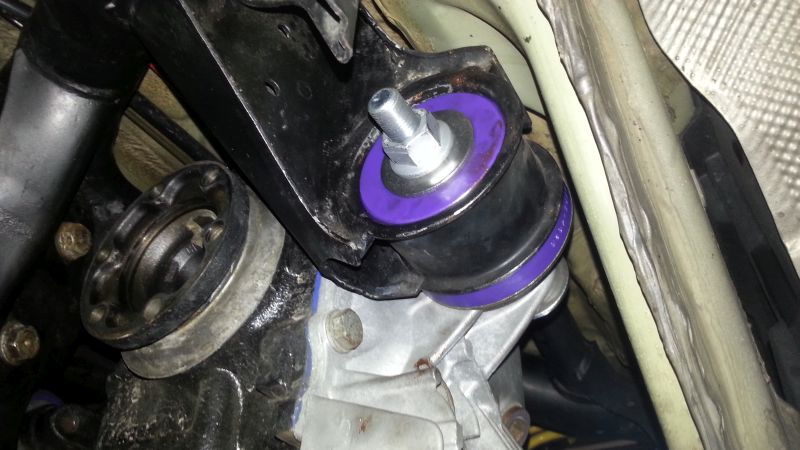
The latter powerflex bushing I installed had a much thicker metal inner core:
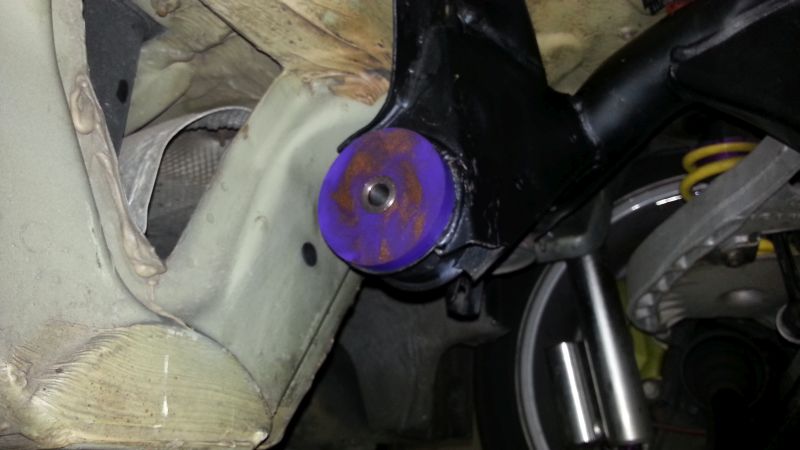
5bout.jpg


I also upgraded the stock bolt.
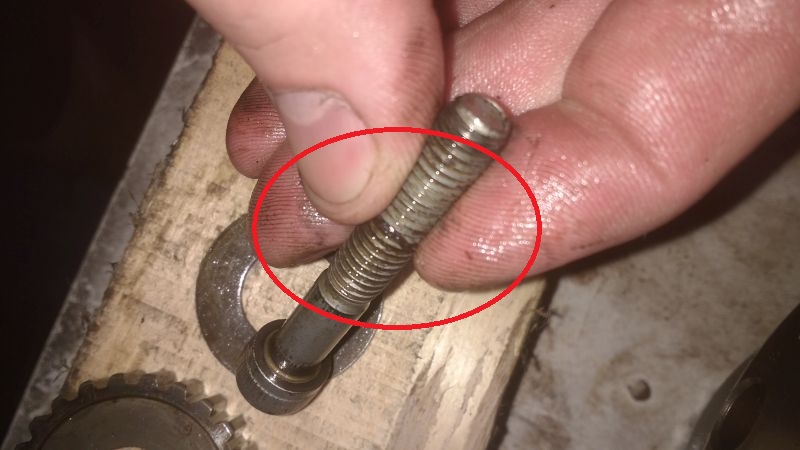
The stock bolt is completely threaded. I got a bolt from a bmw 550i that had partial threads (where there are no threads, the bolt is stronger), but I also got a generic 10.9 DIN931 bolt, that even had a thicker non threaded part. The nett difference in thicknes (area) on the non threaded part compared to the stock bolt is about 20% , so that's quite considerable:
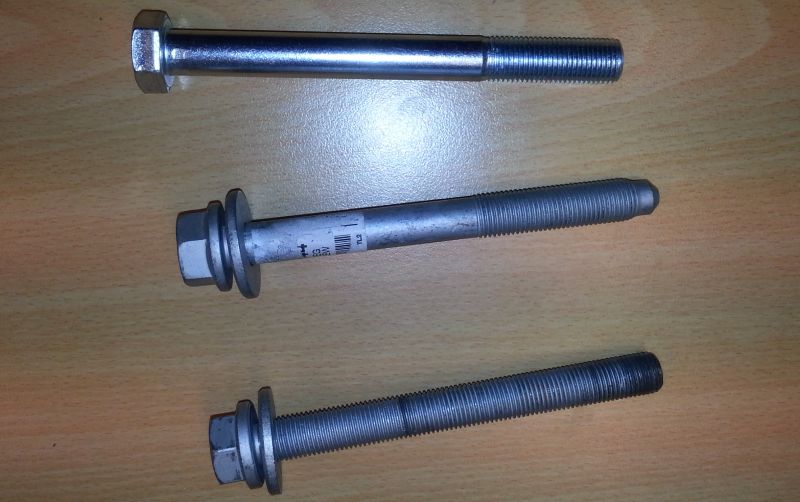
2bout.jpg


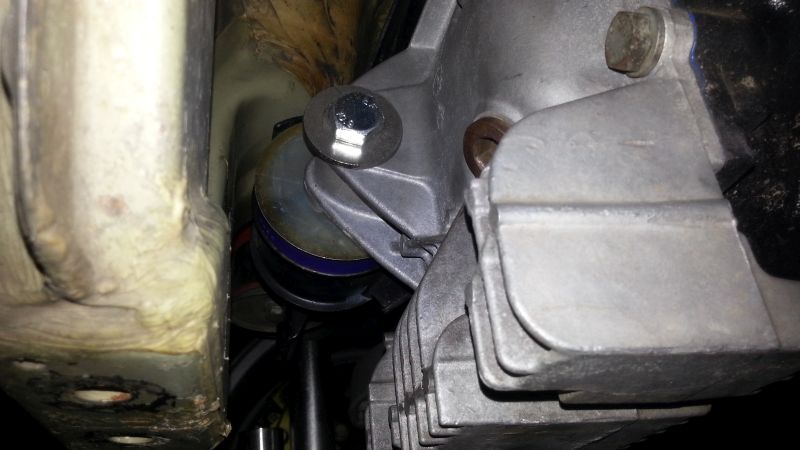
By then the front diff bushings were also available as polyurethane:
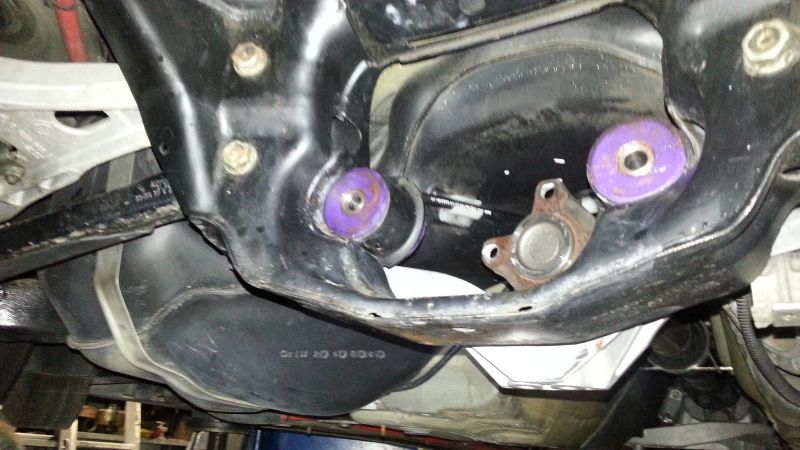
4bout.jpg


6bout.jpg


7bout.jpg
 
I also had a failing starter motor.

These motors are notorious for failing after about 10 years. I already had cleaned mine once, and there was much carbon deposit (so brush wear).
This happened exactly 1 year ago, during last years limborit. Some of you may remember, I was that car that had to be push started all weekend :D :whistle: (obviously that caused a lot of laughs with the other attendants....)
Lets hope that this sunday I dont have any unexpected mishaps....

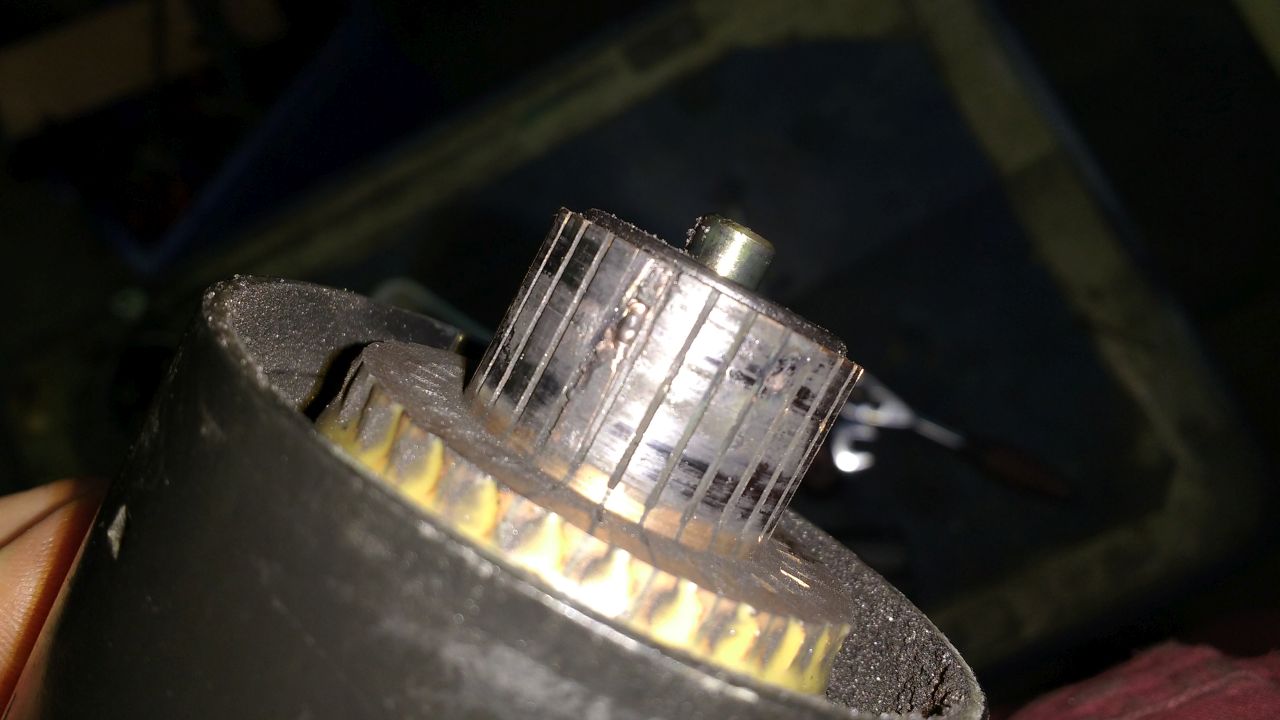
When the brushes failed it also burned one of the poles on the communitator:

collector.jpg


So I bought another 2nd had starter for 20 quid or so on ebay (I wanted exactly the same model, so I didnt get a refurb: most refurbs can be different models: a lot of different starters fit)
You can see the original brushes of the replacement starter also showed a lot of wear as expected:
borstelsvervang.jpg


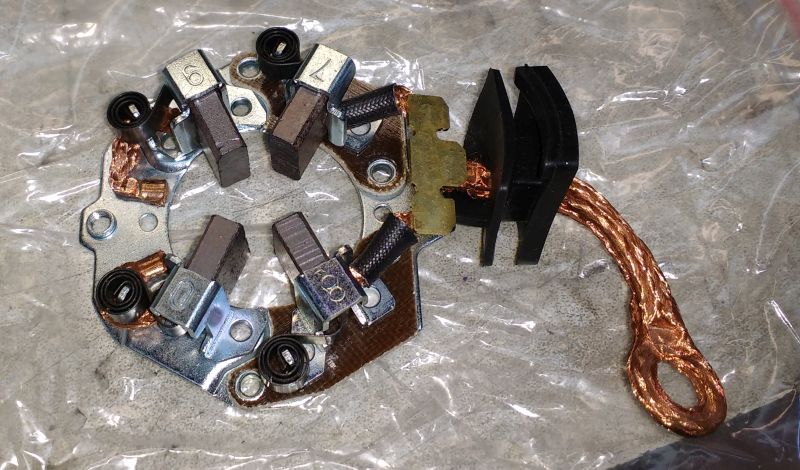
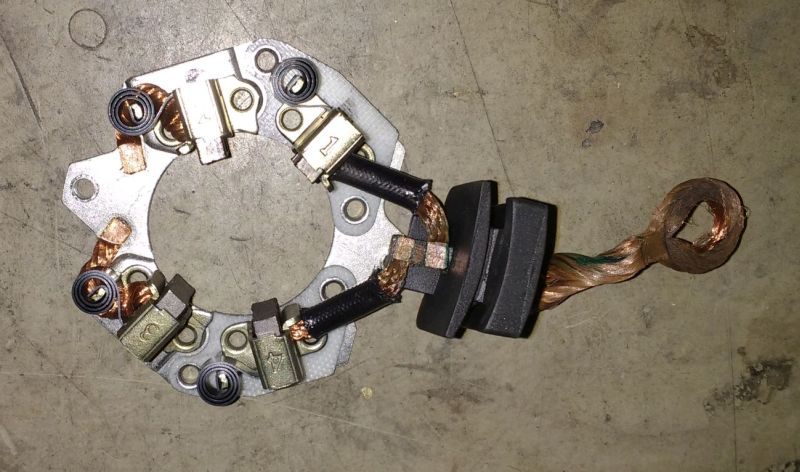
I cleaned that starter and bought a new brush assembly on aliexpress.
This is the brush assembly you need for this starter:
https://nl.aliexpress.com/item/Elec...525-530-Starter-Motor-54-53mm/32645223102.htm

new brushes:
nieuweborstels.jpg


I recommend everyone to either check/replace his starter after 10 years or replace the brushes. The moment your starter goes (and it will go) is always inconvenient and unexpected (I also had no warningsigns or so)
 
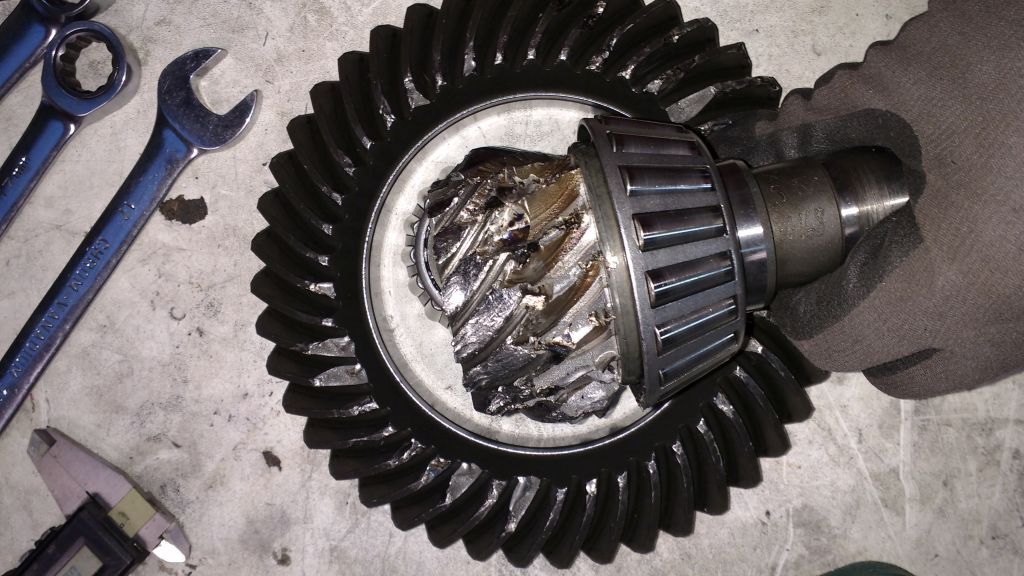
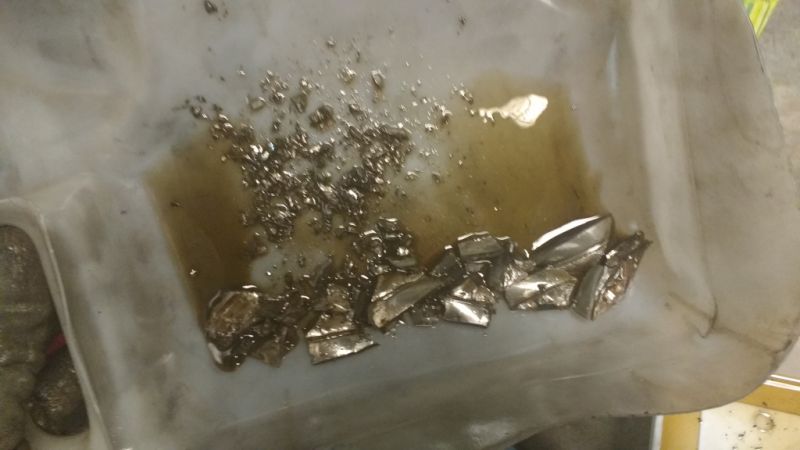
I also broke my differential pretty radically:

pinion.jpg


tanden.jpg


The cause for this is as following.

I have a Quaife LSD.

At a point it started to make some noise. At this time the diff had been in the car for over 5 years.. At the time I thought it was maybe the rear tyres (cupping of the profile). There was a slight whine, but it was not apparant that it came from the diff. At one point it seemed to progress slightly, so I went to investigate.
With an engine stethoscope, I could hear some noises in the diff (but not the apparant whine).

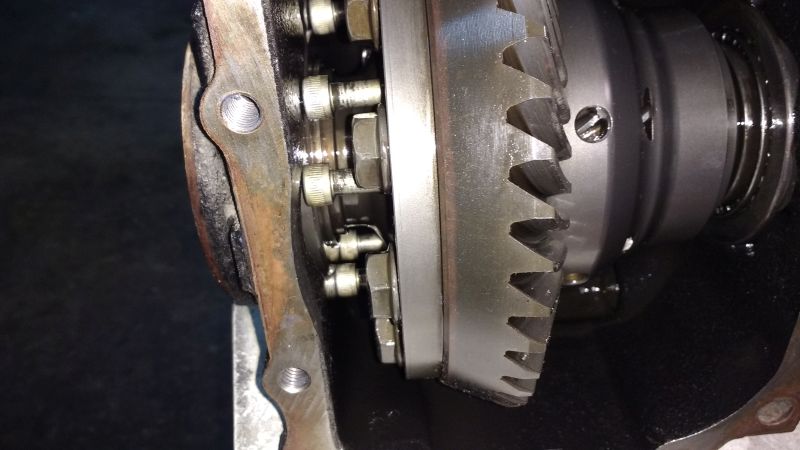
I opened up the diff and saw that a lot of bolts came loose!:

boutenlos.jpg


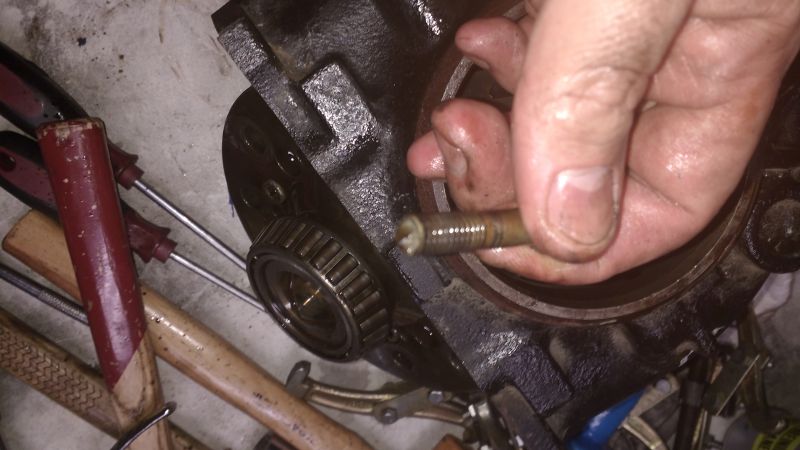
Some had come loose, some had broken (all the broken ones were on 1 side next to eachother):
boutgebroken.jpg


At the installation I used loctite; it was still visible on the bolts:
oudeloctite.jpg


Some short technical info on the diff:
The diff basically consists of 2 half casings (in which the helx gears sit). Those 2 halves are bolted together with 11 bolts.
To get the diff into the outer diff casing, you have to first insert both halves into the outer casing and then bolt them together.
Either one of following scenario's could have happened: Some bolts started breaking, that lost the tightening tension on both halves and resulted in the other ones to come loose, or a lot of bolts came loose at 1 side, and the last few on the other side broke.
It's a strange event. Especially as this happened after 5 years and not sooner...

At this point the diff still wasnt broken, only some bolts were.
I ordered some new bolts, and during install I did notice that the gears at one point were a little bit binding. Not heavily, you could just rotate it by hand, but there was on this point insufficient backlash.
But this was right before my vacation, and of course I wanted to go on vacation with my Z...
So I thought, the diff would just wear a little bit faster, and after my vacation I could look for a donor diff to replace. I just needed the gears.

Alas, it wasnt so and the diff went out with a bang.
Luckily I had a very good insurance with replacement rental car and my car transported back at no cost (my travel insurance premium is paid for the next 100 years....)

So when the car came back, I dismanteled the diff, and as you see in the pictures above, the pinion and crowngear were completely destroyed.
However the Quaife LSD core still looked fine.
There were only a few tiny scratches on its casing:
krasjes.jpg


But in the original case (where the gears exploded), it had some play side to side:
spelingaxiaal.jpg
 
Last edited:
I got 2 replacement diffs (both from the UK btw, it seems they are abundand and cheap there).
I bought the one on ebay for 80 quid, and before I could go and get it, I saw another one also in that region, and gave a 60 quid bid and got that too....
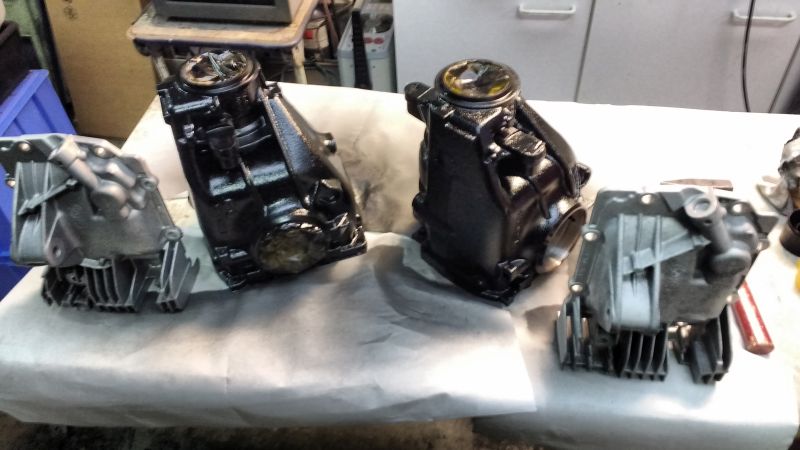
I stripped both cases, and cleaned/painted/beadblasted them:
nieuwediffs.jpg


With 2 diffs I could also choose which gearset had the best backlash gear tolerance.


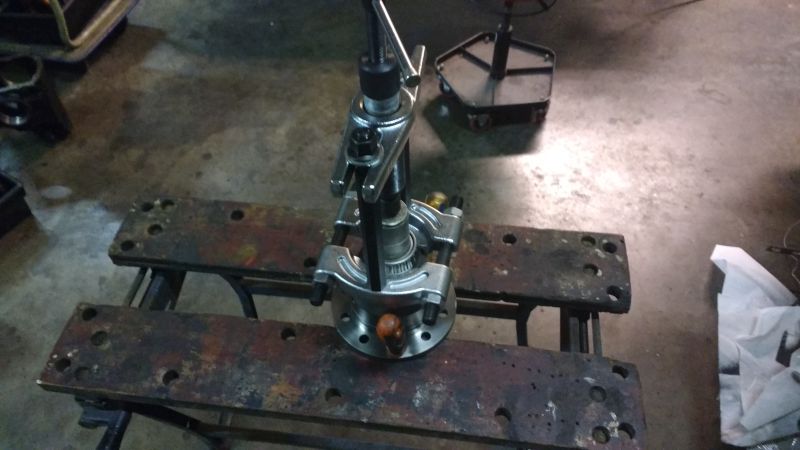
Got the bearings off:

lagertrekker.jpg


And did some measurements:

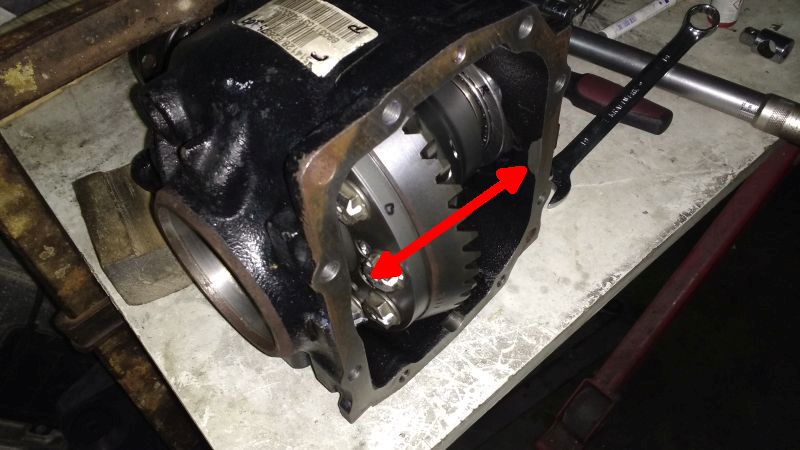
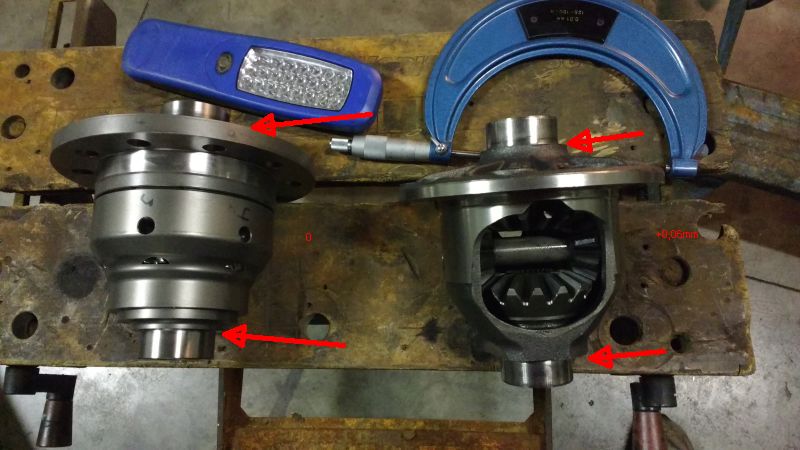
oudvsnieuw.jpg


One diff was slightly narrower than the quaife.
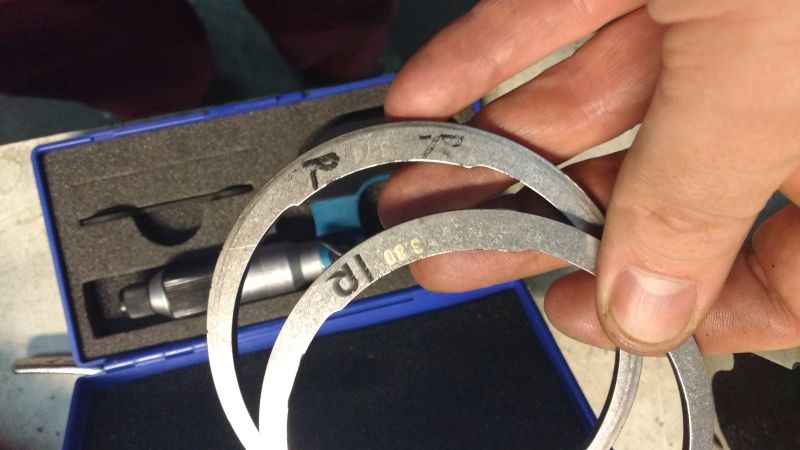
The exact tolerance is not known on these diffs, but you can shim them out with the large C clips.
Different sizes are printed on them:

seegerringen.jpg


You shim them out mostly to get sufficient bearing pretention.

After installing the diff itself in the casing (without the gears), I started measuring to see if my Quaife diff (the most expensive part) was still ok, and not bent:

This is the measurement of the crowngear flange wobble:
View: https://youtu.be/fq_e23VwPXw


The wobble is about +/- 0,01mm, which I guess is still good.

This is the measurement of the axial wobble, and it is also about +/- 0,01mm:

View: https://youtu.be/q1i7QNZGBK0


At this time I expected that my quaife LSD was probably OK and not bent like a hoople....

So from this point I assembled the complete diff; making obviously sure that all bolts were very clean (and the boltholes) and properly loctited to ensure they wont come loose again.
After that measuring the backlash, and it was 0,07mm, which is well within spec:

View: https://youtu.be/RSvK1AWbZdE


So I hope this diff will be ok for the rest of the cars life. (But now I have one spare)
 
What a fascinating thread @GuidoK, I hope to meet you on the weekend and take a look at your fantastic Zed.
 
This is very impressive, lovely bit of kit you have made there.
 
So last week I did some more upgrades to my car.

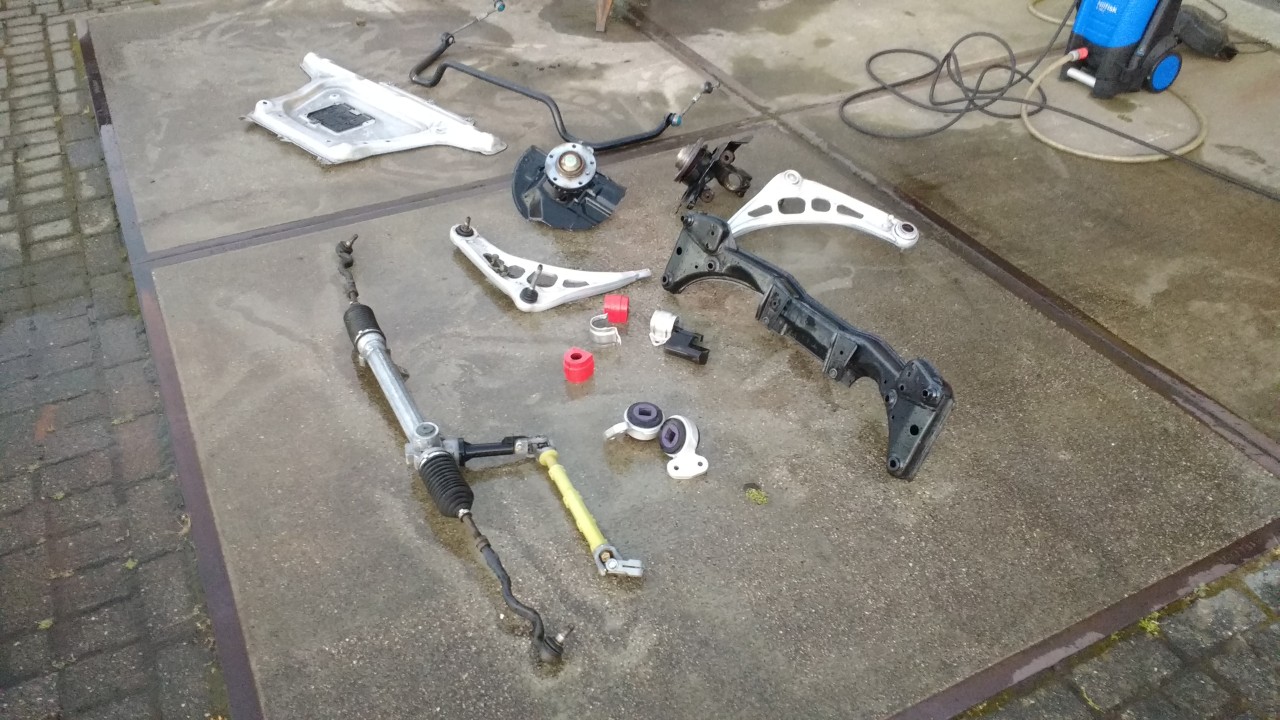
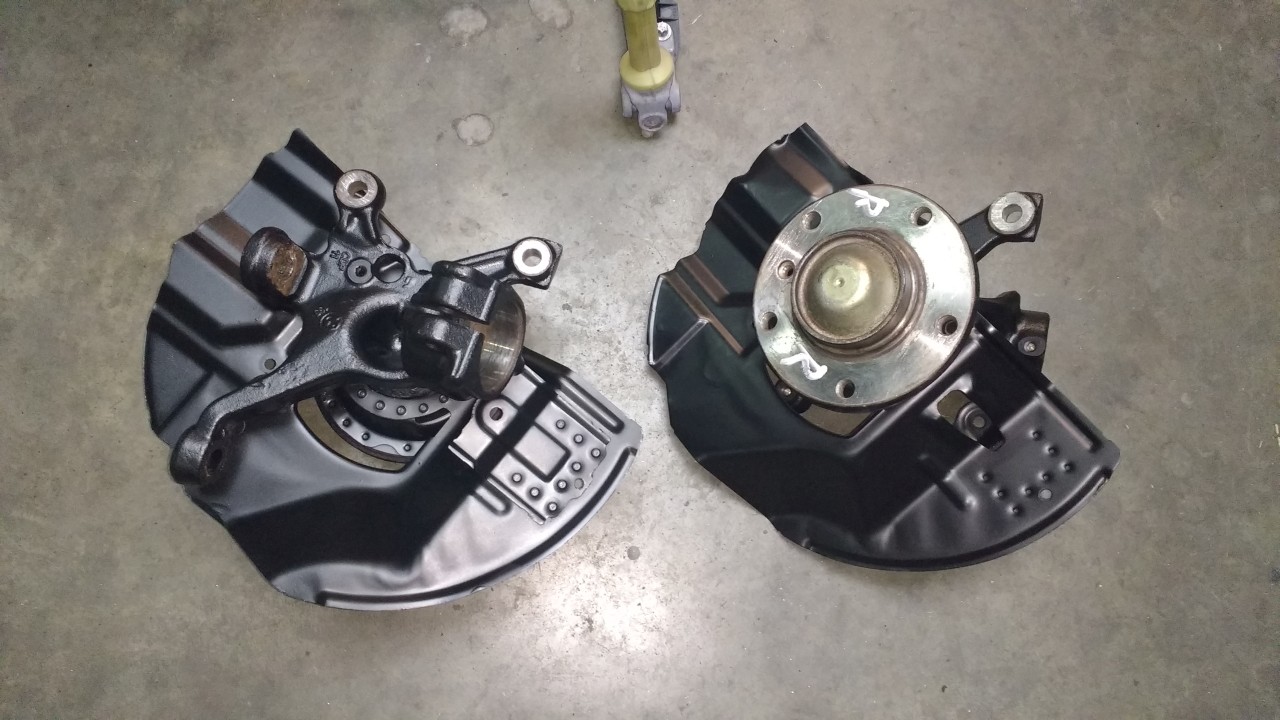
First I dismanteled the complete front axle.
I wanted to give it a good clean, paintjob etc.

So first thing was to secure the engine and getting all parts off:

01voortrein.jpg


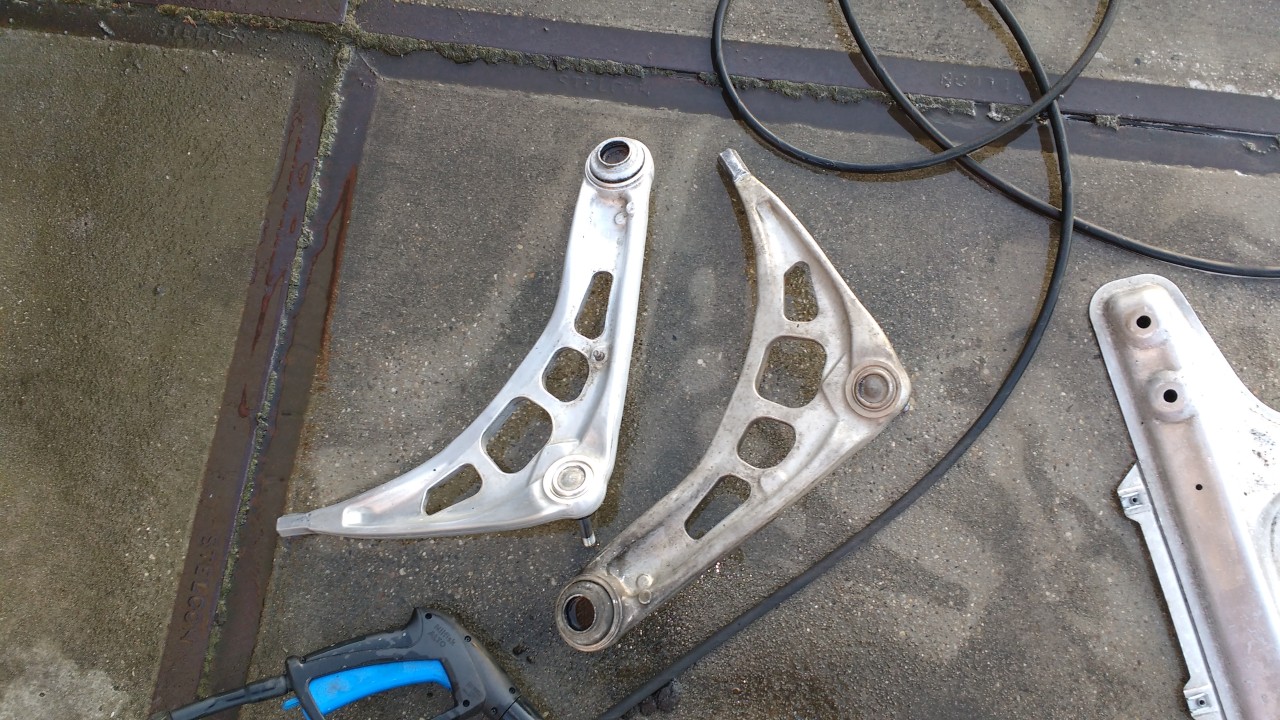
I gave everything a good scuff with scotchbrite and dasty:
02voorpoot.jpg


It was interesting to see that the powerflex front control arm bushings which I mounted 7 years/30k miles ago still were like new. A testimony to their quality.

Repainted all the painted bits (not that there was any rust, but a fresh coat always looks better :)):
03fusee.jpg


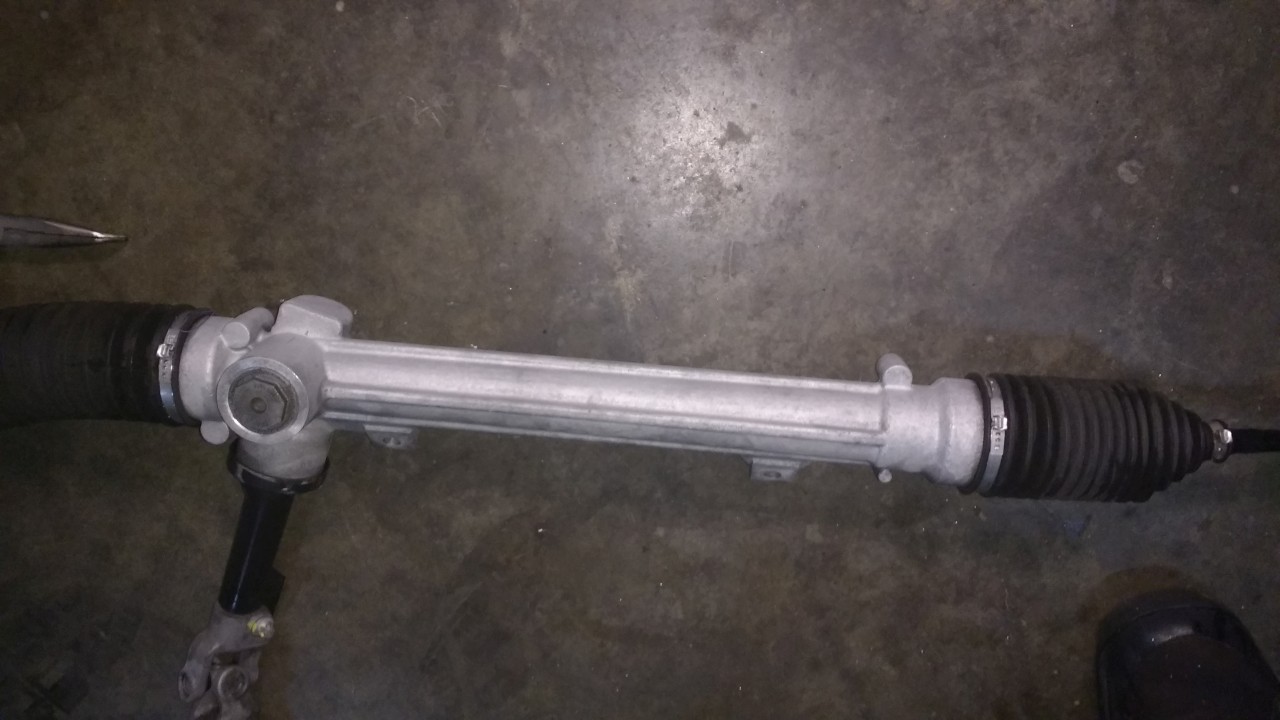
I beadblasted the steering rack to get rid of all the white aluminium corrosion:
04stuurhuis.jpg


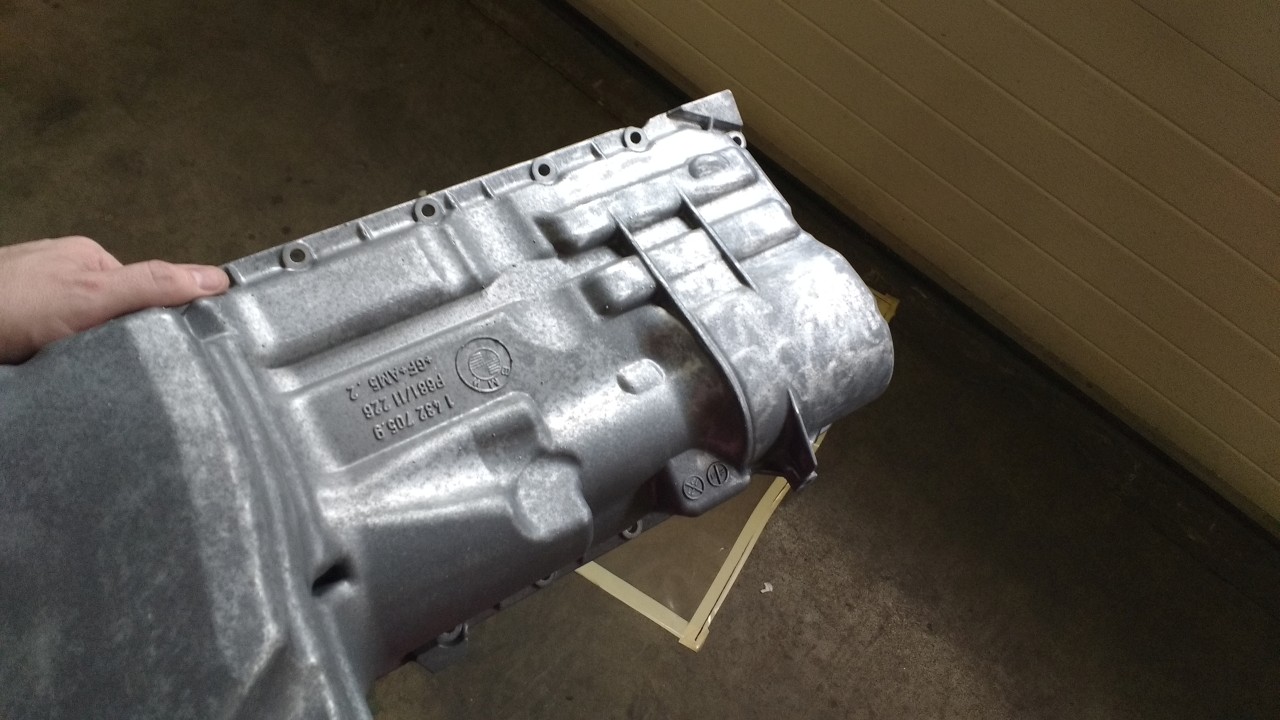
I also beadblasted the sump:

05carter.jpg


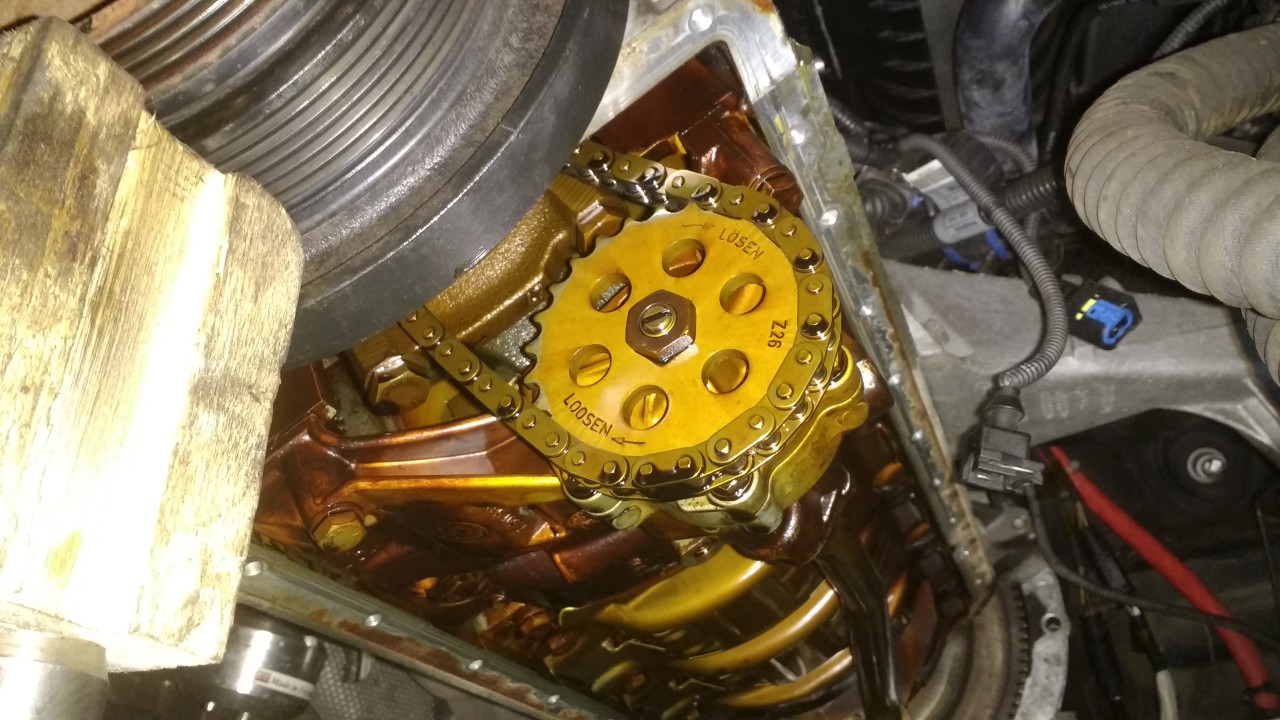
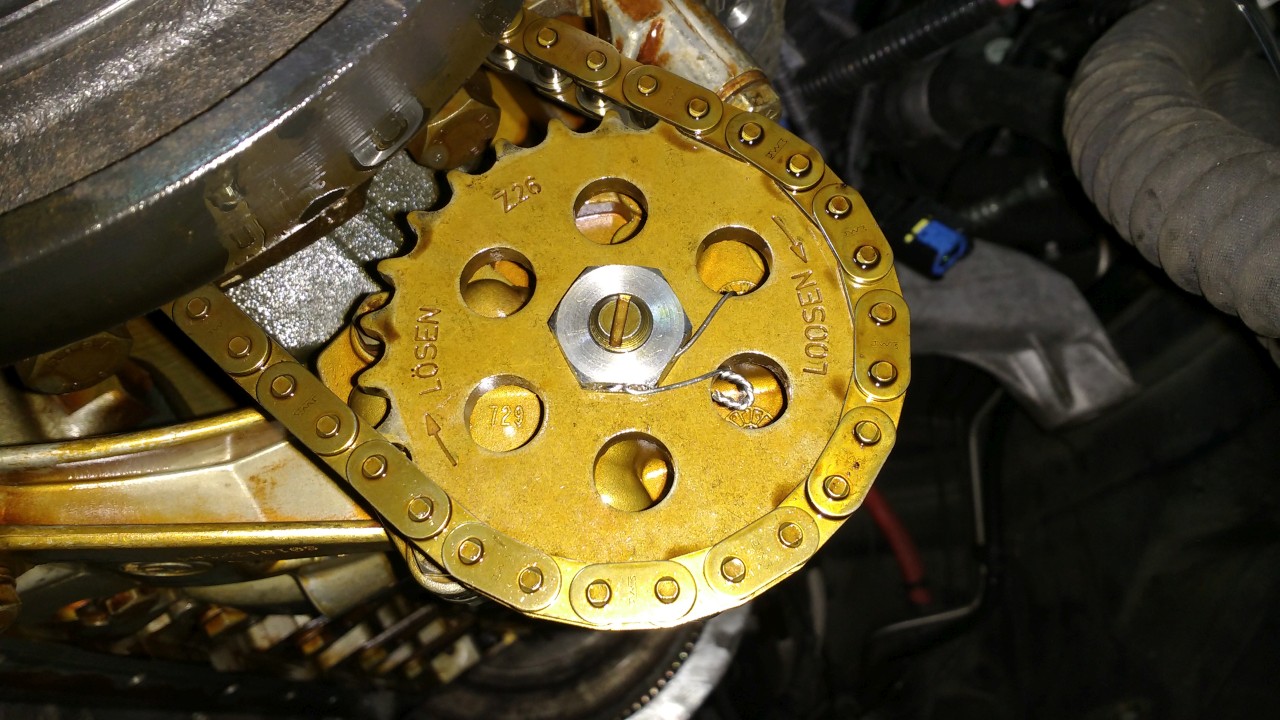
With the sump off, I improved the central nut from the oil pump.
It has been known that this nut can come loose and fall off. If that happens you can loose oil pressue (which can ruin your engine if you dont pay attention to the warning lights).
It doesnt happen a lot, but it does happen...

This is the original oil pump nut:
06oliepompoud.jpg


This is an improved version with a locking wire:

07oliepomp.jpg

(for this job you obviously need a torque wrench that also works in ccw direction ;) )


I also checked on the rodbearings. There's hardly any info on how m54 rodbearings hold up on highly modified m54 engines. Certainly not after a considereable time. My engine has about 90k miles on the clock from which about 30k miles are supercharged. Engine oil replacement intervals are normal (so every 10k - 15k miles; I use 10w40 or 10w60 since its supercharged to reduce the oil consumption)

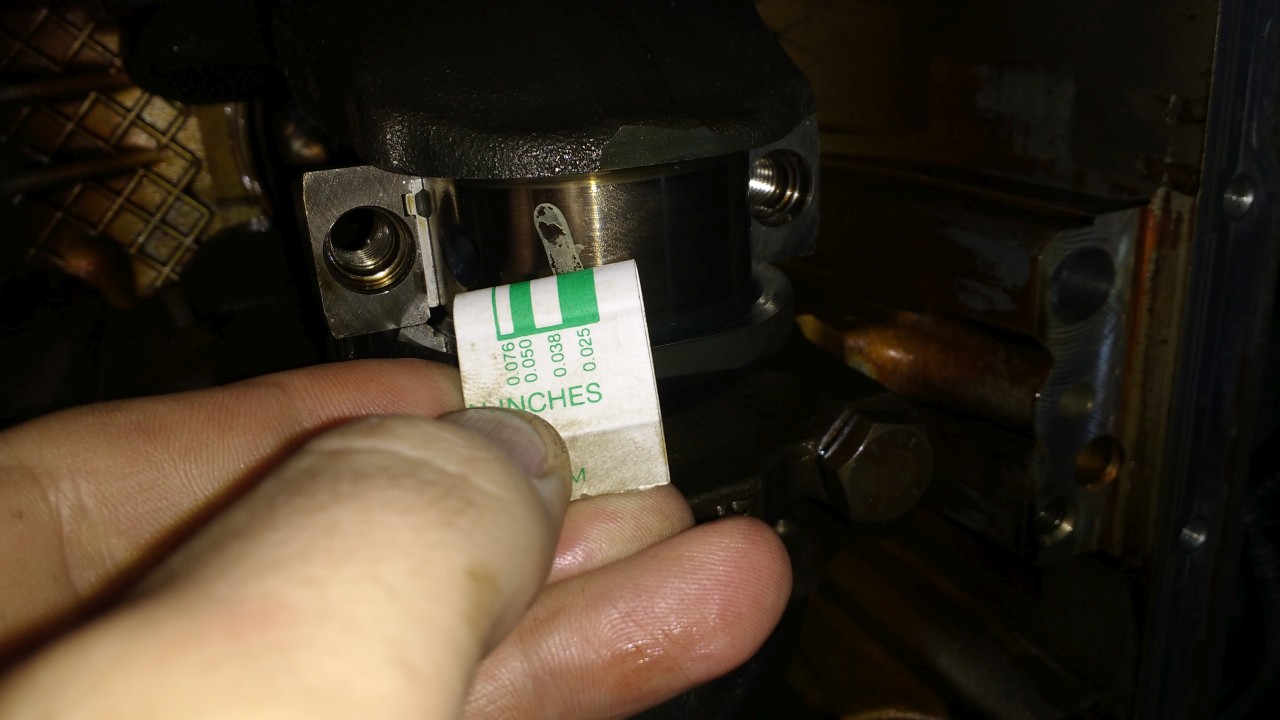
I plastigauged both the old and the new rodbearings to get a good idea on the tolerances. And all measured well within spec:
08plastiorglager.jpg

(quite a bit of work to fit/clean/refit all old and new bearings with plastigauge)

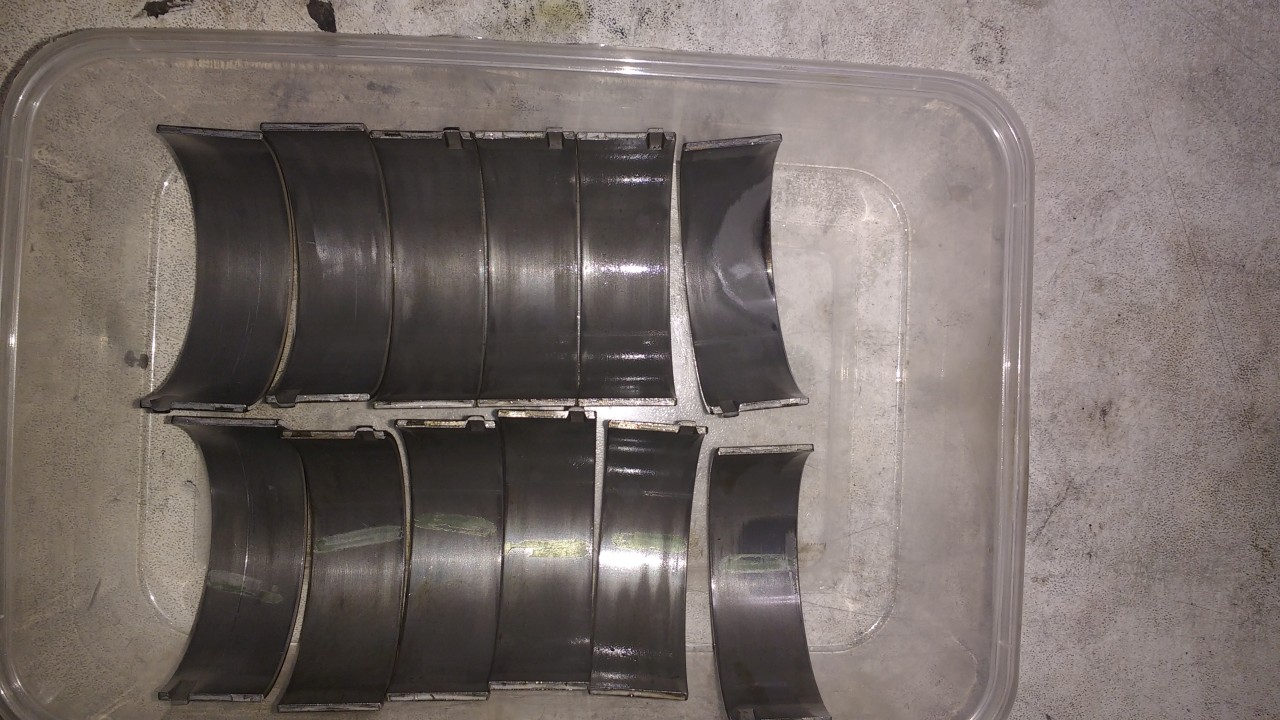
This is the state of the old rodbearings:
09lagerschalen.jpg


They dont have the tell tale sign of cavitation erosion the s50/s54 suffer so heavily from.
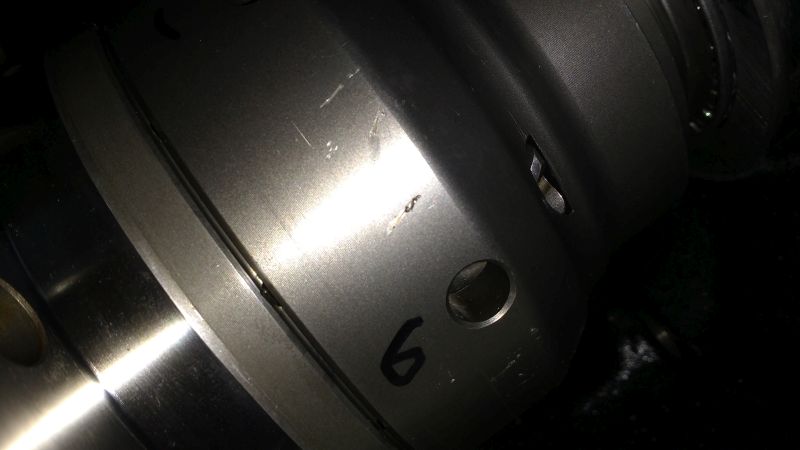
Only cylinder 6 shows uneven wear to one side. I'm not 100% sure why that is.
A slightly bent conrod could cause this, but it plastigauged dead straight, also with the new bearings, so the bearing shells seat ok.
I suspect this is te result of the crankshaft slightly flexing under the increase in torque (stock: 300Nm, my engine 465Nm)
Cylinder 6 is located all the way at the back (so at the side of the clutch/gearbox) and that gets the torque of all remaining cylinders, so the crankshaft is most likely to flex on that spot.
Luckily the bearingspot is very shiny, so that means that the wear occurs very gradually, and with enough lubrication (abrupt wear would result in coarse/rough spots) so I'm not too concerned about that. Below the shiney part there is still a copper layer for bearing lubrication.

For the people who dont know what plastigauge (or flexgauge; every manufacturer has its own brandname) is or how it works:
Plastigauge is a way to measure bearing space tolerance. between the bearing shells and crankshaft there needs to be a space, not too big, not too small, for the oil to create an oil film for lubrication.
If the space is too small, the bearingshells touch the crank and not enough oil can sit inbetween; if hte space is too big, the oil flows out and you loose the oilfilm and oil pressure.
BMW specs this bearing gap at 0,020mm - 0,055mm
Of course there is no room to measure that gap with conventional micrometers, so we use plastigauge.
Plastigauge is a thin wire made of some sort of soft plastic (it looks more like a hard wax) made from a specific controlled thickness.
You break off a piece of this wire, put it on the bearing and mount the bearing back on the crank and torque it to spec. The wire gets squished to a certain point. If there is less space between crank and bearingshell, the plastigauge gets squished more and leaves a wider (flatter) inprint. The width of this imprint is a scale of how much the bearing clearance is, which you measure with the scale table that comes with the plastigauge.
For different ranges of bearing play/measurement there are different thicknesses of plastigauge.
 
Last edited:
Back
Top