
BMW Z3 1.9 M44B19 Maintenance, Repair & Overhaul
This article submitted by Zedonist
This the first phase of my overall Maintenance, Repair and Overhaul job. By the end of this section I will have completed the following:
1) Replaced the Diff Bush
2) Replaced the Rear Anti Roll Bar
3) Changed the Rear Springs
4) Changed the Rear Shock Mounts
5) Changed the Rear Shock Absorbers
6) Completed some general rust removal and rust proofing
I am not trying to produce a show car here, only preserve the ability to maintain the serviceability of the car, the reasons will become apparent as I go through this project.
Health & Safety First:
In order to get access the car needs to be quite high and both rear wheels need to be off the ground, there are a number of ways I guess, but for me I reversed it up on ramps and then jacked onto axle stands in order to remove the rear wheels.
As the handbrake is on the rear wheels you will need to chock the front wheels to prevent movement, this was done with heavy rubber wedges. I used two sets of axle stands just to make sure.
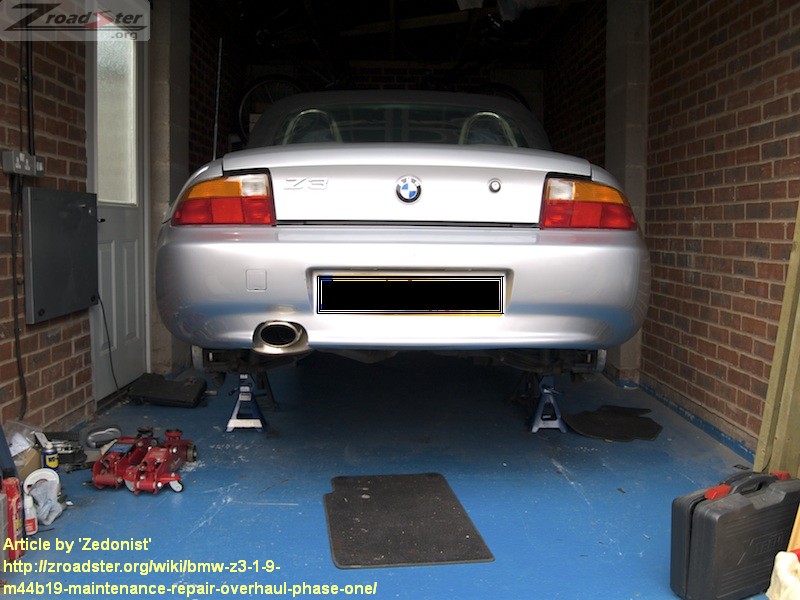
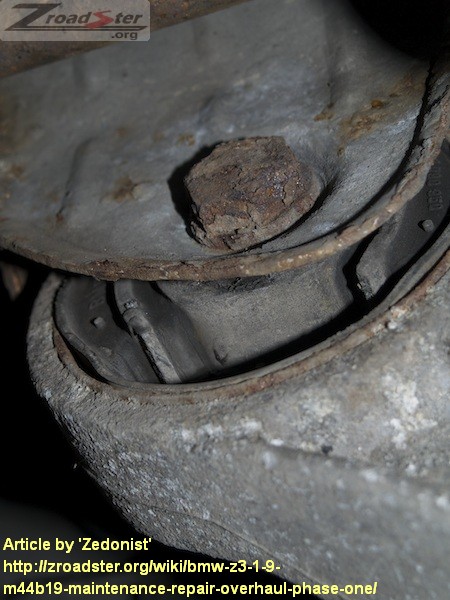
A few pictures to show the current state:


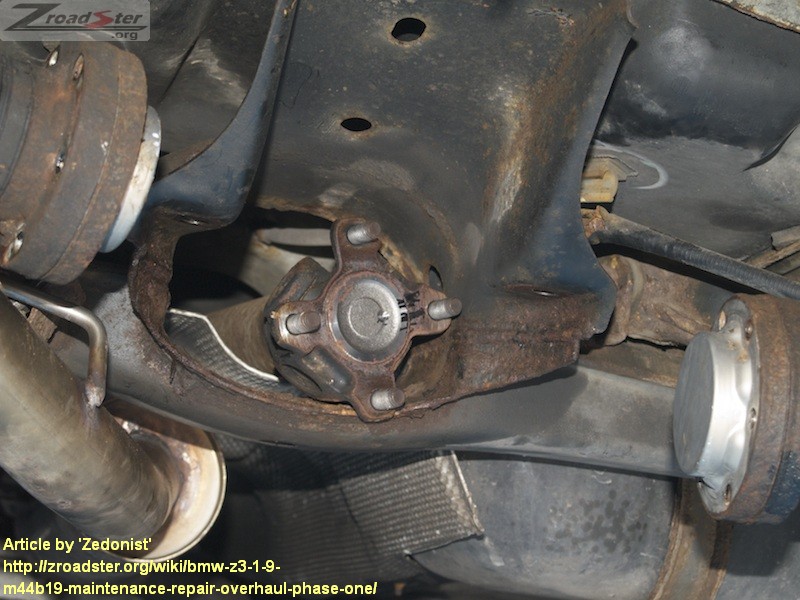
As you can see there is quite a lot of surface corrosion going on, the protective plastic cover on the rear axle carrier has been breached around the prop shaft and the Diff bush is separating from its carrier. The main concern though is the state of the fasteners, if left to continue they will not be able to be removed, so the aim here while doing general repairs will be to replace the fasteners and fixings.
First Job is to spend a few days lubricating all the joints with releasing fluid, in preparation for removal, I used GT85 Spray, but any other product such as WD40 etc will suffice.
Removing the Differential.
1) Four Serrated Nuts 16mm A/F Propeller shaft to Differential, These need to be removed first, using a 16mm socket and breaker bar to over come the torque ribs on the face of the nut (use ful to apply the Hand Brake and leave in Gear).
2) Twelve External Torx Bolt E14 Drive Shafts to differential, These need to be removed using a E14 Torx Socket and breaker bar. you will need to rotate the drive shafts at intervals to get the socket in the correct place to remove, ensure that the drive shafts are secured to protect from damage:

3) Next support the Differential from below utilising a trolley jack or other suitable device.
4) Remove the single bolt 19mm A/F holding the Differential Bush to the Body 19mm Spanner and 19mm Socket:
5) Now for the difficult bit, the four bolts 19mm A/F holding the Differential tro the Rear Axle Carrier, start with the the forward two bolts, access is limited but you can get the 19mm Socket and breaker bar in place, crack the bolts but do not remove completely.
You will notice at this point that the two rear bolts have no access what so ever, you will need to release the pressure on the trolley jack and gently lower the Differential (The Rear Axle carrier will twist, do not worry) until you can get access to put the 19mm Socket on the Bolts, Do Not release the jack all the way down maintain holding the weight of the Differential.
When undoing the top two bolts you will need to come at them from opposite sides in order to get the leverage and movement on the breaker bar. once loose, you can use a ratchet spanner to remove.
When looking at the Propeller Shaft End of the Differential you will notice that there are two holes in the joining flange of the Differential, in order to disconnect the Propeller Shaft from the Differential put a thin punch or similar (I used a screw driver) trough on of the holes and gently tap until the Propeller Shaft splits from the Differential.
Before lowering the Differential from the Car, mark the balance points ( I have used permanent marker) of the Differential to the Propeller Shaft in order to maintain the factory balance:

To recap the tools for removing the Differential are:
Trolley Jack, 16mm Spanner, 19mm Spanner, 19mm Socket Ratchet, E14 Socket, Breaker Bar, Hammer, Punch, Marker Pen, Lubrication (GT85)

Removing the Rear Anti Roll Bar
1) Start with the Lower Fixing Bracket by removing the nut 13mm A/F using a 13mm Socket, You will first need to remove the fir tree fixing (Flat Blade Screw Driver) holding the brake pipe as it obstructs the socket:


2) Remove the Hand Brake Cable from its clip:

3) Repeat Steps 1 and 2 on the opposite side
4) Next you will need to remove the nut 13mm A/F from the top retaining bracket:

5) Repeat for the opposite side, you can now remove the Rear Anti Roll Bar complete with Drop Links, Note the worn bushes on the drop links:

To recap the tools for removing the Rear Anti Roll Bar are:
13mm Socket and Ratchet, Flat Blade Screw Driver Lubrication (GT85):


Shock Absorbers, Top Mounts and Springs will be removed next…
This article submitted by Zedonist
This the first phase of my overall Maintenance, Repair and Overhaul job. By the end of this section I will have completed the following:
1) Replaced the Diff Bush
2) Replaced the Rear Anti Roll Bar
3) Changed the Rear Springs
4) Changed the Rear Shock Mounts
5) Changed the Rear Shock Absorbers
6) Completed some general rust removal and rust proofing
I am not trying to produce a show car here, only preserve the ability to maintain the serviceability of the car, the reasons will become apparent as I go through this project.
Health & Safety First:
In order to get access the car needs to be quite high and both rear wheels need to be off the ground, there are a number of ways I guess, but for me I reversed it up on ramps and then jacked onto axle stands in order to remove the rear wheels.
As the handbrake is on the rear wheels you will need to chock the front wheels to prevent movement, this was done with heavy rubber wedges. I used two sets of axle stands just to make sure.
A few pictures to show the current state:
As you can see there is quite a lot of surface corrosion going on, the protective plastic cover on the rear axle carrier has been breached around the prop shaft and the Diff bush is separating from its carrier. The main concern though is the state of the fasteners, if left to continue they will not be able to be removed, so the aim here while doing general repairs will be to replace the fasteners and fixings.
First Job is to spend a few days lubricating all the joints with releasing fluid, in preparation for removal, I used GT85 Spray, but any other product such as WD40 etc will suffice.
Removing the Differential.
1) Four Serrated Nuts 16mm A/F Propeller shaft to Differential, These need to be removed first, using a 16mm socket and breaker bar to over come the torque ribs on the face of the nut (use ful to apply the Hand Brake and leave in Gear).
2) Twelve External Torx Bolt E14 Drive Shafts to differential, These need to be removed using a E14 Torx Socket and breaker bar. you will need to rotate the drive shafts at intervals to get the socket in the correct place to remove, ensure that the drive shafts are secured to protect from damage:
3) Next support the Differential from below utilising a trolley jack or other suitable device.
4) Remove the single bolt 19mm A/F holding the Differential Bush to the Body 19mm Spanner and 19mm Socket:
5) Now for the difficult bit, the four bolts 19mm A/F holding the Differential tro the Rear Axle Carrier, start with the the forward two bolts, access is limited but you can get the 19mm Socket and breaker bar in place, crack the bolts but do not remove completely.
You will notice at this point that the two rear bolts have no access what so ever, you will need to release the pressure on the trolley jack and gently lower the Differential (The Rear Axle carrier will twist, do not worry) until you can get access to put the 19mm Socket on the Bolts, Do Not release the jack all the way down maintain holding the weight of the Differential.
When undoing the top two bolts you will need to come at them from opposite sides in order to get the leverage and movement on the breaker bar. once loose, you can use a ratchet spanner to remove.
When looking at the Propeller Shaft End of the Differential you will notice that there are two holes in the joining flange of the Differential, in order to disconnect the Propeller Shaft from the Differential put a thin punch or similar (I used a screw driver) trough on of the holes and gently tap until the Propeller Shaft splits from the Differential.
Before lowering the Differential from the Car, mark the balance points ( I have used permanent marker) of the Differential to the Propeller Shaft in order to maintain the factory balance:
To recap the tools for removing the Differential are:
Trolley Jack, 16mm Spanner, 19mm Spanner, 19mm Socket Ratchet, E14 Socket, Breaker Bar, Hammer, Punch, Marker Pen, Lubrication (GT85)
Removing the Rear Anti Roll Bar
1) Start with the Lower Fixing Bracket by removing the nut 13mm A/F using a 13mm Socket, You will first need to remove the fir tree fixing (Flat Blade Screw Driver) holding the brake pipe as it obstructs the socket:
2) Remove the Hand Brake Cable from its clip:
3) Repeat Steps 1 and 2 on the opposite side
4) Next you will need to remove the nut 13mm A/F from the top retaining bracket:
5) Repeat for the opposite side, you can now remove the Rear Anti Roll Bar complete with Drop Links, Note the worn bushes on the drop links:
To recap the tools for removing the Rear Anti Roll Bar are:
13mm Socket and Ratchet, Flat Blade Screw Driver Lubrication (GT85):
Shock Absorbers, Top Mounts and Springs will be removed next…
